
Improve Your Digital Security in 2024 with These New Year’s Resolutions
Get ready for a safer 2024 with New Year’s resolutions that will help you secure your devices, avoid scams, block malware, and enjoy the security and ease of use of password managers.

Happy New Year, and welcome to 2024! For many of us, starting a new year means reflecting on fresh habits we’d like to adopt. Although we support any resolutions you may have made to get enough sleep, eat better, exercise more, and reduce social media usage, allow us suggest a few more that will improve your digital security and reduce the chances that bad things will happen to you online.
Back Up All Your Devices
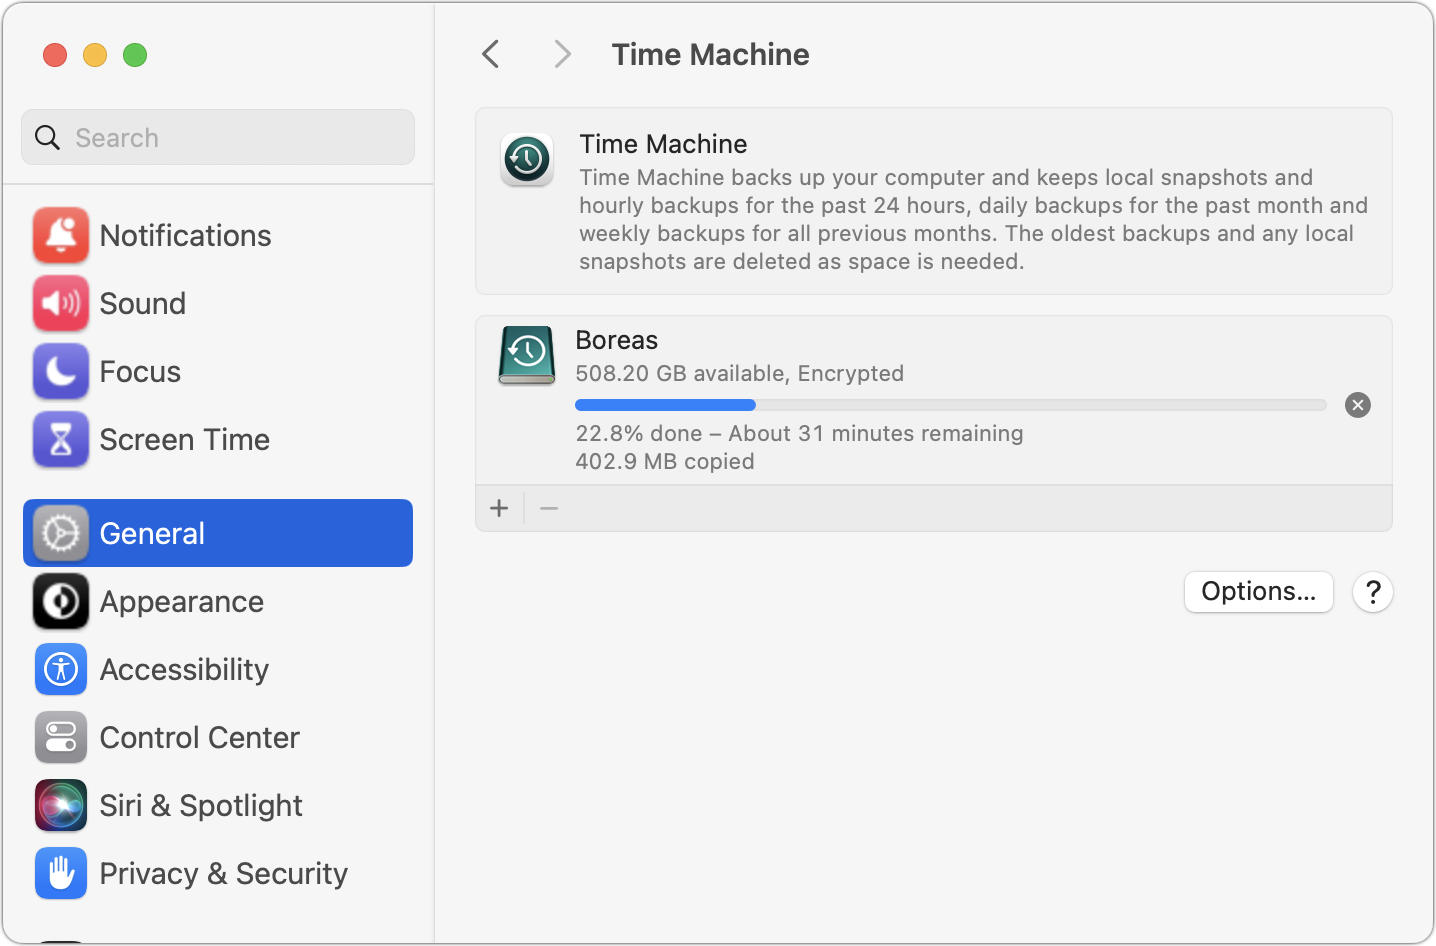
The most important thing you can do to stave off the slings and arrows of digital doom is to make regular backups. Bad things happen to good people, such as a Mac’s SSD failing, an iPhone accidentally falling off a boat, an Apple Watch breaking in a fall, or loss due to theft, fire, or flood. With a good backup strategy, you can recover from nearly any problem.
For the Mac, it’s easiest to back up with Time Machine to an external drive, but remember that an offsite or Internet backup is also essential. With iPhones and iPads, it’s easiest to back up to iCloud, which happens every night automatically if you turn it on in Settings > Your Name > iCloud > iCloud Backup, but you can also back up to your Mac if you don’t have sufficient iCloud storage space. Apple Watches automatically back up to their paired iPhones, so if you protect your iPhone, you can always restore your Apple Watch.
Keep Your Devices Updated
Another key thing you can do to protect your security is to install new operating system updates and security updates soon after Apple releases them. Although the details seldom make the news because they’re both highly specific and highly technical, you can get a sense of how important security updates are by the fact that a typical update addresses 10–30 vulnerabilities that Apple or outside researchers have identified. Some are even zero-day vulnerabilities that are already being exploited in the wild.
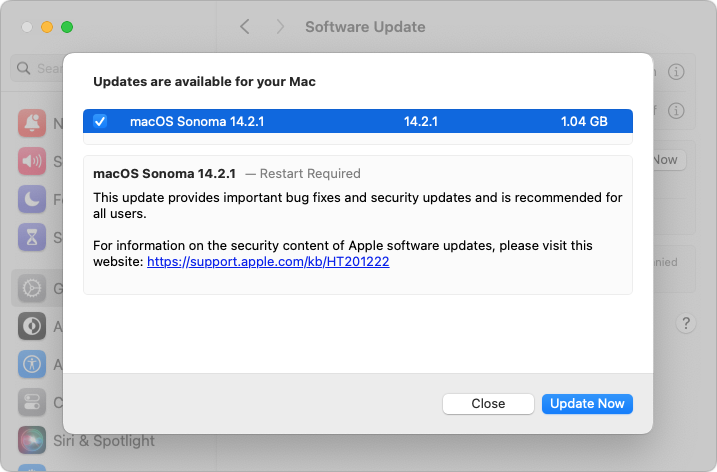
It’s usually a good idea to wait a week or so after an update appears before installing, on the off-chance that it has undesirable side effects. Although such problems are uncommon, when they do happen, Apple pulls the update quickly, fixes it, and releases it again, usually within a few days.
Use a Password Manager
We’ll keep banging the password manager drum until passkeys, the replacement for passwords, have become ubiquitous, which will take years. Until then, if you’re still typing passwords in by hand or copying and pasting from a list you keep in a file, please start using a password manager like 1Password or BitWarden. Even Apple’s built-in password manager and iCloud Keychain are fine, if not as fully featured as the others. A password manager offers five huge benefits:
It generates strong passwords for you. Mypassword1 can be hacked in seconds.
It stores your passwords securely. An Excel file on your desktop is a recipe for disaster.
It enters passwords for you. Wouldn’t that be easier than typing them in manually?
It audits existing accounts. How many of your accounts use the same weak password?
It lets you access passwords on all your devices. Finally, easy logins on your iPhone!
A bonus benefit for families is password sharing. It allows couples to share essential passwords or parents and teens to share specific passwords.
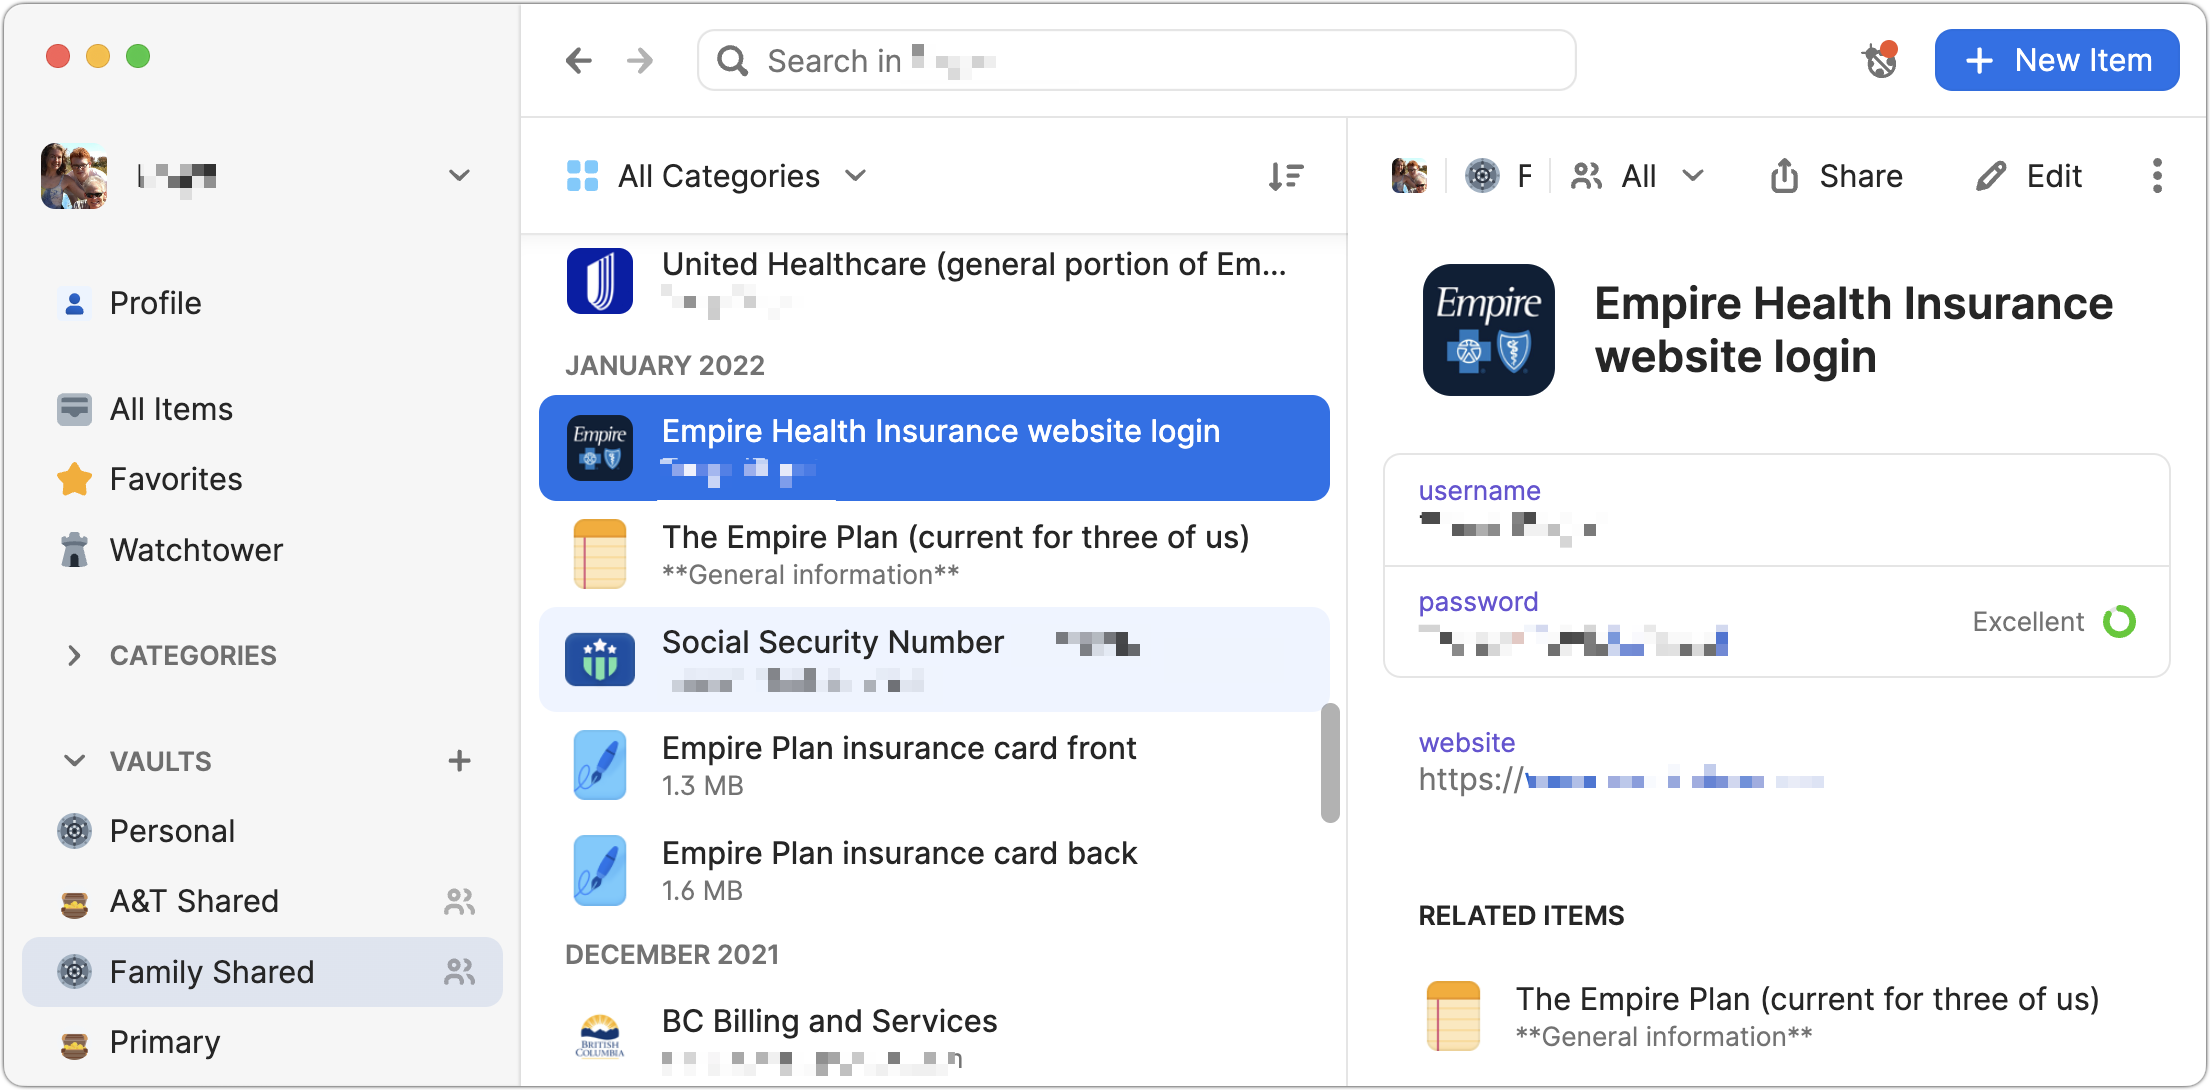
Using a password manager is faster, easier, more secure, and better. If you need help getting started, get in touch.
Beware of Phishing Email
Individuals and businesses frequently suffer from security lapses caused by phishing, forged emails that fool someone into revealing login credentials, credit card numbers, or other sensitive information. Although spam filters catch many phishing attempts, you must always be on guard. Here’s what to watch for:
Any email that tries to get you to reveal information, follow a link, or sign a document
Messages from people you don’t know, asking you to take an unusual action
Direct email from a large company for whom you’re an anonymous customer
Forged email from a trusted source asking for sensitive information
All messages that contain numerous spelling and grammar mistakes
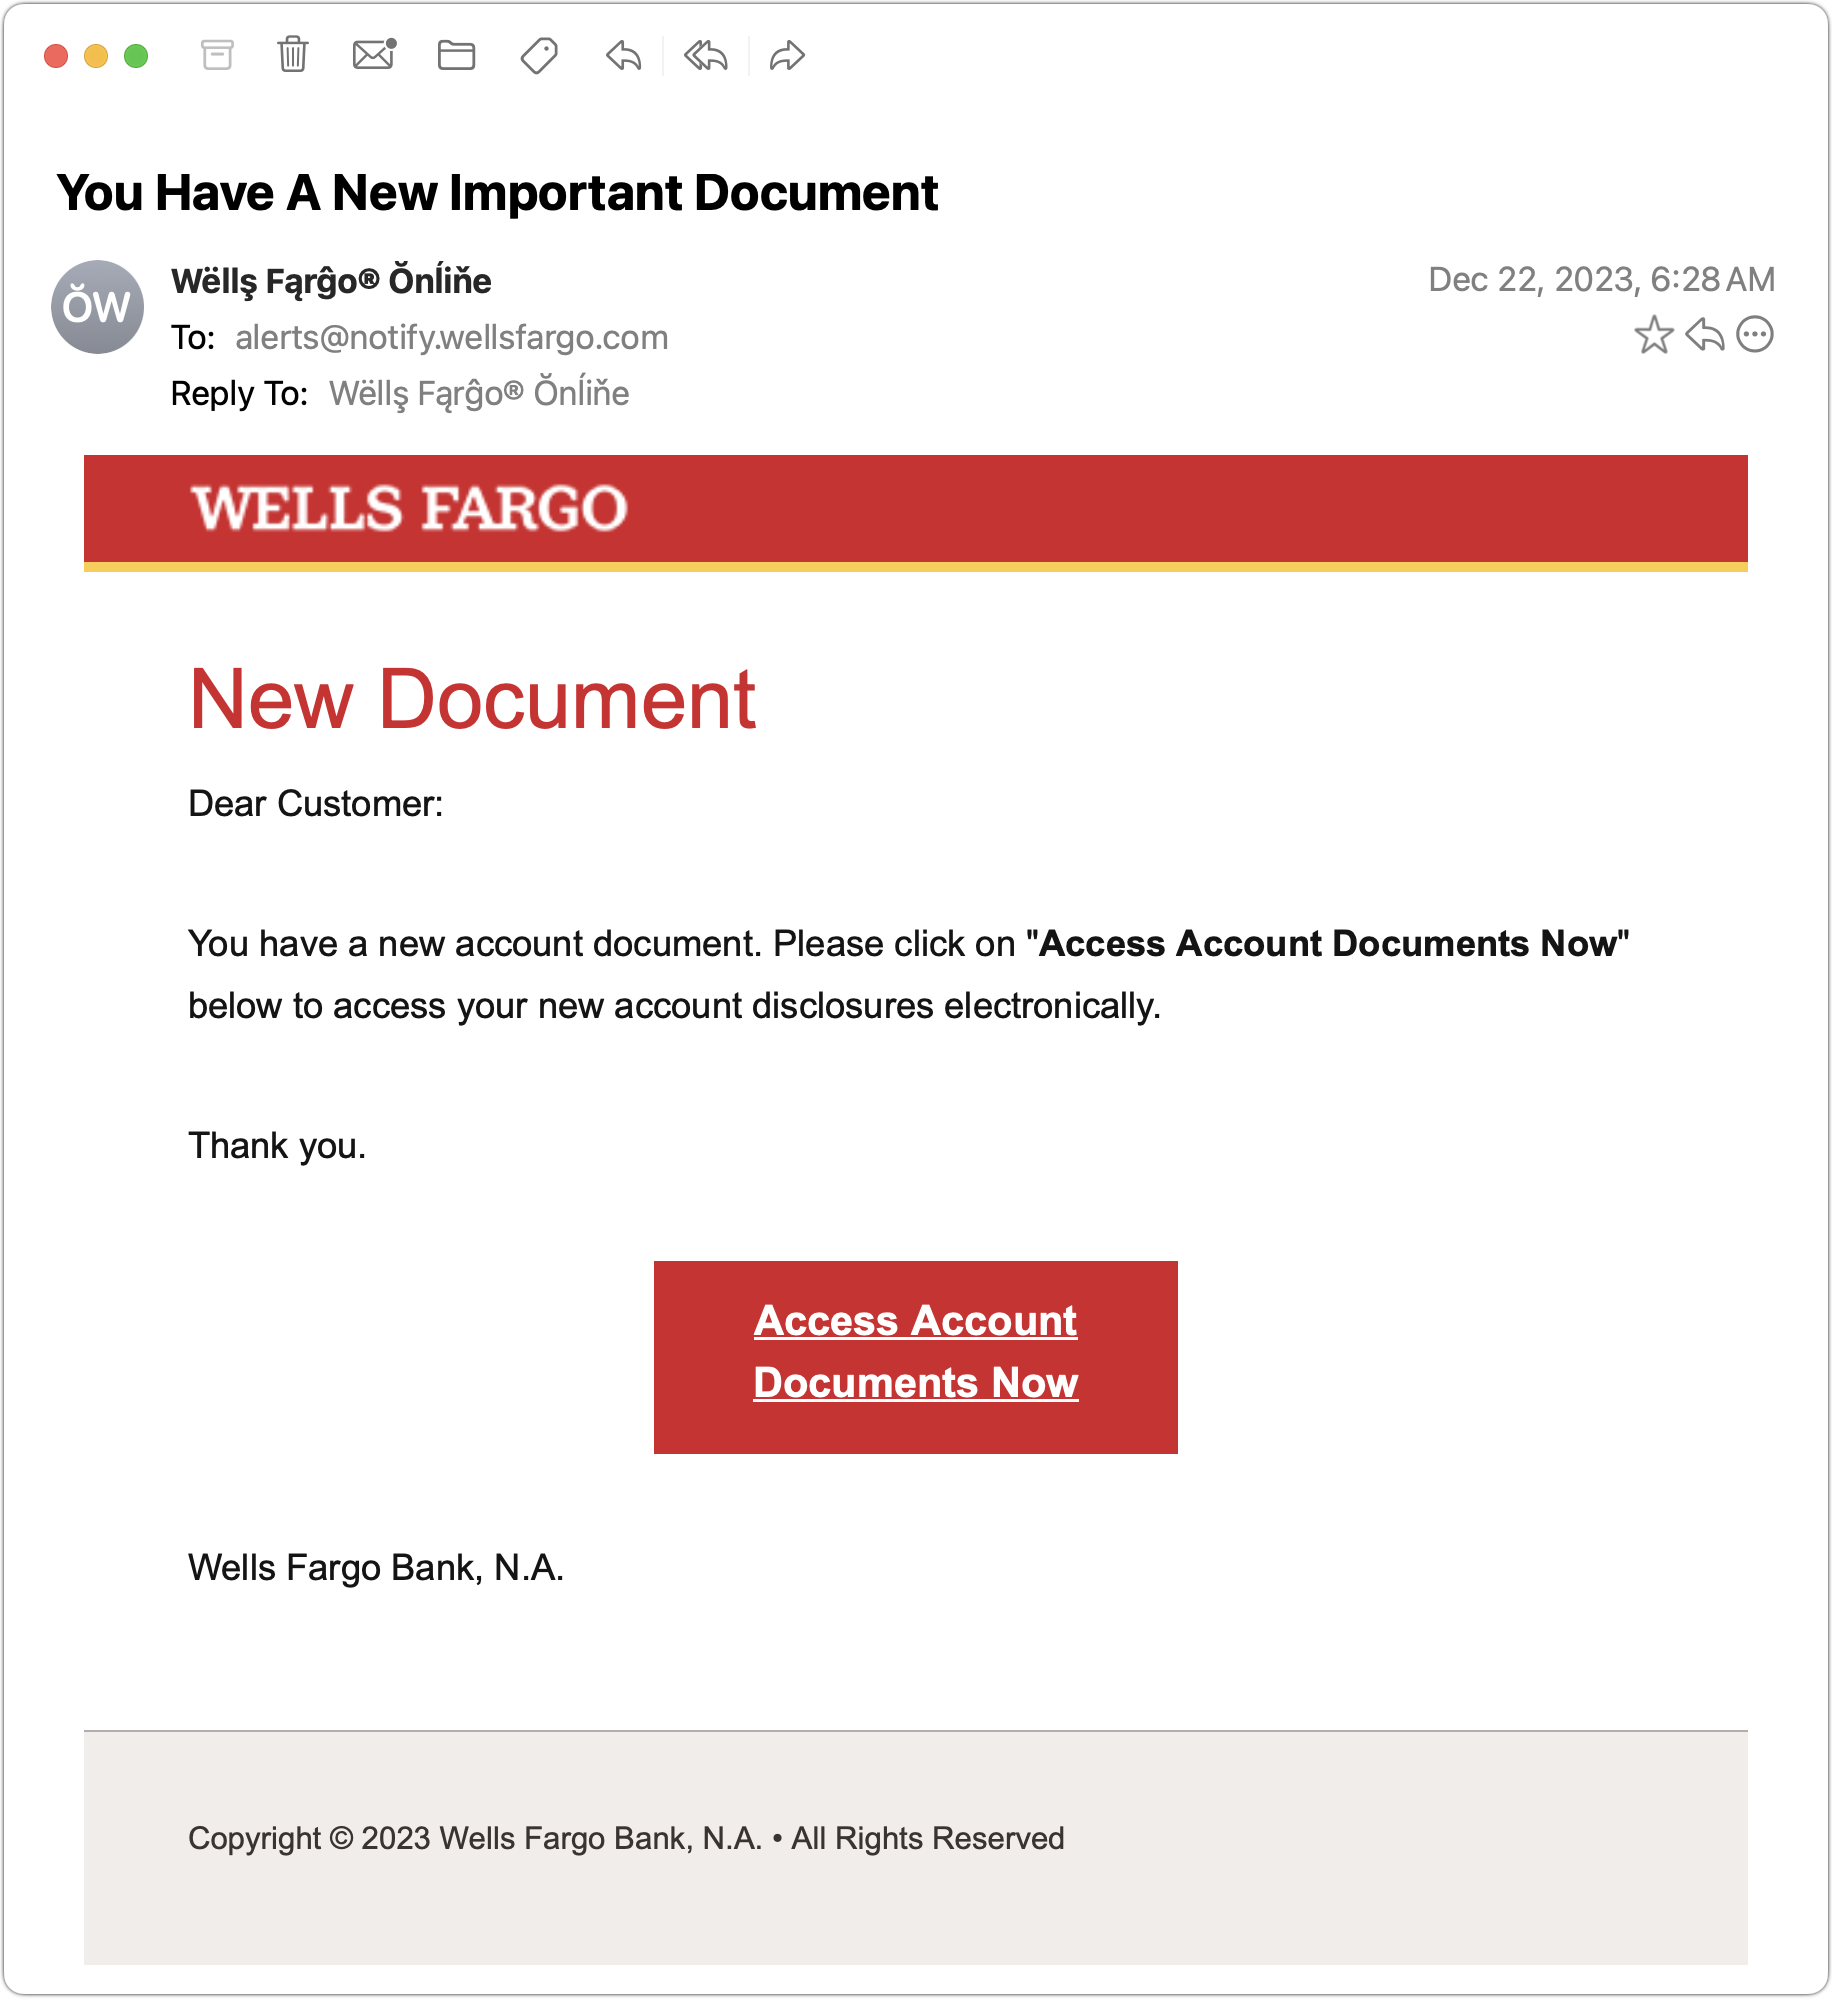
When in doubt, don’t follow the link or reply to the email. Instead, contact the sender another way to see if the message is legit.
Never Respond to Unsolicited Calls or Texts
Although phishing happens mostly via email, scammers also use texts and phone calls. Thanks to weaknesses in the telephone system, such texts and calls can appear to come from well-known companies, including Apple and Amazon. Even worse, with so much online ordering, fake text messages pretending to help you track packages are becoming more common.
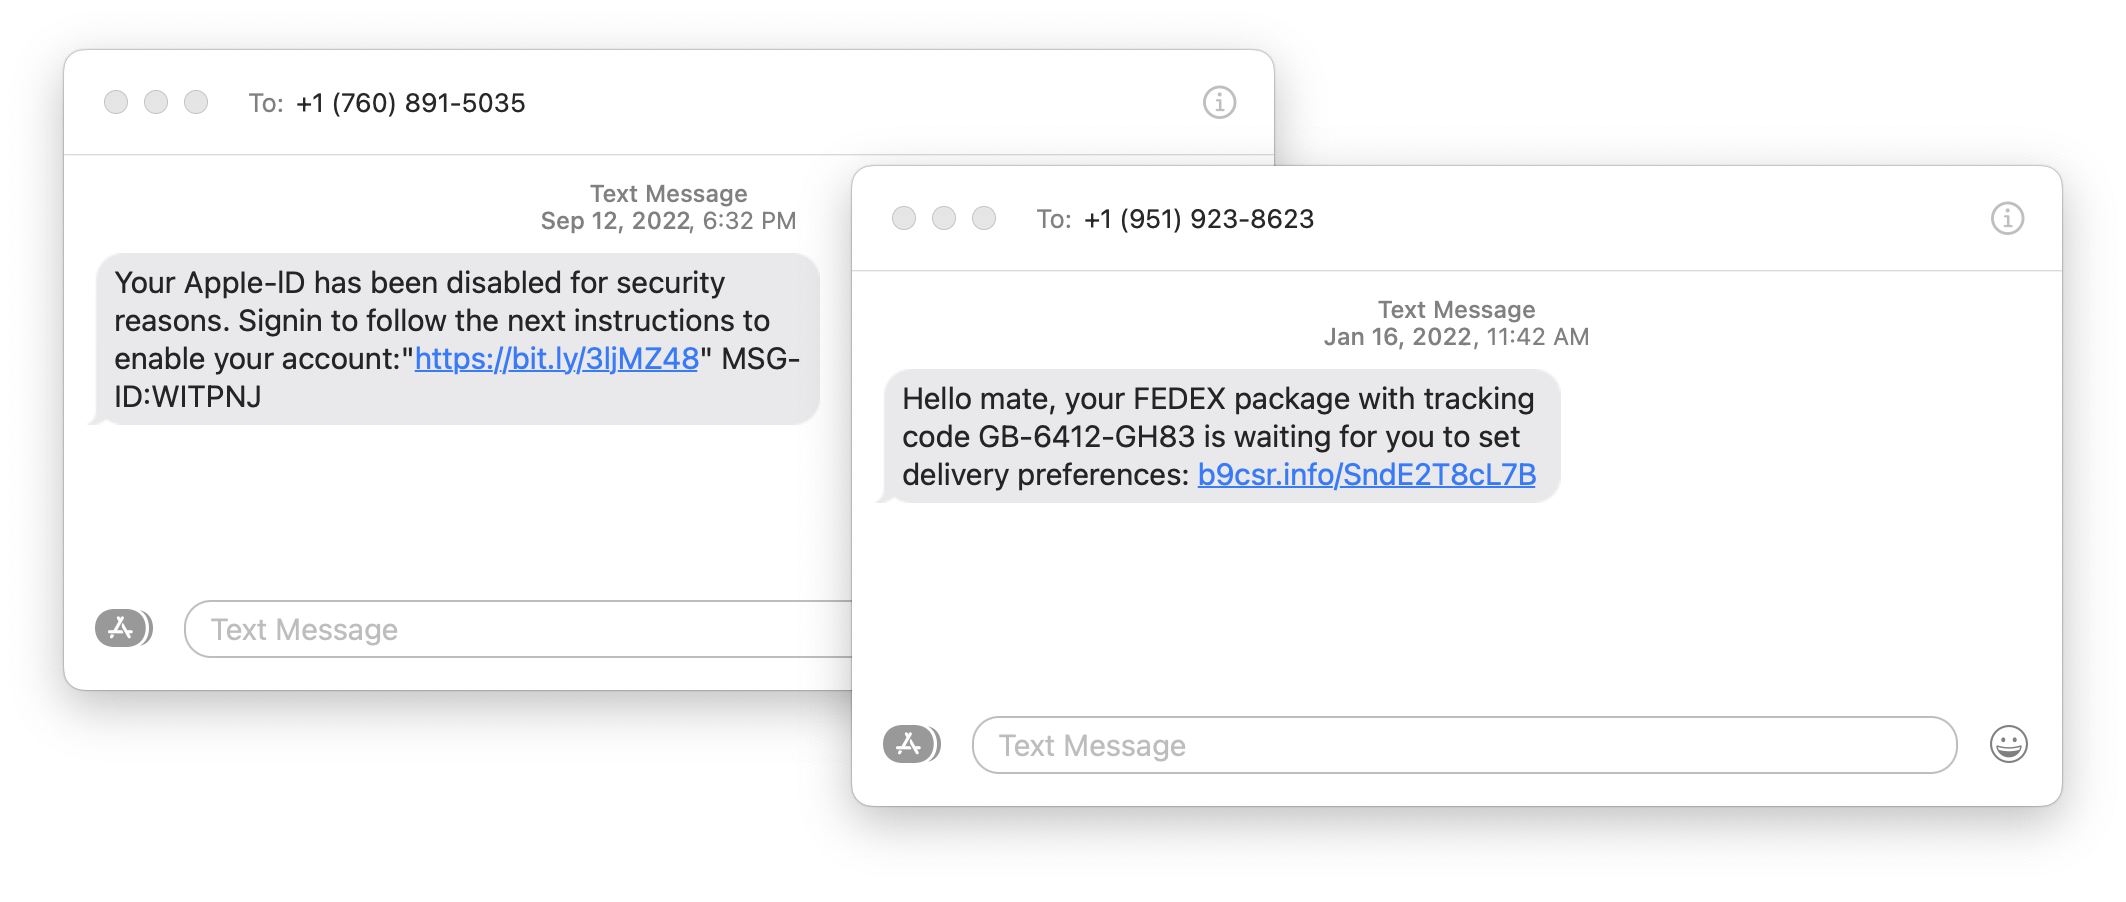
For texts, avoid following links unless you recognize the sender and it makes sense that you’d be receiving such a link. (For instance, Apple can text delivery details related to your orders.) Regardless, never enter login information at a site you’ve reached by following a link because there’s no way to know if it’s real. Instead, if you want to learn more, manually navigate to the company’s site by entering its URL, then log in.
For phone calls from companies, unless you’re expecting a call back from a support ticket you opened, don’t answer. Let the call go to voicemail, and if you feel it’s important to respond, look up the company’s phone number elsewhere and talk with someone at that number rather than the one provided by the voicemail.
Avoid Sketchy Websites
We won’t belabor this last one, but suffice it to say that you’re much more likely to pick up malware from sites on the fringes of the Web or that cater to the vices of society. The more you can avoid sites that revolve around pirated software, cryptocurrency, “adult” content, gambling, or sales of illicit substances, the safer you’ll be. That’s not to say that reputable sites haven’t been hacked and used to distribute malware, but it’s far less common.
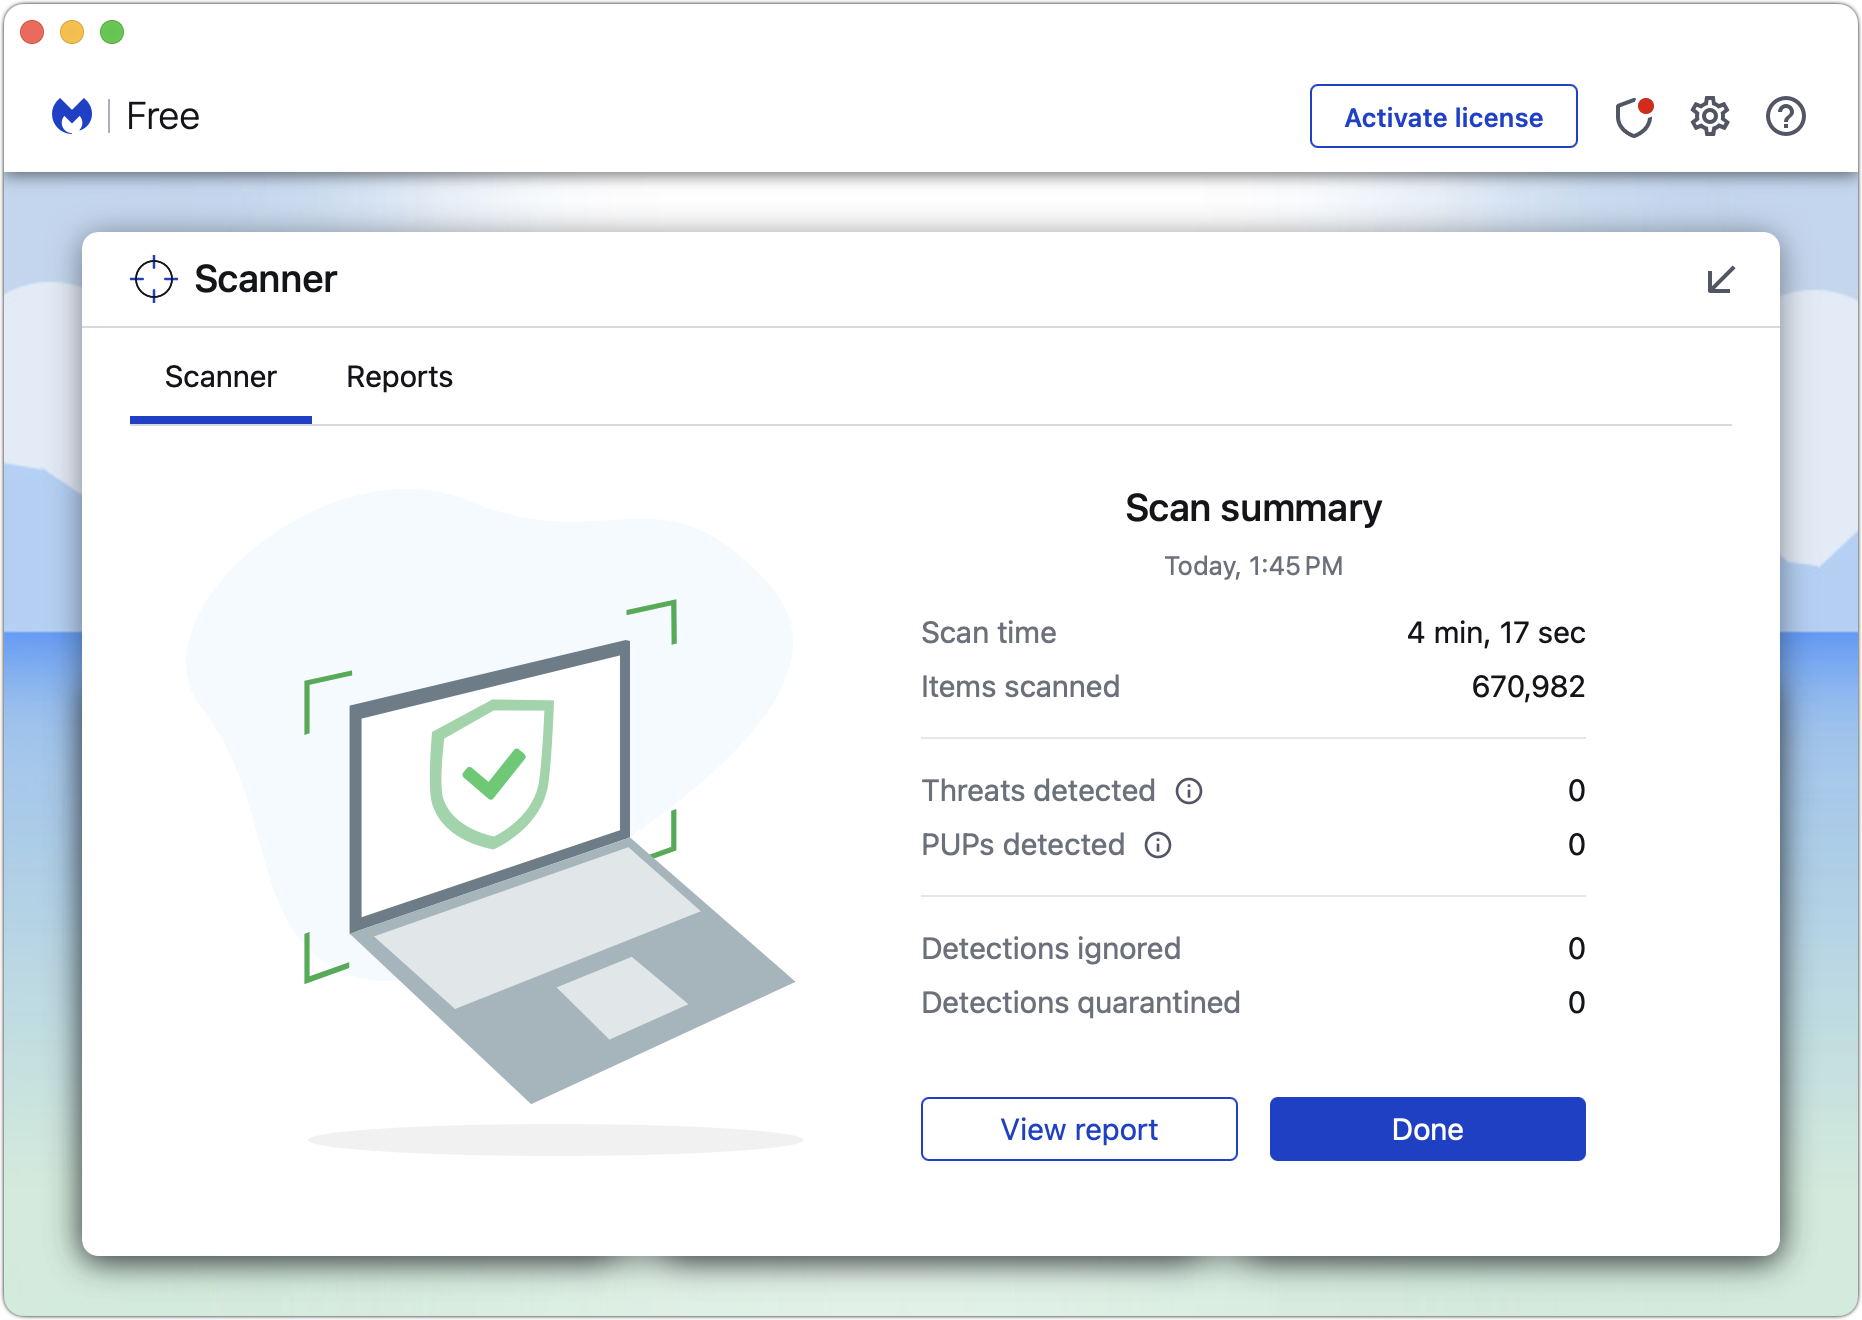
If you are concerned after spending time in the darker corners of the Web, download a free copy of Malwarebytes or VirusBarrier Scanner and scan for malware manually.
Let’s raise a glass to staying safe online in 2024!
(Featured image by iStock.com/Bet_Noire)
Concerned by the Privacy or Results of Google Search? Try These Other Search Engines
Have you become disillusioned by Google due to its search quality or how it tracks your activity to serve targeted ads? You can try other search engines that promise to protect your privacy and provide independent search results.

Google is big. Google Search generated $225 billion in revenue in 2022, thanks in part to being the default search engine on all Apple devices. To retain that position—and continue to reap the ad revenue that it generates—Google pays Apple about $18 billion every year. Along with Apple, Google pays billions to phone manufacturers like Samsung, LG, and Motorola; major wireless carriers such as AT&T, T-Mobile, and Verizon; and browser developers like Mozilla and Opera.
So is Google Search’s 90% market share because it’s the best search engine or because Google has enough money to pay distributors for top placement?
Along with concerns about whether Google is the best search engine, some people worry about Google collecting information about them to show targeted ads alongside search results. The more information Google has on users, the argument goes, the better that ads can be targeted, and the more likely it is that users will click the ads, which generates money for Google from advertisers. Others worry that Google’s results may reflect certain types of bias.
If you’re perturbed by the privacy implications of Google knowing everything you search for, or if you’ve found Google’s search results less helpful than you’d like, you can easily switch to another search engine to see if you prefer its results and privacy stance.
How to Switch Search Engines
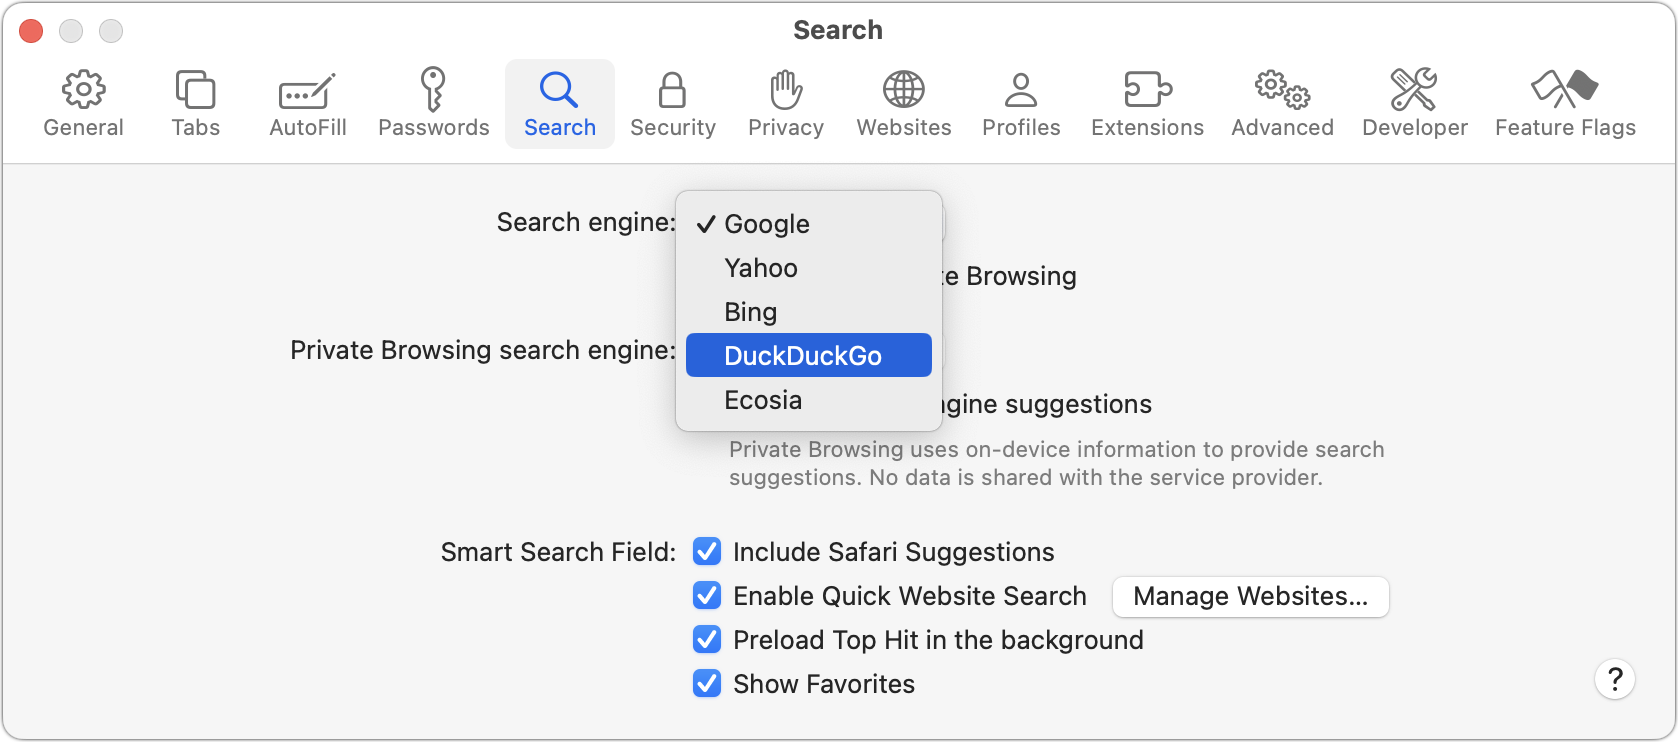
For many Apple users, the main place to choose a preferred search engine is in Safari’s settings. On the Mac, choose Safari > Settings > Search and choose the desired search engine from the Search Engine pop-up menu. You can choose a different one for Private Browsing windows if you want.
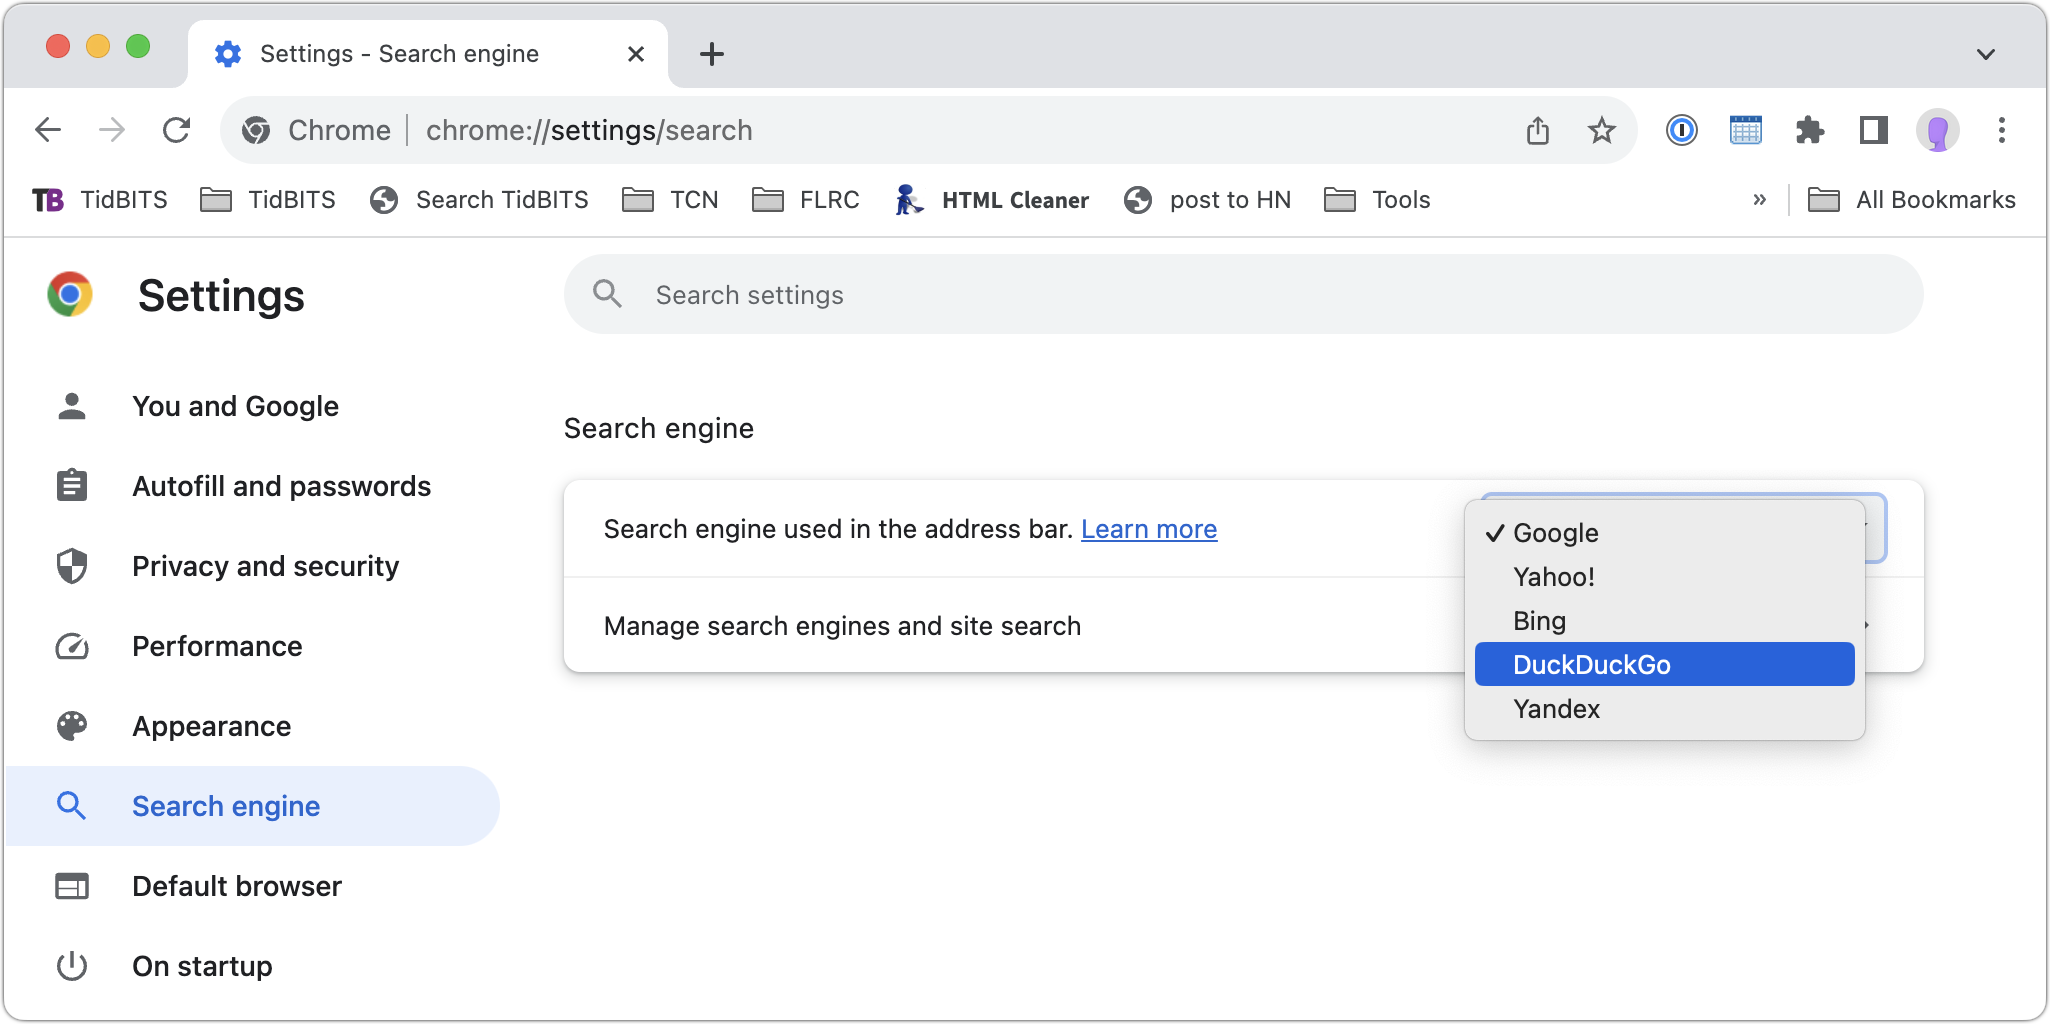
In Chrome-based browsers like Google Chrome, Arc, Brave, Microsoft Edge, and Opera on the Mac, open the settings and look for Search Engine. A pop-up menu lets you choose from some standard options, and additional choices let you add search engines like Brave Search that are too new (or not paying) to appear. Firefox offers similar options when you choose Firefox > Settings > Search.
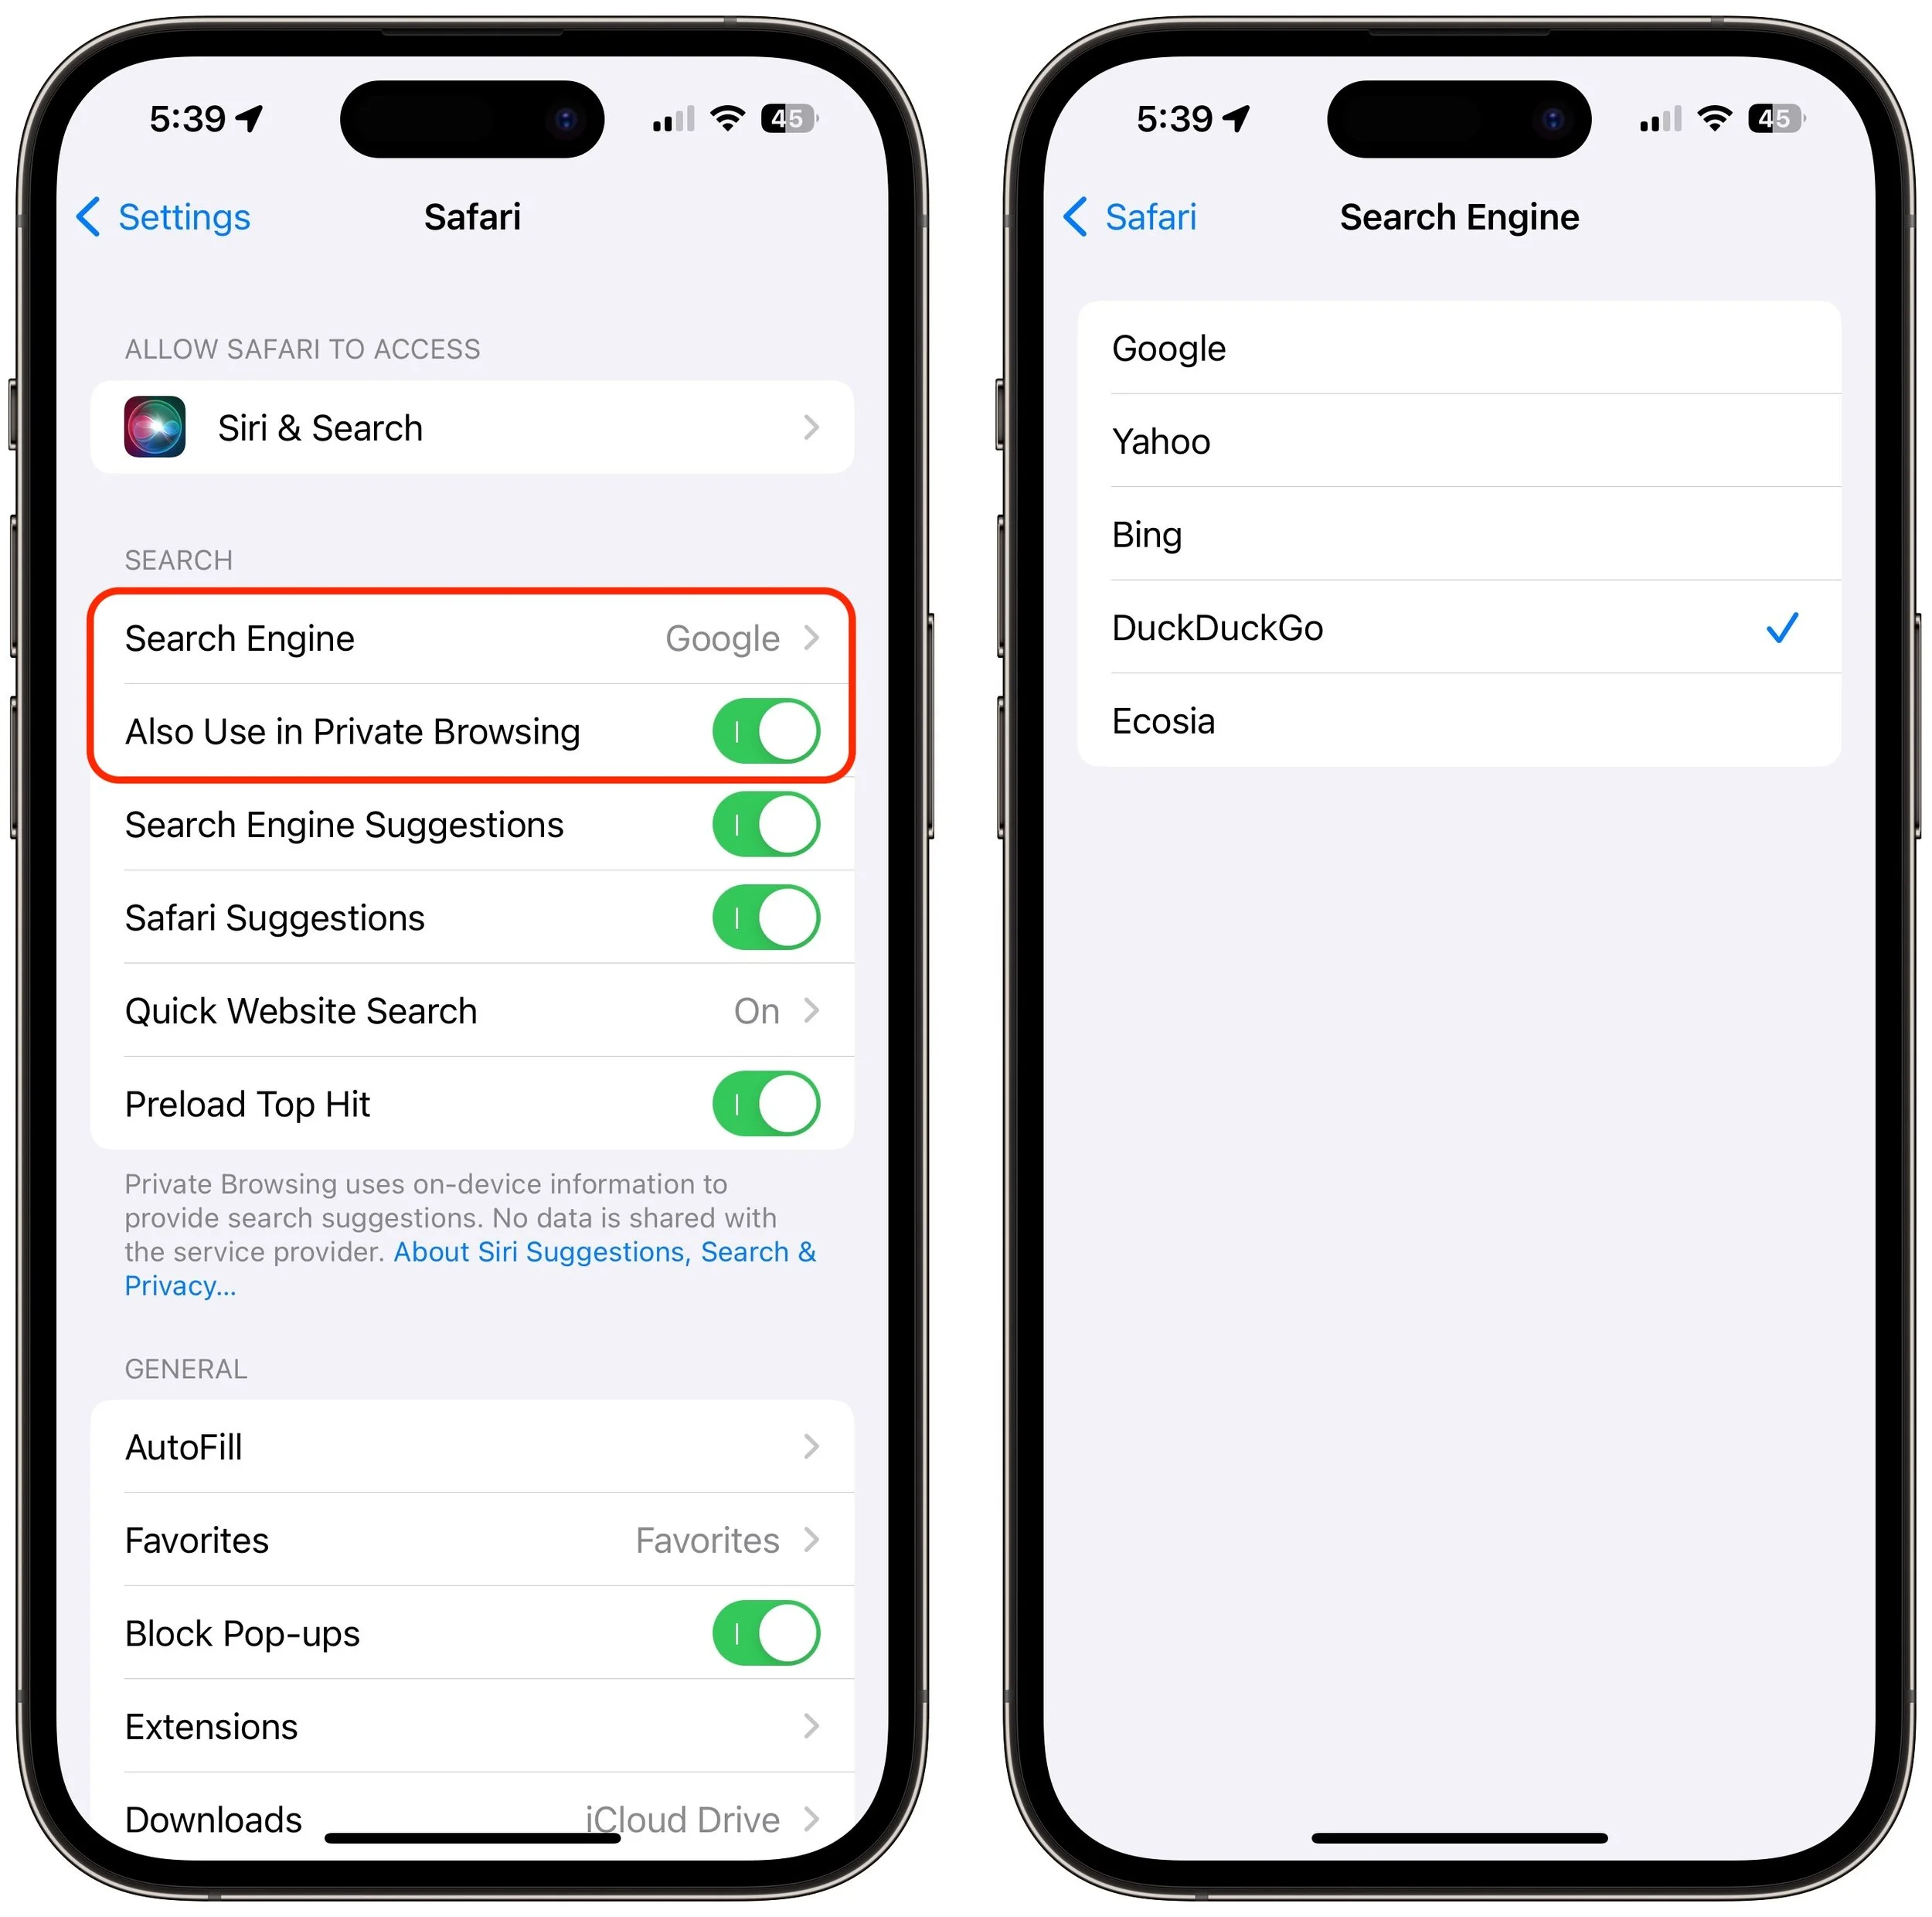
On the iPhone and iPad, go to Settings > Safari > Search Engine. Again, if you want a different search engine in Private Browsing tabs, turn off Also Use in Private Browsing and choose another option.
Top Alternative Search Engines
Conceptually, what search engines do is simple—they search a set of Web pages for matching keywords and return a list of them in order of relevance to the user. The hard part is dealing with the number of pages—estimates suggest Google indexes 50 billion pages and Bing 4.5 billion—and scaling the service to respond instantly to tens or hundreds of millions of queries per day. (Google processes 8.5 billion searches per day; Bing handles 400 million.) Beyond Google, here are the main search engines and what sets them apart. (You will also likely see Yandex, sometimes called “the Google of Russia.” Avoid it. For so many reasons.)
Bing: The second-most popular (though far, far behind Google) search engine in the world, Microsoft’s Bing sets itself apart with a busy, highly designed search results page that mixes a variety of results. It may work well for you, or you may find it overwhelming and difficult to parse. Microsoft is also putting a lot of effort into chat-based AI-powered results. Bing claims to offer more user privacy than Google, but it’s still tracking users to target ads better. If Bing has better privacy than Google, it may mostly be due to not being part of the larger Google data-collection empire.

Yahoo: Though it was the first Web search engine, Yahoo hasn’t run its own index since 2009. Today, Yahoo’s search results are powered by Microsoft Bing, so while the look of the search results page may differ, the results should be identical to Bing’s. Yahoo’s privacy stance is also similar to Bing’s.

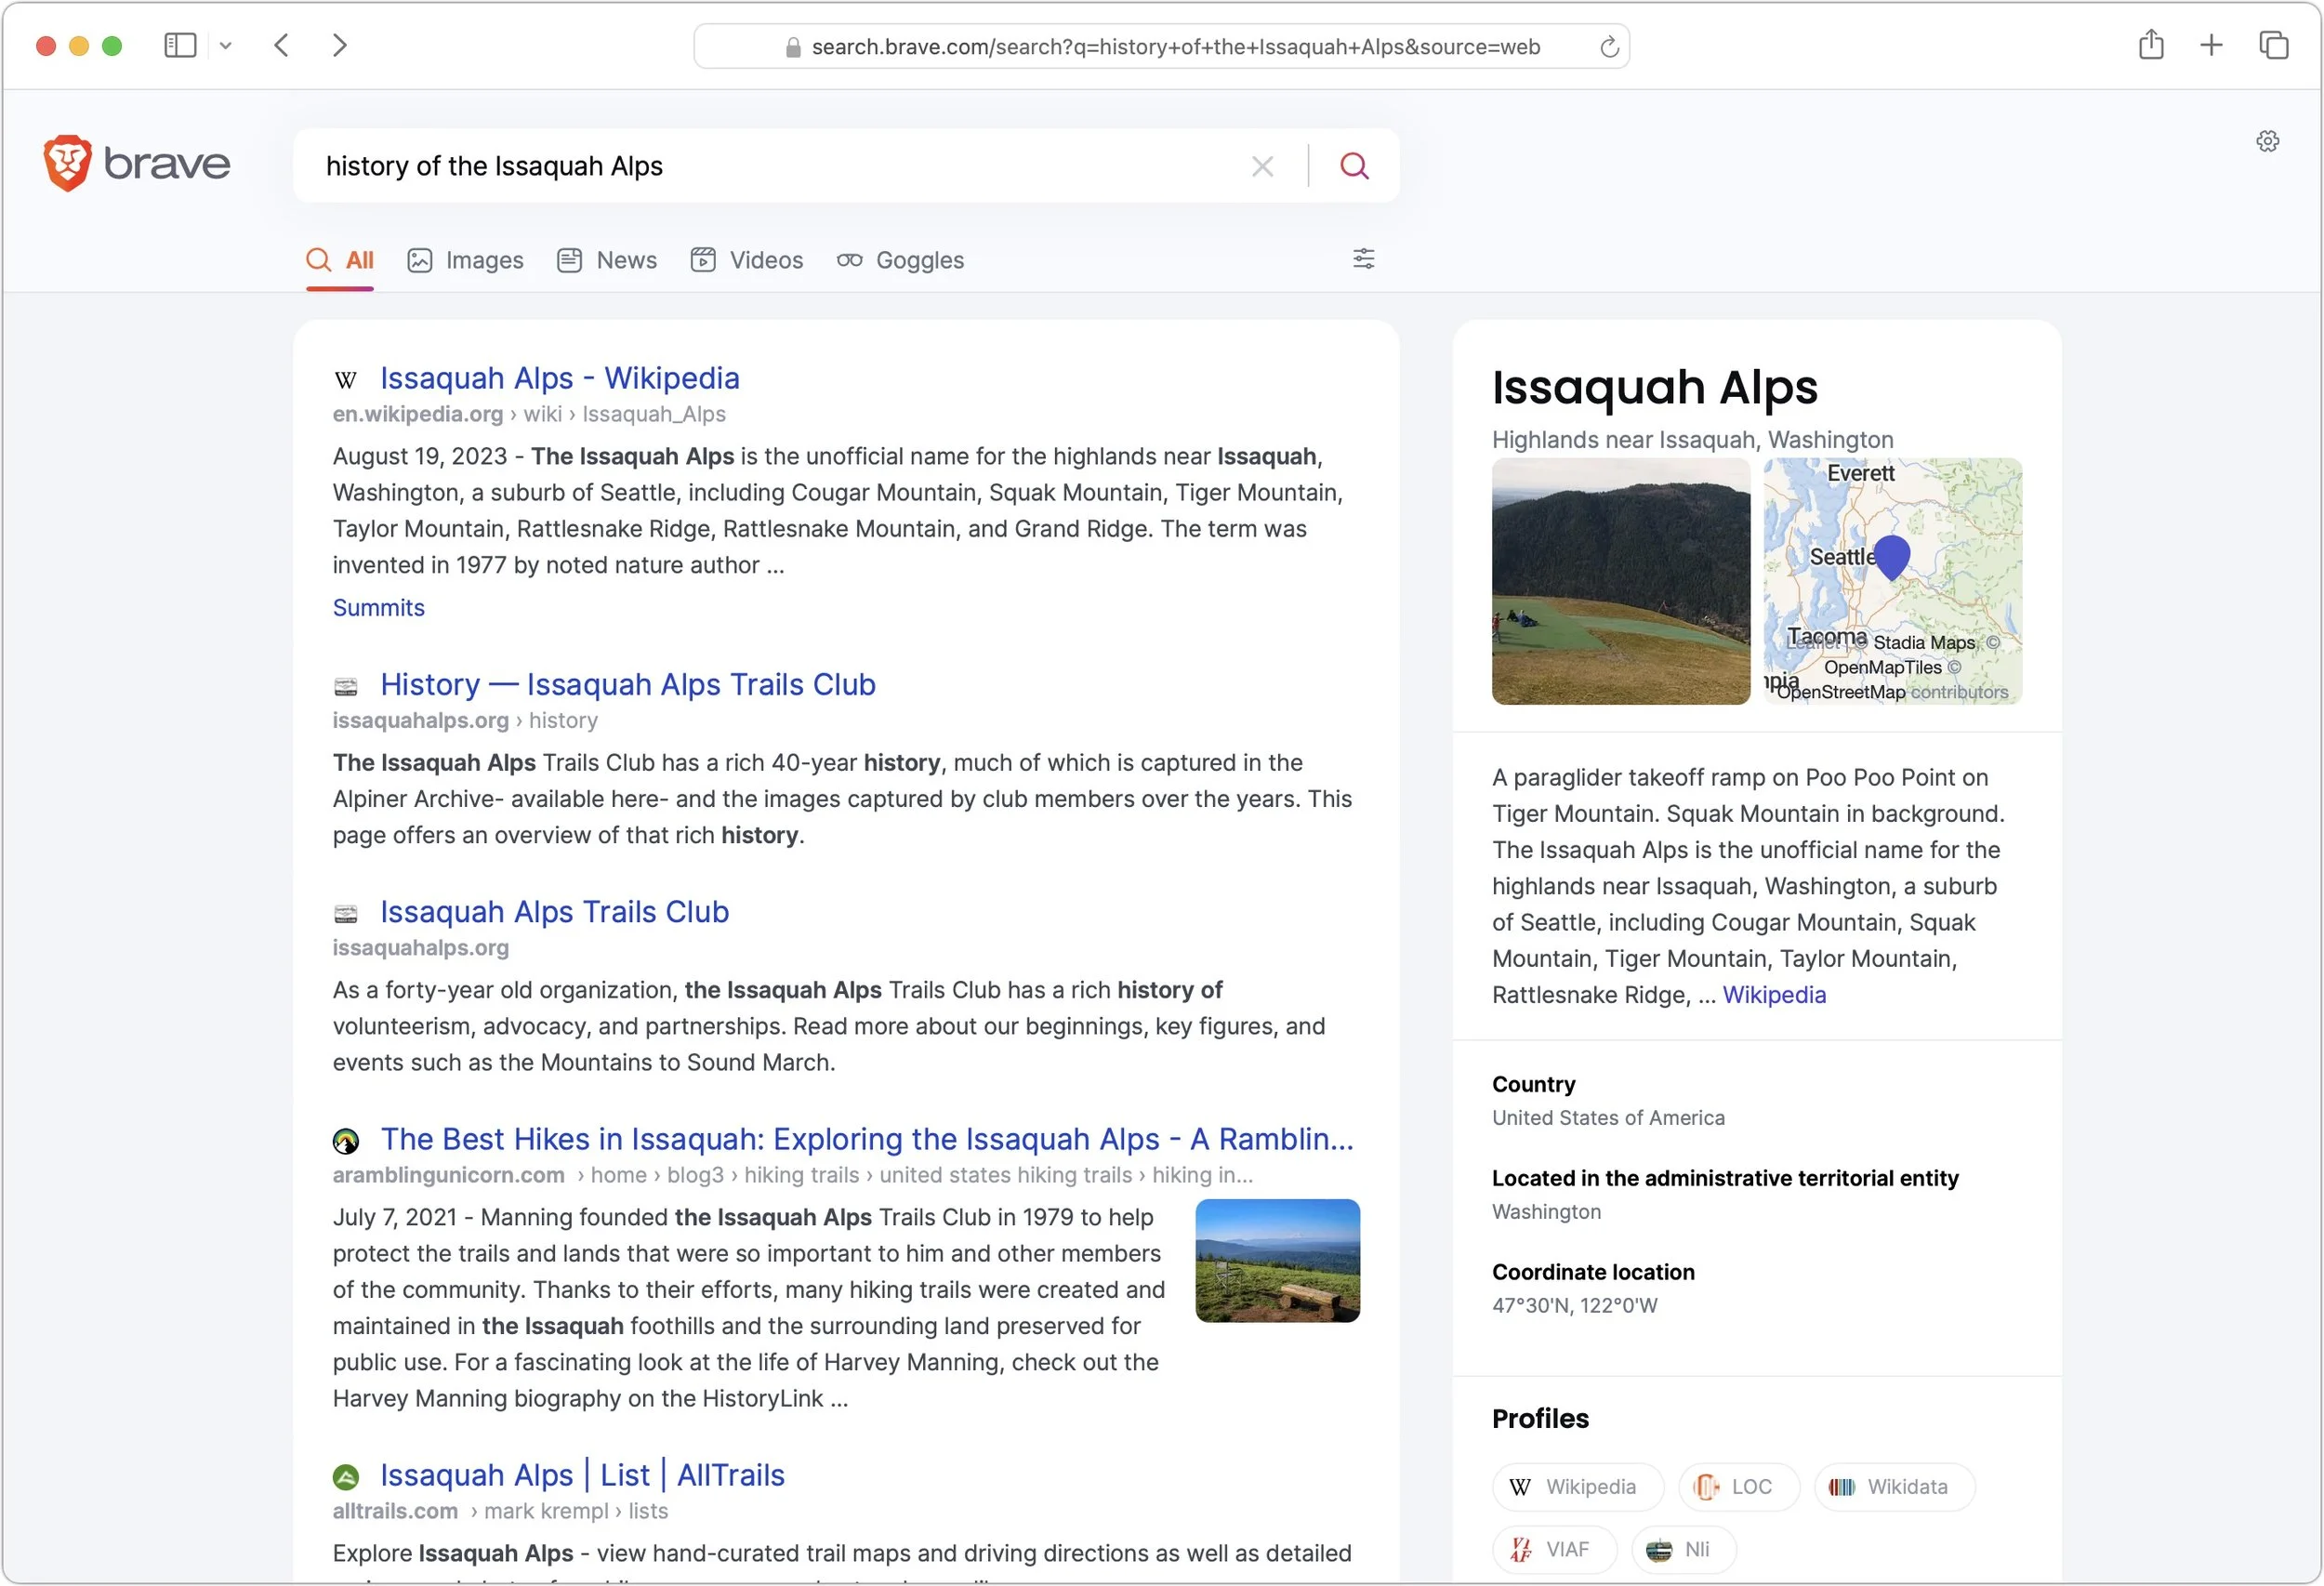
DuckDuckGo: If privacy is paramount, DuckDuckGo is worth a look because it does not track or store user information at all. Instead, it chooses ads to display only by matching with search keywords. Although it uses Bing for some of its results, DuckDuckGo also incorporates information from numerous other sources, so it won’t seem like an exact clone of Bing.
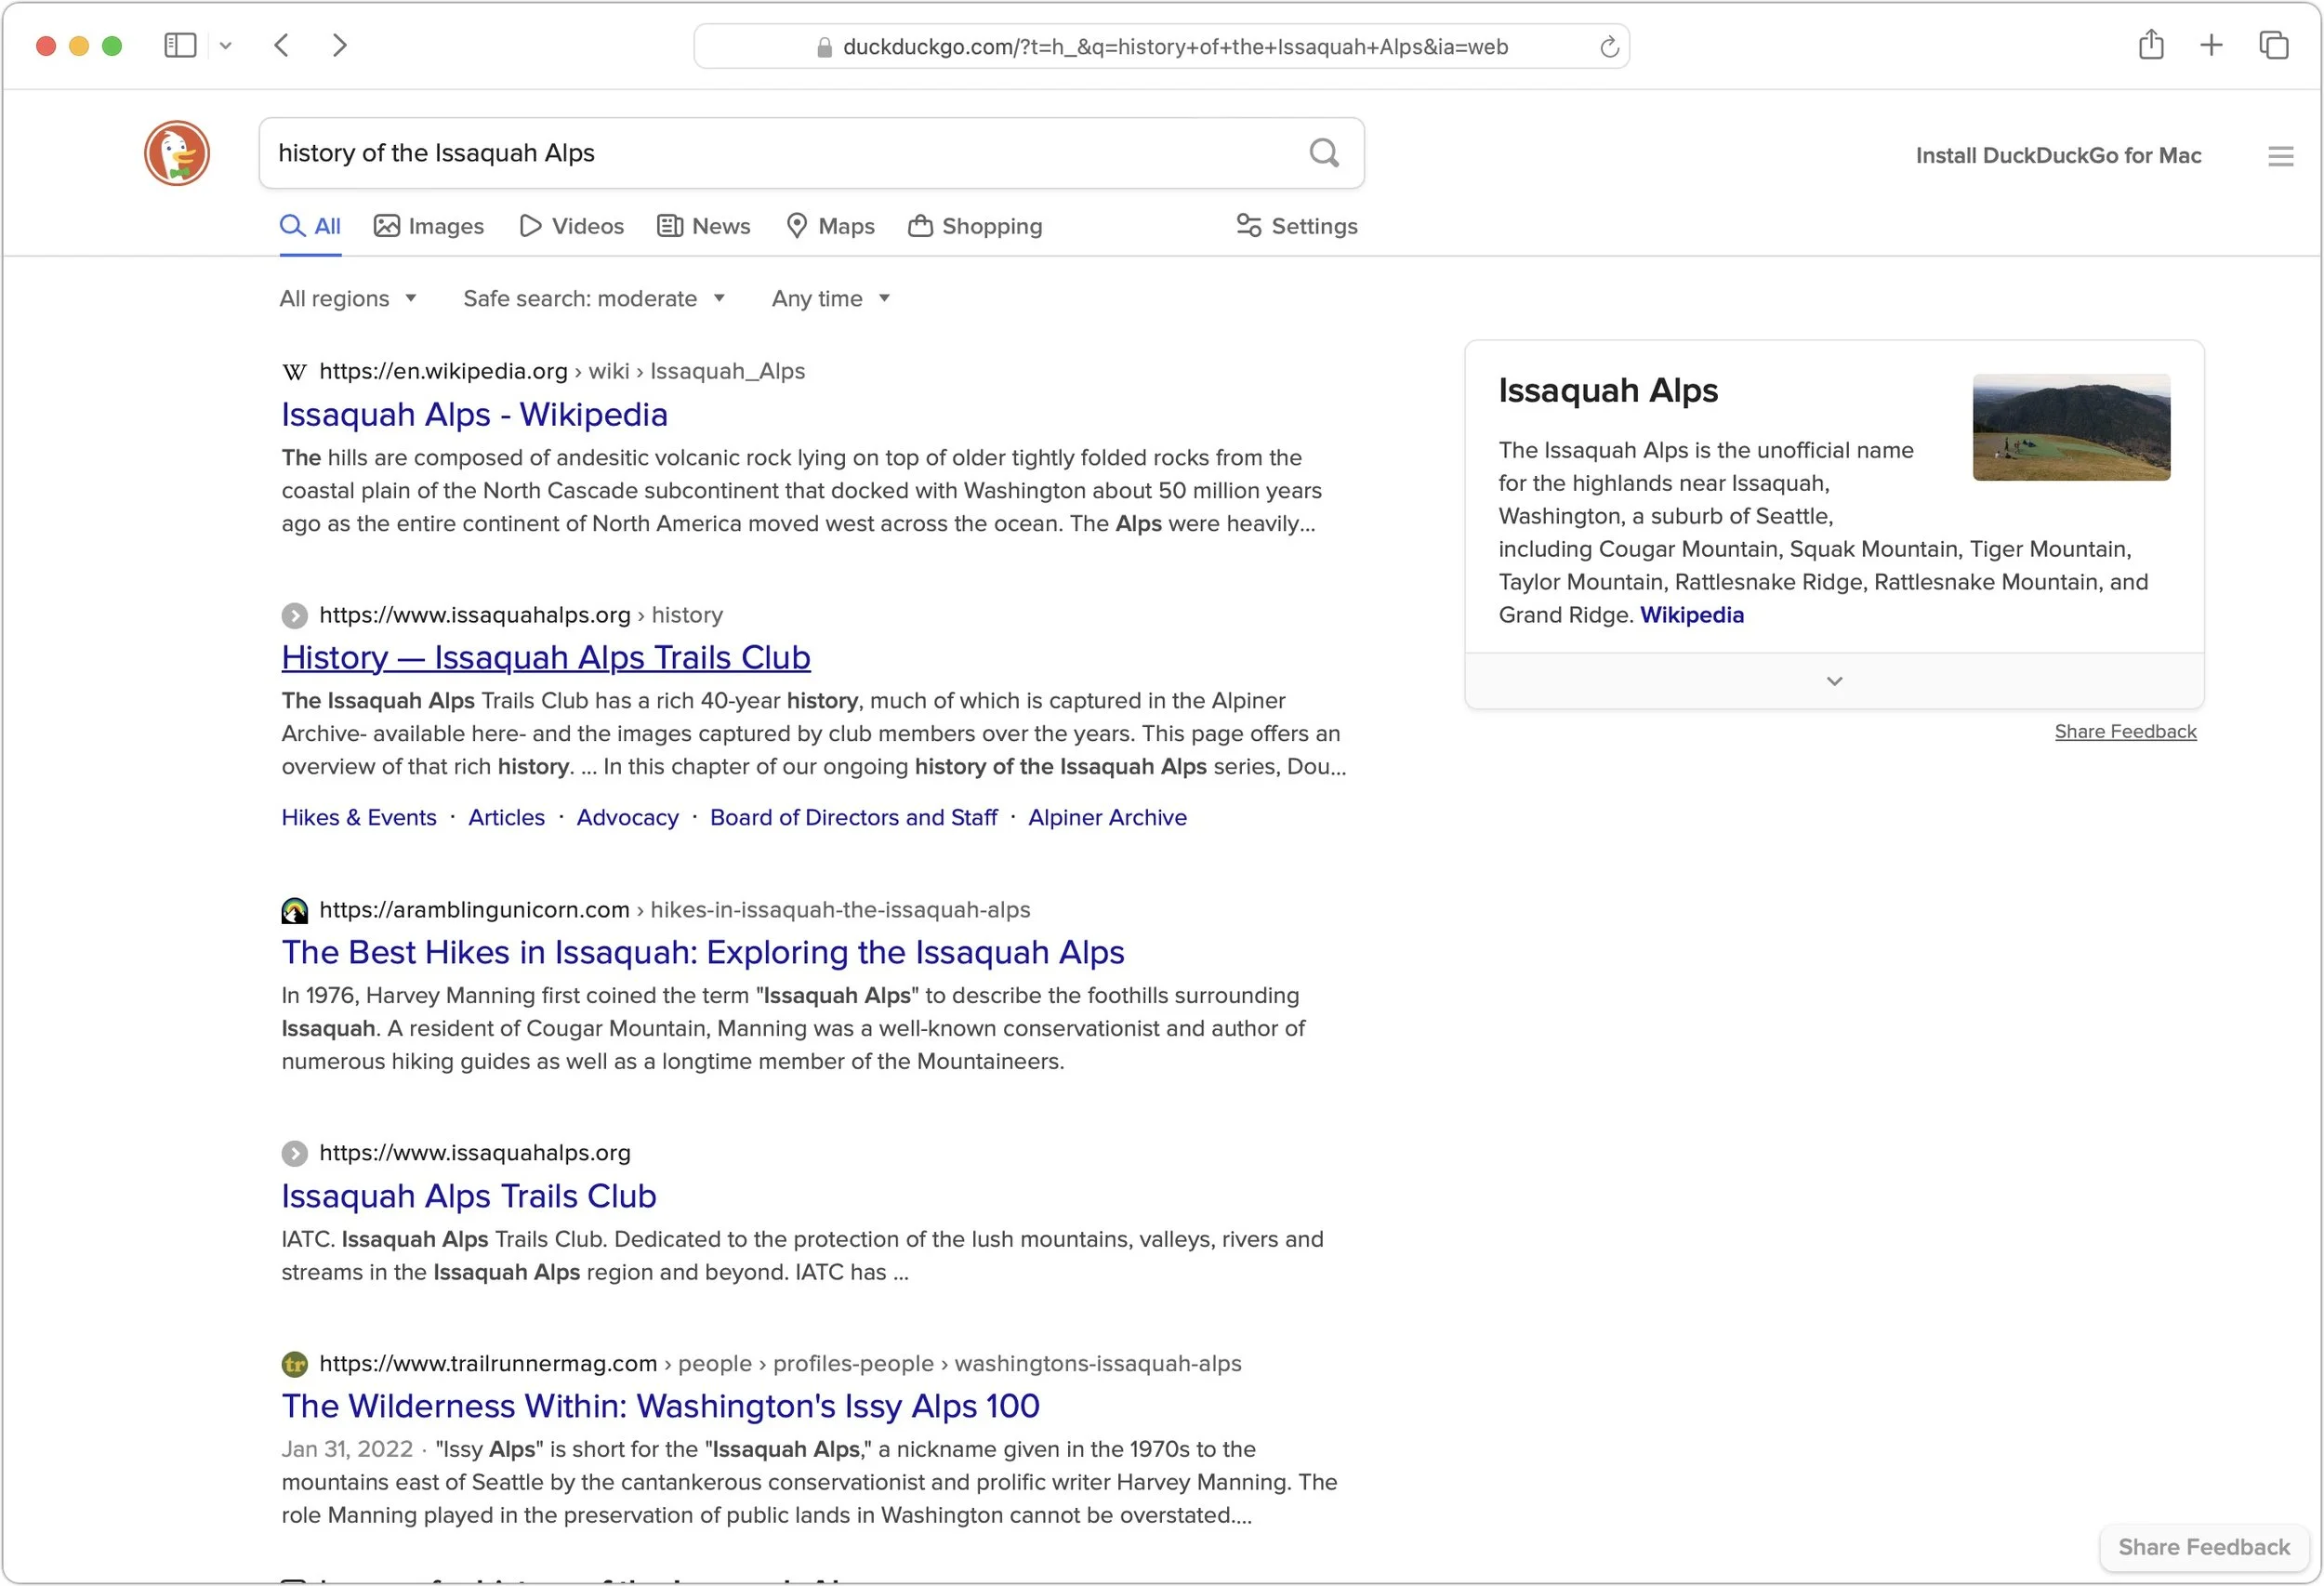
Ecosia: The main reason to use the Berlin-based Ecosia is if you like Bing’s results (but not its layout) and want to support a “social business” that claims to be carbon-negative, offers full financial transparency, and protects users’ privacy. Founded in 2009, Ecosia today relies entirely on Bing’s search results and ads (clicks on which are how Ecosia earns money), and it claims to have planted over 188 million trees in 35 countries since its inception. It’s hard to argue with Ecosia’s environmental results, but as a search engine, it doesn’t feel special.
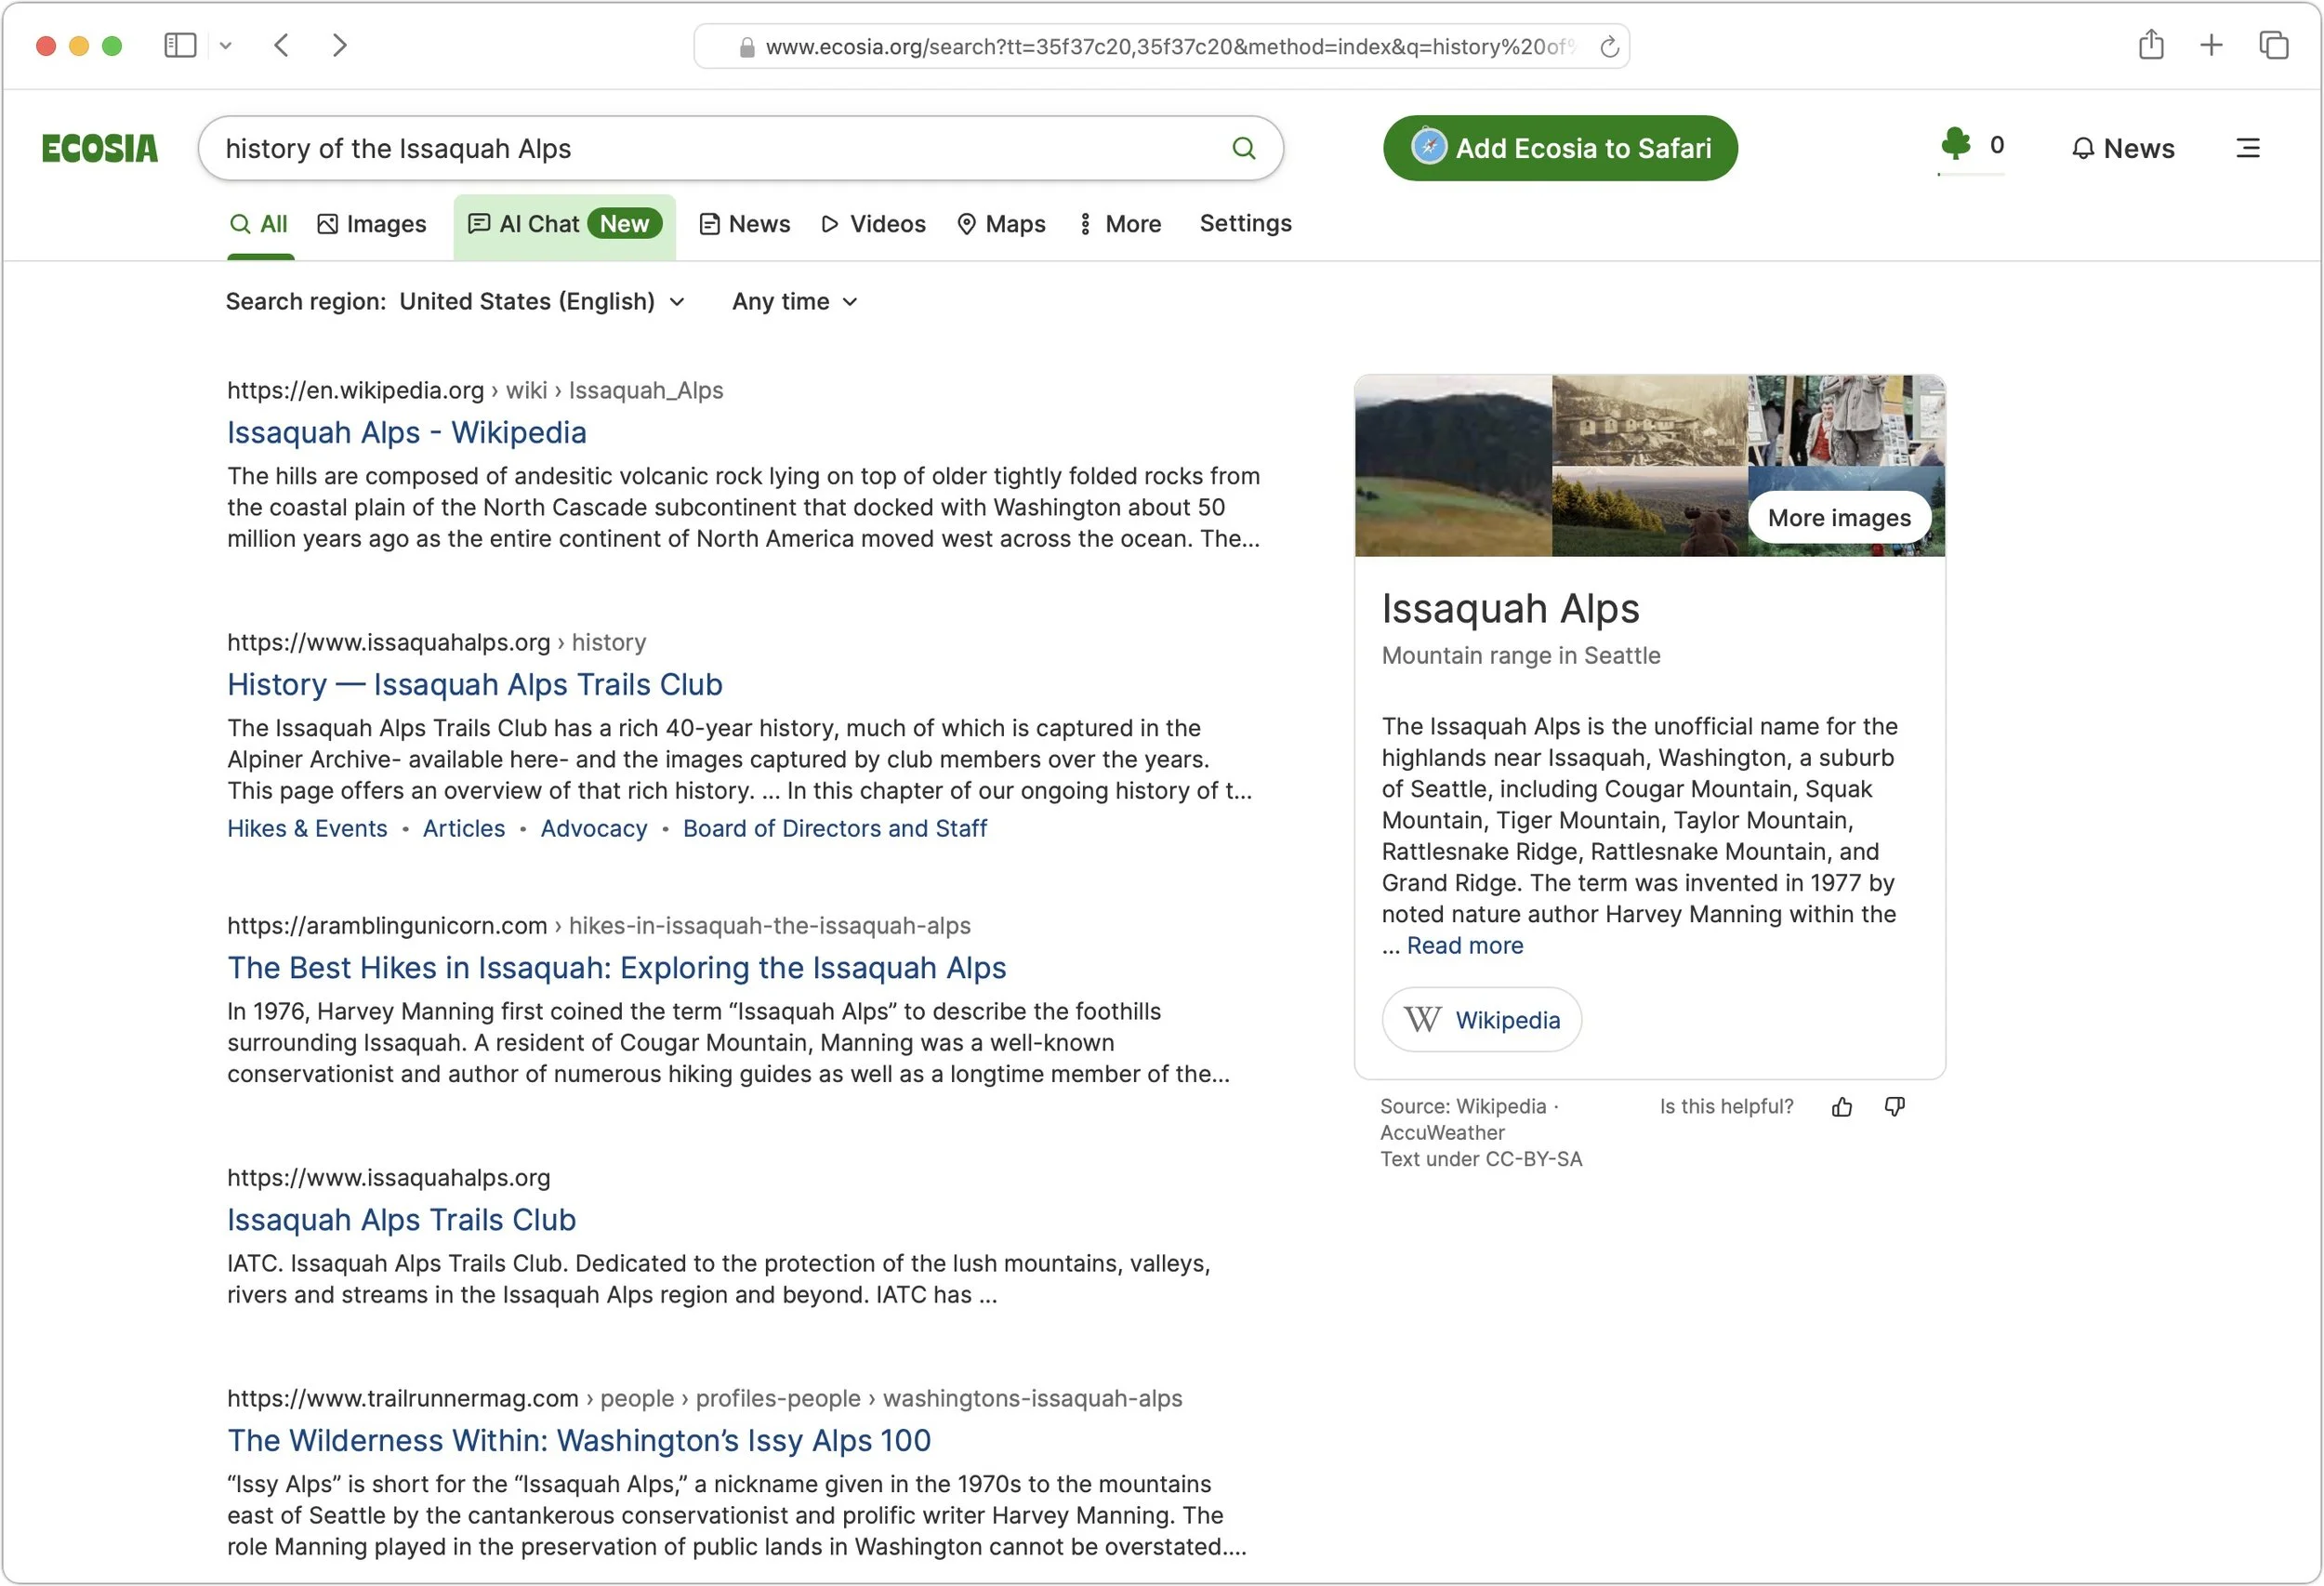
Brave Search: A truly independent search engine, Brave Search relies on its own created-from-scratch index (it leaned on Google and Bing for some results early on, but ceased in August 2023). It also emphasizes user privacy and doesn’t track users, searches, or clicks. Although Brave Search displays key-word-based ads by default, users can pay $3 per month for Brave Search Premium, which provides ad-free results pages. You’ll have to set Brave as the default search engine for most browsers manually; for Safari, all you can do is make a favorite to search.brave.com.
Kagi: Speaking of paid search engines, if you really want to avoid ads, Kagi is another independent search engine that rolls its own index and provides access only to subscribers, eschewing ads entirely. You can sign up for a 100-search test account, and if you like it, pay $5 per month for 300 searches or $10 per month for unlimited searches. As with Brave Search, you must manually set Kagi as the default search engine (there’s an extension for Safari).

The “best” search engine is the one that gives you the answers you want without trig-gering privacy worries or concerns about bias. If you want to see if something other than Google will work better for you, set it as your default search engine and try it for a few weeks.
(Featured image by iStock.com/Prykhodov)
Everything You Need to Know about Taking Screenshots on the Mac
Screenshots and screen recordings are helpful for capturing things that happen on your Mac screen for later reference. The macOS screenshot control bar makes it easy to take screenshots and movies, and our handy guide helps you work with it.
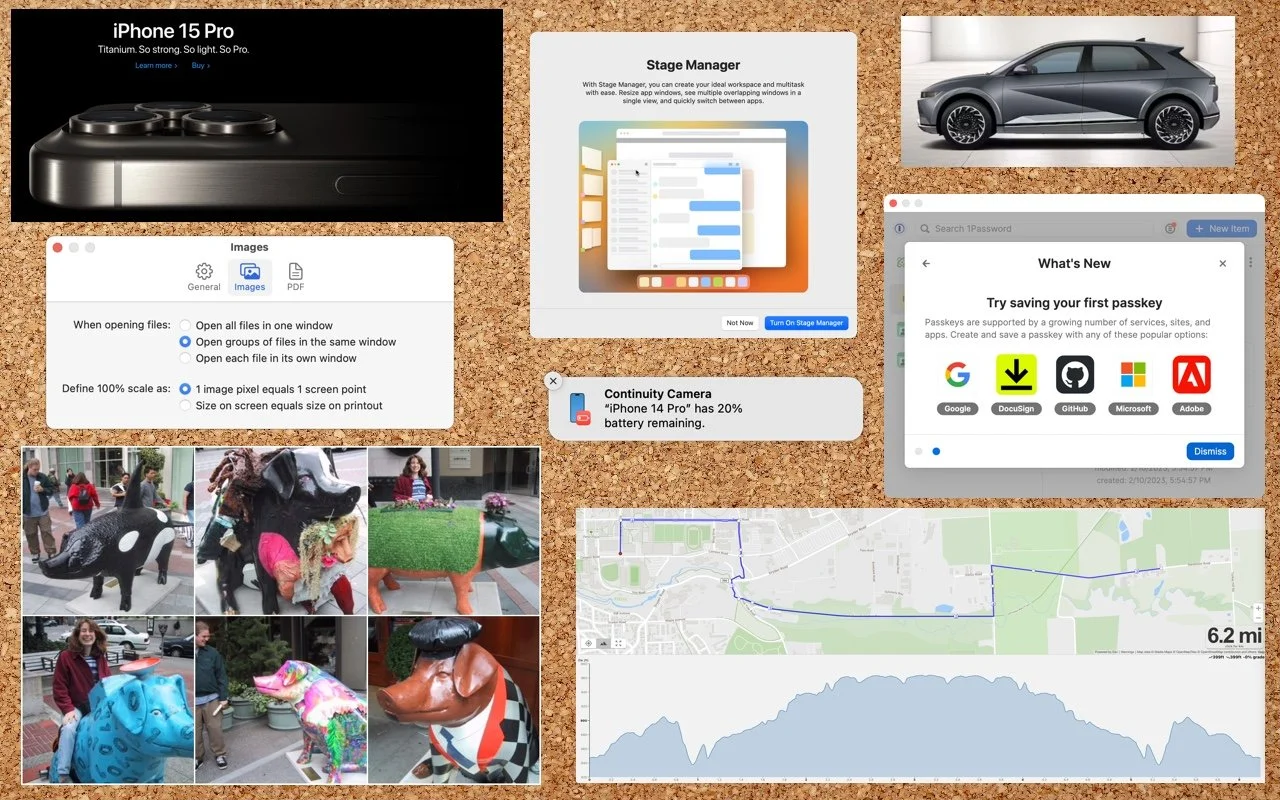
Many people use screenshots to clip portions of their Mac screen for later reference. For example, you could save a screenshot of an error dialog to show tech support, store a confirmation number from a Web page, or keep a chat from social media. You can even record screen movies to show a developer how their app is misbehaving.
Years ago, Apple introduced a floating control bar that makes accessing features for taking screenshots and recording screen movies easier. The hardest thing about using the control bar is memorizing its keyboard shortcut: Command-Shift-5. (The even older shortcuts of Command-Shift-3 for full-screen screenshots and Command-Shift-4 for windows and portions of the screen also still work.)
Meet the Control Bar
Let’s take a quick tour of the control bar. The leftmost 🅧 button dismisses the bar (alternatively, press Esc). You can also drag next to the 🅧 to reposition the bar. You’ll use the following three buttons to take screenshots and the next two to record movies.

The Options button displays a pop-up menu. If you’ve selected a screenshot button, the menu offers screenshot-related choices; if you’ve clicked either movie button, you see recording choices.
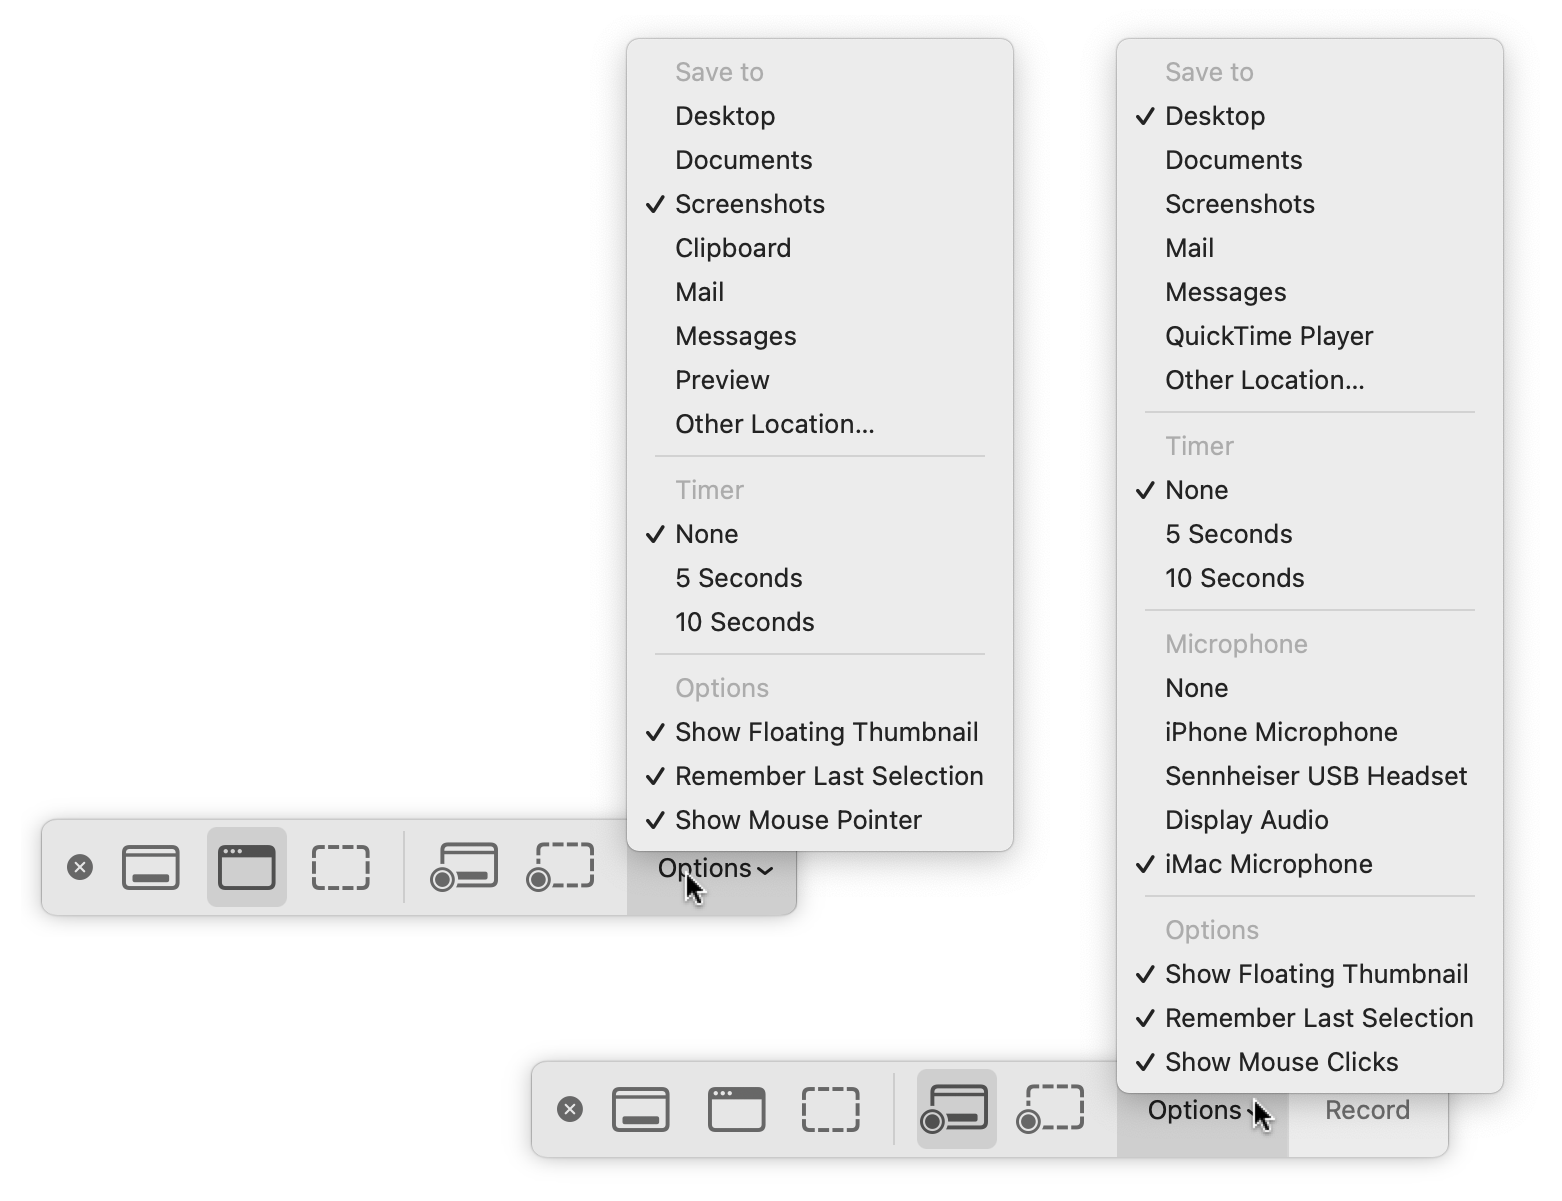
You may also see a Capture or Record button off to the right; more on them shortly.
Using the Options Menu
The top area of this menu, labeled Save To, enables you to choose a destination for screenshots or movies. By default, it’s set to the Desktop folder, which makes it easy to work with your screenshots right away, but your desktop can quickly get cluttered if you take a lot of screenshots. Feel free to choose Other Location and specify a folder of your choice, such as the Screenshots folder shown above.
If you choose an app like Mail, Messages, or Preview, a copy of your screenshot or movie will immediately appear in that app. For screenshots, you can also choose Clipboard to put a copy in the clipboard so you can paste it. Holding down the Control key while capturing a screenshot also puts the screenshot in the clipboard.
The Timer options let you adjust something on the screen immediately before your screenshot or movie begins. You can choose a 5- or 10-second delay. Timers are handy for situations where invoking the control bar would change the screen in an undesirable way.
With movies, you can record your voice over the action on screen. Select the desired microphone in the menu.
The bottom portion of the menu offers special options:
With Show Floating Thumbnail, a small icon of a screenshot or movie appears temporarily in the lower-right corner of the screen after you take it. In the case of a screenshot, you can click this icon to mark it up, trash it, or share it; for a movie, you can crop it (useful if the start or end aren’t what you want), play it, delete it, or share it.
Remember Last Selection is a big help when generating a batch of screenshots or movies using the same selection rectangle.
To make your pointer appear in your screenshot, choose Show Mouse Pointer, and for movies, to display a circle where you click, choose Show Mouse Clicks.
Taking a Screenshot
Here’s how to take each type of screenshot:
Capture Entire Screen: Click the leftmost screenshot button and move the pointer off the control bar. Click the screen. (If your Mac has multiple screens, click the one you want.)
Capture Selected Window: To limit your screenshot to just one standalone interface element—a window, dialog, or menu—click the second button and then click the desired item. If you want to capture a dialog separately from an app window behind it, press Command and move the pointer over the dialog. (To eliminate the drop shadow, press and hold Option as you click.)
Capture Selected Portion: To take a screenshot of an arbitrary portion of the screen, use the third screenshot button . Click it and then resize and reposition the selection rectangle over the desired area—note that it shows you the pixel dimensions of the selection. (Reposition the rectangle by moving it with the hand pointer that appears when you hover over it, and resize it by dragging any selection dot.) Finally, click the Capture button at the right of the control bar or press the Return key to create the screenshot.
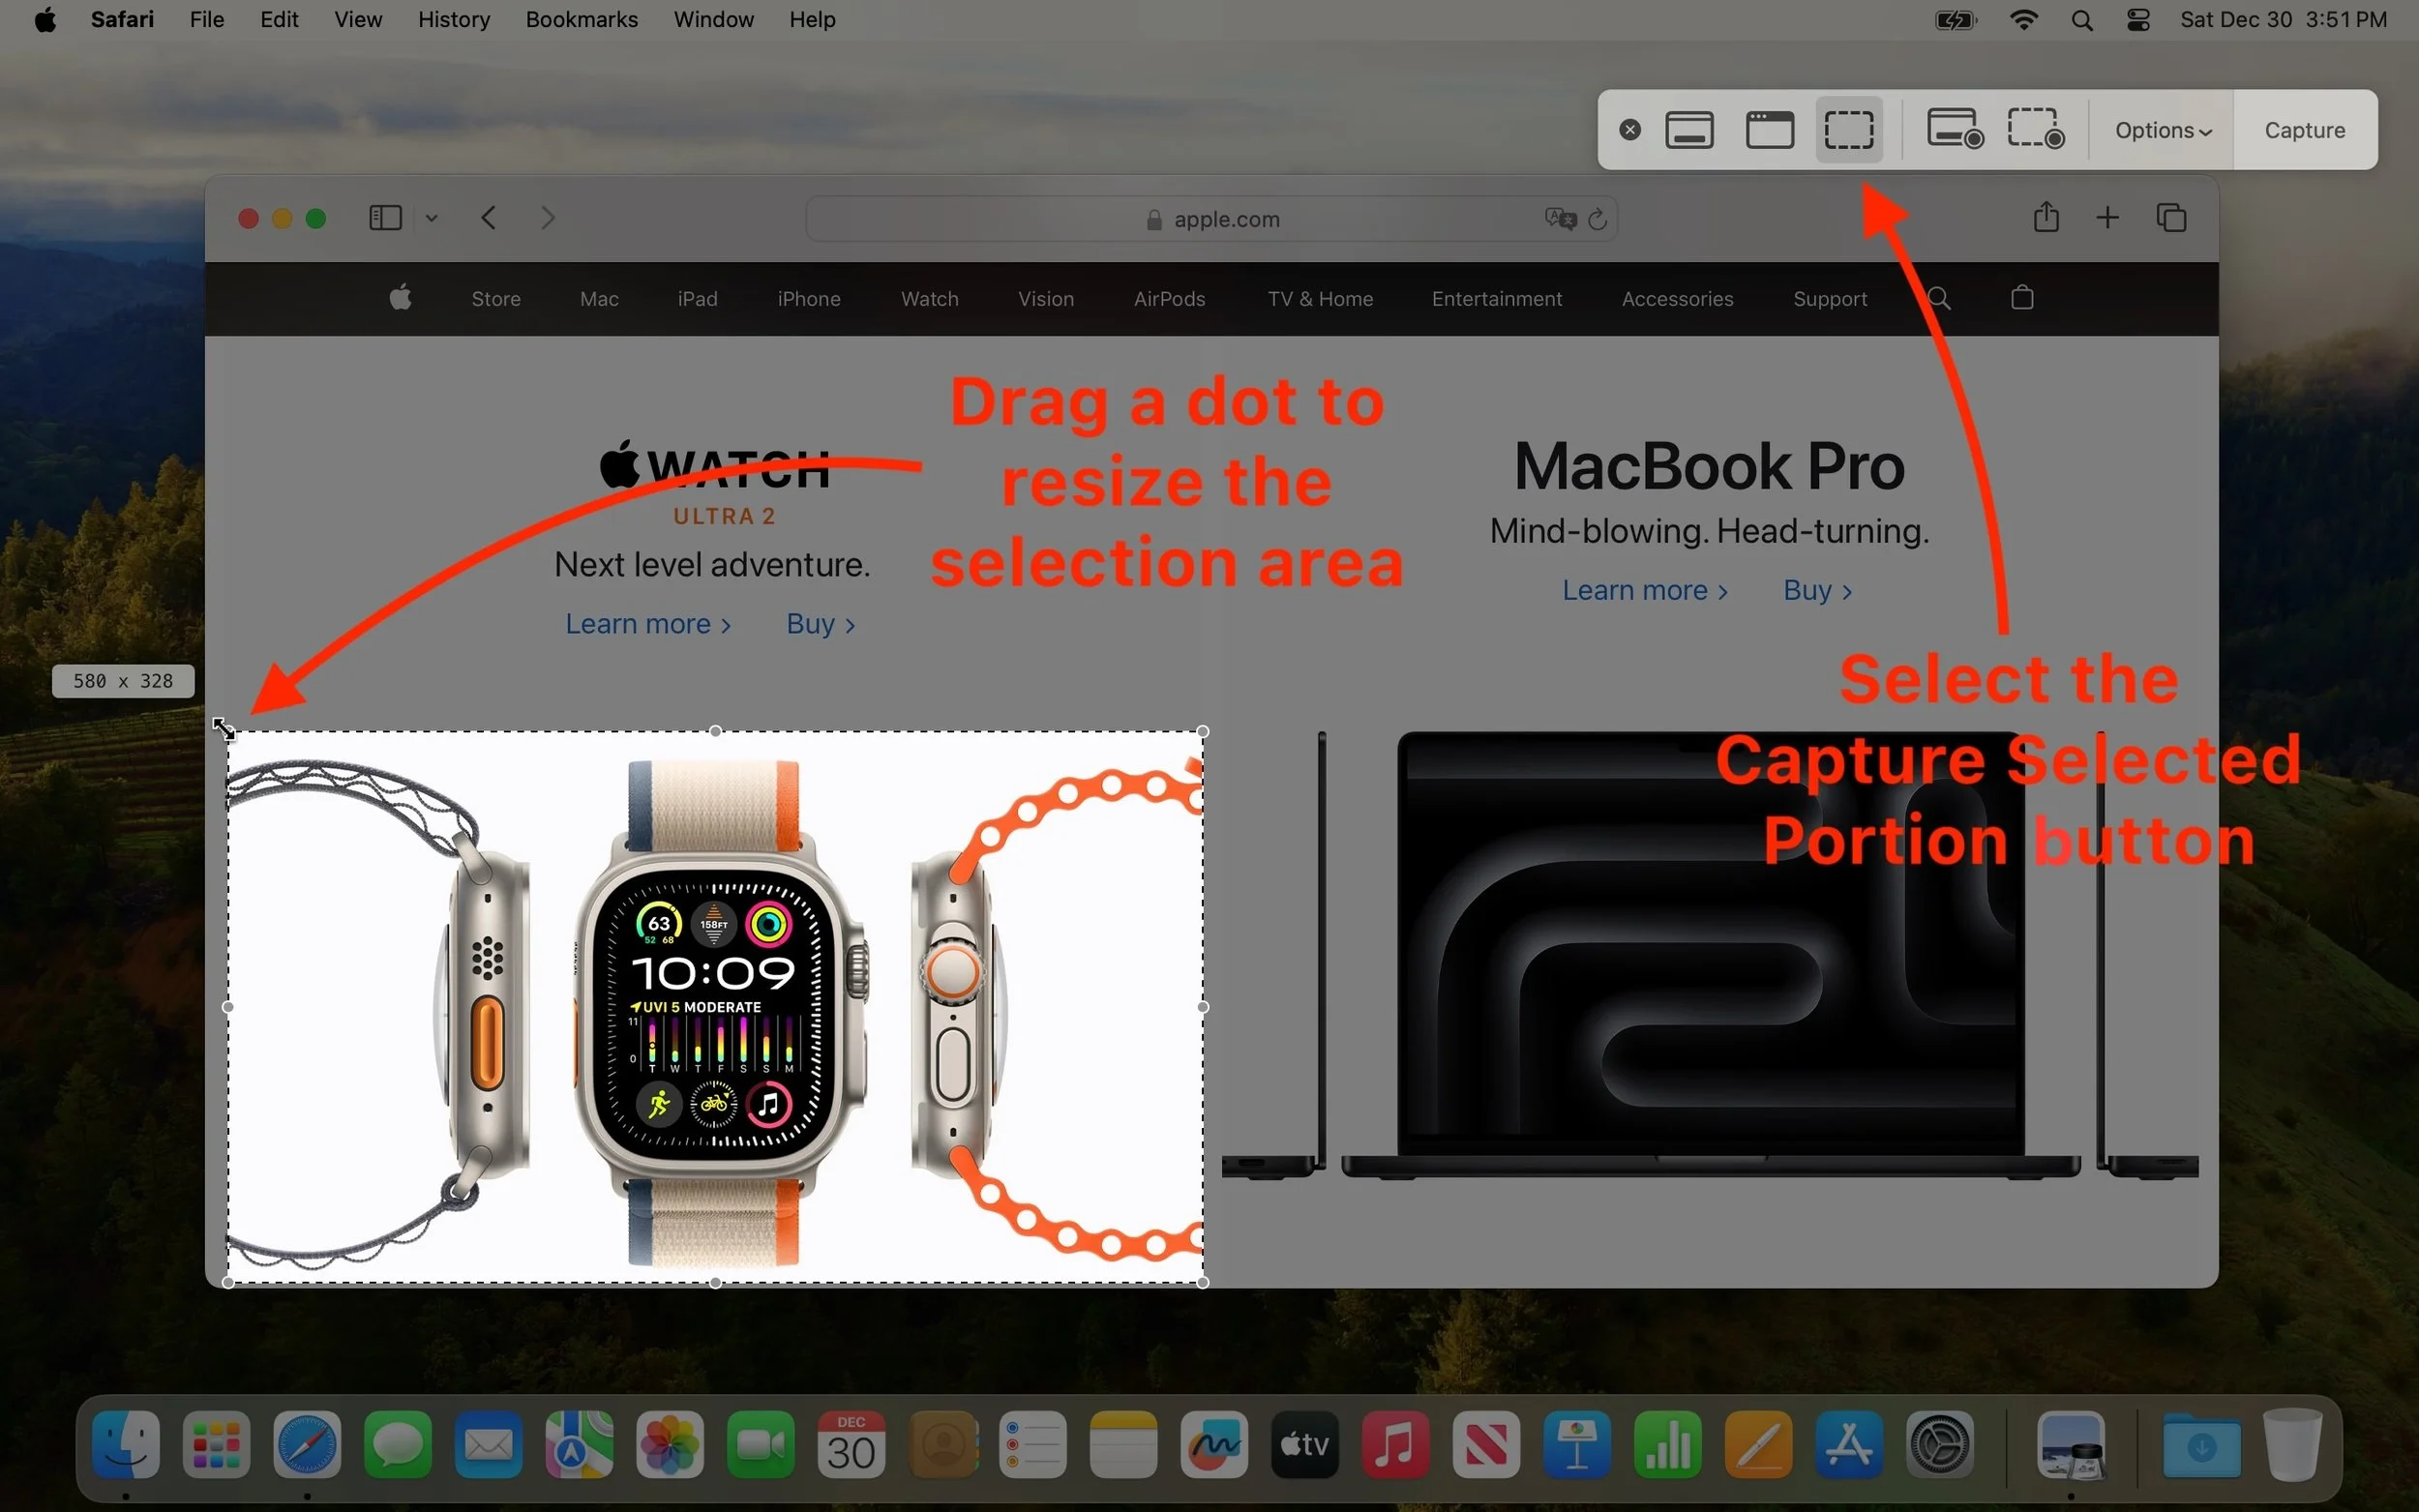
The name of the resulting image will be “Screenshot” plus the current date and time. It will also be in PNG format. If you prefer JPEG format for all your screenshots, you can change the default by pasting the command below into Terminal. Change things back by repeating the command, replacing JPG with PNG.
defaults write com.apple.screencapture type JPG
Recording a Movie
The two screen recording buttons are also easy to use:
Record Entire Screen: Click the first movie button and then the Record button at the right of the control bar. If you have two or more screens, clicking the Record button presents a menu from which you can choose which screen to record.
Record Selected Portion: Click the second movie button , then resize and reposition the selection rectangle over the recording area, just as with capturing a selection for a screenshot. When you’re ready, click the Record button.
When it’s time to stop recording, if you see a stop button on the menu bar to the right of the current app’s menu items, click it. If it’s hard to find, press Command-Shift-5 to bring up the control bar again, which will now offer a stop button. Or just press Command-Control-Escape.

Movies are named “Screen Recording” plus the date and time and will be in Quick-Time movie (.mov) format using the H.264 codec.
With screenshots and screen movies, the sky’s the limit for what you can capture or record, whether it’s a funny autocorrect chat mistake, an important reservation number, or a movie of a buggy app to share with tech support.
(Featured image uses a background by iStock.com/Altinosmanaj)
Feel Free to Upgrade to macOS 14 Sonoma When You’re Ready
When should you upgrade to macOS 14 Sonoma? There’s no need to install it today, but we think it’s now safe for those who want to take advantage of the new features and integration with Apple’s other operating systems.
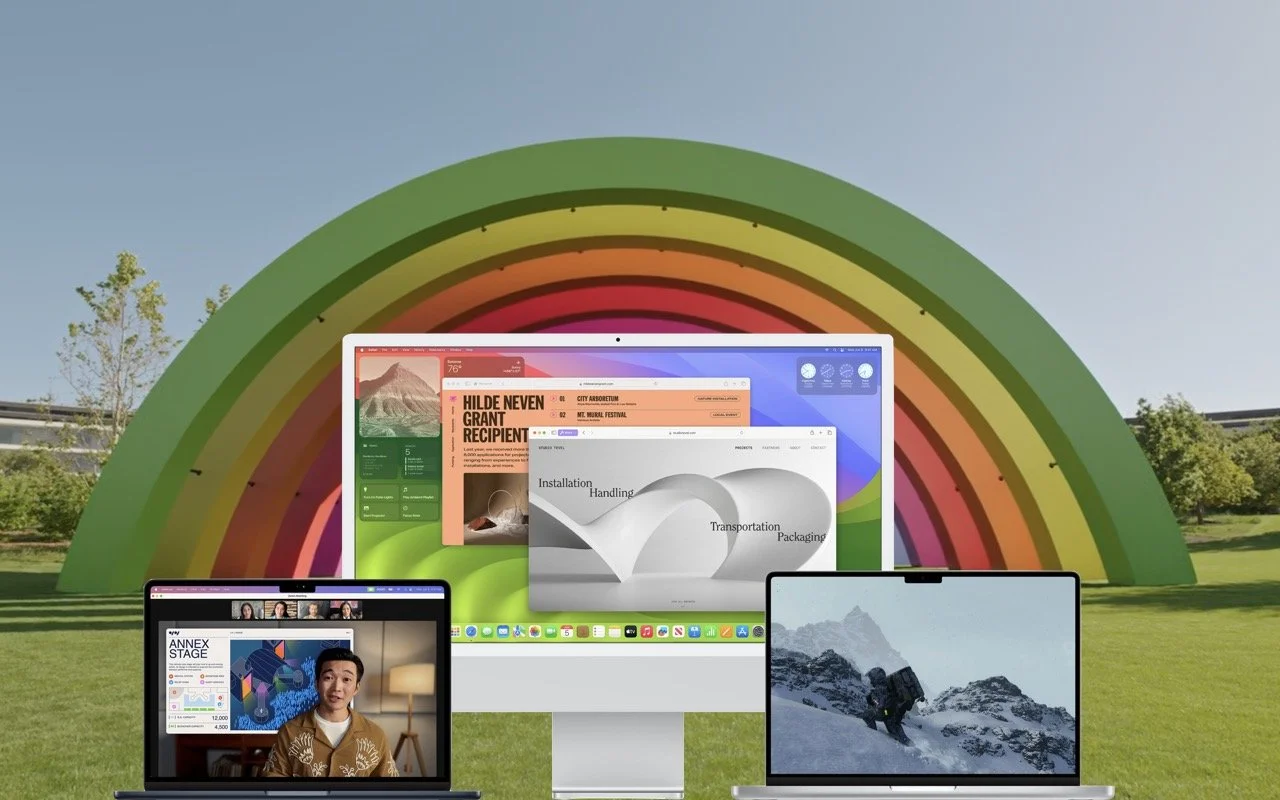
Although we’re cautious about recommending that people upgrade to the latest major release of macOS, we think Apple has done a good enough job with macOS 14 Sonoma that anyone who wants to upgrade can do so now. That doesn’t mean you have to upgrade immediately, but there’s no major reason most people need to delay.
Our confidence comes from our positive experience working with those who have upgraded to Sonoma and the fact that Sonoma has received only three updates so far. None included significant bug fixes:
macOS 14.1 fixed two bugs that could reset the System Services settings within Location Services and prevent encrypted external drives from mounting.
macOS 14.1.1 came with generic release notes, but the community discovered that it fixed a bug introduced in 14.1 that affected Photoshop and another that could prevent a new M3 24-inch iMac that shipped with macOS 13 Ventura from upgrading to Sonoma.
macOS 14.1.2 focused on fixing two WebKit-related security vulnerabilities that were exploited in iOS.
Apple will likely release another update before the end of the year, probably macOS 14.2, with some promised features, a few more bug fixes, and the usual handful of security improvements. After that, the company will continue with an update every month or so to address newly discovered bugs and security vulnerabilities.
That said, you can put off the Sonoma upgrade as long as you’re running macOS 12 Monterey or macOS 13 Ventura and are staying current with Apple’s security updates. Earlier macOS versions no longer receive security fixes, rendering them more vulnerable to attack. Possible reasons to continue delaying include:
You’re too busy. The upgrade process will take a few hours, plus some additional time to configure everything properly afterward. When you are ready to upgrade, aim for when a little downtime will be convenient.
You rely on incompatible software. The jump from Monterey or Ventura to Sonoma isn’t a big one, so most modern apps should have been updated by now. But if you’re still running macOS 10.14 Mojave or earlier with 32-bit apps, you’ll lose access to them if you upgrade. There’s nothing new here—32-bit apps stopped working in macOS 10.15 Catalina in 2019. Rather than delaying, consider running Mojave and your 32-bit apps in a virtual machine using VMware Fusion or Parallels Desktop.
You need consistent versions for workflow reasons. We’re unaware of any examples here, but it’s conceivable that a coworker could be stuck on an older version of macOS and older versions of shared productivity apps. If your upgrade would force you to update those apps and introduce compatibility is-sues when collaborating with that coworker, you may have to wait until your coworker can upgrade as well.
Sonoma won’t transform your experience of using a Mac, but it has new features you might appreciate. The most noticeable is probably desktop widgets that provide updated information at a glance—you can even add widgets from your iPhone. Sonoma also lets you turn websites in Safari into standalone apps, enjoy aerial screensavers from the Apple TV, create a video overlay of yourself on video calls when sharing your screen, autofill PDF forms, and use the keyboard while dictating.
Before You Upgrade
Once you’ve decided to upgrade to Sonoma, you have three main tasks:
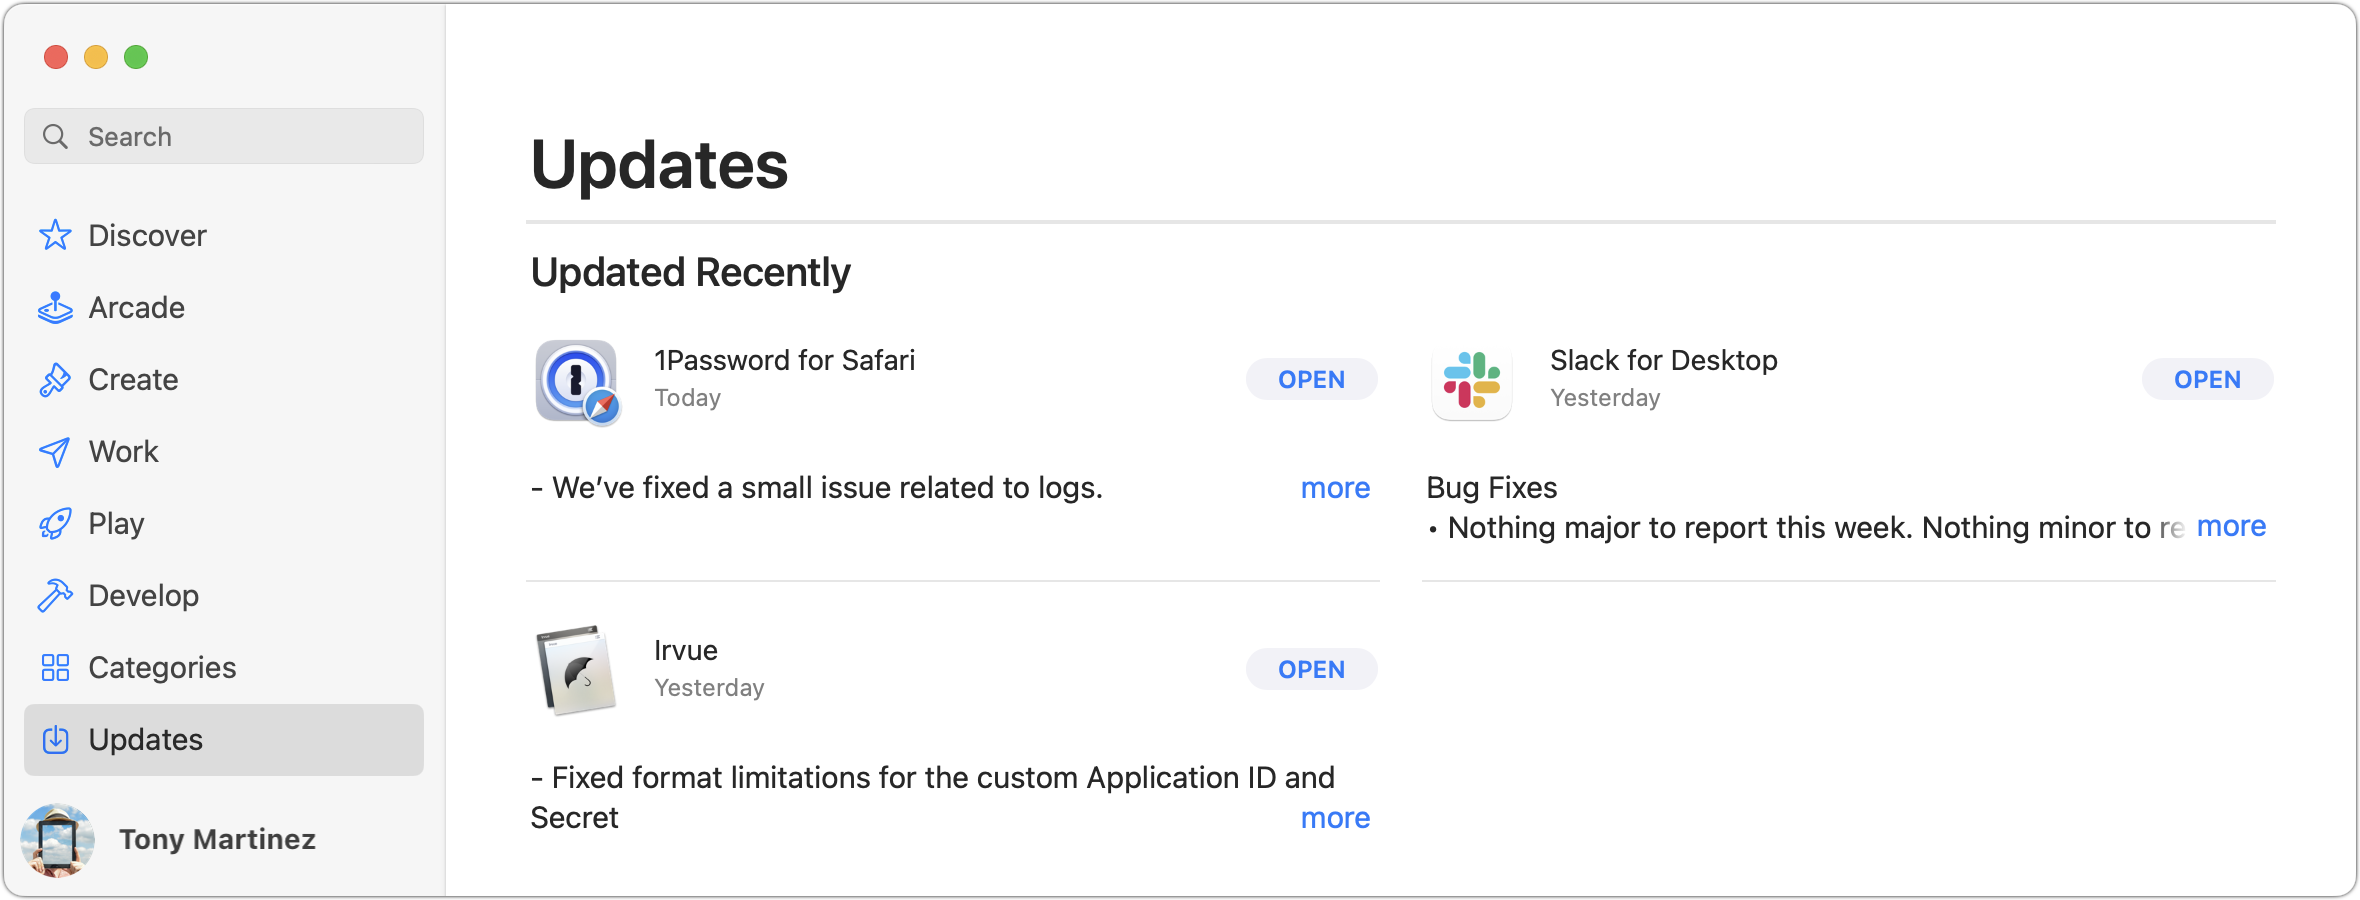
Update apps: Make sure all your apps are as up-to-date as possible. If you regularly put off updates, now’s the time to let them complete so you have Sonoma-compatible versions.
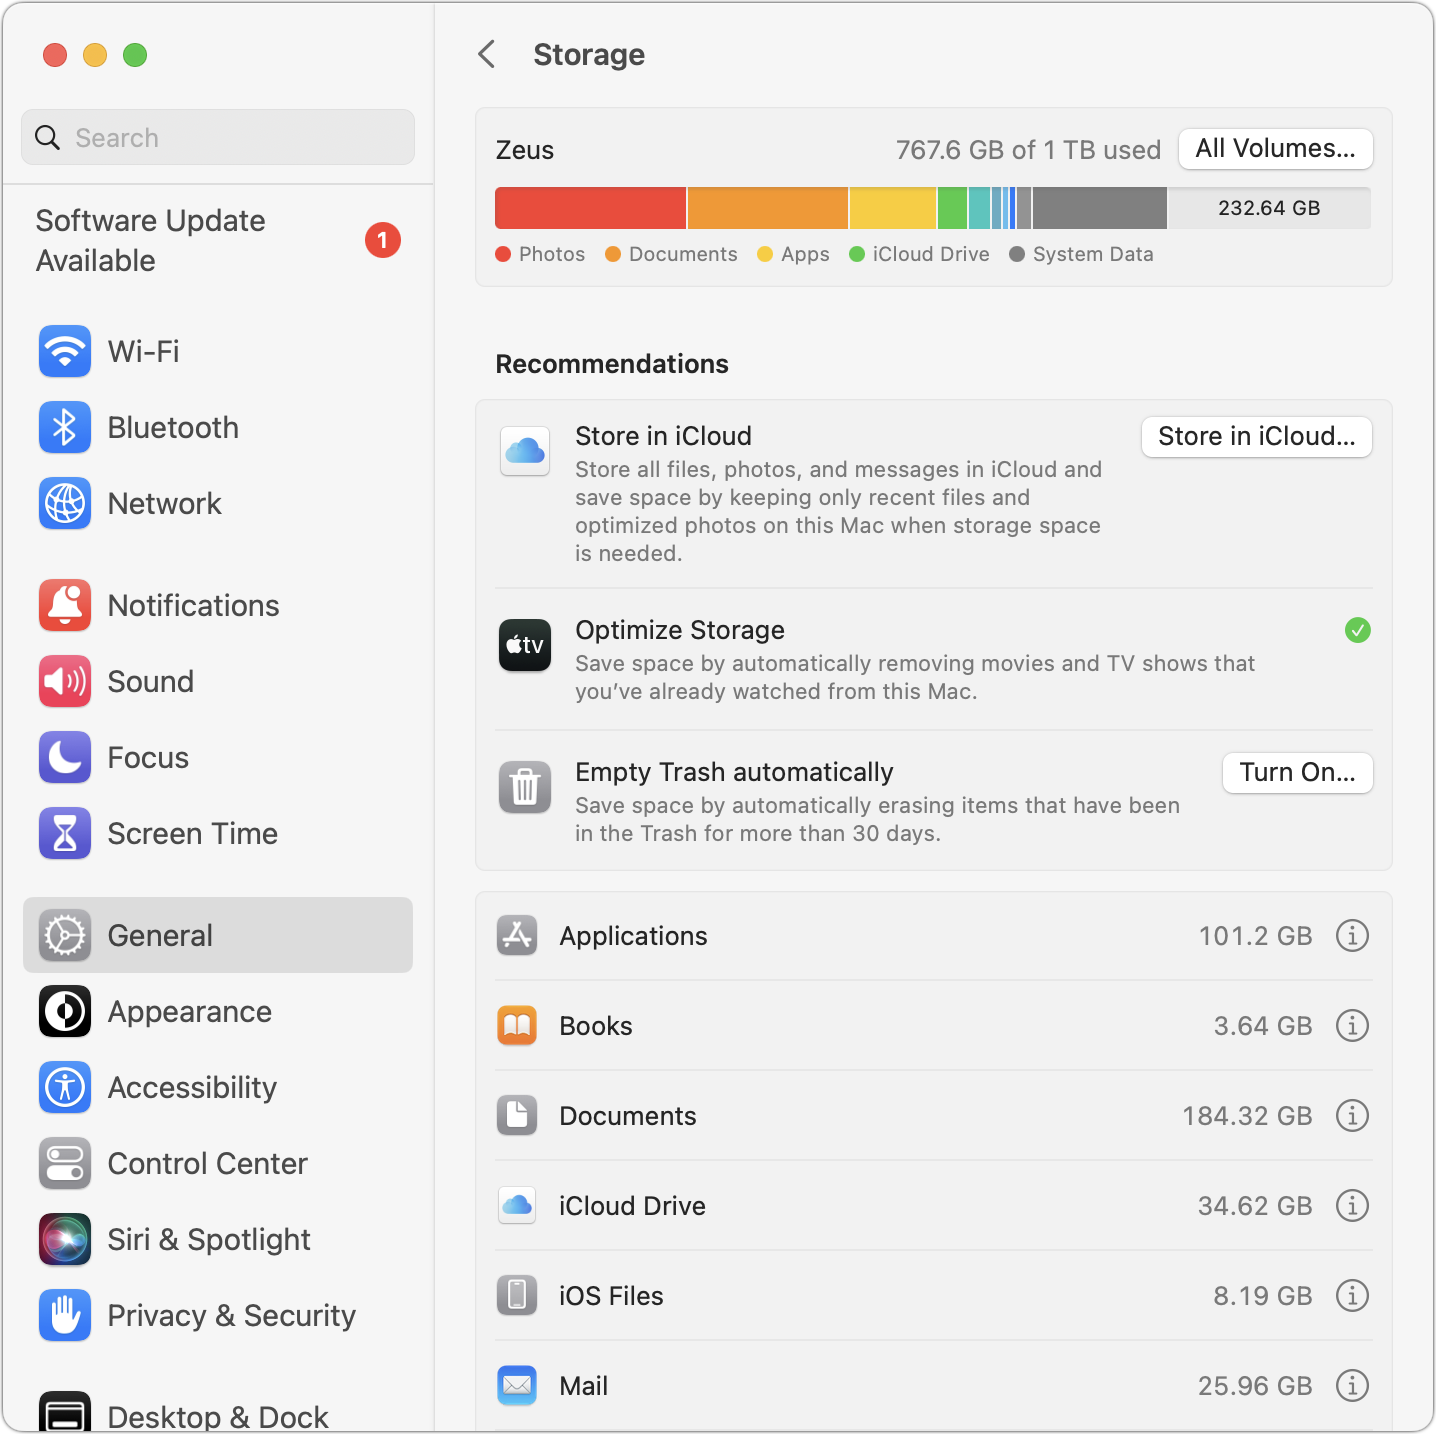
Clear space: Sonoma may need as much as 25 GB of free space to upgrade, and the Sonoma installer itself is about 12 GB, so we recommend making sure you have at least 37 GB free. Don’t cut this close—you should always have at least 10–20% free space for virtual memory, cache files, and breathing room. Check in Ventura by choosing System Settings > General > Storage; in earlier versions of macOS, choose About This Mac from the Apple menu and click Storage. System Settings provides quick ways to free up space. Another easy one for iCloud Drive users is to Control-click large folders and choose Remove Download to “evict” the local versions of those files temporarily; Box, Drop-box, and Google Drive have similar features.
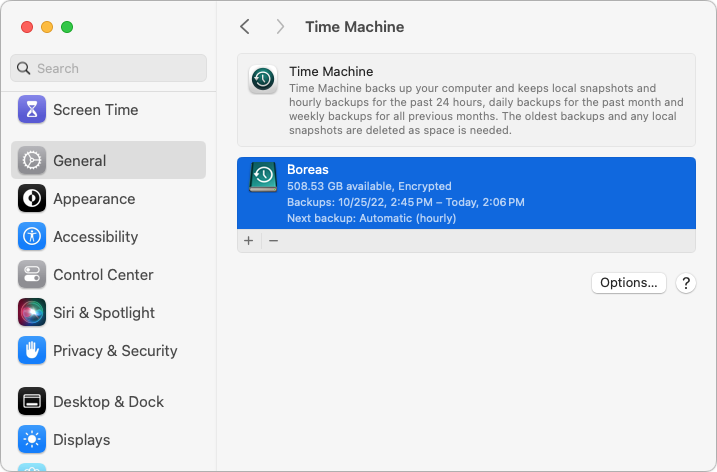
Make a backup: Never, ever install an update to macOS without ensuring you have at least one current backup first. In an ideal world, you’d have an updated Time Machine backup, a duplicate, and an Internet backup. That way, if something goes wrong, you can quickly revert.
Upgrading
After completing those tasks, ensure you won’t need your Mac for a few hours. There’s no telling exactly how long the upgrade will take, so never start an upgrade if you need the Mac soon.
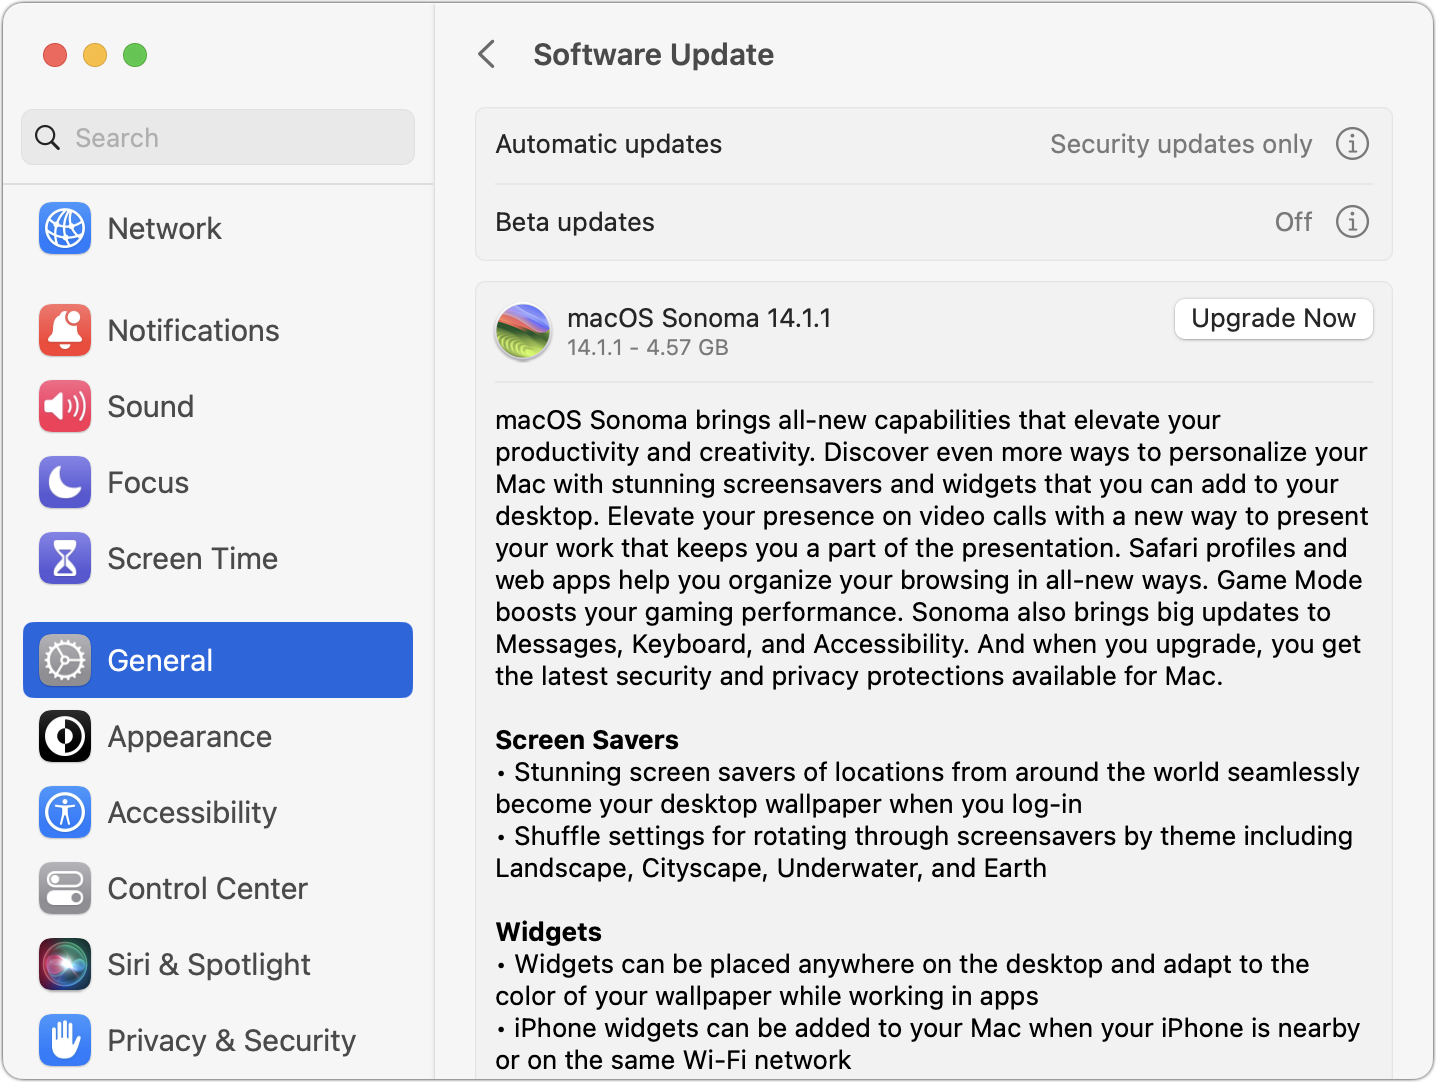
Initiating the upgrade is just a matter of opening System Settings > General > Software Update in Ventura (System Preferences > Software Update in previous versions of macOS), clicking the Upgrade Now button, and following the instructions. If you’d like more handholding, check out Joe Kissell’s ebook Take Control of Sonoma.
After You Upgrade
Part of the reason to set aside plenty of time for your Sonoma upgrade is that there are usually cleanup tasks afterward. We can’t predict precisely what you’ll run into, depending on what version of macOS you’re running now and what apps you use, but here are a few situations we’ve noticed in the past:
macOS may need to update its authentication situation by asking for your Apple ID password, your Mac’s password, and if you have another Mac, its password as well. Don’t worry that your Mac has been compromised by malware—it’s fine.
Some apps may have to ask for various permissions even though you previously granted them. Again, that’s fine and won’t happen again.
If you use your Apple Watch to unlock your Mac and apps (and you should, it’s great!), you may need to re-enable that in System Settings > Touch ID & Password (or Login Password on a non-Touch ID-enabled Mac (previously, it was in System Preferences > Security & Privacy > General).
If you use Gmail, Google Calendar, or other Google services, you may need to log in to your Google account again.
Websites that usually remember your login state may require that you log in again. If you’re using a password manager like 1Password, that’s easy.
You may have to re-enable text message forwarding to your Mac. You do this on your iPhone in Settings > Messages > Text Message Forwarding.
With all that housekeeping done, it’s time to check out all the new features in Sonoma!
(Featured image by Apple)
Nine Ways of Moving Data from One Mac to Another
Copying a file from one Mac to another is conceptually straightforward, but not all approaches work equally well in all situations. Read on to learn which ways of moving files are most appropriate for your needs.

You have a file on one Mac and want to copy it to another Mac, either yours or someone else’s. Sounds easy, and it is, but the best way to go about it varies widely depending on circumstances, and your go-to method may not be the best choice, depending on the size of the file and the locations of the Macs. Here are some possibilities:
Email: It’s easy to attach a file to an email message, but most email providers limit the attachment size, such as 20 MB (iCloud) or 25 MB (Gmail). Thus, email is best for sharing small files with other people—there are better ways of moving files among your own Macs. Attachments also take up significant space in your email account, and running out of space will cause new messages to bounce.
Messages: For relatively small files, dropping a file in an iMessage (blue bubble) conversation in Messages works well as long as the file is smaller than 100 MB. Remember that files sent in Messages consume iCloud and local storage space unless deleted, so this approach is also best reserved for occasional use.
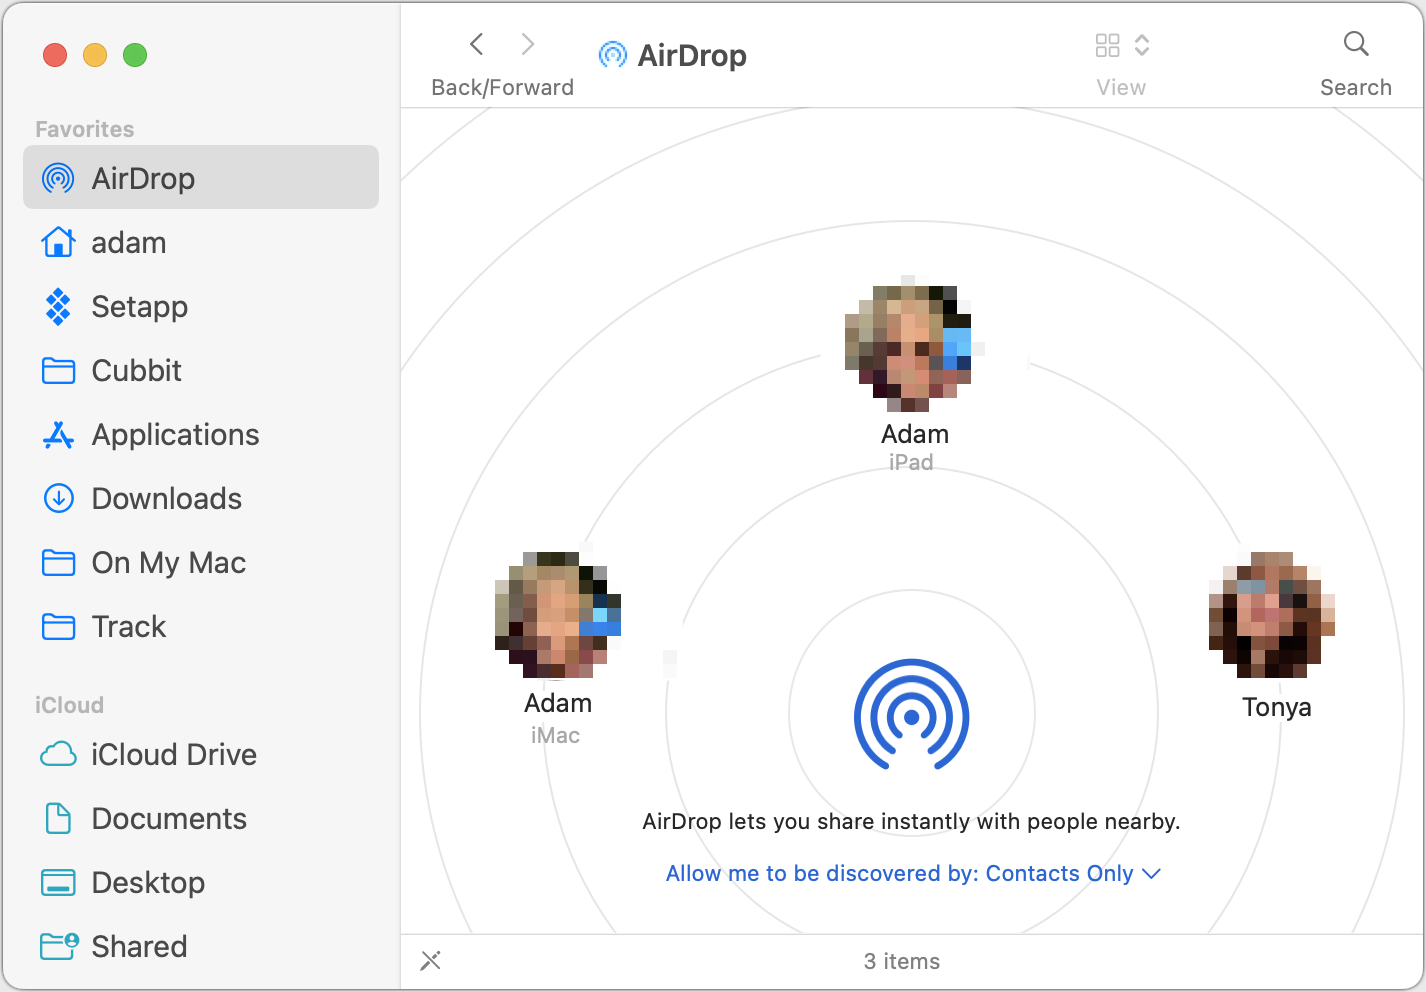
AirDrop: To copy a file to another Mac in the same room, AirDrop is the most convenient solution. Make sure it’s turned on in Control Center on both Macs and the discovery options are correctly set. Bluetooth and Wi-Fi must be on, but the Macs don’t need to be connected to any network or to iCloud. To transfer a file, select AirDrop in a Finder window sidebar (enable it in Finder > Settings > Sidebar if necessary) and drop the file on the icon for the other Mac. Or Control-click the file, choose Share, click AirDrop, and select the desired Mac. AirDrop has no file size limits, but it’s not the fastest approach and might have issues with multi-gigabyte files or older Macs. Received files appear in the Downloads folder.
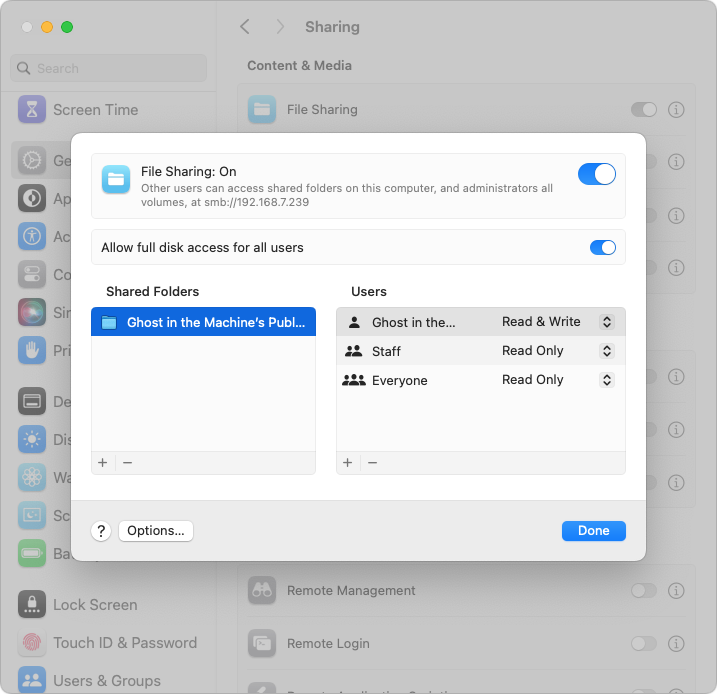
File Sharing: Regularly copying files between Macs on the same network is best done with network file sharing. It’s fussy to set up, requiring one Mac to be set as the file server in Settings > General > Sharing > File Sharing. Then click the info icon to add shared folders, designate users, and set access privileges. (In macOS 14 Sonoma, the temporary “Allow full disk access for all users” option for the server Mac may simplify things.) To connect to the server Mac, in the Finder, choose Go > Network, and click the Connect As button to log in if necessary. On the plus side, once you’ve configured everything and made aliases or sidebar items for quick access, file sharing is easy and fast.
Network server or NAS device: If you need to copy files between several Macs on a network, it may be better to use a dedicated server or NAS (network-attached storage) device as an intermediary. (Or, instead of copying files locally, you can access the files directly on the server or NAS. This requires a fast network.)
Target Disk Mode: The fastest option for moving huge files around occasionally is Target Disk Mode over a Thunderbolt connection between two Macs. The setup differs between Intel-based Macs and Macs with Apple silicon, but once one Mac is in Target Disk Mode, it appears in the Finder of the connected Mac as an external drive, and you can drag files to and from it. It’s most appropriate for transferring many gigabytes of files.
External storage: Never underestimate the speed and ease of copying files to external storage, whether an SSD, hard drive, or USB flash drive, and then copying them off to another Mac.
Cloud storage service: Box, Dropbox, Google Drive, and iCloud Drive can all work well for moving files between Macs, although they’re best used with files under a few hundred megabytes. For sharing among your Macs, they’re particularly convenient, and it’s usually easy to copy a link to a file to share it with someone else, though that sometimes requires setting sharing permissions first. iCloud Drive sometimes has problems updating quickly.
File sending service: The best way to send a large file via email, Messages, or another messaging service is to send a link. That’s easy if the file is already in a cloud storage service, and some email apps and services automatically create links for attachments over a certain size. Otherwise, try a file sending service such as Files to Friends or WeTransfer, which email links to files up to 1–2 GB in size for free. Many other services exist but allow only smaller files for free.
With so many options, you should have no trouble finding one that meets your needs in any particular situation.
(Featured image by iStock.com/LightFieldStudios)
No, NameDrop in iOS 17 Isn’t a Privacy Concern. Here’s How to Use It
Is iOS 17’s new NameDrop feature a privacy concern or a quick way to share contact info with a new friend? We think the privacy concerns are entirely overblown and explain how easy it is to use NameDrop.

One of the prominent new features in iOS 17.1 and watchOS 10.1 is NameDrop, which makes it easy to exchange contact information with someone merely by putting your iPhone or Apple Watch next to theirs. When you do that, you can share your contact card and receive theirs, or just receive theirs—nothing happens unless you initiate an action.
Unfortunately, some police departments have posted warnings about NameDrop on Facebook, insinuating that it’s a privacy concern. Nothing could be further from the truth. First, NameDrop requires the devices to be almost touching, so it’s implausible that it could be triggered inadvertently, and second, you must unlock your iPhone and tap a button to share your contact information with the other person. If you lock your iPhone or move it out of range, Apple says the transfer will be canceled.
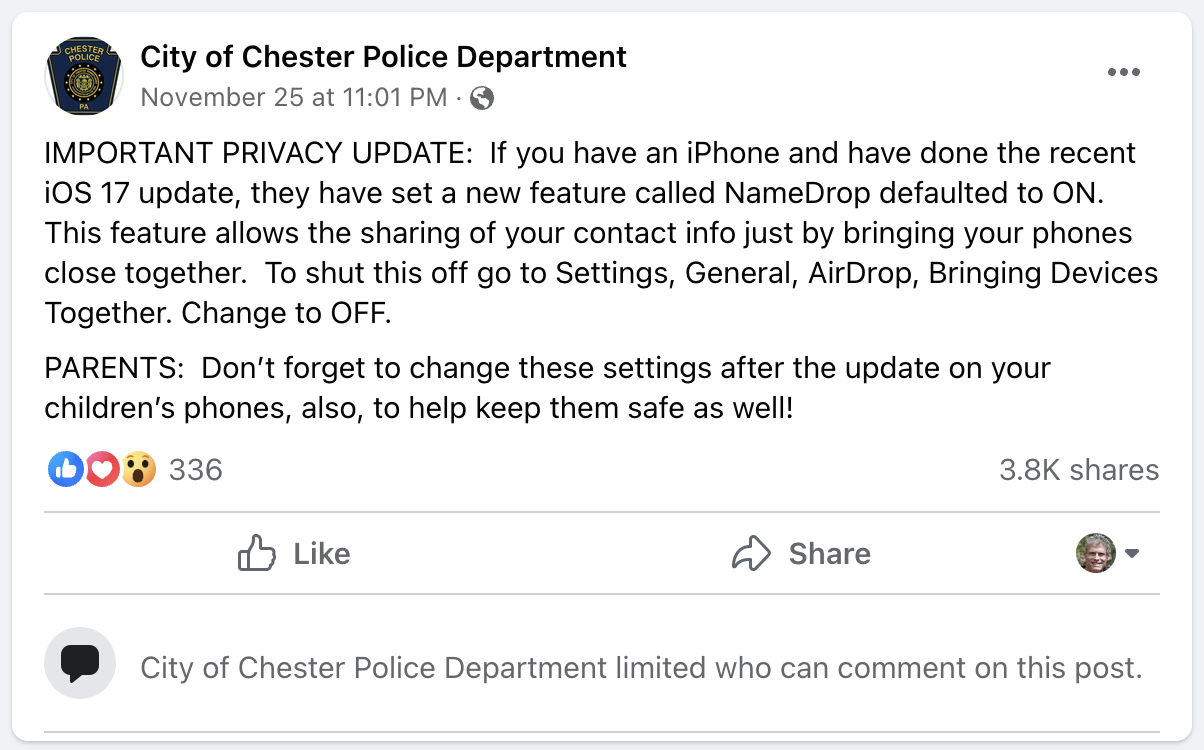
There’s no harm in turning NameDrop off by default other than losing access to the feature, but it’s a sufficient win that we encourage you to leave it enabled.
Imagine you meet someone new at a conference and want to share contact information. Previously, you would have had to find your contact card at the top of the Contacts app or Phone app, tap Share Contact, choose which fields to share, tap Done, and then share it via AirDrop (which may require them to enable their receive settings in Settings > General > AirDrop > Everyone for 10 Minutes), Messages (after entering their phone number), Mail (after typing their email address), or another method. It’s a pain.
Here’s how sharing contact information with someone new works in NameDrop. (It only supports sending new contact information, not updating an existing contact.) Both of you must have an iPhone running iOS 17.1 or an Apple Watch Ultra, Apple Watch Series 7 or later, or second-generation Apple Watch SE running watchOS 10.1. To get started, either:
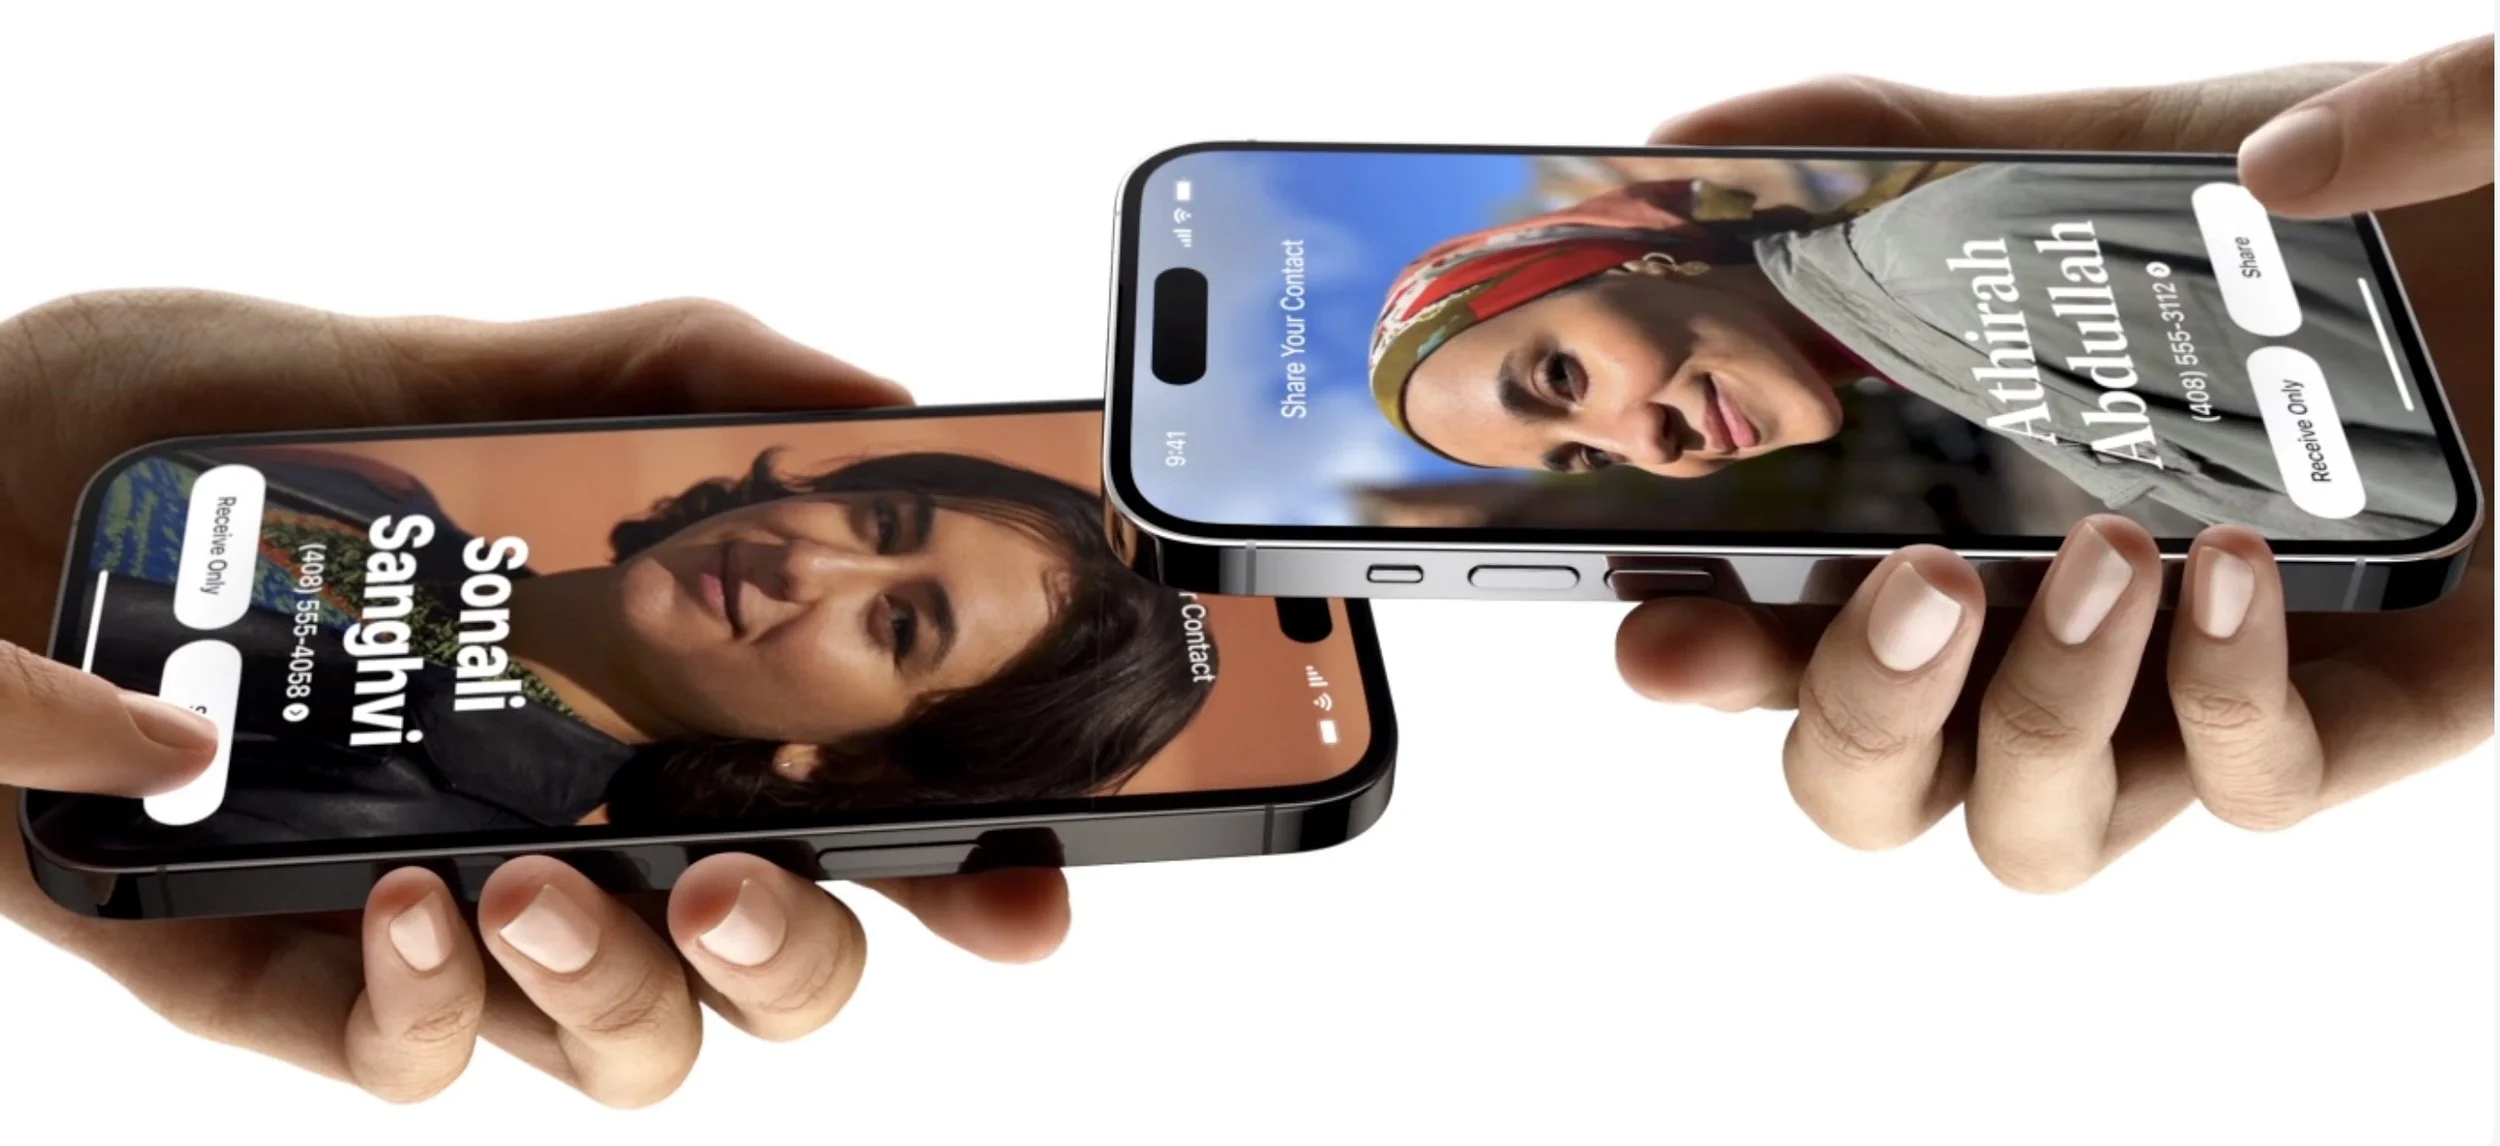
Share from an iPhone to another iPhone or an Apple Watch: Hold your unlocked iPhone close (almost touching) to the top of the other person’s iPhone or Apple Watch.
Share from an Apple Watch to another Apple Watch: Open the Contacts app on your Apple Watch, tap your picture in the upper-right corner, tap Share, and then put your watch close to the other person’s Apple Watch (Apple’s animation shows them being positioned face to face).
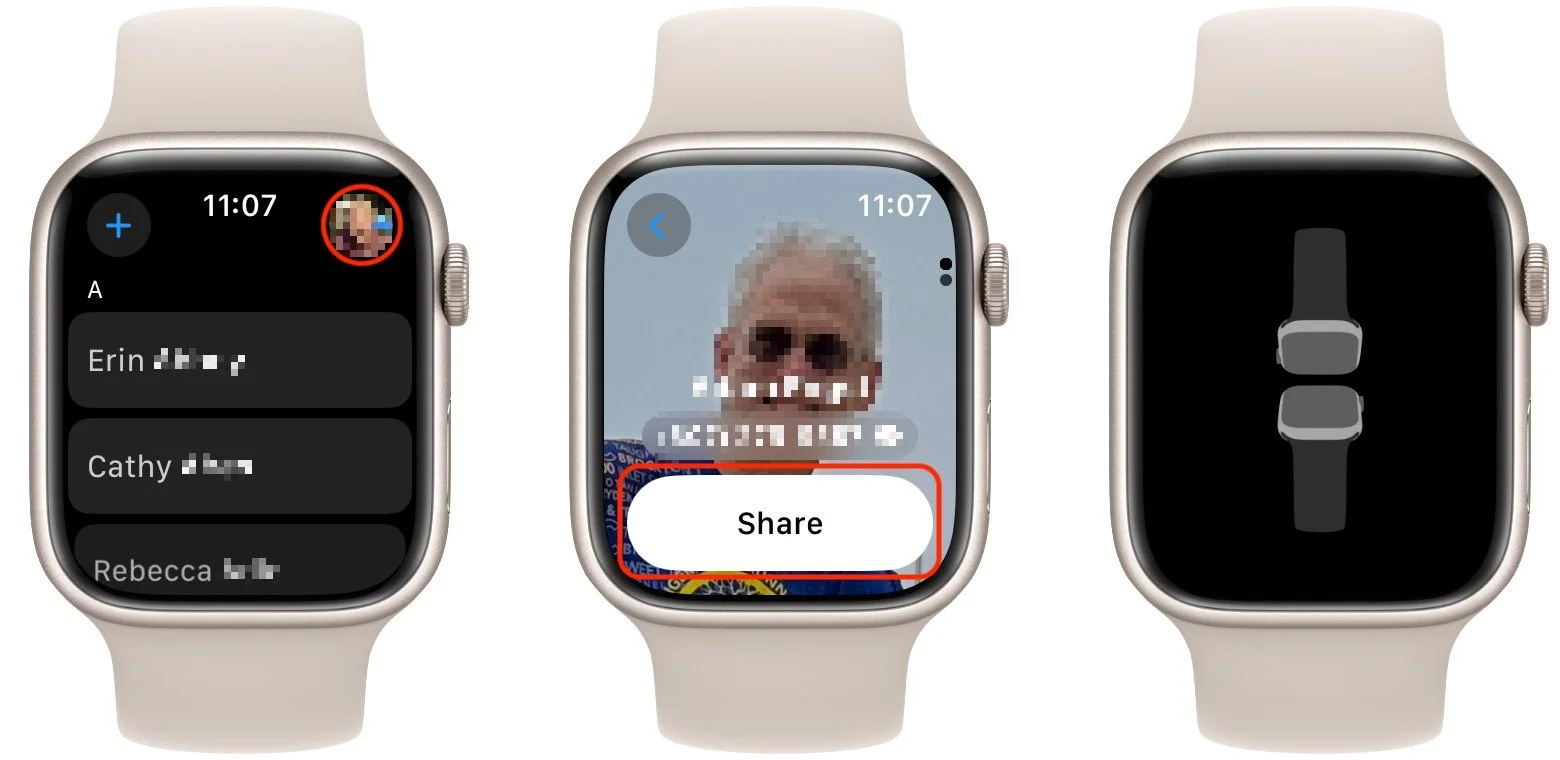
Keep the devices close together until NameDrop appears on both screens. On the iPhone, tap Share to exchange contact information or Receive Only to get theirs without sending yours. On the Apple Watch, you have only a Share button.
Next time you meet someone new and want to exchange contact information, give NameDrop a try. Alas, if they’re an Android user, you’ll have to fall back on the old, clumsy methods.
(Featured image based on an original by iStock.com/Caiaimage/Martin Barraud)
The Best Apple Gifts for 2023
Looking for the perfect holiday gift for the Apple user in your life? Here are our suggestions for the top Apple gifts for 2023.
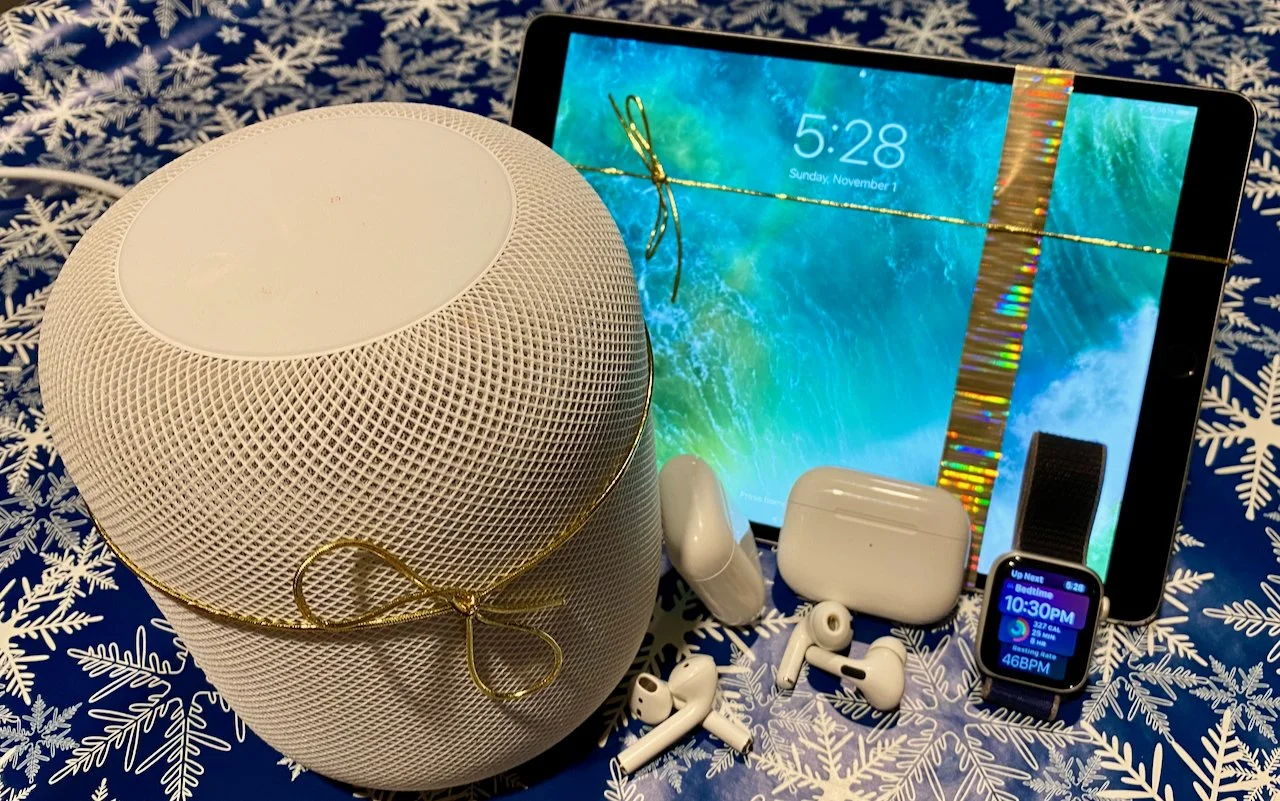
We’re moving into the holiday shopping season, and if you’re looking for the perfect gift for that special someone, Apple-related gifts always go over well. Here are our recommendations this year.
AirTag
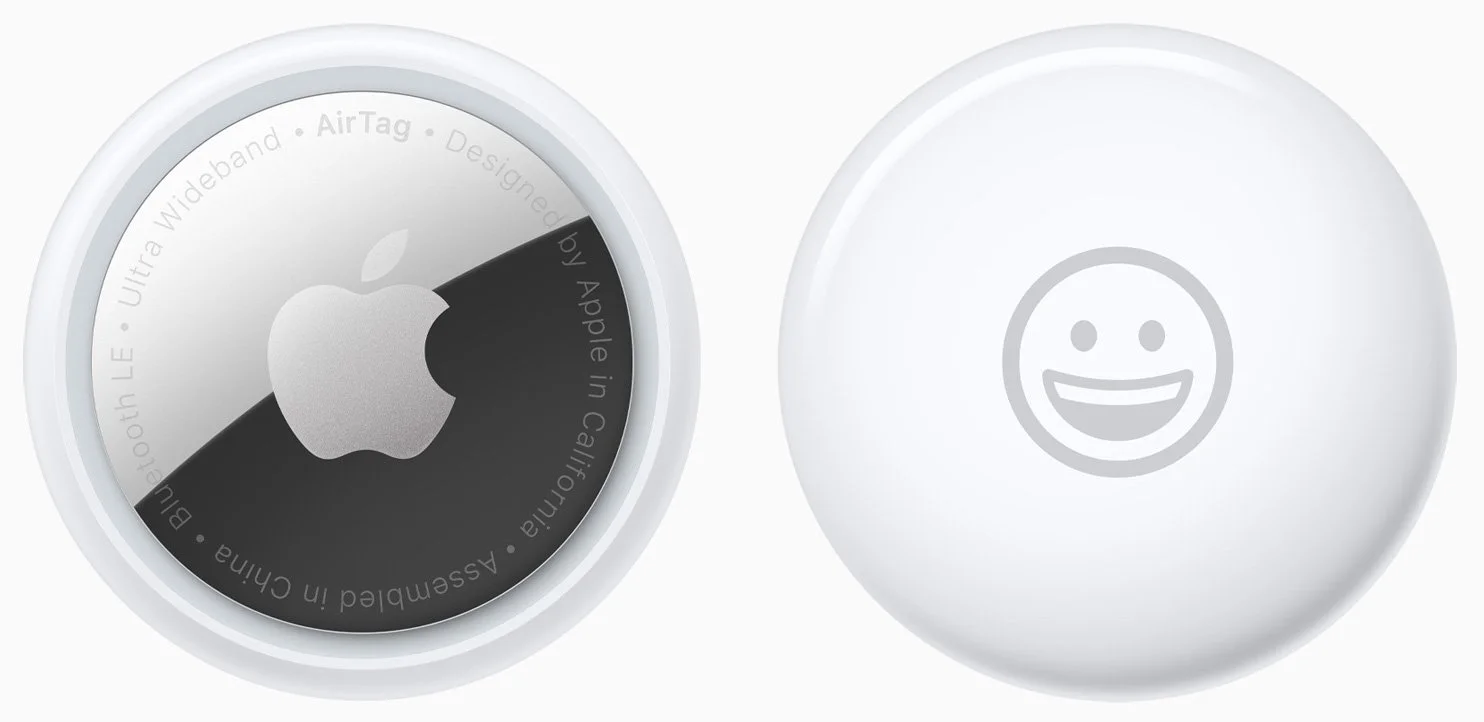
Do you know someone who’s always misplacing their keys, purse, or backpack, or who’s planning a trip? They might appreciate Apple’s AirTag trackers. Attach one to a keyring or backpack (with a separate $29 AirTag Loop or $35 AirTag FineWoven Key Ring—there are also lots of third-party clips and holders, such as for bikes) or store it deep in a bag pocket, and from then on, they can use the iPhone’s Find My app to see where they left their stuff. AirTags leverage the Find My network, so wherever the item is, nearby Apple devices that detect it can securely share its location with you. AirTags are especially helpful for tracking down checked luggage that hasn’t arrived at its destination—we wouldn’t travel without them anymore. One AirTag costs $29, or you can get a four-pack for $99. You can even have Apple personalize each AirTag with custom text and emoji. In iOS 17, you can better share AirTags with family members, too!
AirPods and AirPods Pro
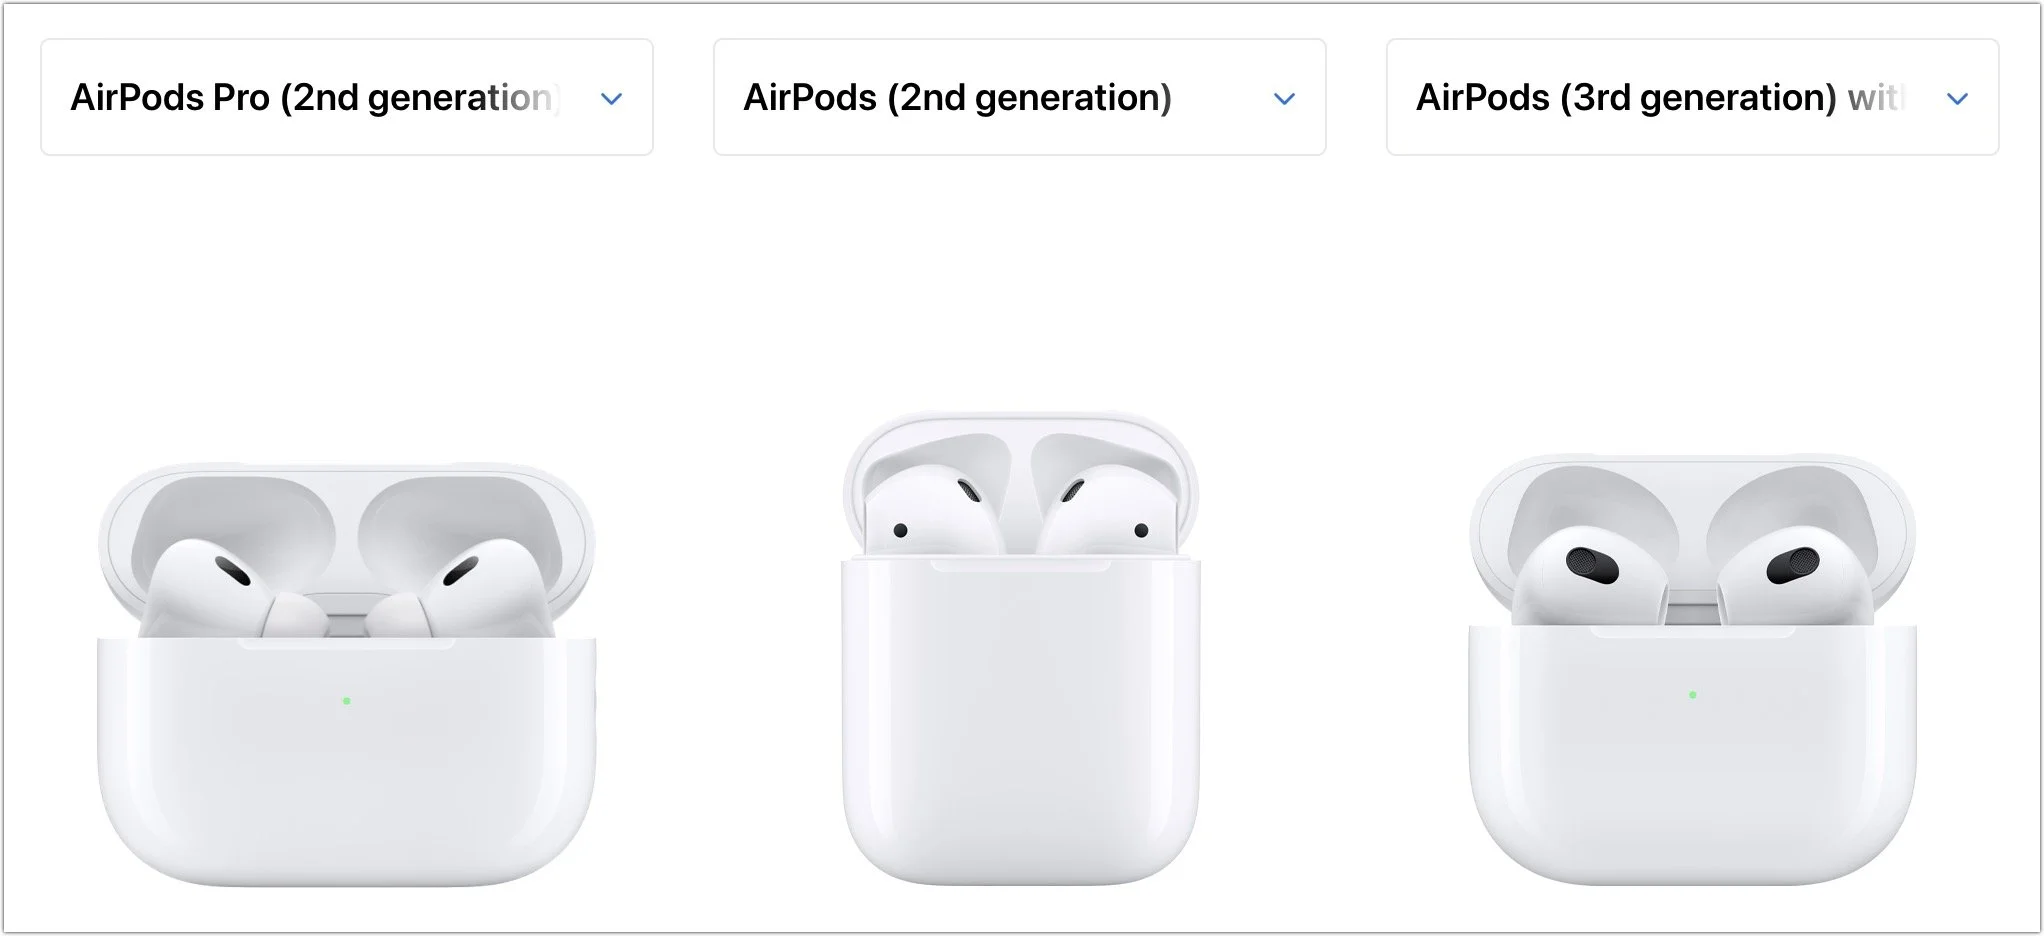
Apple’s wireless earbuds keep getting better. In September, the company updated the second-generation AirPods Pro with a USB-C charging case (to match the USB-C–focused iPhone 15 line) and improved dust resistance. The updated AirPods Pro also support lossless audio with the Apple Vision Pro headset promised for early 2024. The second-generation AirPods and third-generation AirPods remain available, and all three make excellent gifts.
The second-generation AirPods cost $129, have a relatively long stalk, and feature up to 5 hours of listening on one charge. The $179 third-generation AirPods shrink the stalk, switch to a force sensor for controls, add support for spatial audio with dynamic head tracking, feature sweat and water resistance, have a MagSafe wireless charging case, and last up to 6 hours on a single charge. For $249, the second-generation AirPods Pro now offer Adaptive Audio, which blends Active Noise Cancellation and Transparency mode to let important sounds in when needed. They provide touch control for media playback and volume adjustments from the stem and boast a battery life of up to 6 hours. The new USB-C charging case for the AirPods Pro is dust- and water-resistant, includes a lanyard loop, and can charge from a USB-C cable, MagSafe charger, Qi wireless charger, or Apple Watch charger. All three models support Hey Siri commands and automatically switch between Apple devices. See all the similarities and differences in Apple’s comparison tool.
HomePod and HomePod mini
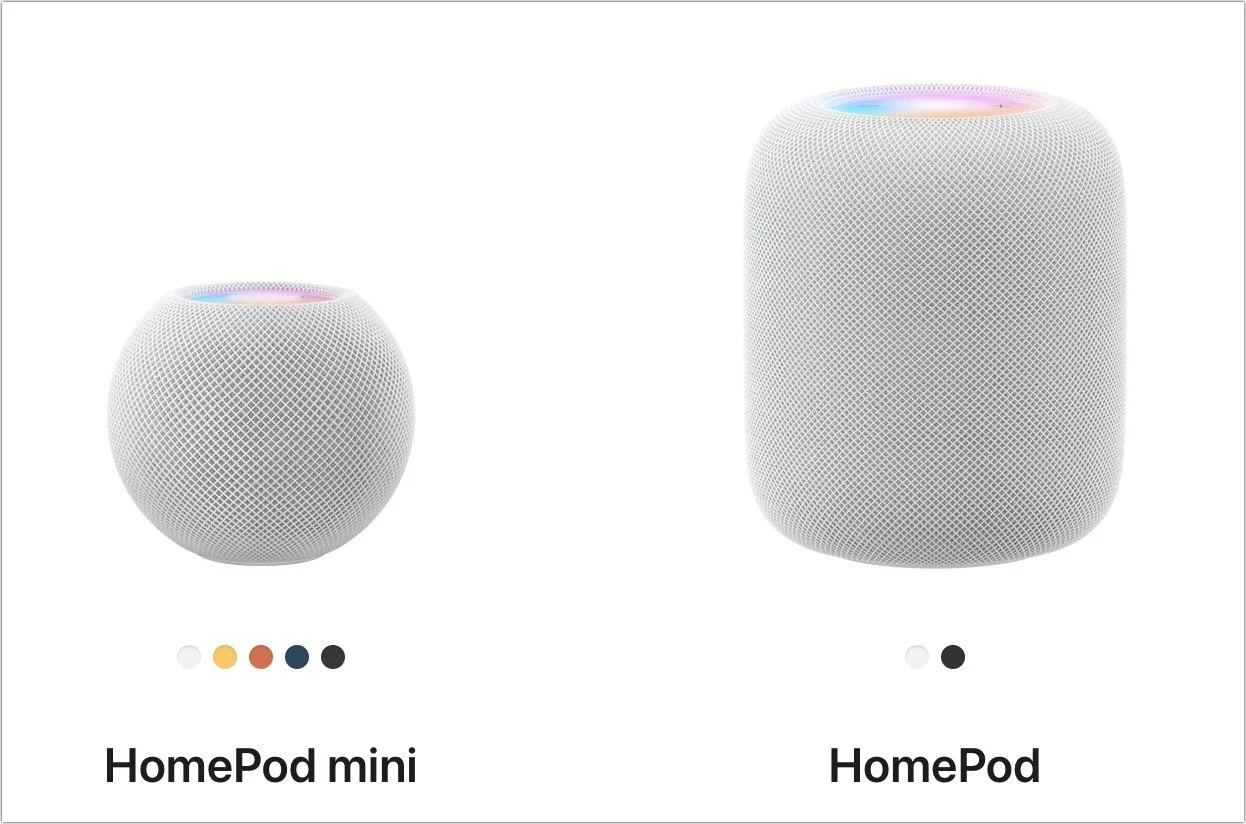
Apple unexpectedly brought the full-size HomePod back to its lineup in 2023, tweaking the hardware specs to reduce manufacturing costs while maintaining or even improving sound quality, depending on whose ears are listening. The $299 second-generation HomePod supports spatial audio with Dolby Atmos for music and video, includes temperature and humidity monitoring, and can alert you if smoke or carbon monoxide alarms go off. The grapefruit-sized HomePod mini takes up less space, produces excellent sound for its size, and can do almost everything the larger HomePod can do for only $99.
You can control either the HomePod or HomePod mini entirely via Siri, use it as a hub for your HomeKit home automation accessories, and even have it play sound from your Apple TV. Put a HomePod in different rooms in the house, and you can use Intercom to communicate with family members with your voice. Pair two HomePods of the same type and generation for stereo sound for the best audio experience. HomePods work best when coupled with an Apple Music subscription, but remember that either HomePod model comes with a free 6-month subscription.
Apple TV 4K
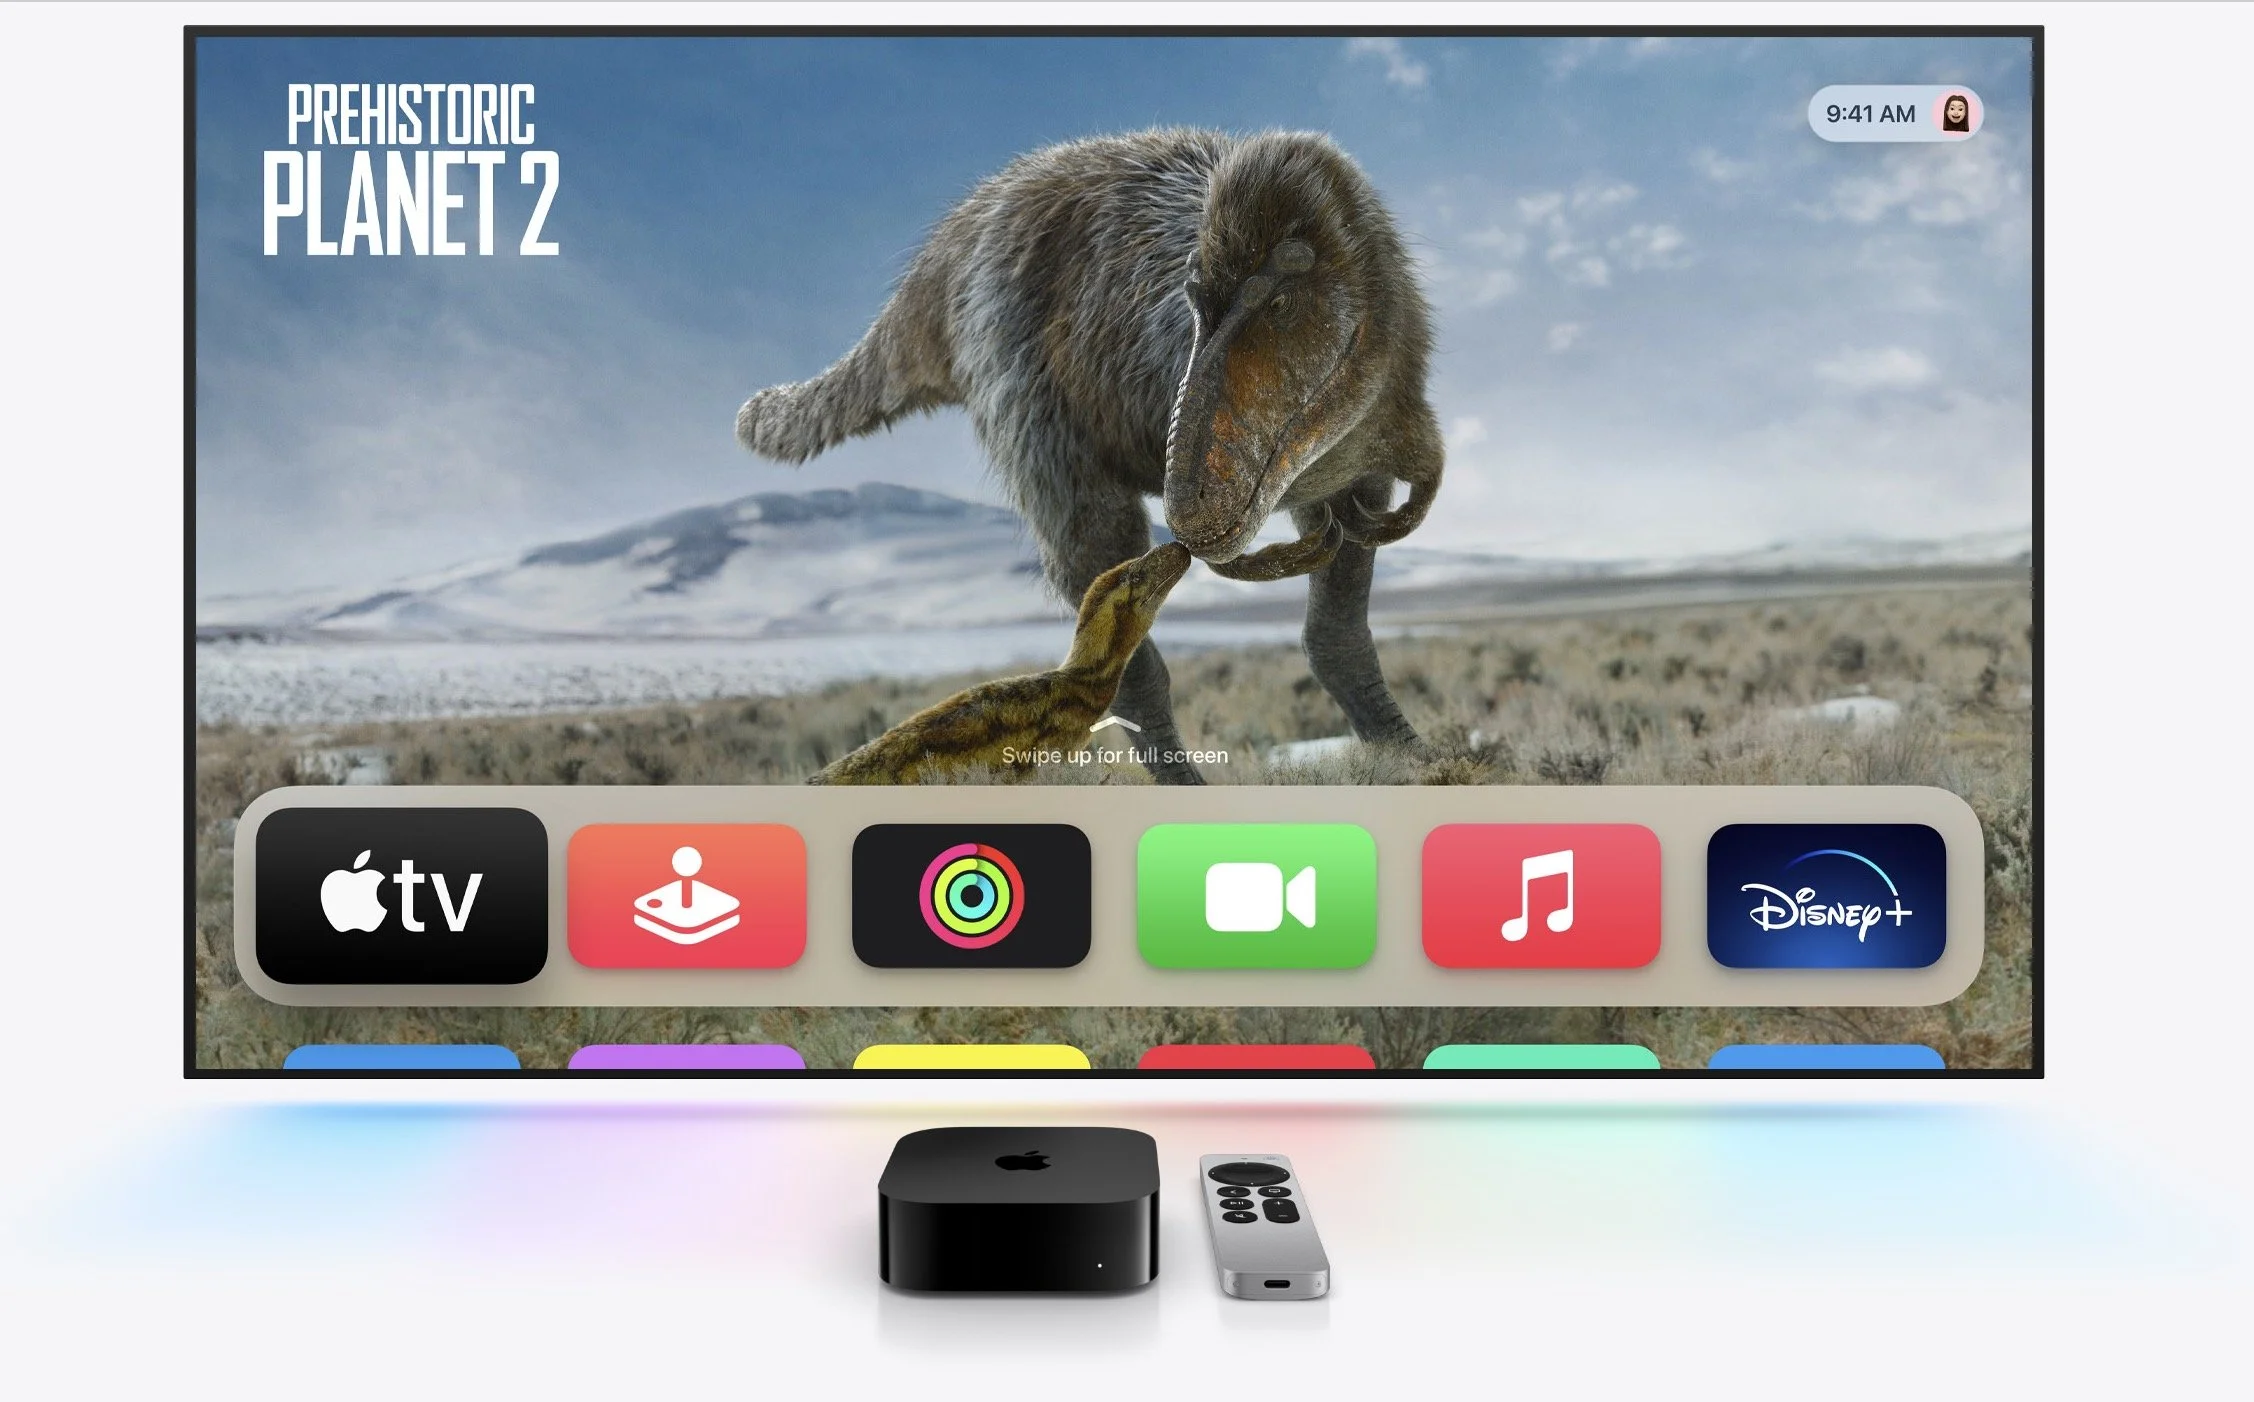
The Apple TV hasn’t changed much for a while, but last year’s models still make great gifts. If someone on your list would enjoy a streaming media player, consider the third-generation Apple TV 4K, which has a lot going for it. For someone who primarily wants to watch videos, the $129 Apple TV 4K (Wi-Fi) model is all they’ll ever need, with 64 GB of storage. For $149, the Apple TV 4K (Wi-Fi + Ethernet) has 128 GB of storage for loading numerous apps and games, and it includes a Gigabit Ethernet port and supports the Thread home automation protocol. Both include a Siri Remote that charges via USB-C.
iPad, iPad mini, and iPad Air
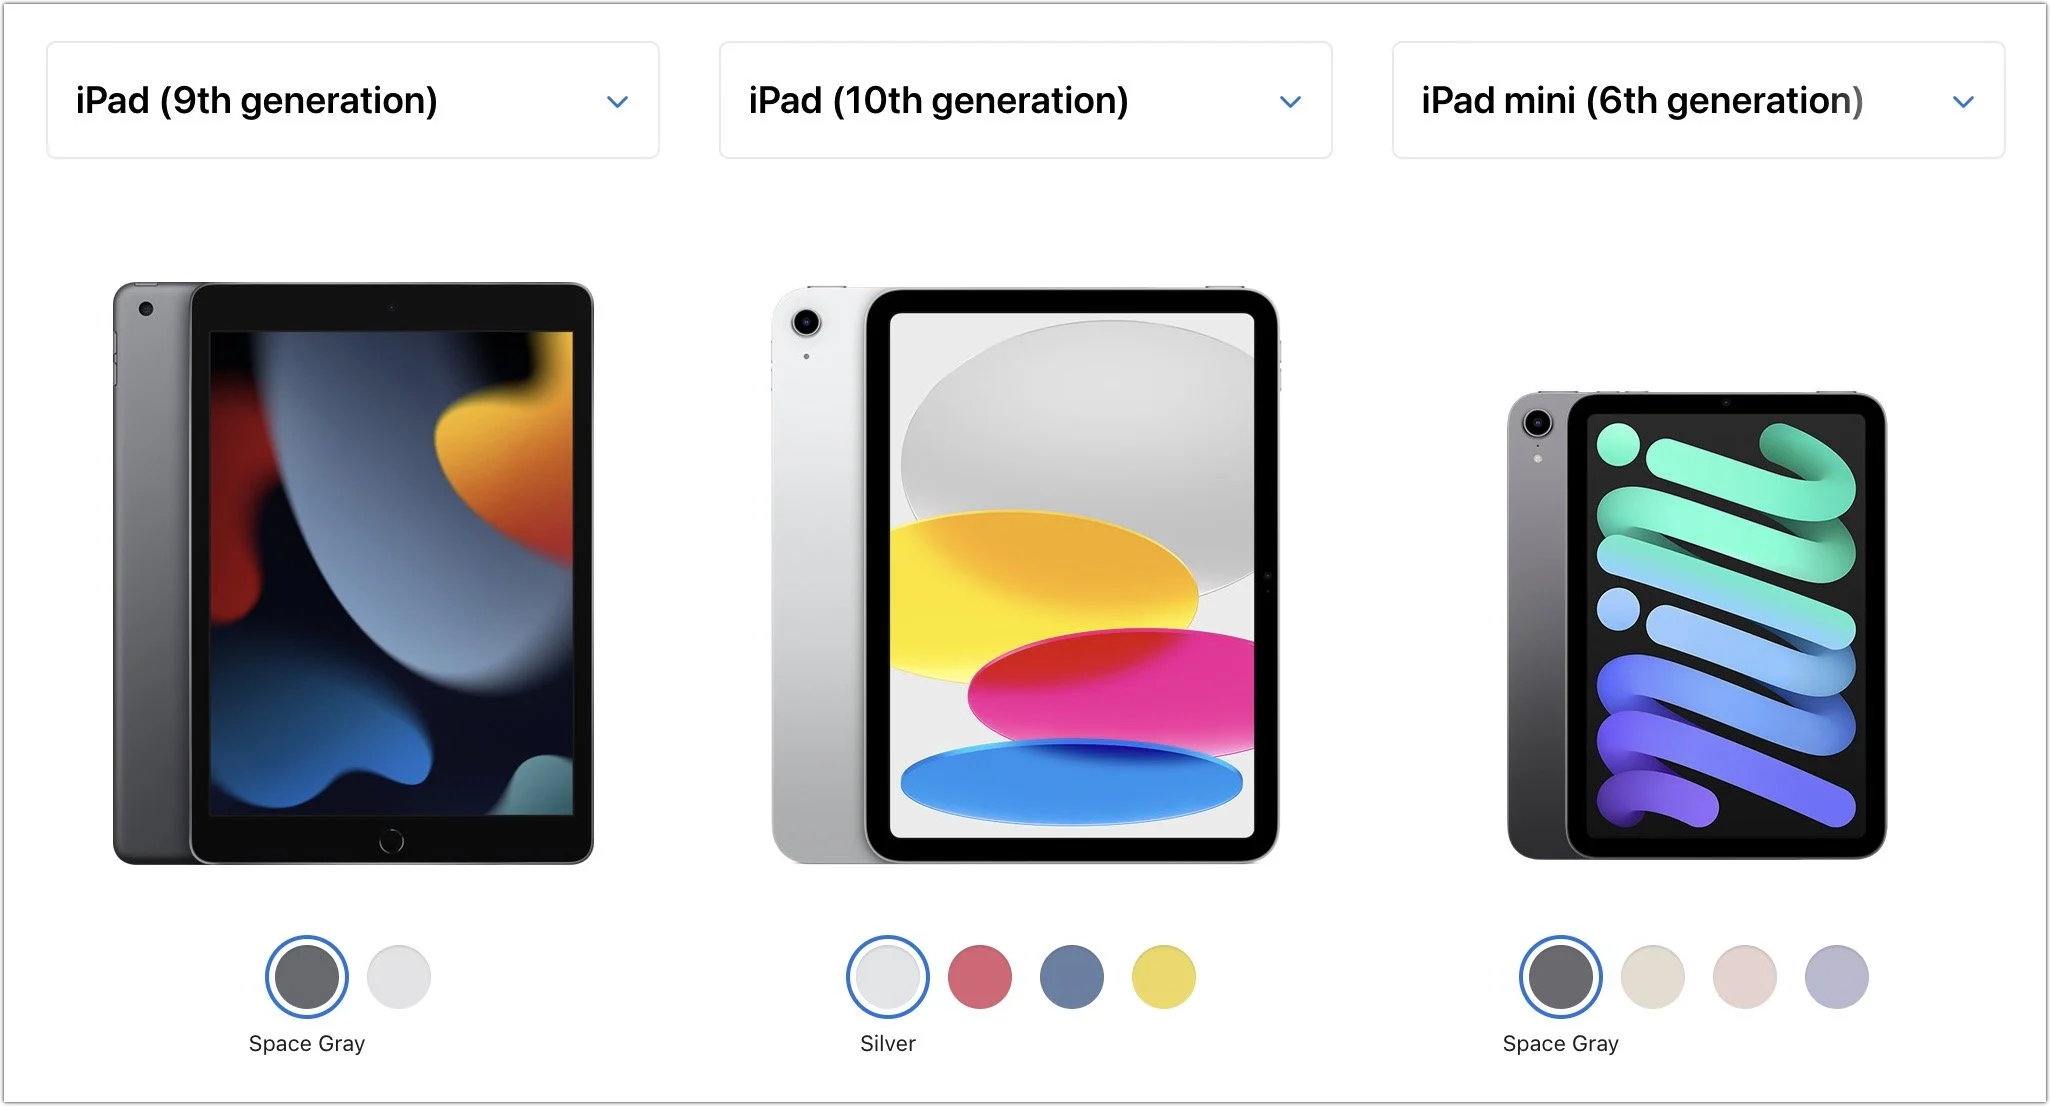
If you’re considering giving an iPad as a gift, Apple has numerous options for you to choose from, with starting prices ranging from $329 to $599. The main change for 2023 is the release of the new USB-C Apple Pencil, which is compatible with all iPads with USB-C and costs just $79. The $50 price drop comes with the loss of pressure sensitivity and wireless charging.

iPad choices include:
Ninth-generation iPad: The budget choice for a kid or an adult with basic needs is the two-year-old ninth-generation iPad, which remains a bargain at $329. It works with the first-generation Apple Pencil ($99), and those who need to type can add the $159 Smart Keyboard.
Tenth-generation iPad: Last year’s tenth-generation iPad starts at $449. It moves Touch ID to the top button, increases the display size to 10.9 inches, and positions the front-facing camera on the landscape edge. It pairs with the $249 Magic Keyboard Folio and either the first-generation Apple Pencil or the USB-C Apple Pencil ($79).
iPad mini: If you’re looking for something small, the diminutive sixth-generation iPad mini fits the bill at just $499. It’s compatible with the second-generation Apple Pencil ($129) and the USB-C Apple Pencil, but to add a keyboard, you’ll have to look to a third-party manufacturer or use a standard Bluetooth wireless keyboard.
iPad Air: For the most power short of the pricey iPad Pro models, consider the fourth-generation iPad Air. It starts at $599 and can handle even the most intensive tasks, especially when coupled with a second-generation Apple Pencil or USB-C Apple Pencil and either a Magic Keyboard ($299) or Smart Keyboard Folio ($179).
Apple Watch Gift Certificate
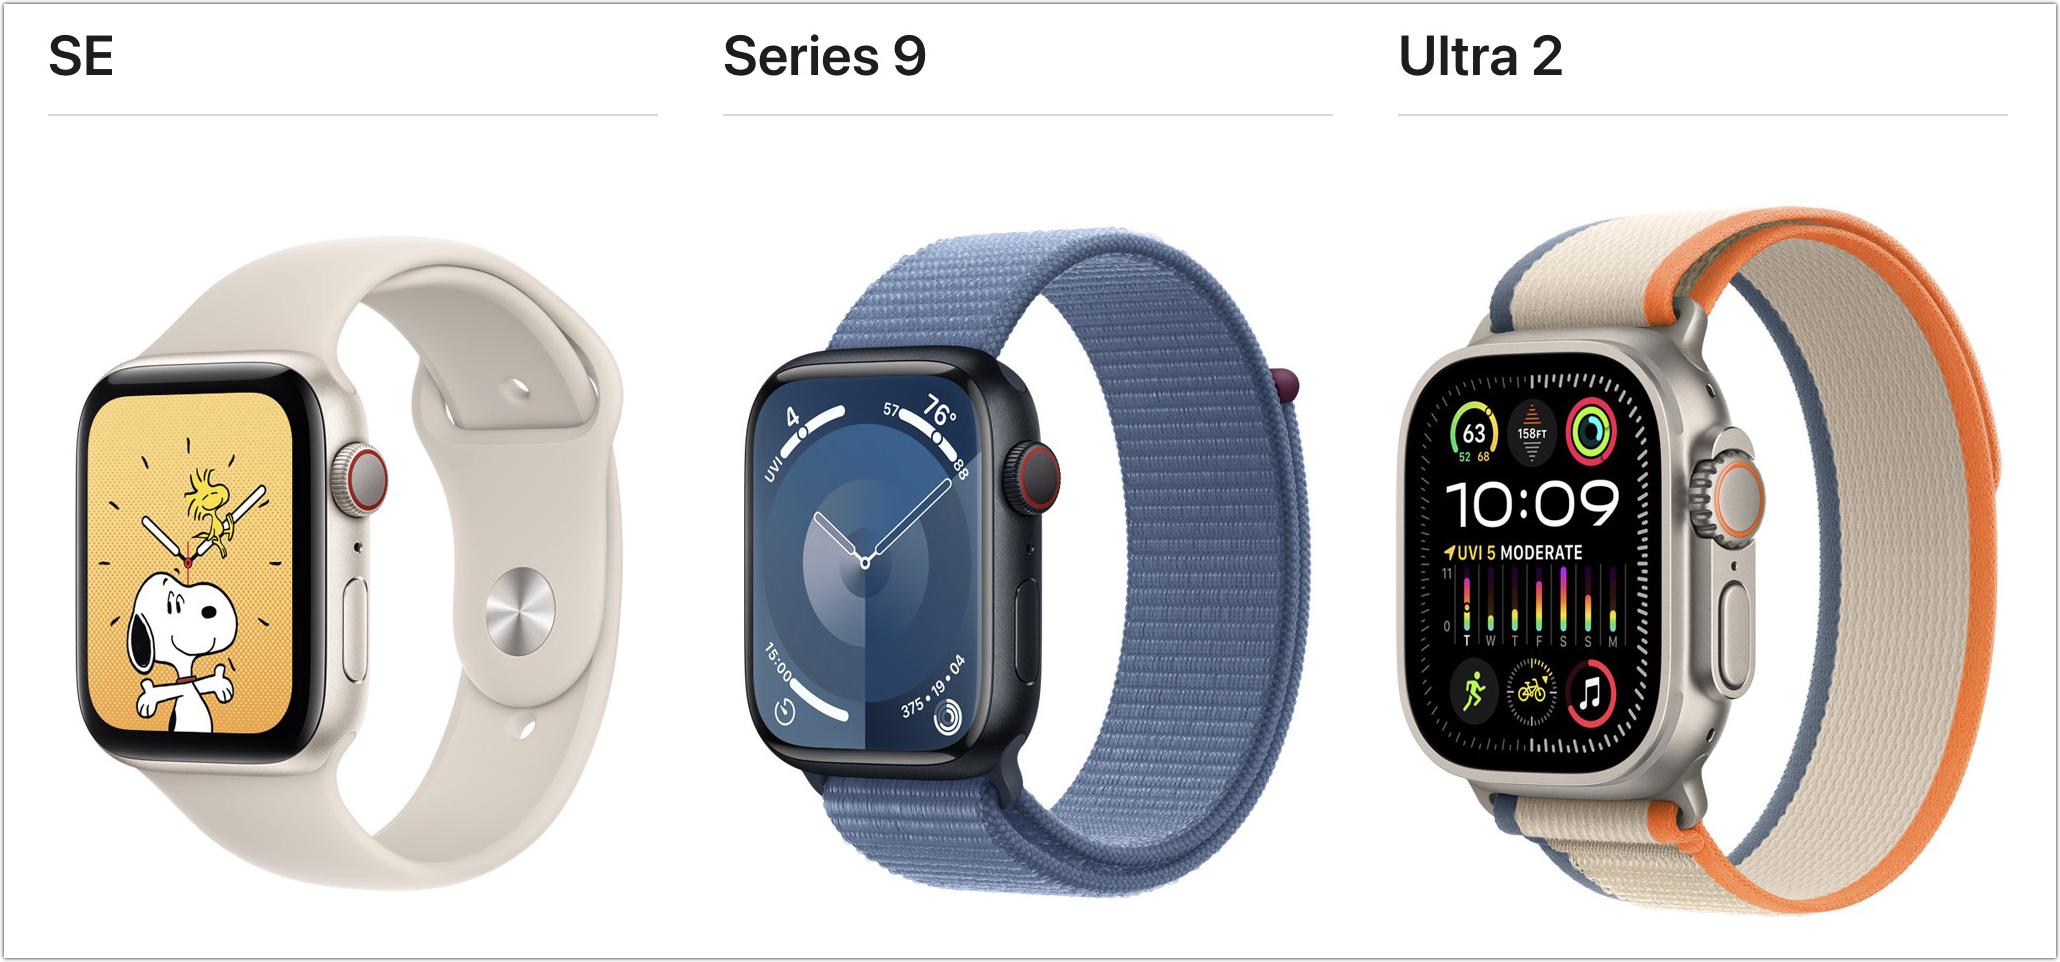
We love the Apple Watch, but it can be tricky to give a gift. There are three rather different models, and Apple provides a dizzying number of options for case size, material, and color, plus many band options, making it difficult to know what would be most appreciated. Instead of guessing what your recipient would like, we encourage giving a certificate that’s good for a conversation about what to purchase. Then sit down with the recipient to run through all the decisions on the Apple Watch site.
2023’s options include the second-generation Apple Watch SE (starting at $249), the new Apple Watch Series 9 (starting at $399), and the second-generation of the big, beefy, adventure-focused Apple Watch Ultra (starting at $799). Remember that cellular models cost more and require a monthly service fee.
With its support for heart rate monitoring, fall detection, and crash detection, the Apple Watch SE is all that most people need. Consider the Apple Watch Series 9 if you also want a larger and brighter Always-On display, blood oxygen sensor, ECG capabilities, temperature sensor for cycle tracking, and support for watchOS 10’s new double-tap gesture for activating the default button in the current app. The second-generation Apple Watch Ultra puts all those features and more into a 49mm titanium case with an Action button for quick access to app-specific commands. Its buttons are larger and easier to press, the Always-On display is brighter, the GPS works better in challenging conditions, and it has a depth gauge and water temperature sensor so it can serve as a dive computer. The Apple Watch Ultra boasts up to 36 hours of battery life in everyday usage and up to 72 hours in Low Power Mode. It’s impressive, but make sure you like how it looks on your wrist, given how big it is. Again, Apple has a helpful comparison tool.
Even though they are worthy gifts, we didn’t include any Macs in this article because they’re quite a bit more expensive and difficult to select without extensive discussion of the recipient’s needs. Let us know if you need help choosing the right Mac for someone on your list, but we’re partial to the M1- and M2-based MacBook Air and the new M3-based 24-inch iMac for many users.
(Featured image by Adam Engst)
Nine Tips for Switching from an iPhone with Touch ID to One with Face ID
Are you switching from an iPhone with Touch ID to one with Face ID? The challenge of learning new things can intimidate some people, but we have a list of what you’ll need to know. (And some of the changes are better!)
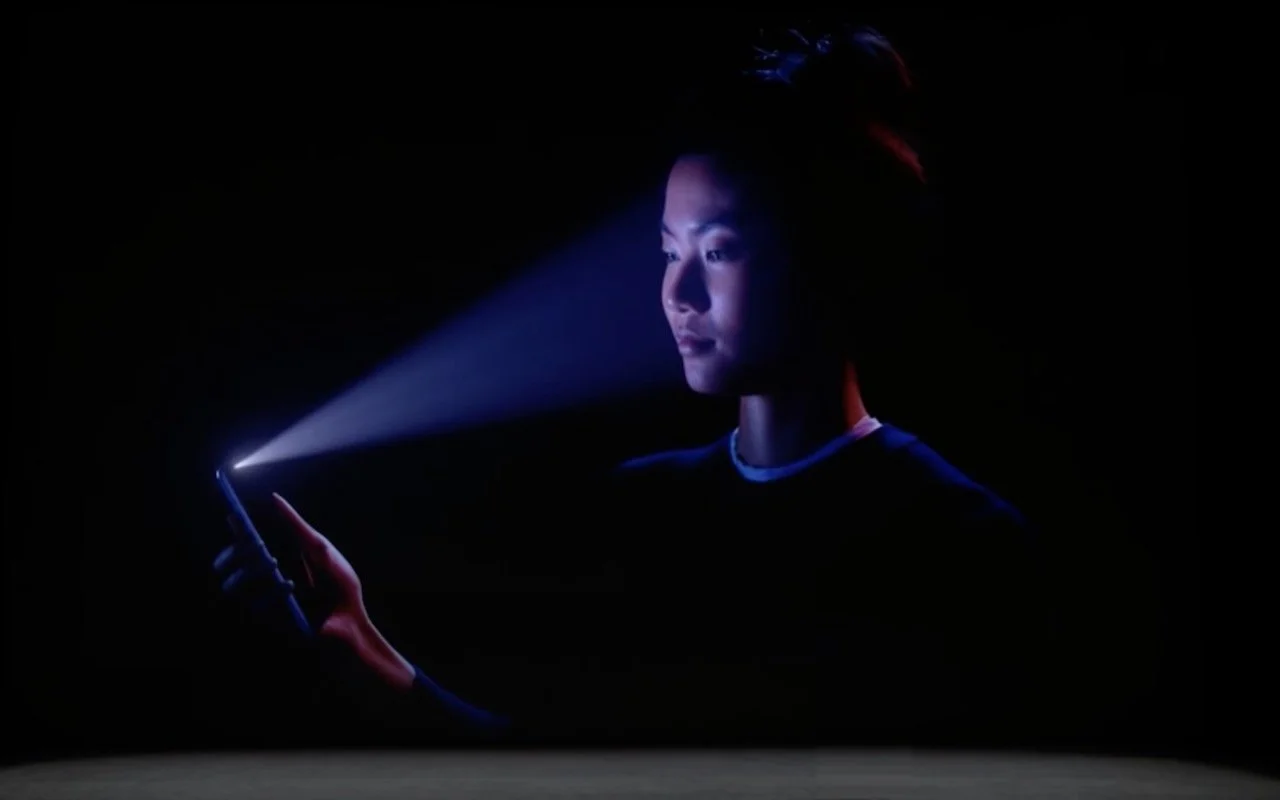
In 2013, Apple added Touch ID to the Home button of the iPhone 5S. Taking advantage of the uniqueness of fingerprints, Touch ID combines the Home button press to wake up the iPhone with a fingerprint scan to authenticate the user. But in 2017, Apple introduced the iPhone X with Face ID, which relies on cameras and sensors at the top of the screen to authenticate the user via facial recognition. Since then, Apple has slowly been phasing out Touch ID in the iPhone line, with only the third-generation iPhone SE still supporting it. (Only the iPad Pro models have Face ID; other iPads have Touch ID in the Home button or the top button.)
We’re not here to dub one better than the other, but many people find themselves needing to upgrade from an older iPhone with Touch ID to a newer one with Face ID. If you’re trying to switch between Touch ID and Face ID, we have some tips to help.
Unlock the iPhone
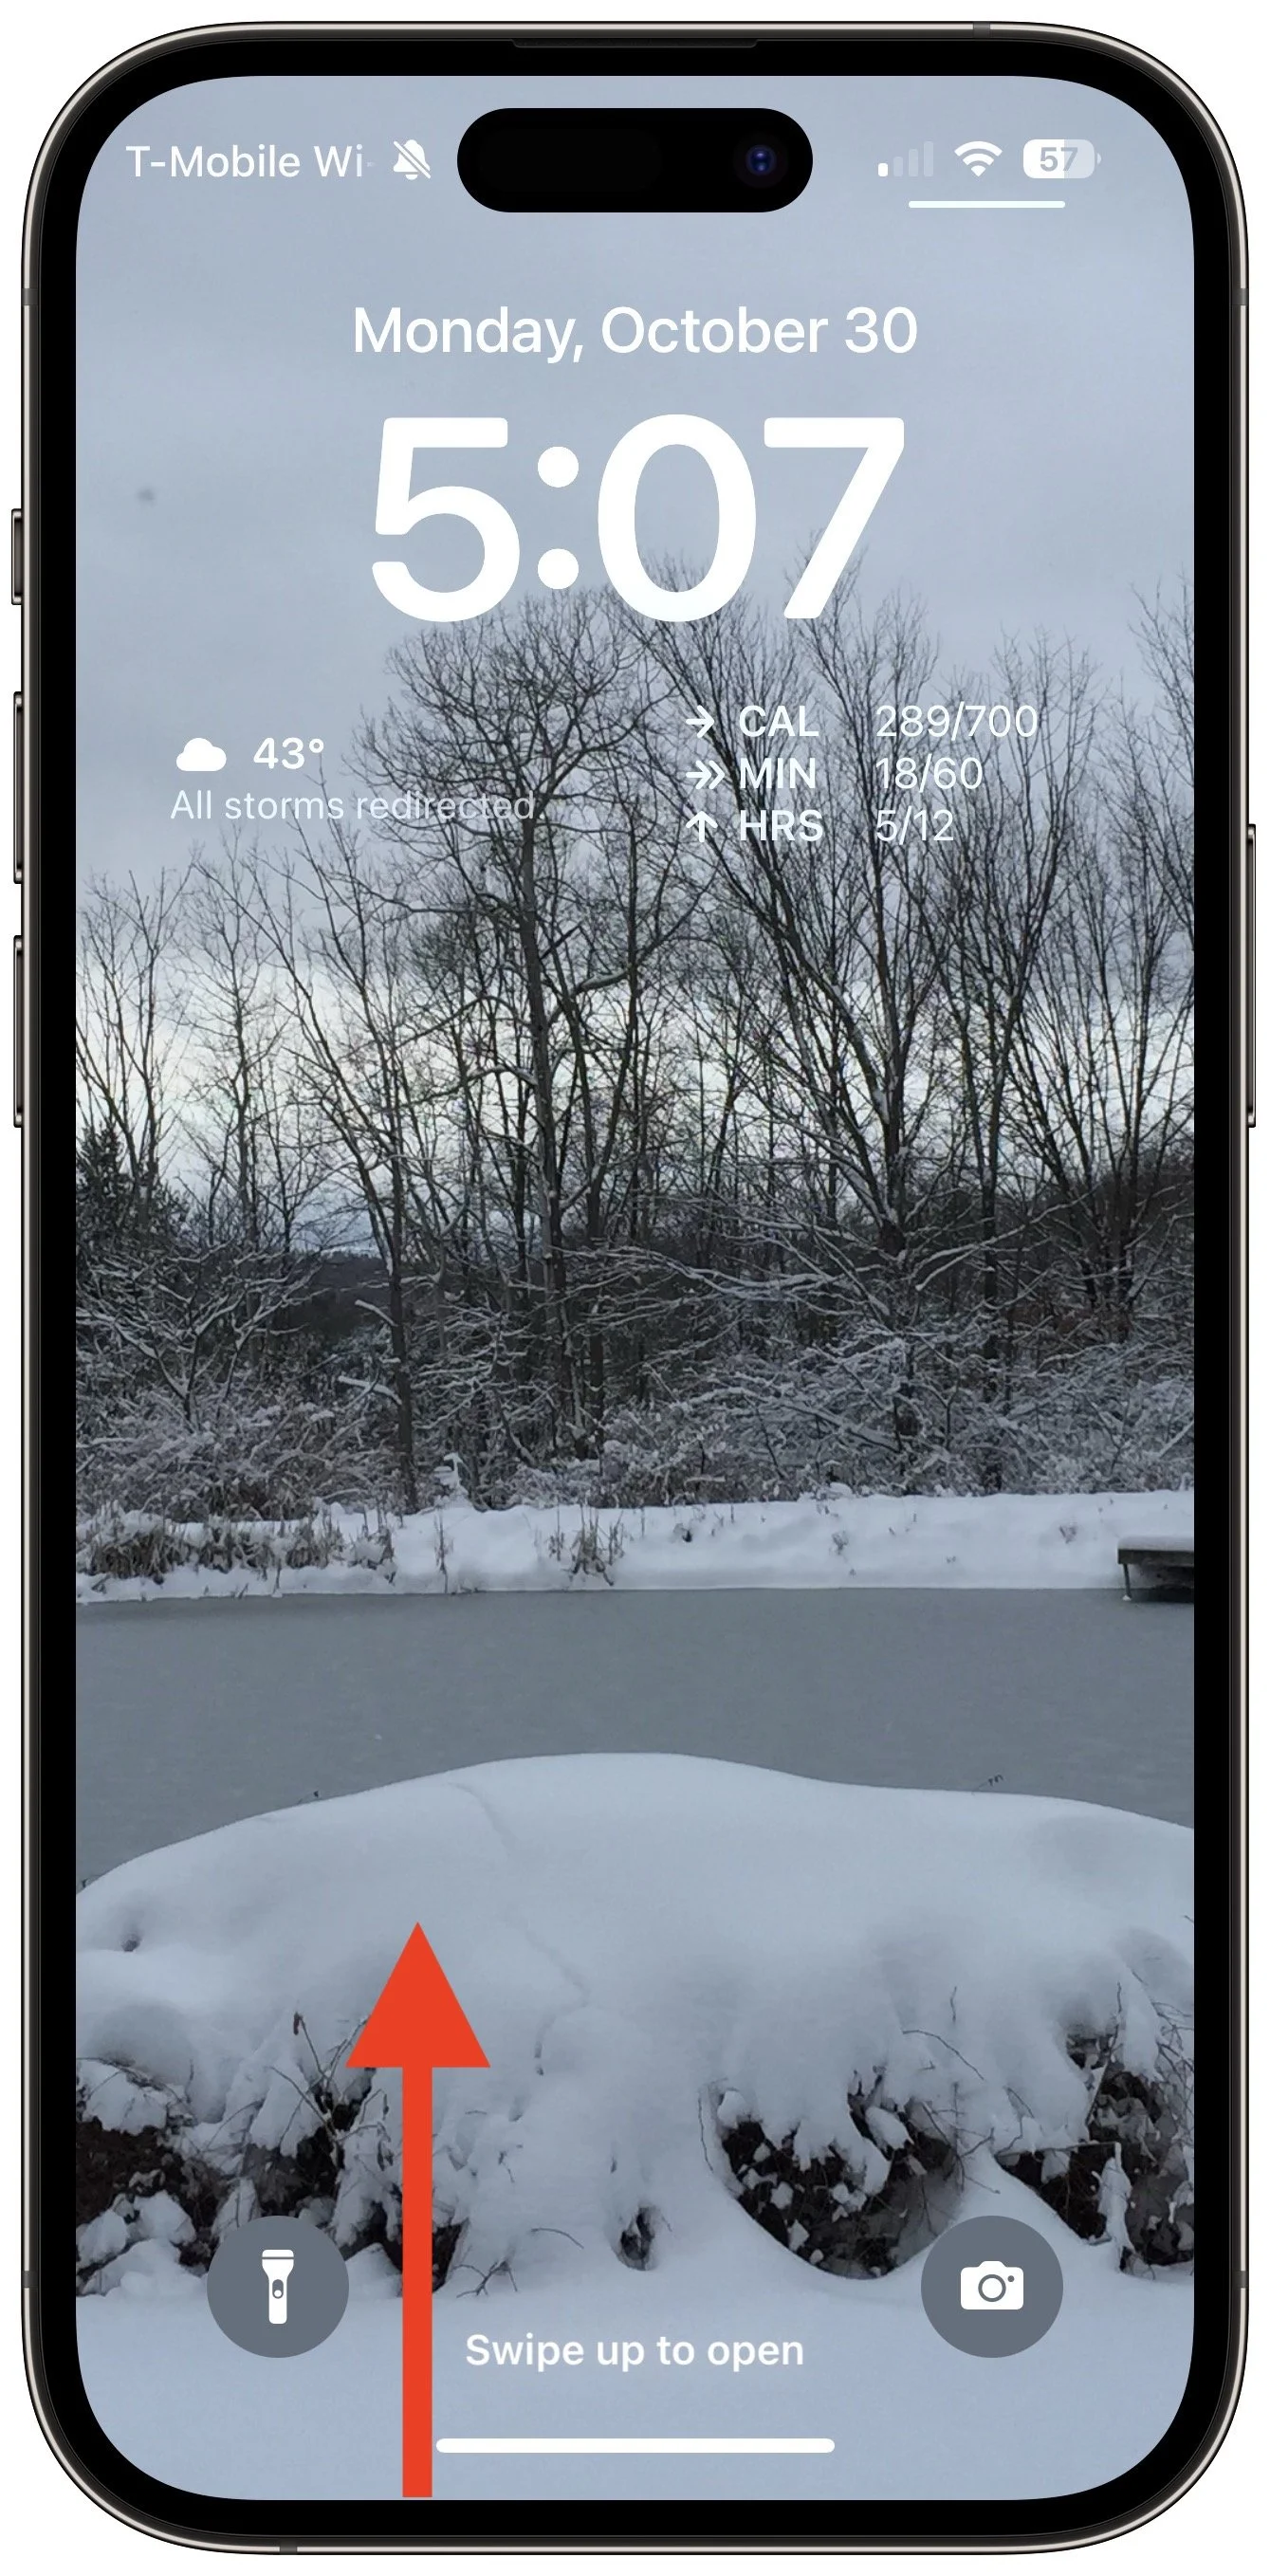
Once the iPhone is awake (the screen is lit up), you unlock an iPhone with Touch ID by pressing the Home button. On an iPhone with Face ID, you swipe up from the bottom of the Lock Screen—a bar reminds you where to start—while looking at the iPhone. Face ID is fast and accurate enough that you’ll notice that authentication is happening only if iOS asks to verify your passcode (which it also does with Touch ID).
Return to the Home Screen
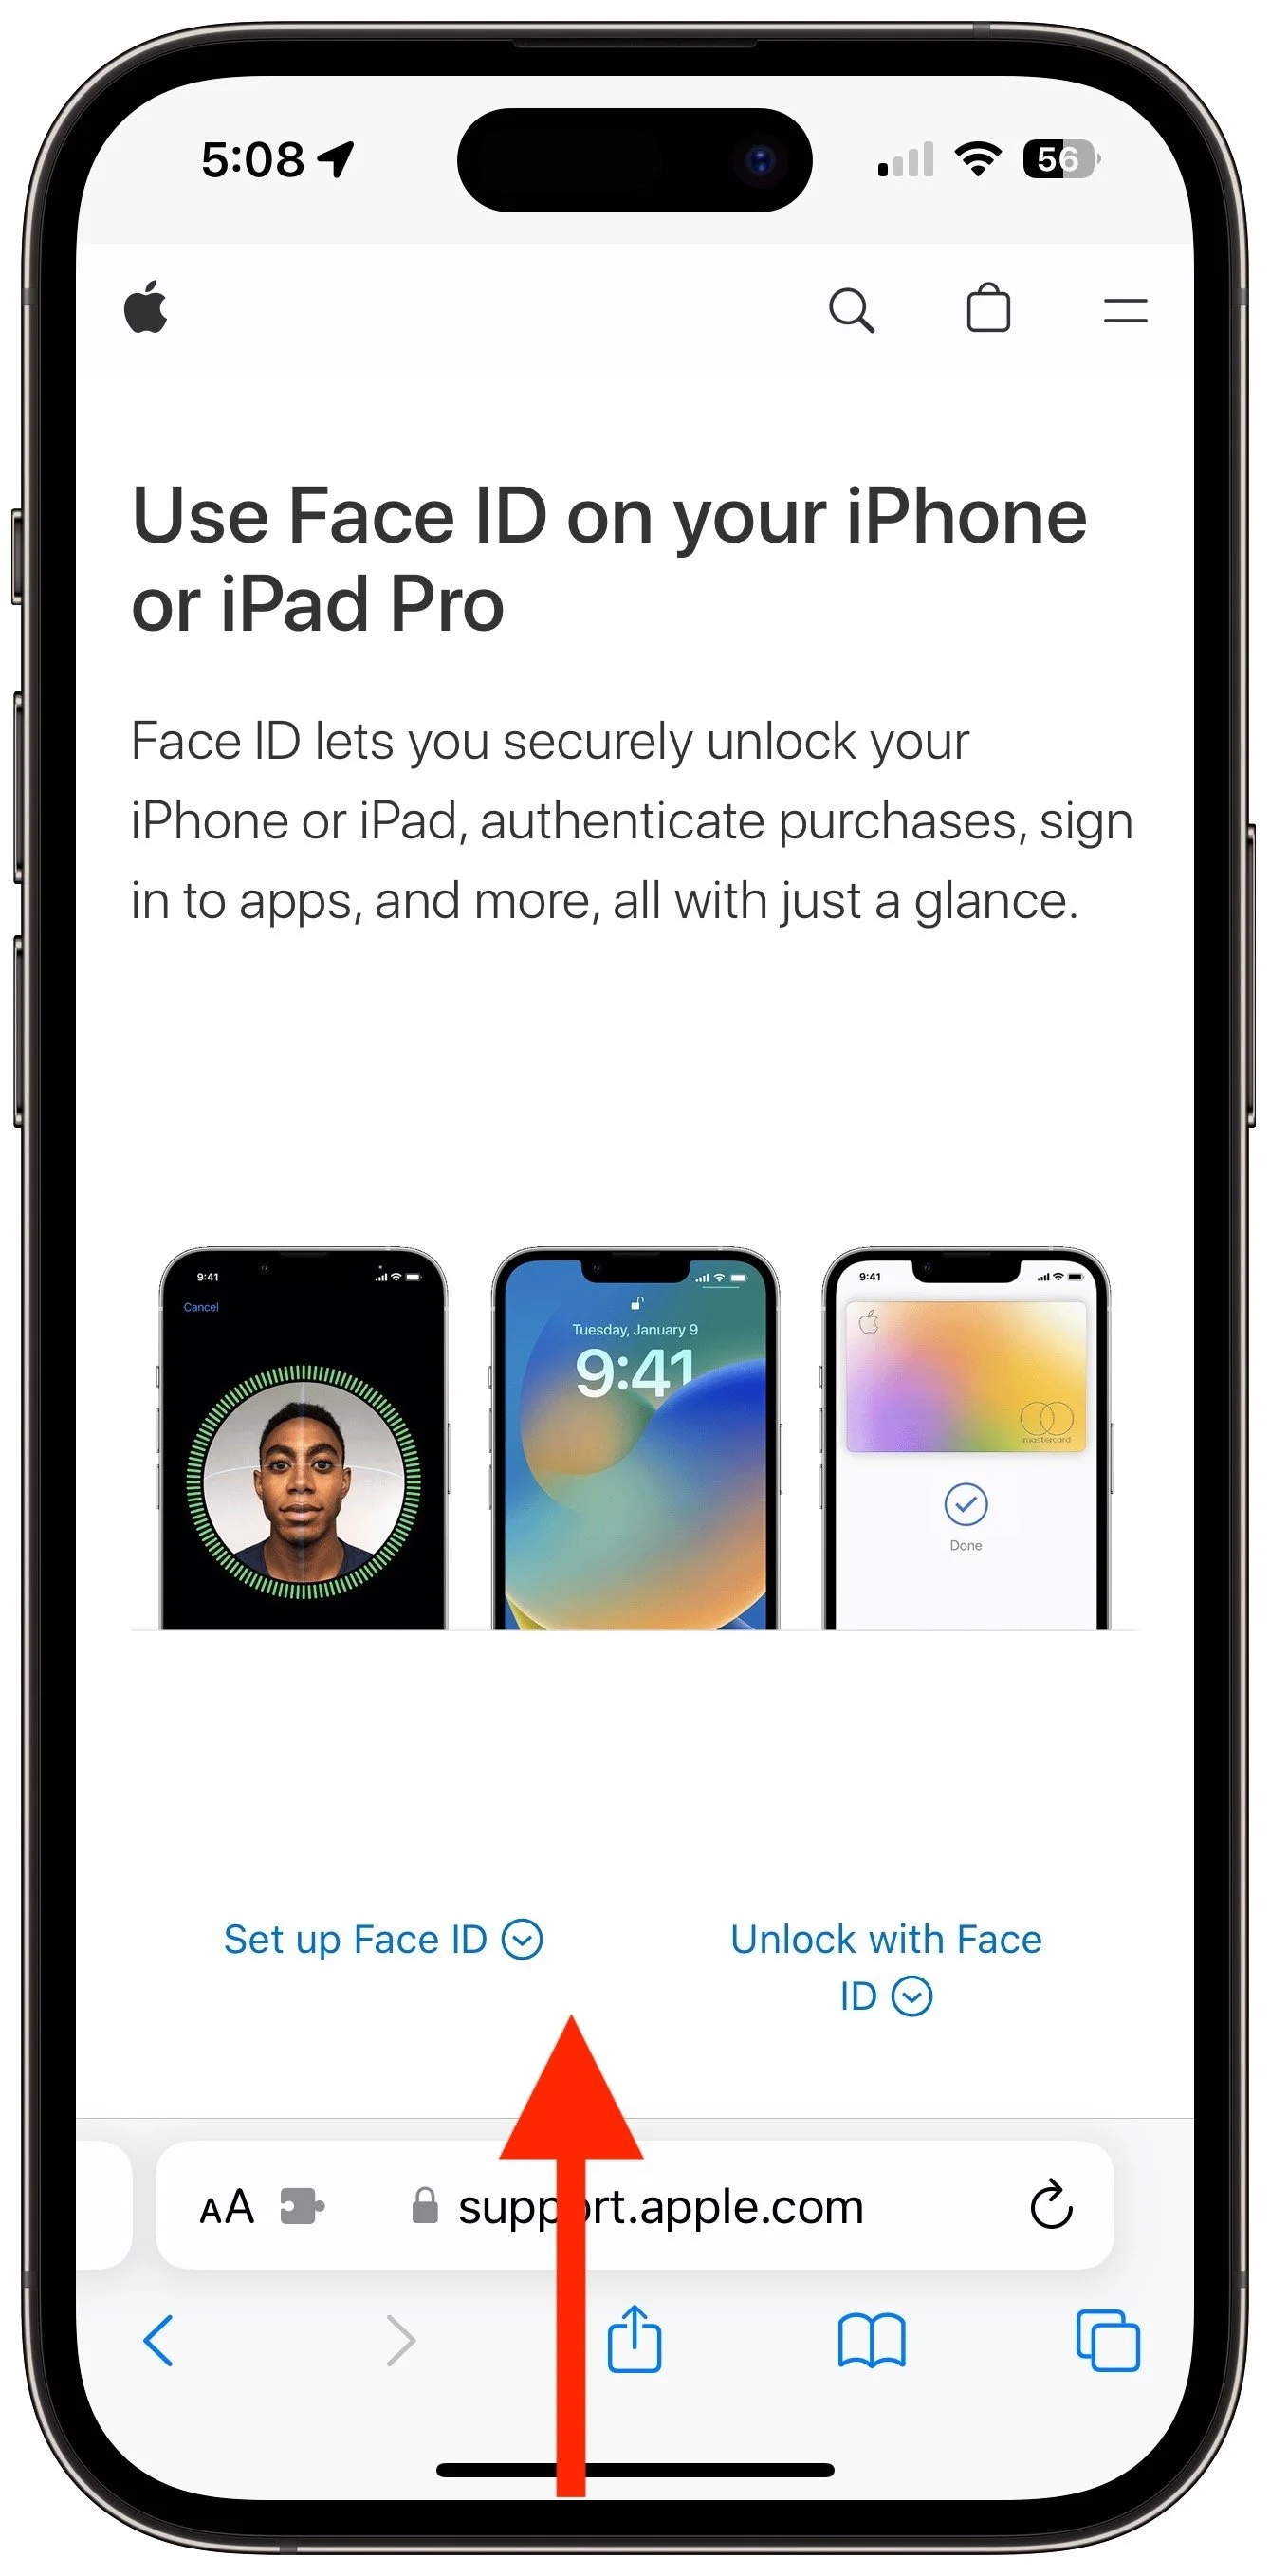
When you’re using an app on an iPhone with Touch ID and want to return to the Home Screen, you press the Home button—logical! On an iPhone with Face ID, you repeat that swipe up from the bottom of the screen action you use to unlock the iPhone. You’ll get really good at it.
Switch between Apps
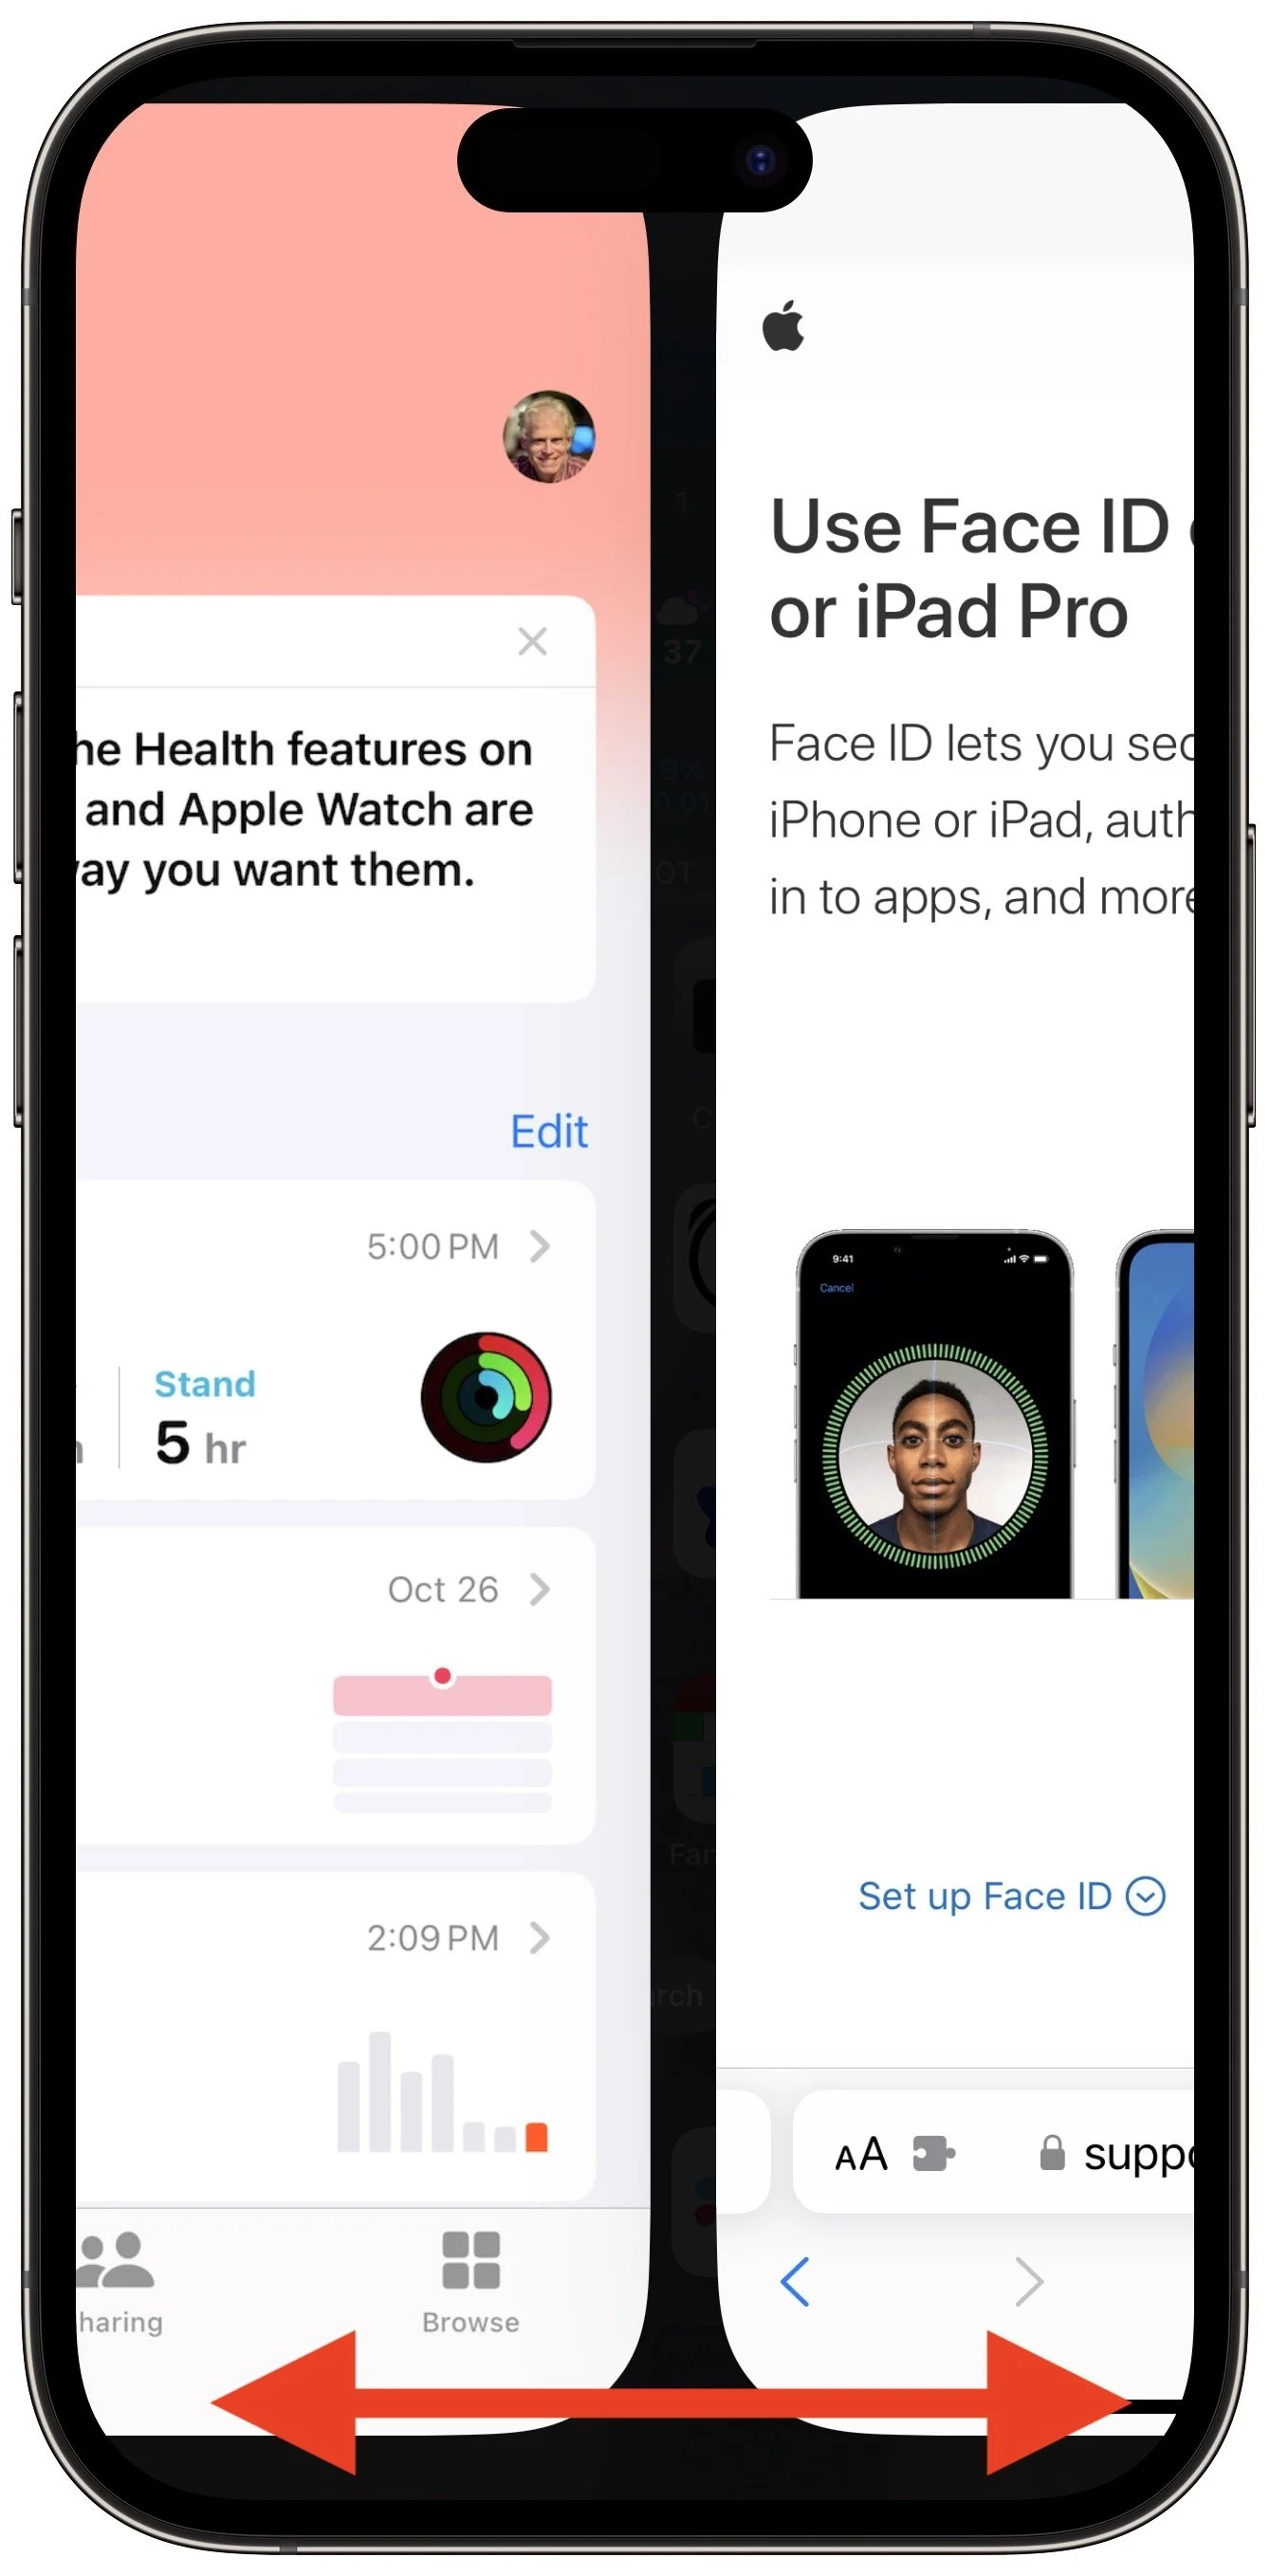
When it comes to switching between apps, iPhones with Face ID offer a unique shortcut. On an iPhone with Touch ID, you must quickly press the Home button twice and then swipe between apps in the App Switcher. Bringing up the App Switcher on an iPhone with Face ID requires swiping up from the bottom of the screen just slightly and then continuing the swipe to the right. But Face ID experts seldom do that. Instead, swipe right and left on the bar at the bottom of the screen to switch between apps—it’s far faster and easier, if hidden.
Activate Siri
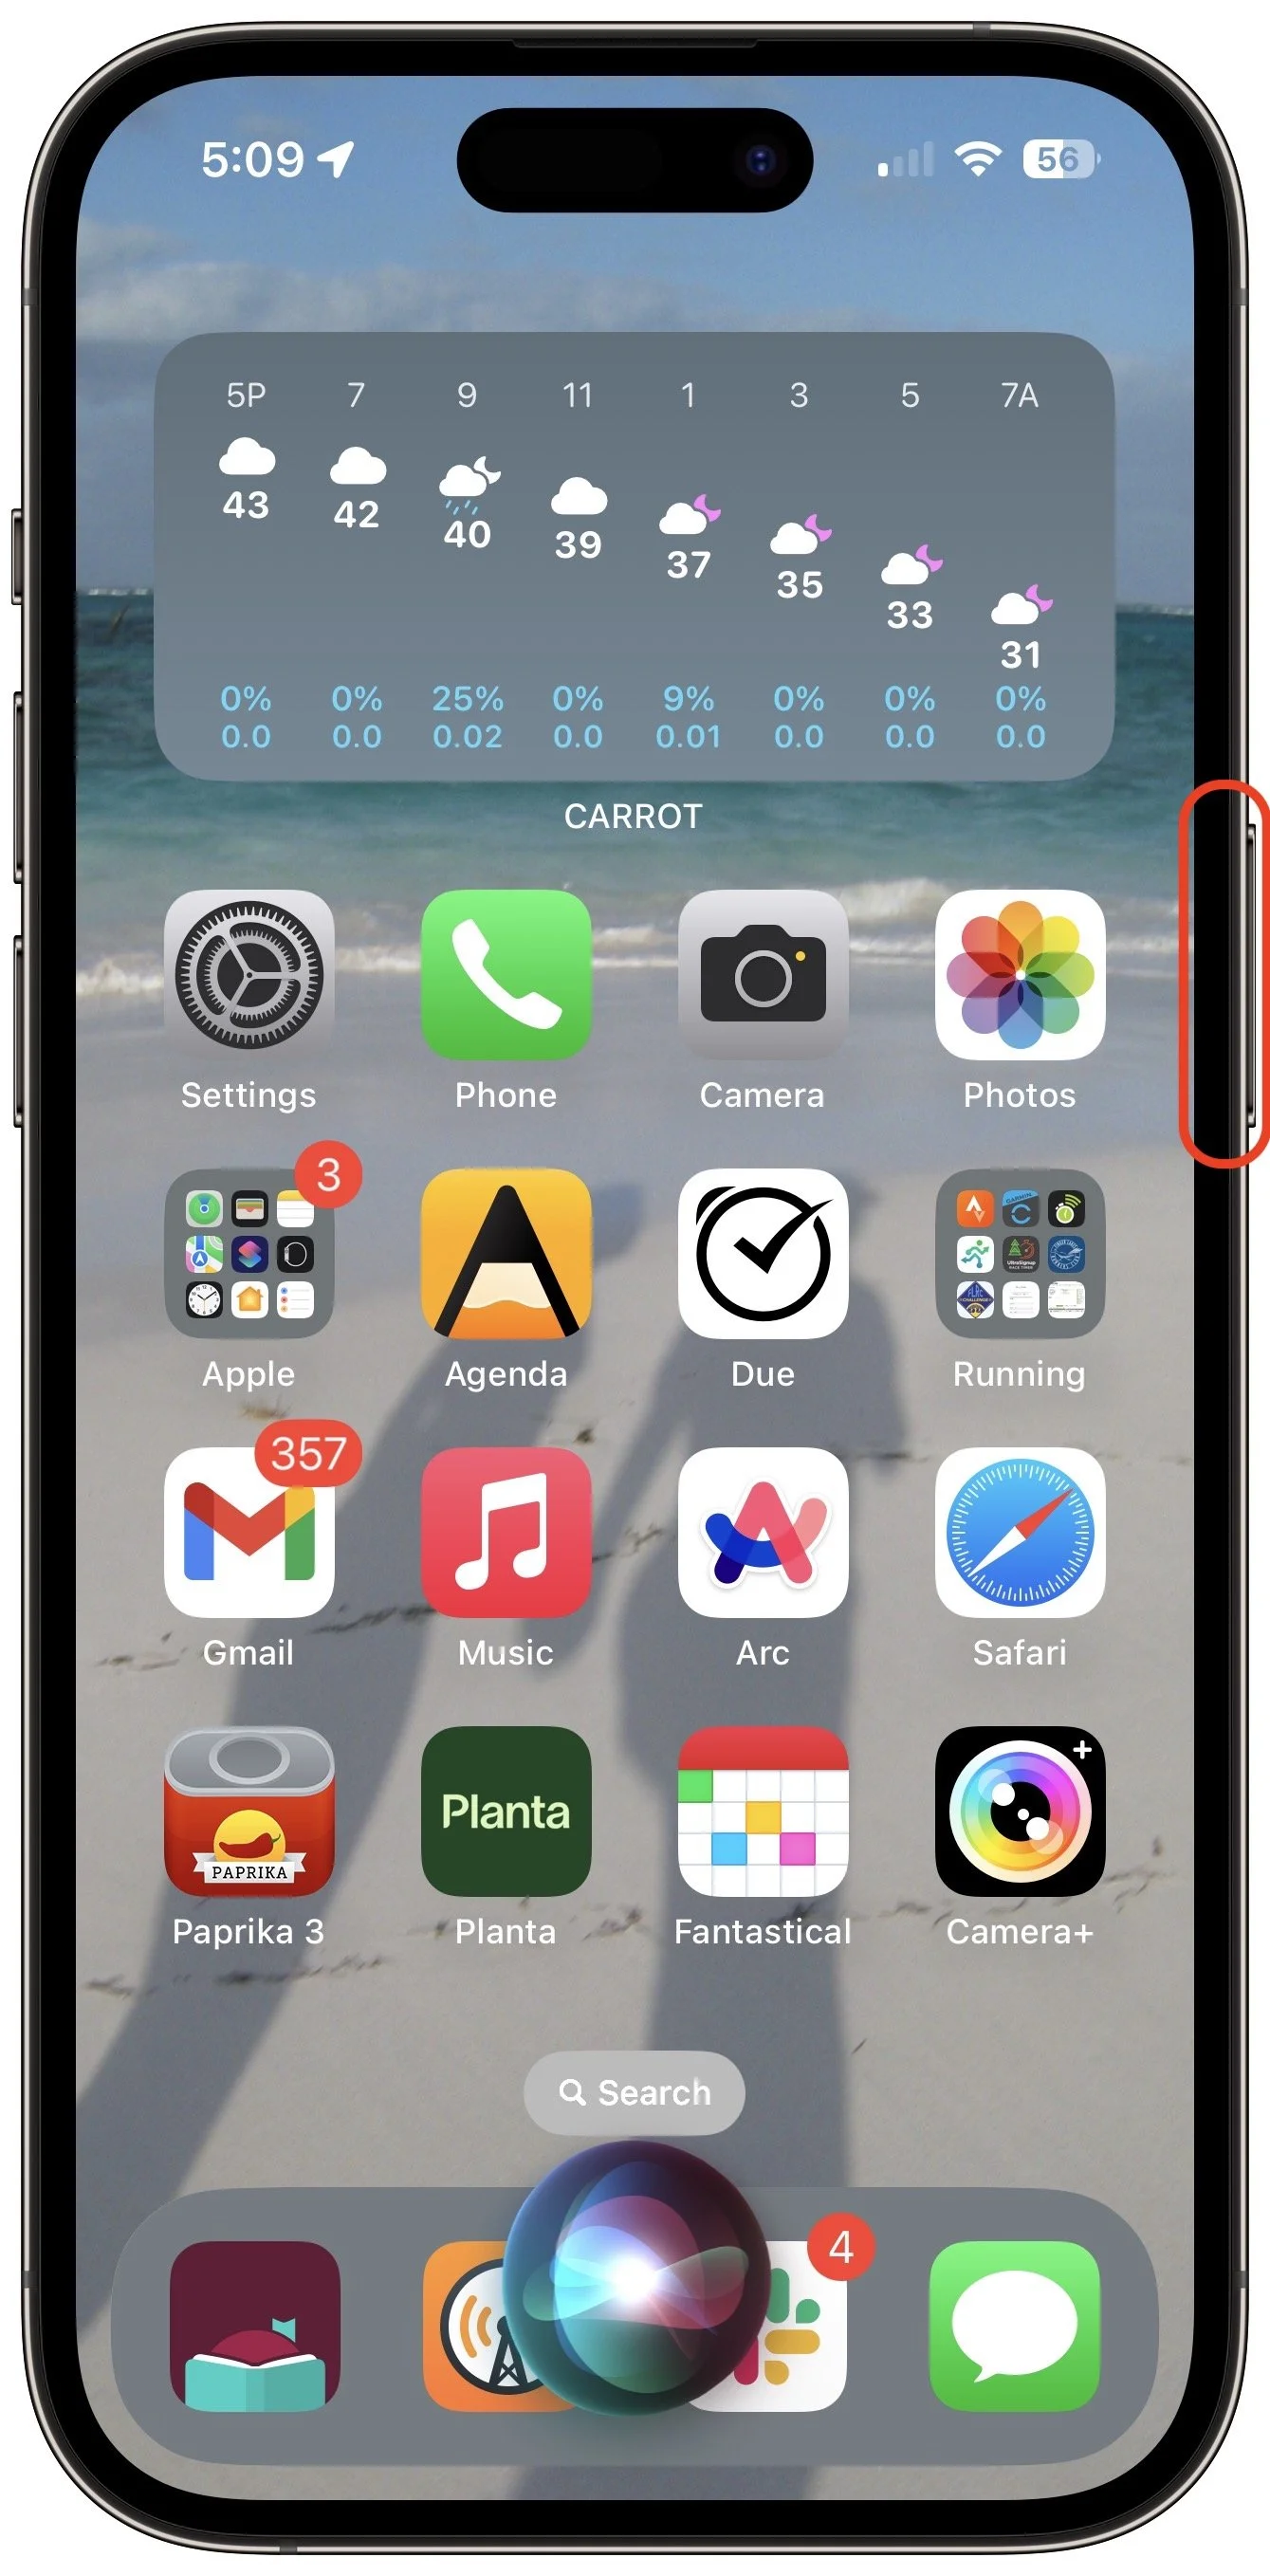
On an iPhone with Touch ID, holding the Home button activates Siri. On an iPhone with Face ID, press and hold the side button to activate Siri. Tomato, tomahto.
Open Control Center
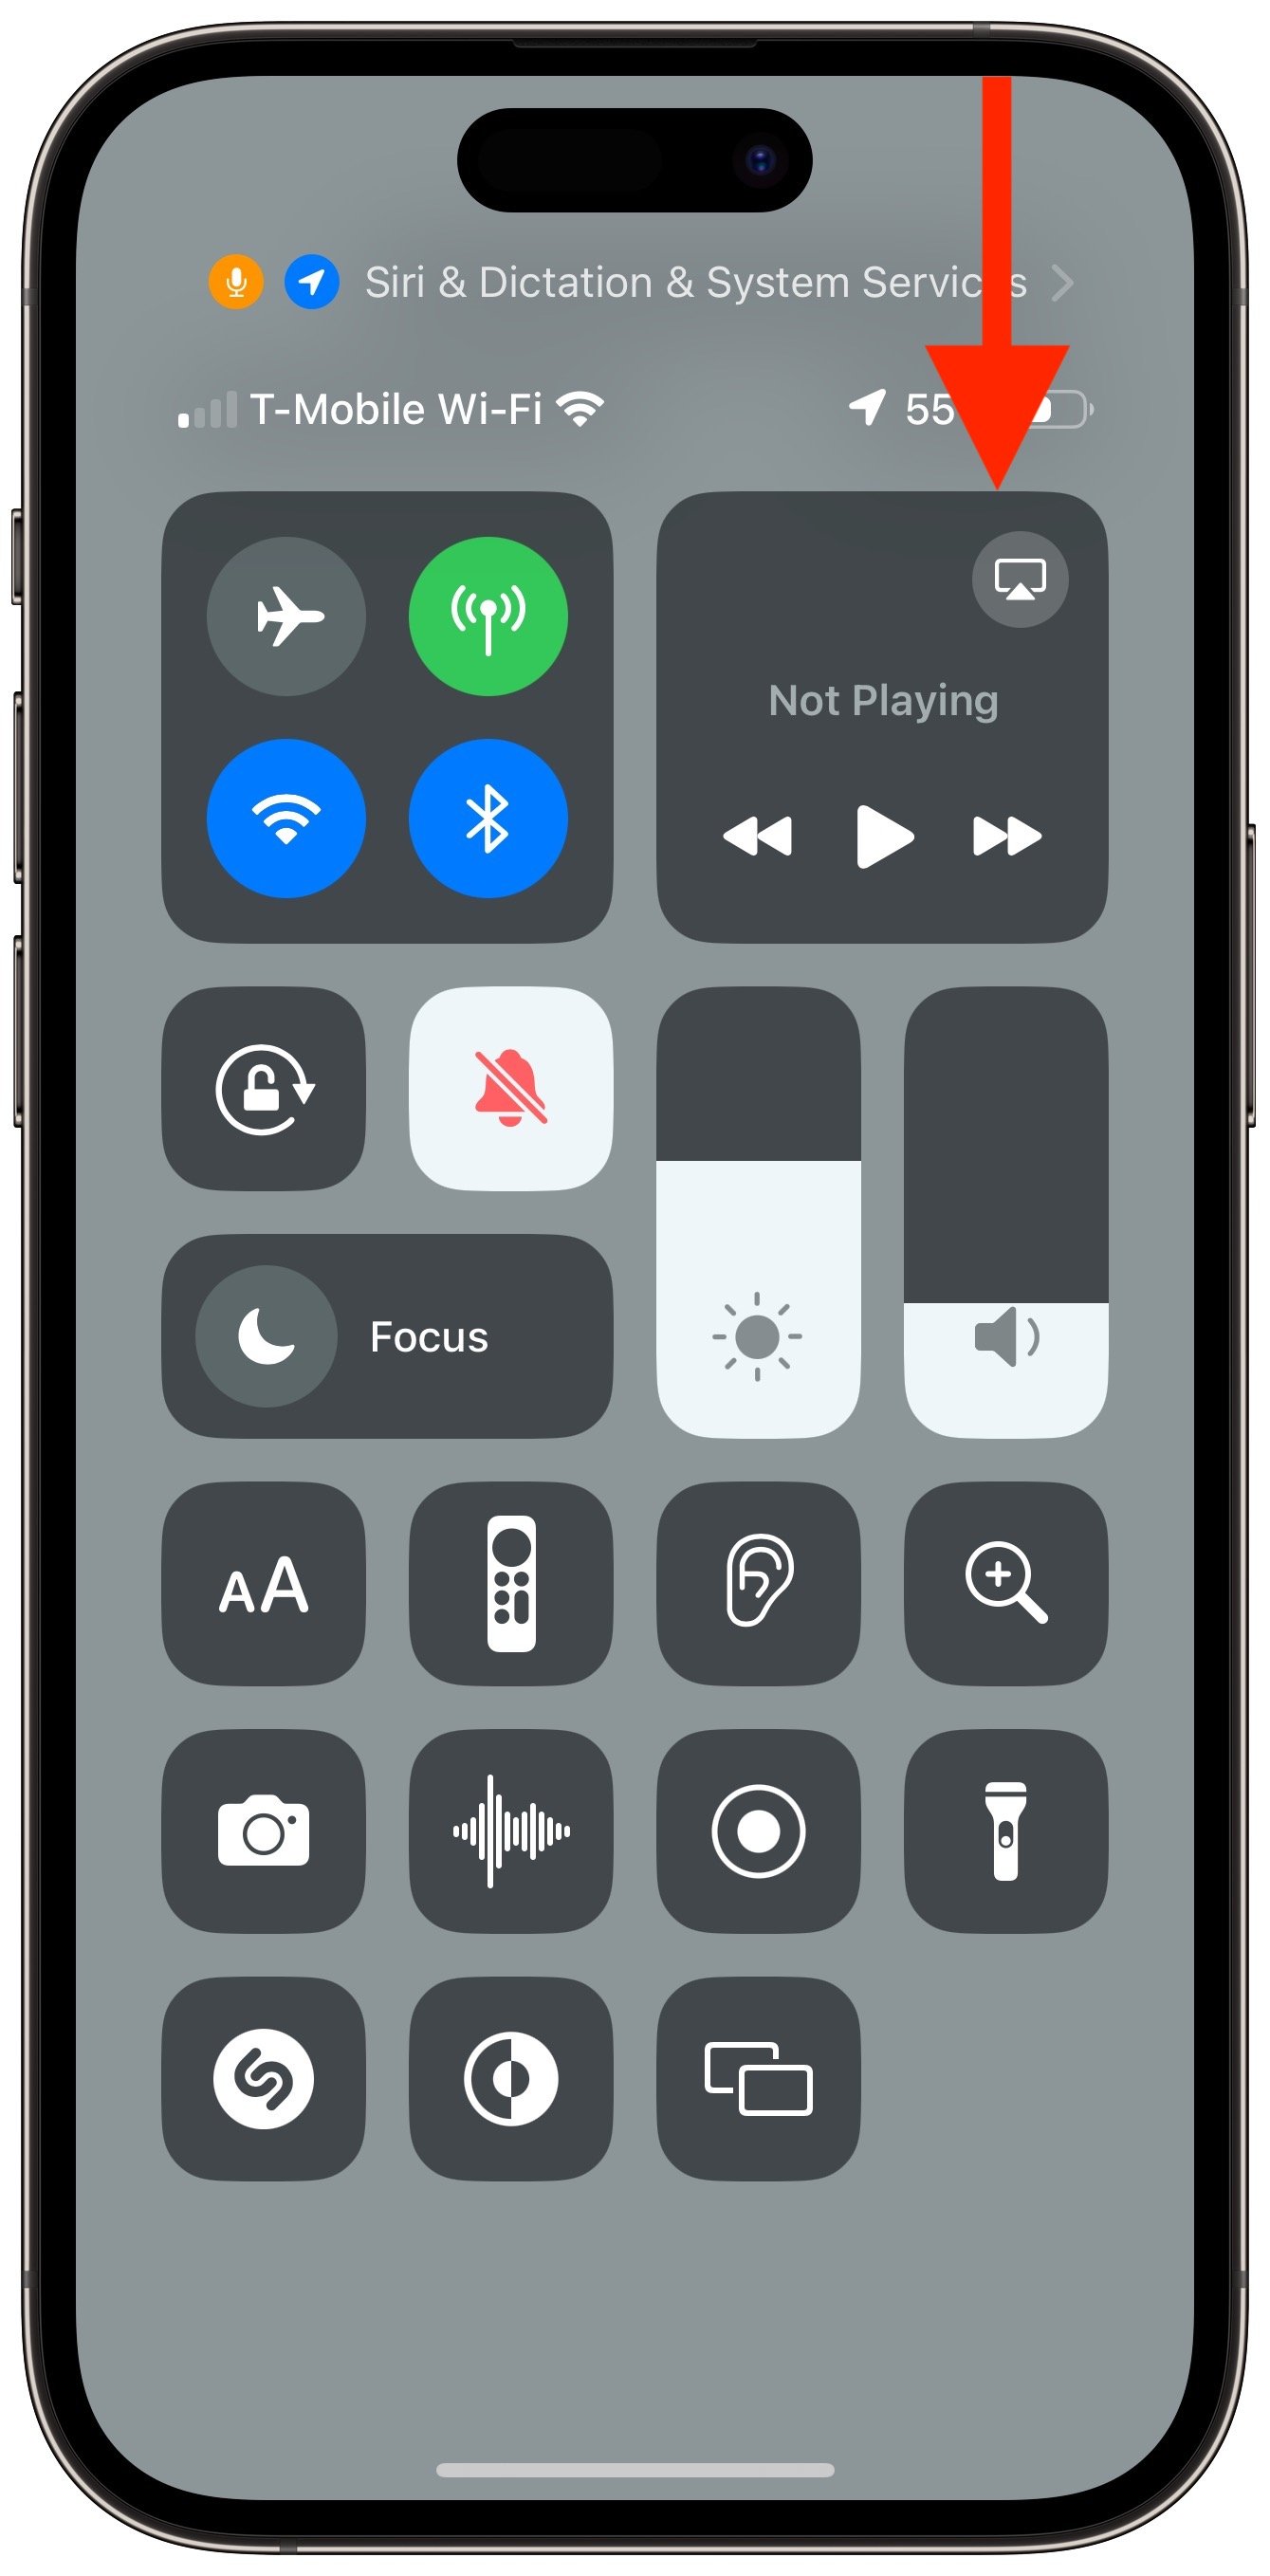
When all we had were iPhones with Touch ID, Apple decided we’d open Control Center by swiping up from the bottom of the screen. Face ID relies on that gesture for unlocking and opening the App Switcher, so on iPhones with Face ID, you instead open Control Center by swiping down from the top right of the screen. Think of it as swiping down from the cellular, Wi-Fi, and battery status icons.
View Notifications
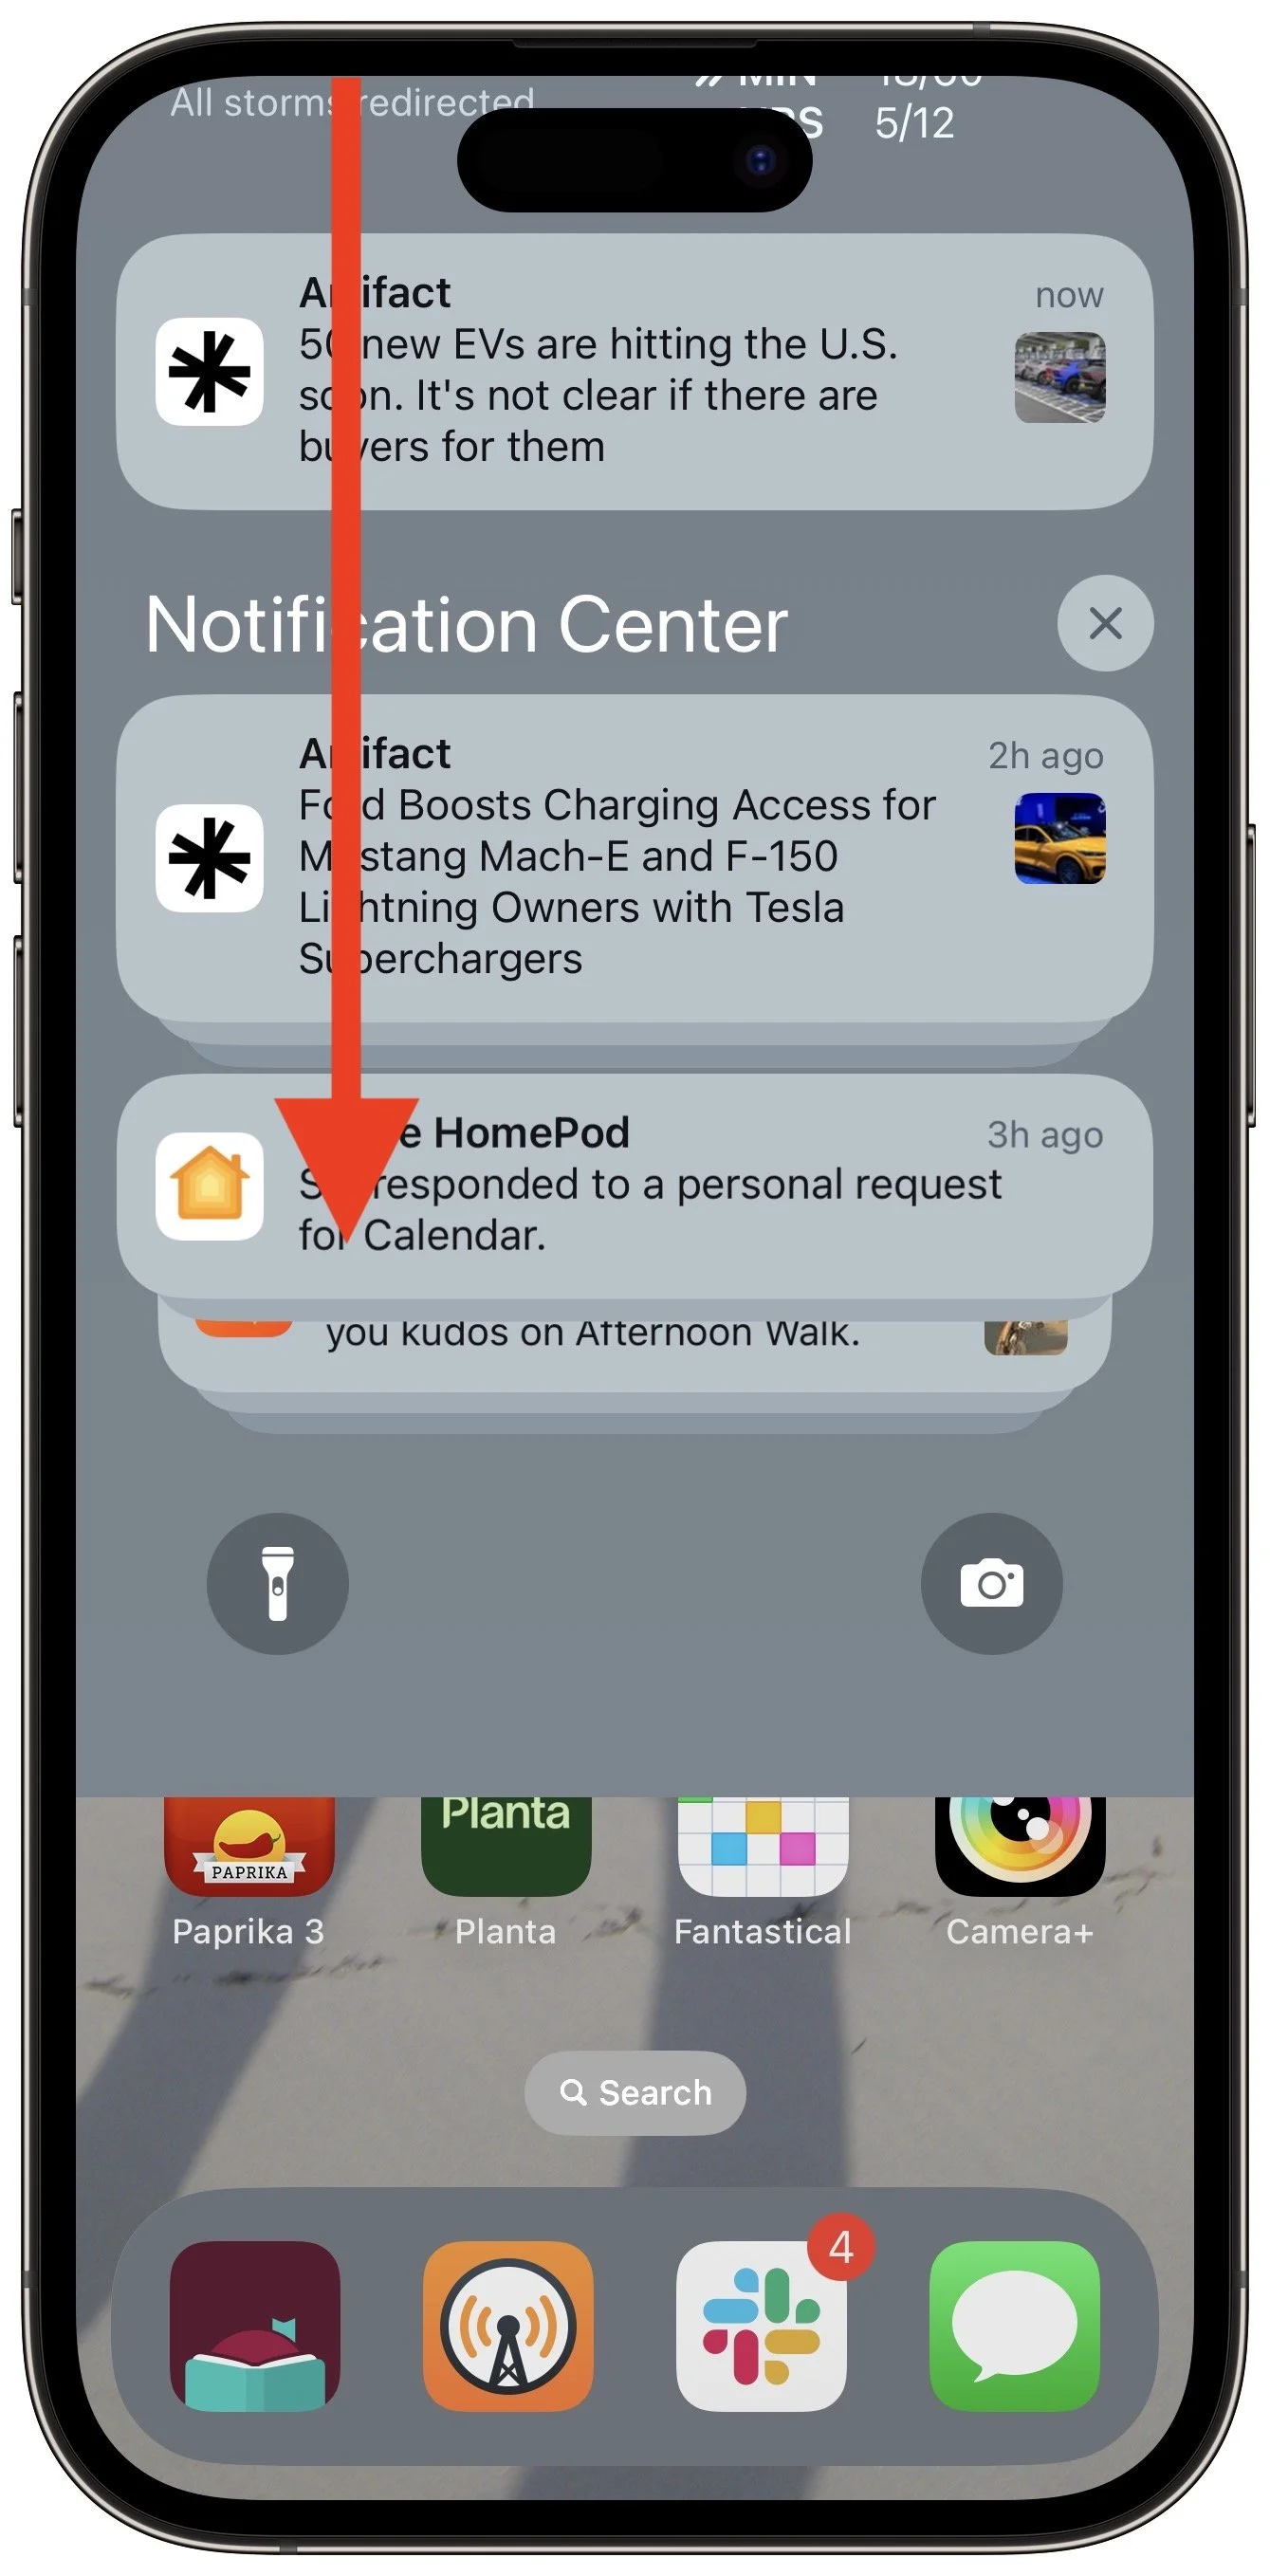
Because iPhones with Touch ID use a swipe up from the bottom for Control Center, they can devote a swipe down from the top of the screen to displaying the Lock Screen with notifications. The same gesture works on an iPhone with Face ID, but you must start from the left side of the screen.
Use Apple Pay
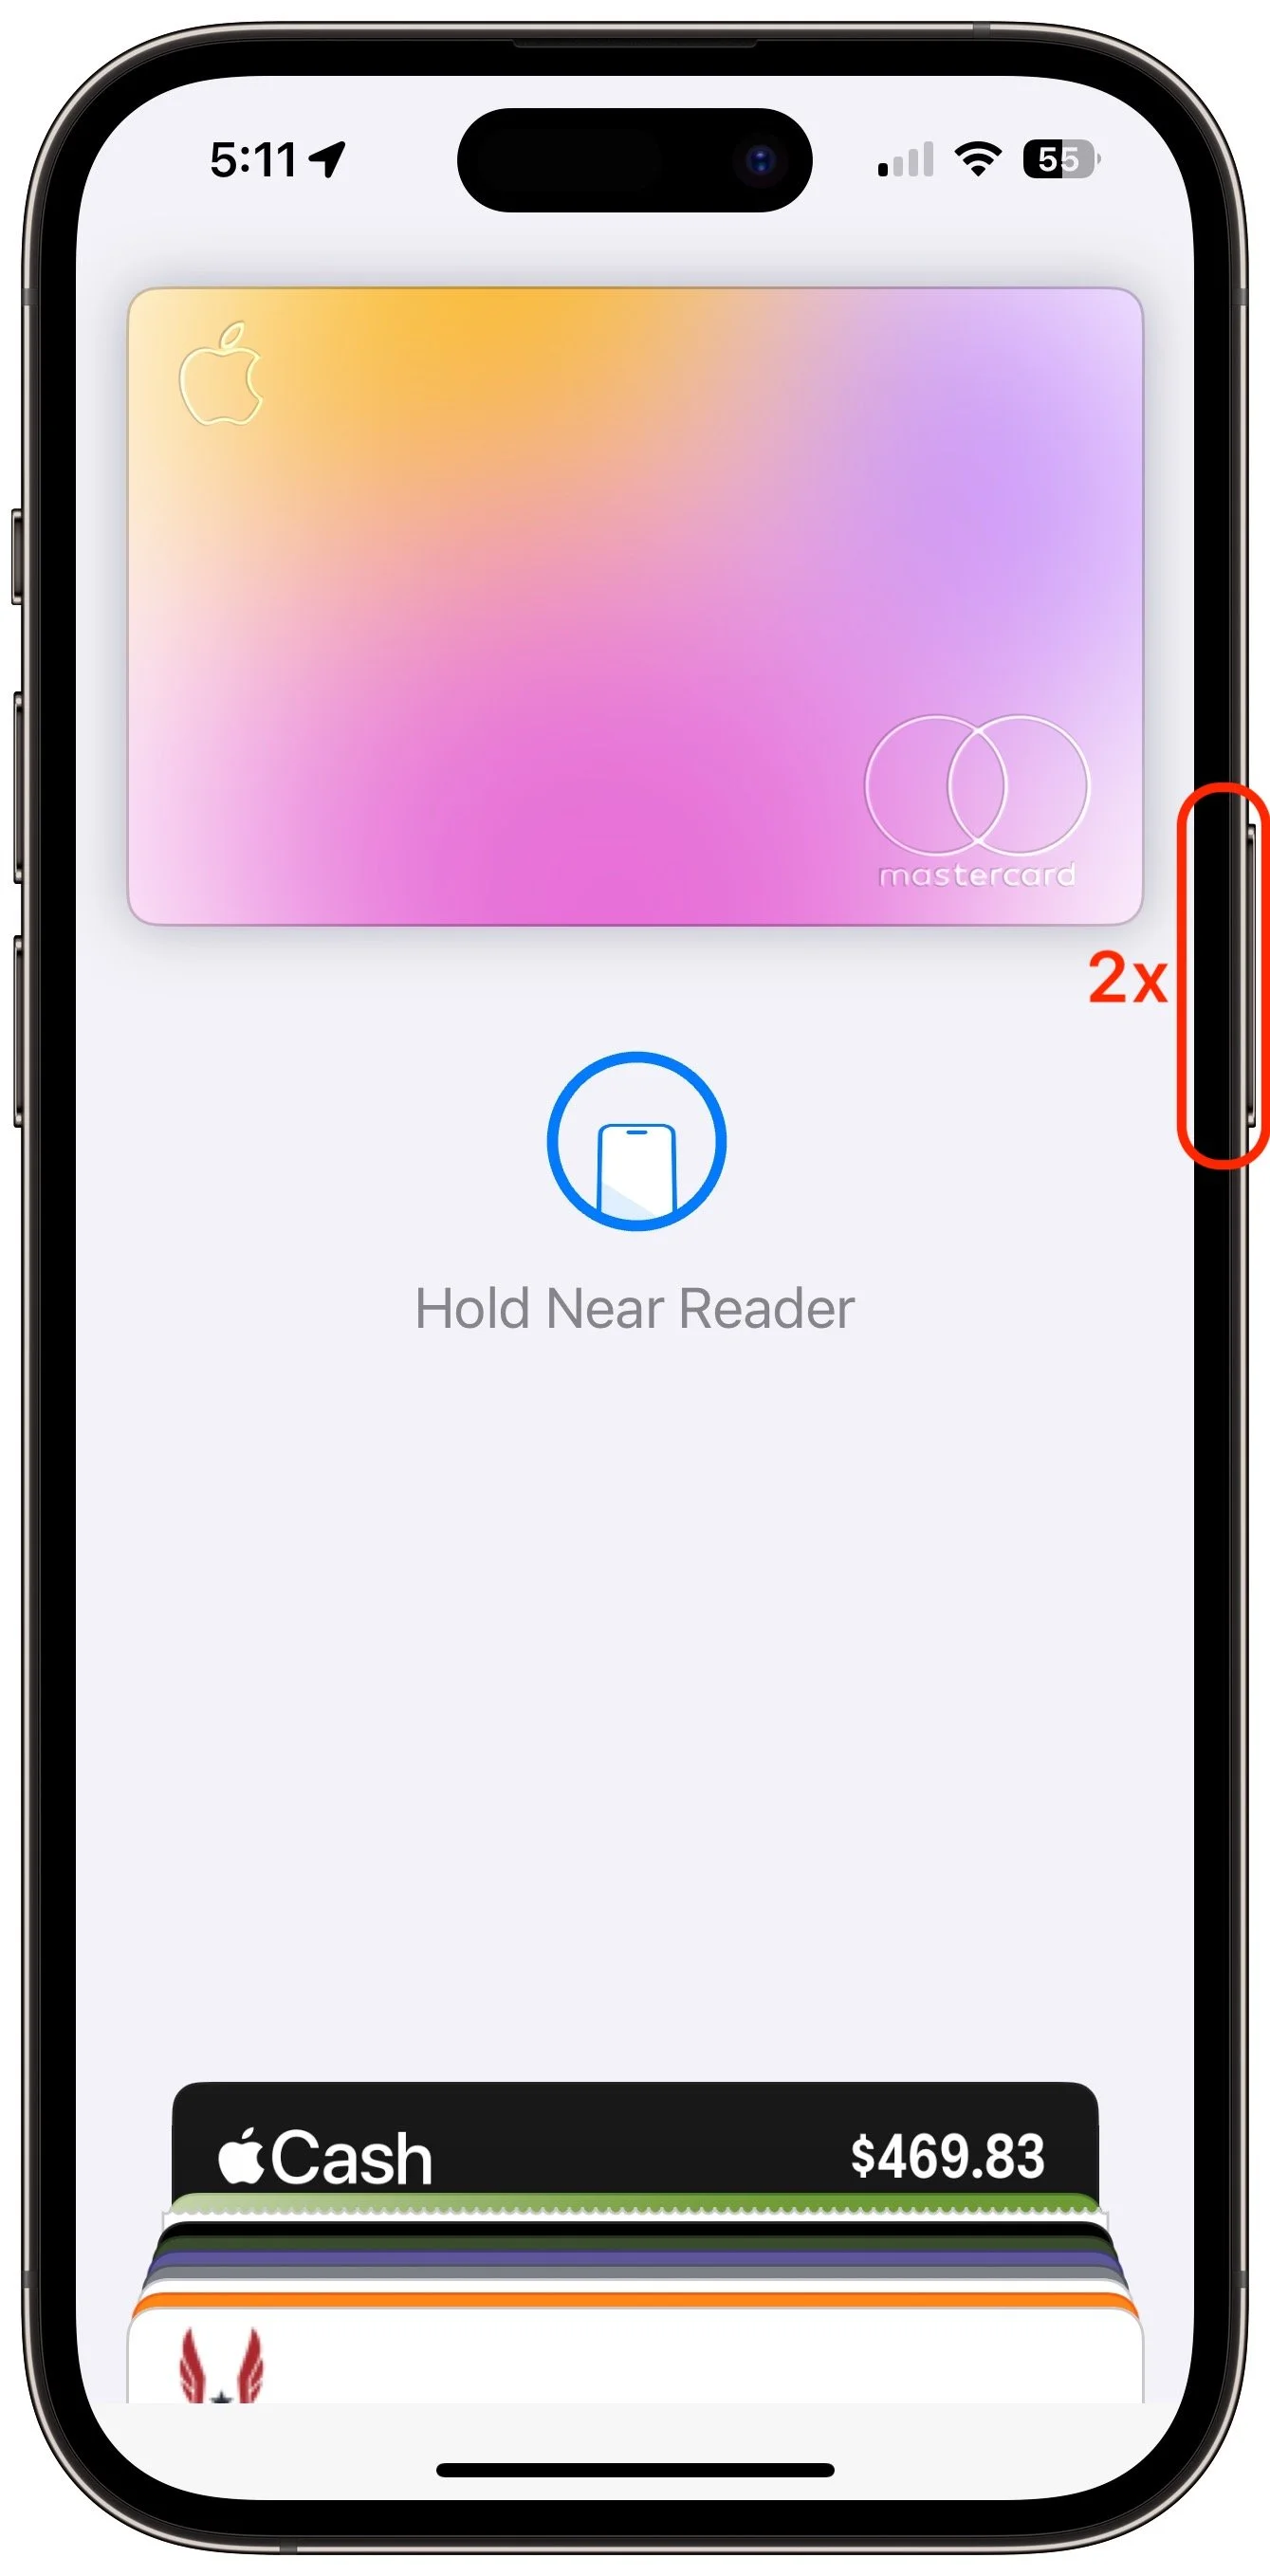
Paying for a purchase with Apple Pay requires that you authenticate, which means placing your finger on the Home button—but not pressing it!—on an iPhone with Touch ID. Getting the hang of the touch-but-don’t-press action can take some time, but once you have it, you may even have developed a habit of not looking at your iPhone to authenticate Apple Pay. In contrast, with an iPhone with Face ID, you must look at the screen when prompted so the Face ID sensors can confirm you’re making the purchase. Honestly, neither is as easy as double-pressing the side button on an Apple Watch.
Authenticate in Apps
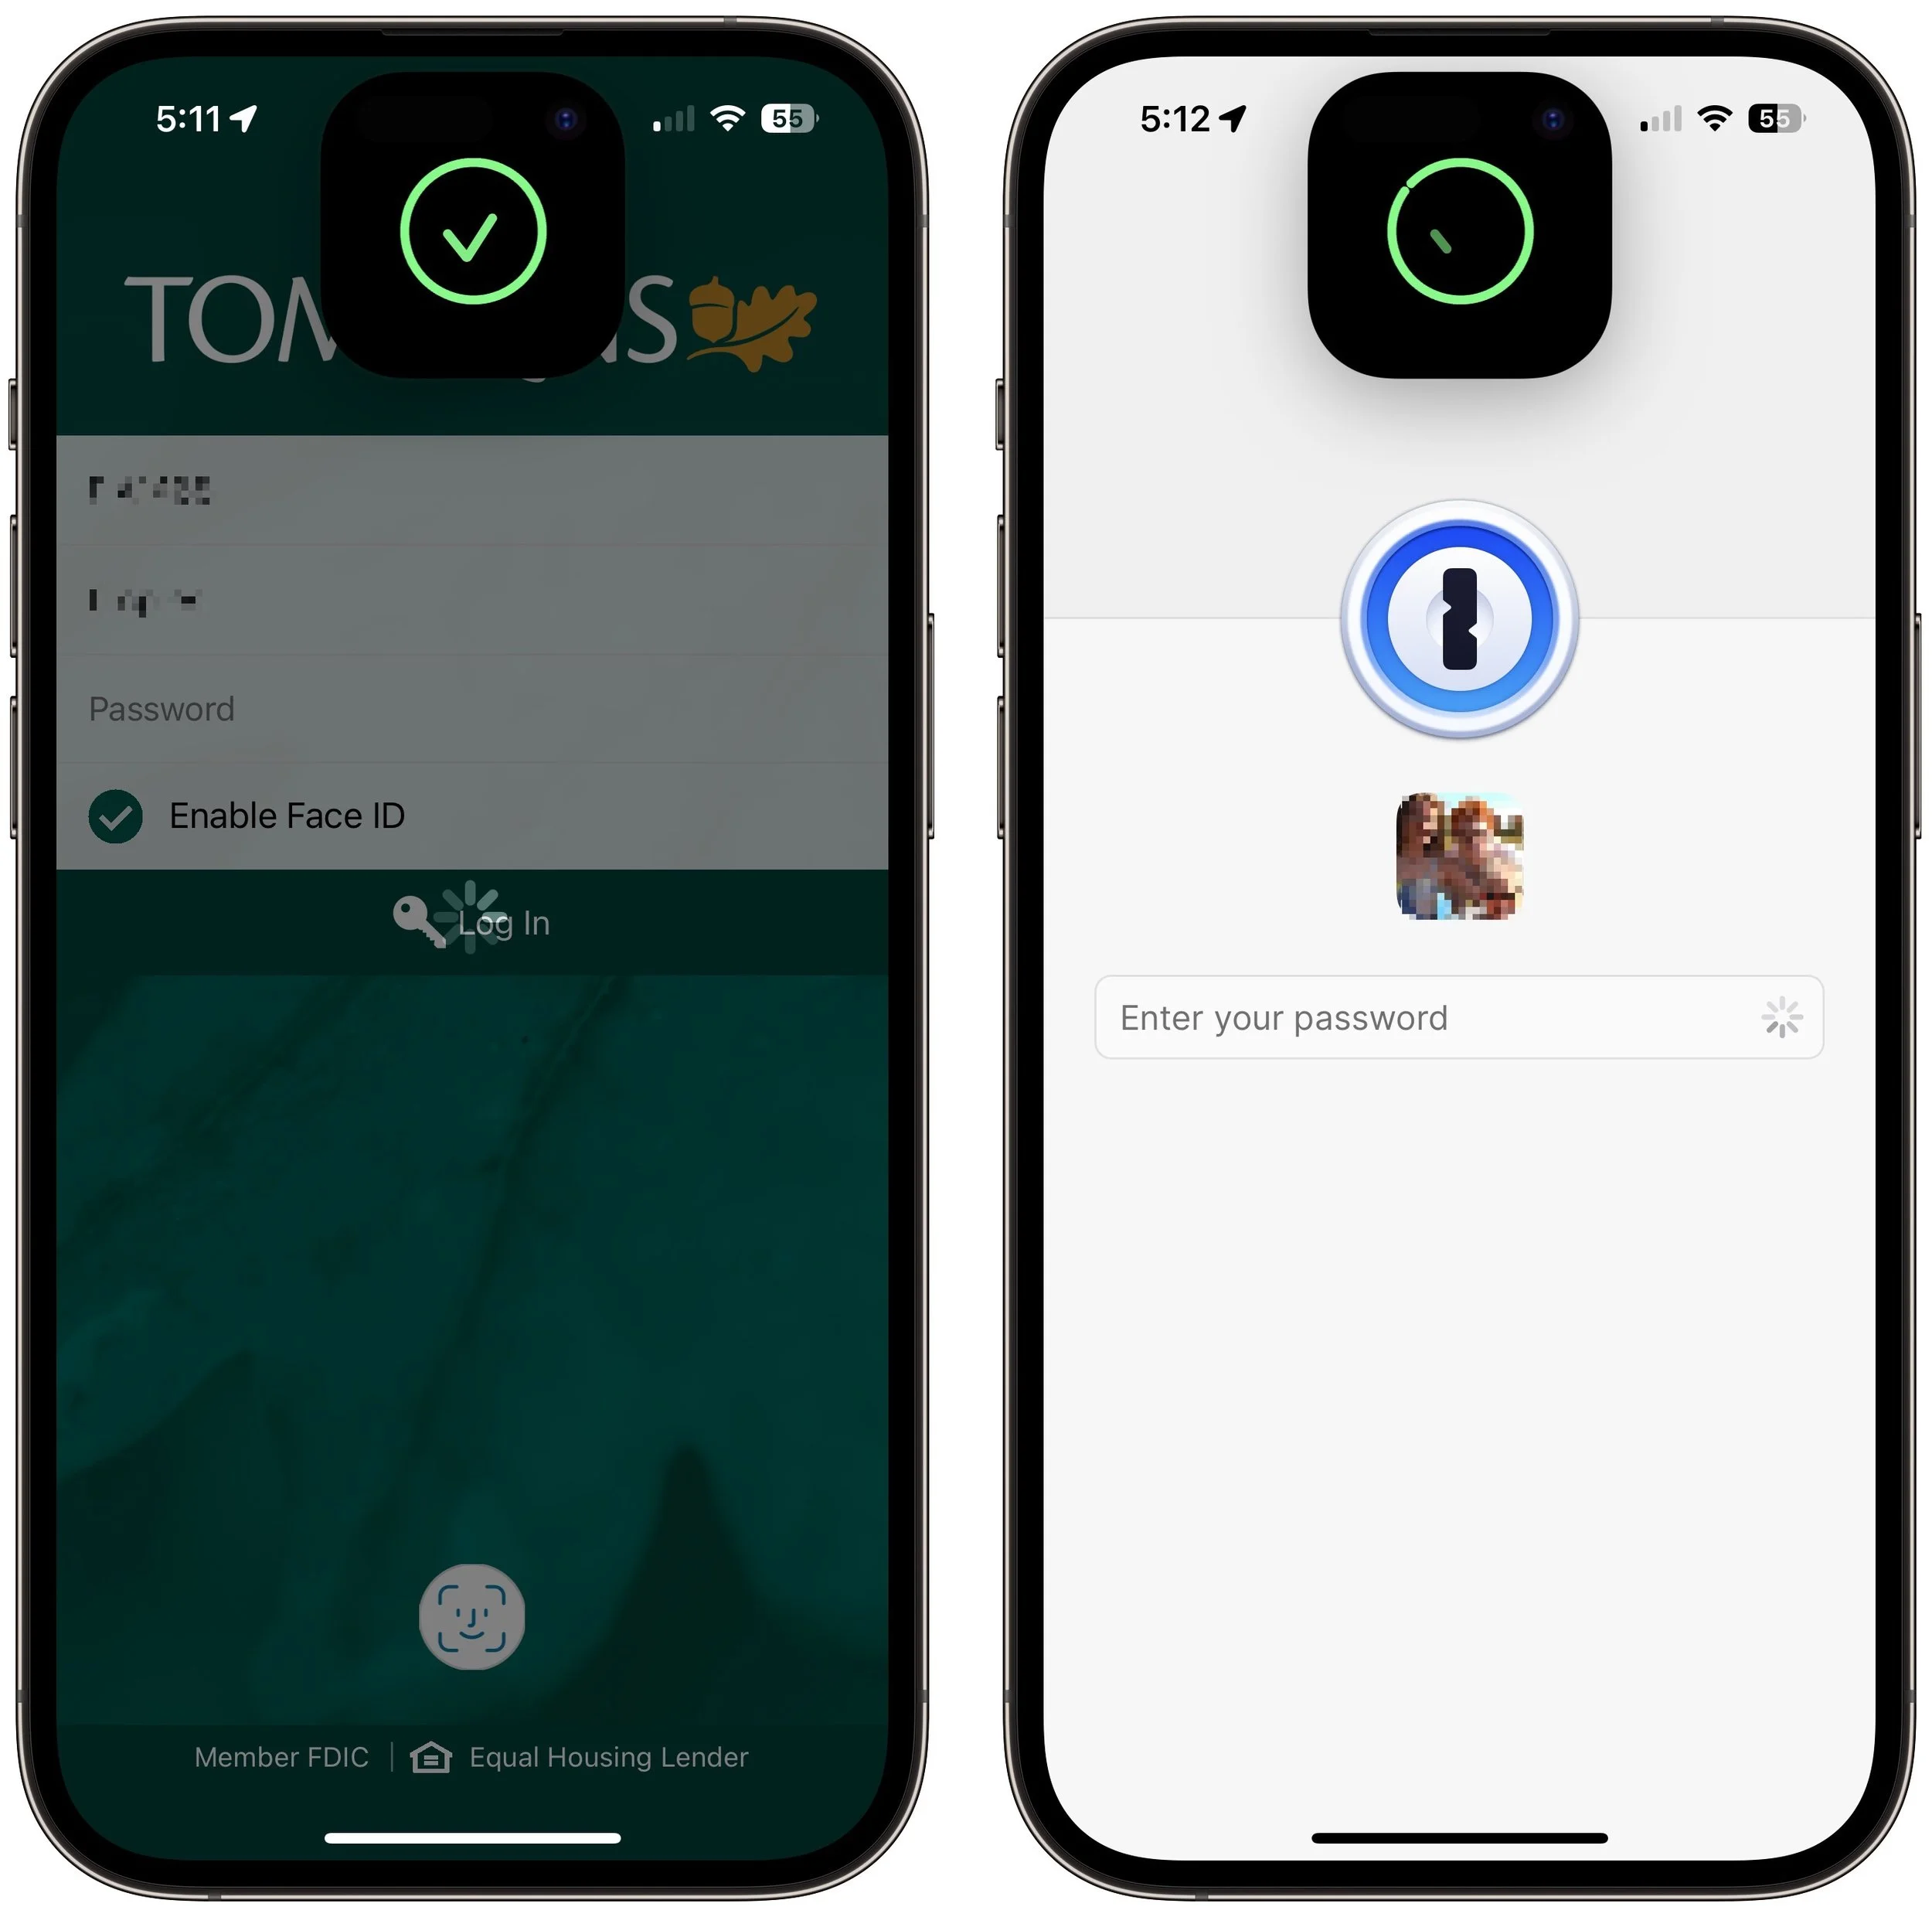
Beyond Apple Pay, plenty of apps from the App Store, like password managers and banking apps, tie into biometric authentication so you don’t have to type lengthy passwords. As you’d expect, if you previously authenticated by touching the Home button, doing so on an iPhone with Face ID requires looking at the iPhone screen. That’s nearly always what you do anyway, so it’s even easier than touching the Home button.
Register Alternate Appearances
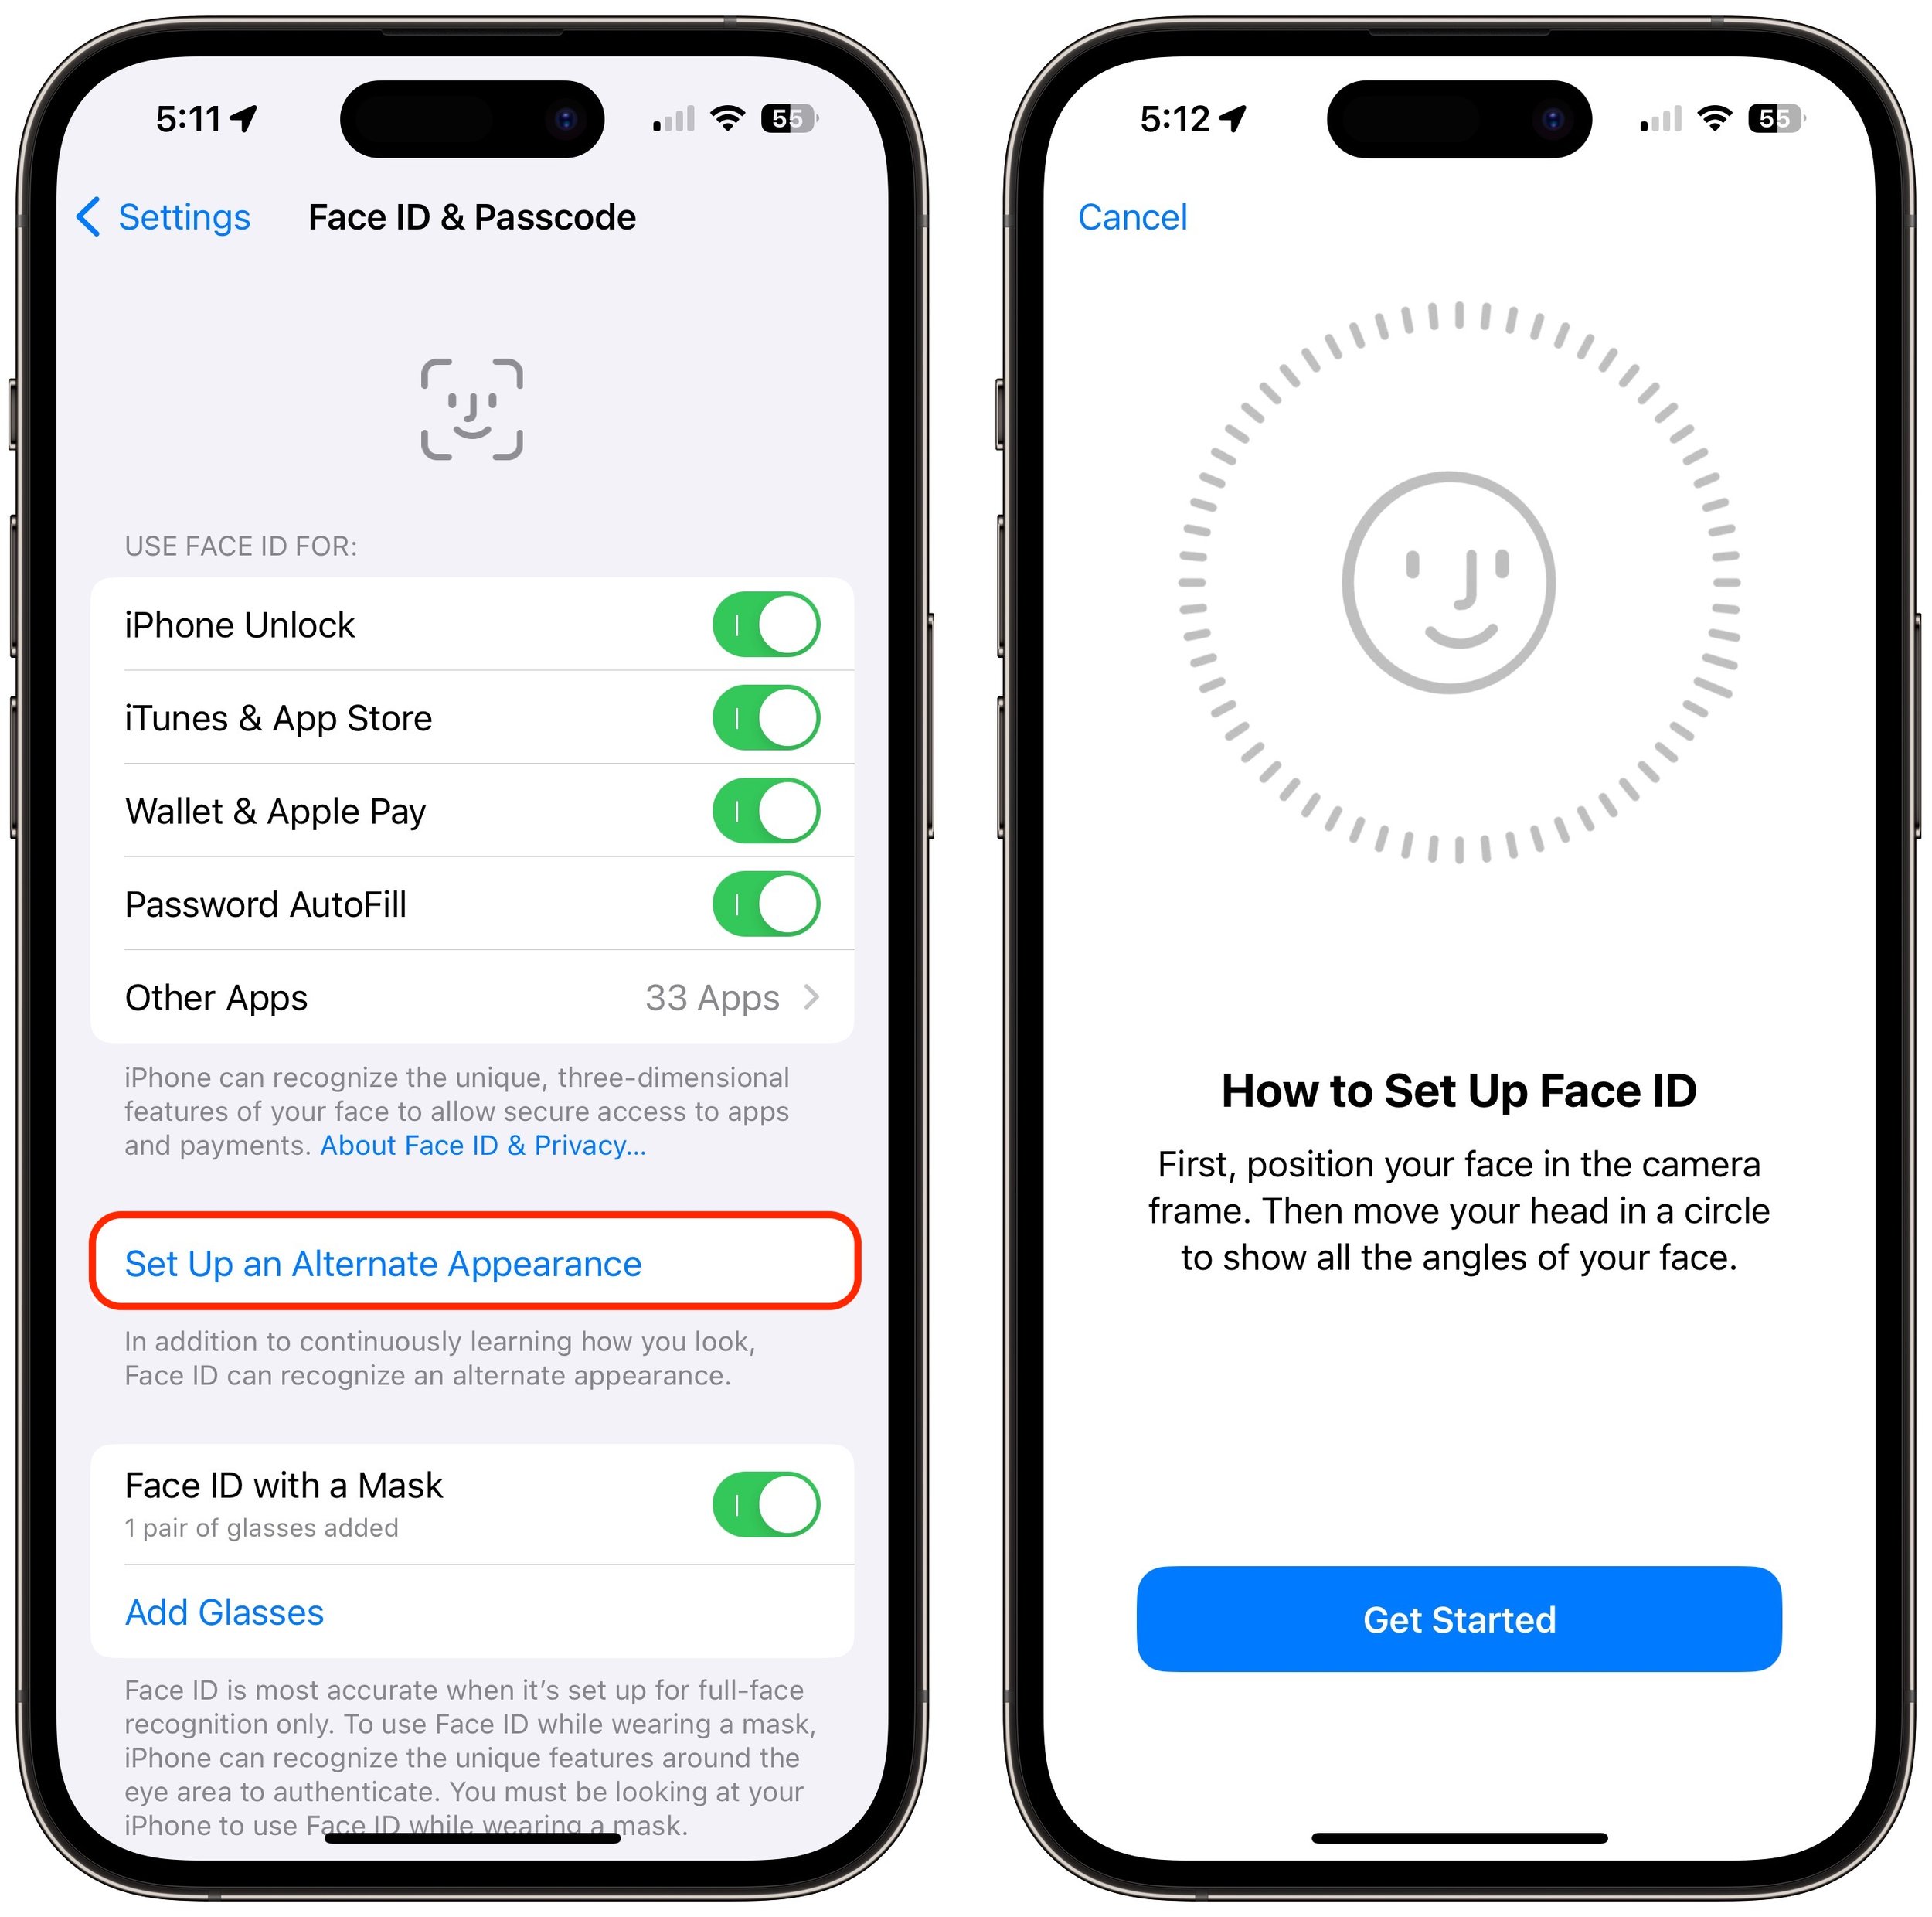
With Touch ID, you can register up to five fingers, which lets you use several of your own and let a trusted spouse or family member authenticate using Touch ID as well. We tend to have more fingers than faces, though, so with Face ID, Apple allows only a single alternate appearance. That shouldn’t be too limiting, but if everyone in your family had a Touch ID finger, sorry, you’ll have to pick a favorite.
(Featured image by Apple)