
Run a Business? Sign Up with Apple Business Connect
Discover how Apple Business Connect helps businesses stand out in apps like Maps, Spotlight, Calendar, and Wallet. From custom Place Cards to branded email, Apple Business Connect can enhance your brand and help you reach your audience more effectively.
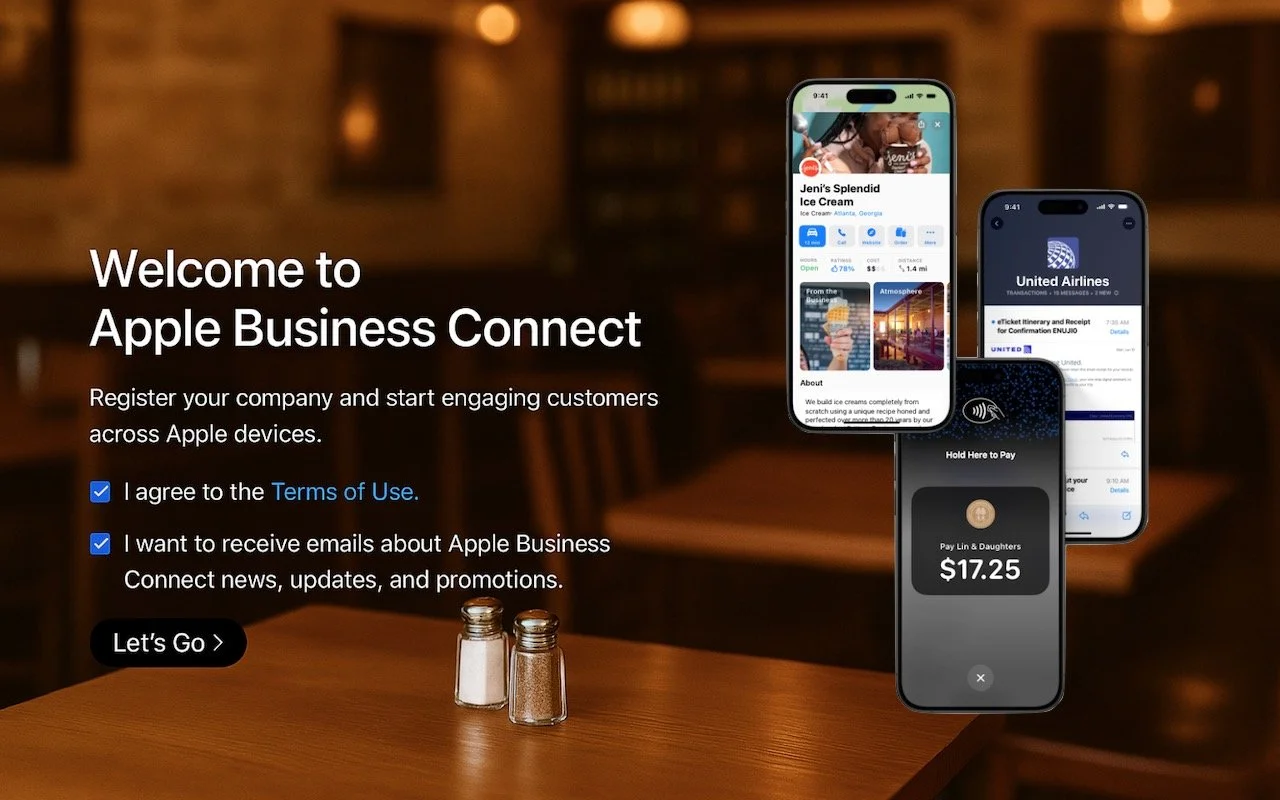
Every company today conducts business online, by sending email, if nothing else. That’s true even if your firm operates primarily in the physical world—customers undoubtedly find you by browsing in Apple Maps, searching in Spotlight, and asking Siri for directions. If you sell products, you probably take Apple Pay.
Apple Business Connect is a free program designed to help businesses enhance their brands everywhere they appear on Apple devices, including Maps, Wallet, Siri, Calendar, Messages, Spotlight searches, and more. Once you sign up for Apple Business Connect (we’ll resist the temptation to say it’s as easy as ABC) and are verified by Apple, you can:
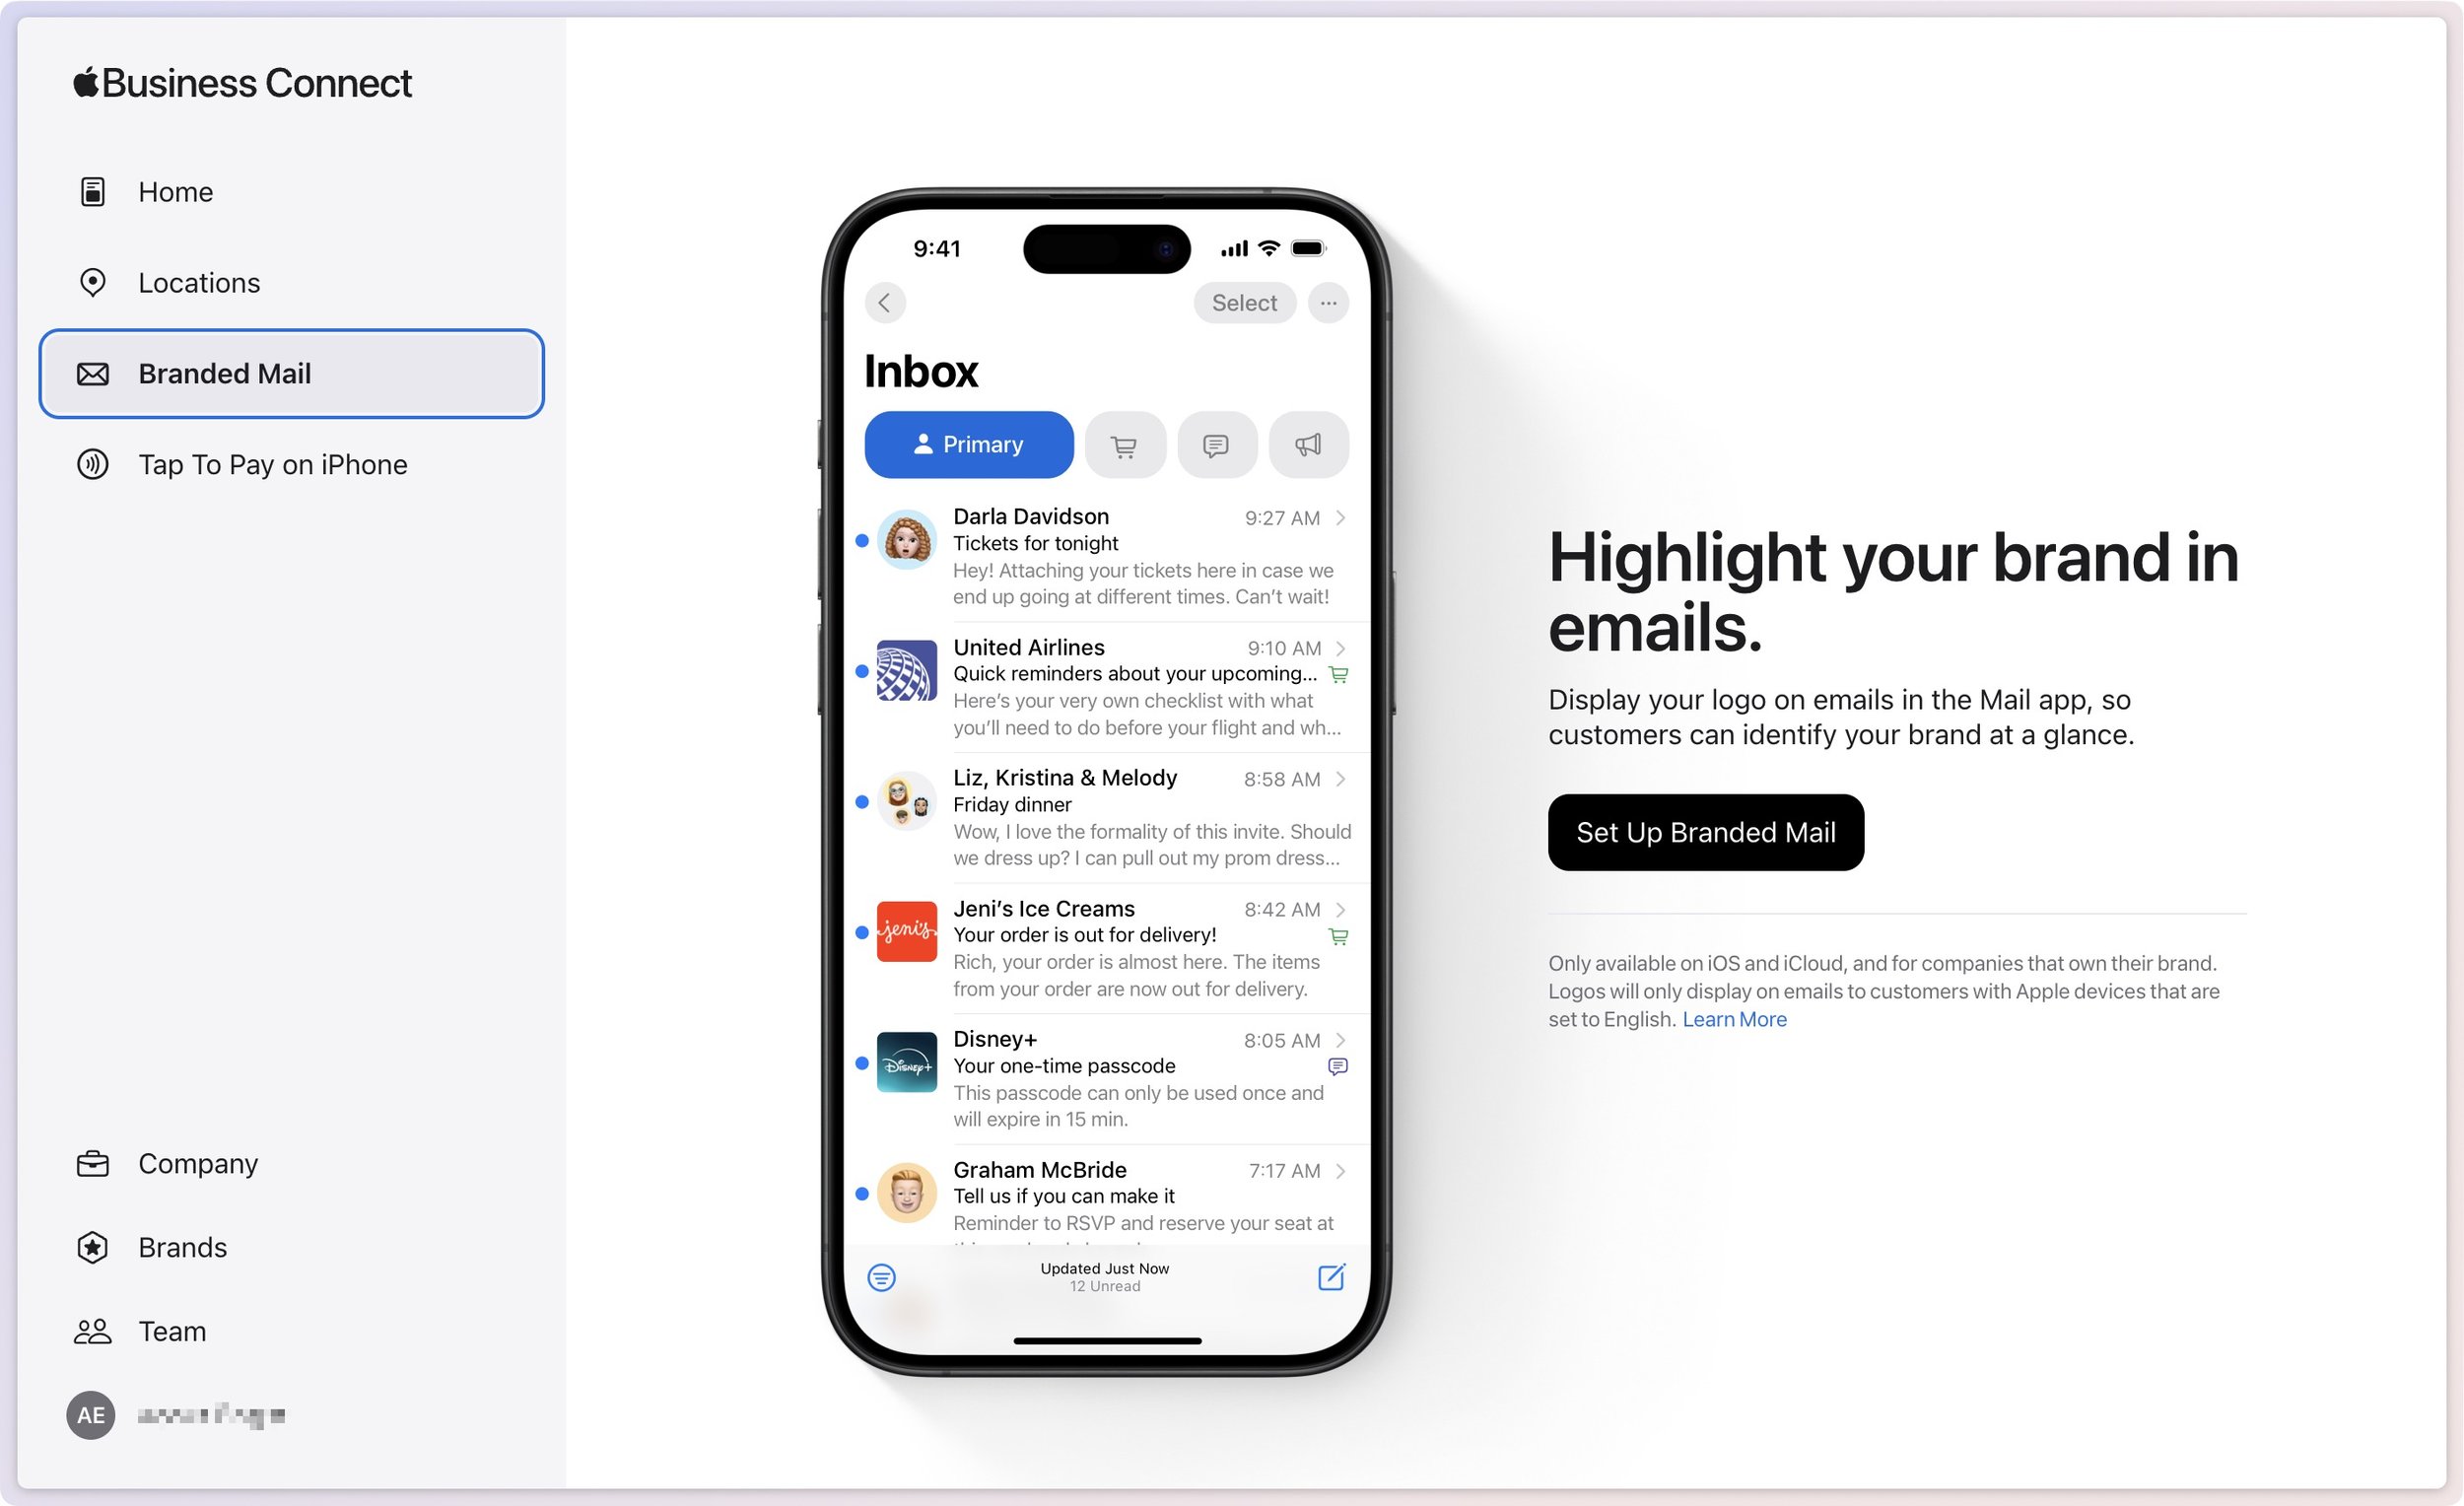
Set up Branded Mail: With Branded Mail, email sent from specific addresses or your entire domain will be branded with your logo in the Mail app on Apple devices, helping users identify your brand.
Configure location information: Simple addresses don’t always connect with store entrances, so you can precisely specify the entrance to each of your locations.
Customize Place Cards: When customers find you in Maps, add your address to Calendar, or ask for your location from Siri, Apple displays a Place Card. With Apple Business Connect, you can customize the Place Card.
Add custom action links: Your Place Card can contain custom action links that point to your website or other Web-accessible platforms. For instance, a restaurant might add custom action links for Menu, Reservations, Takeout, etc.
Create Showcases: A Showcase is a module on the Place Card that lets you highlight sales, deals, new items, or other promotional content. If someone is looking for you, why not promote your latest offerings?
Get Insights: Apple records valuable information about customer search behavior, including search locations, discovery methods, and actions customers take after finding your business.
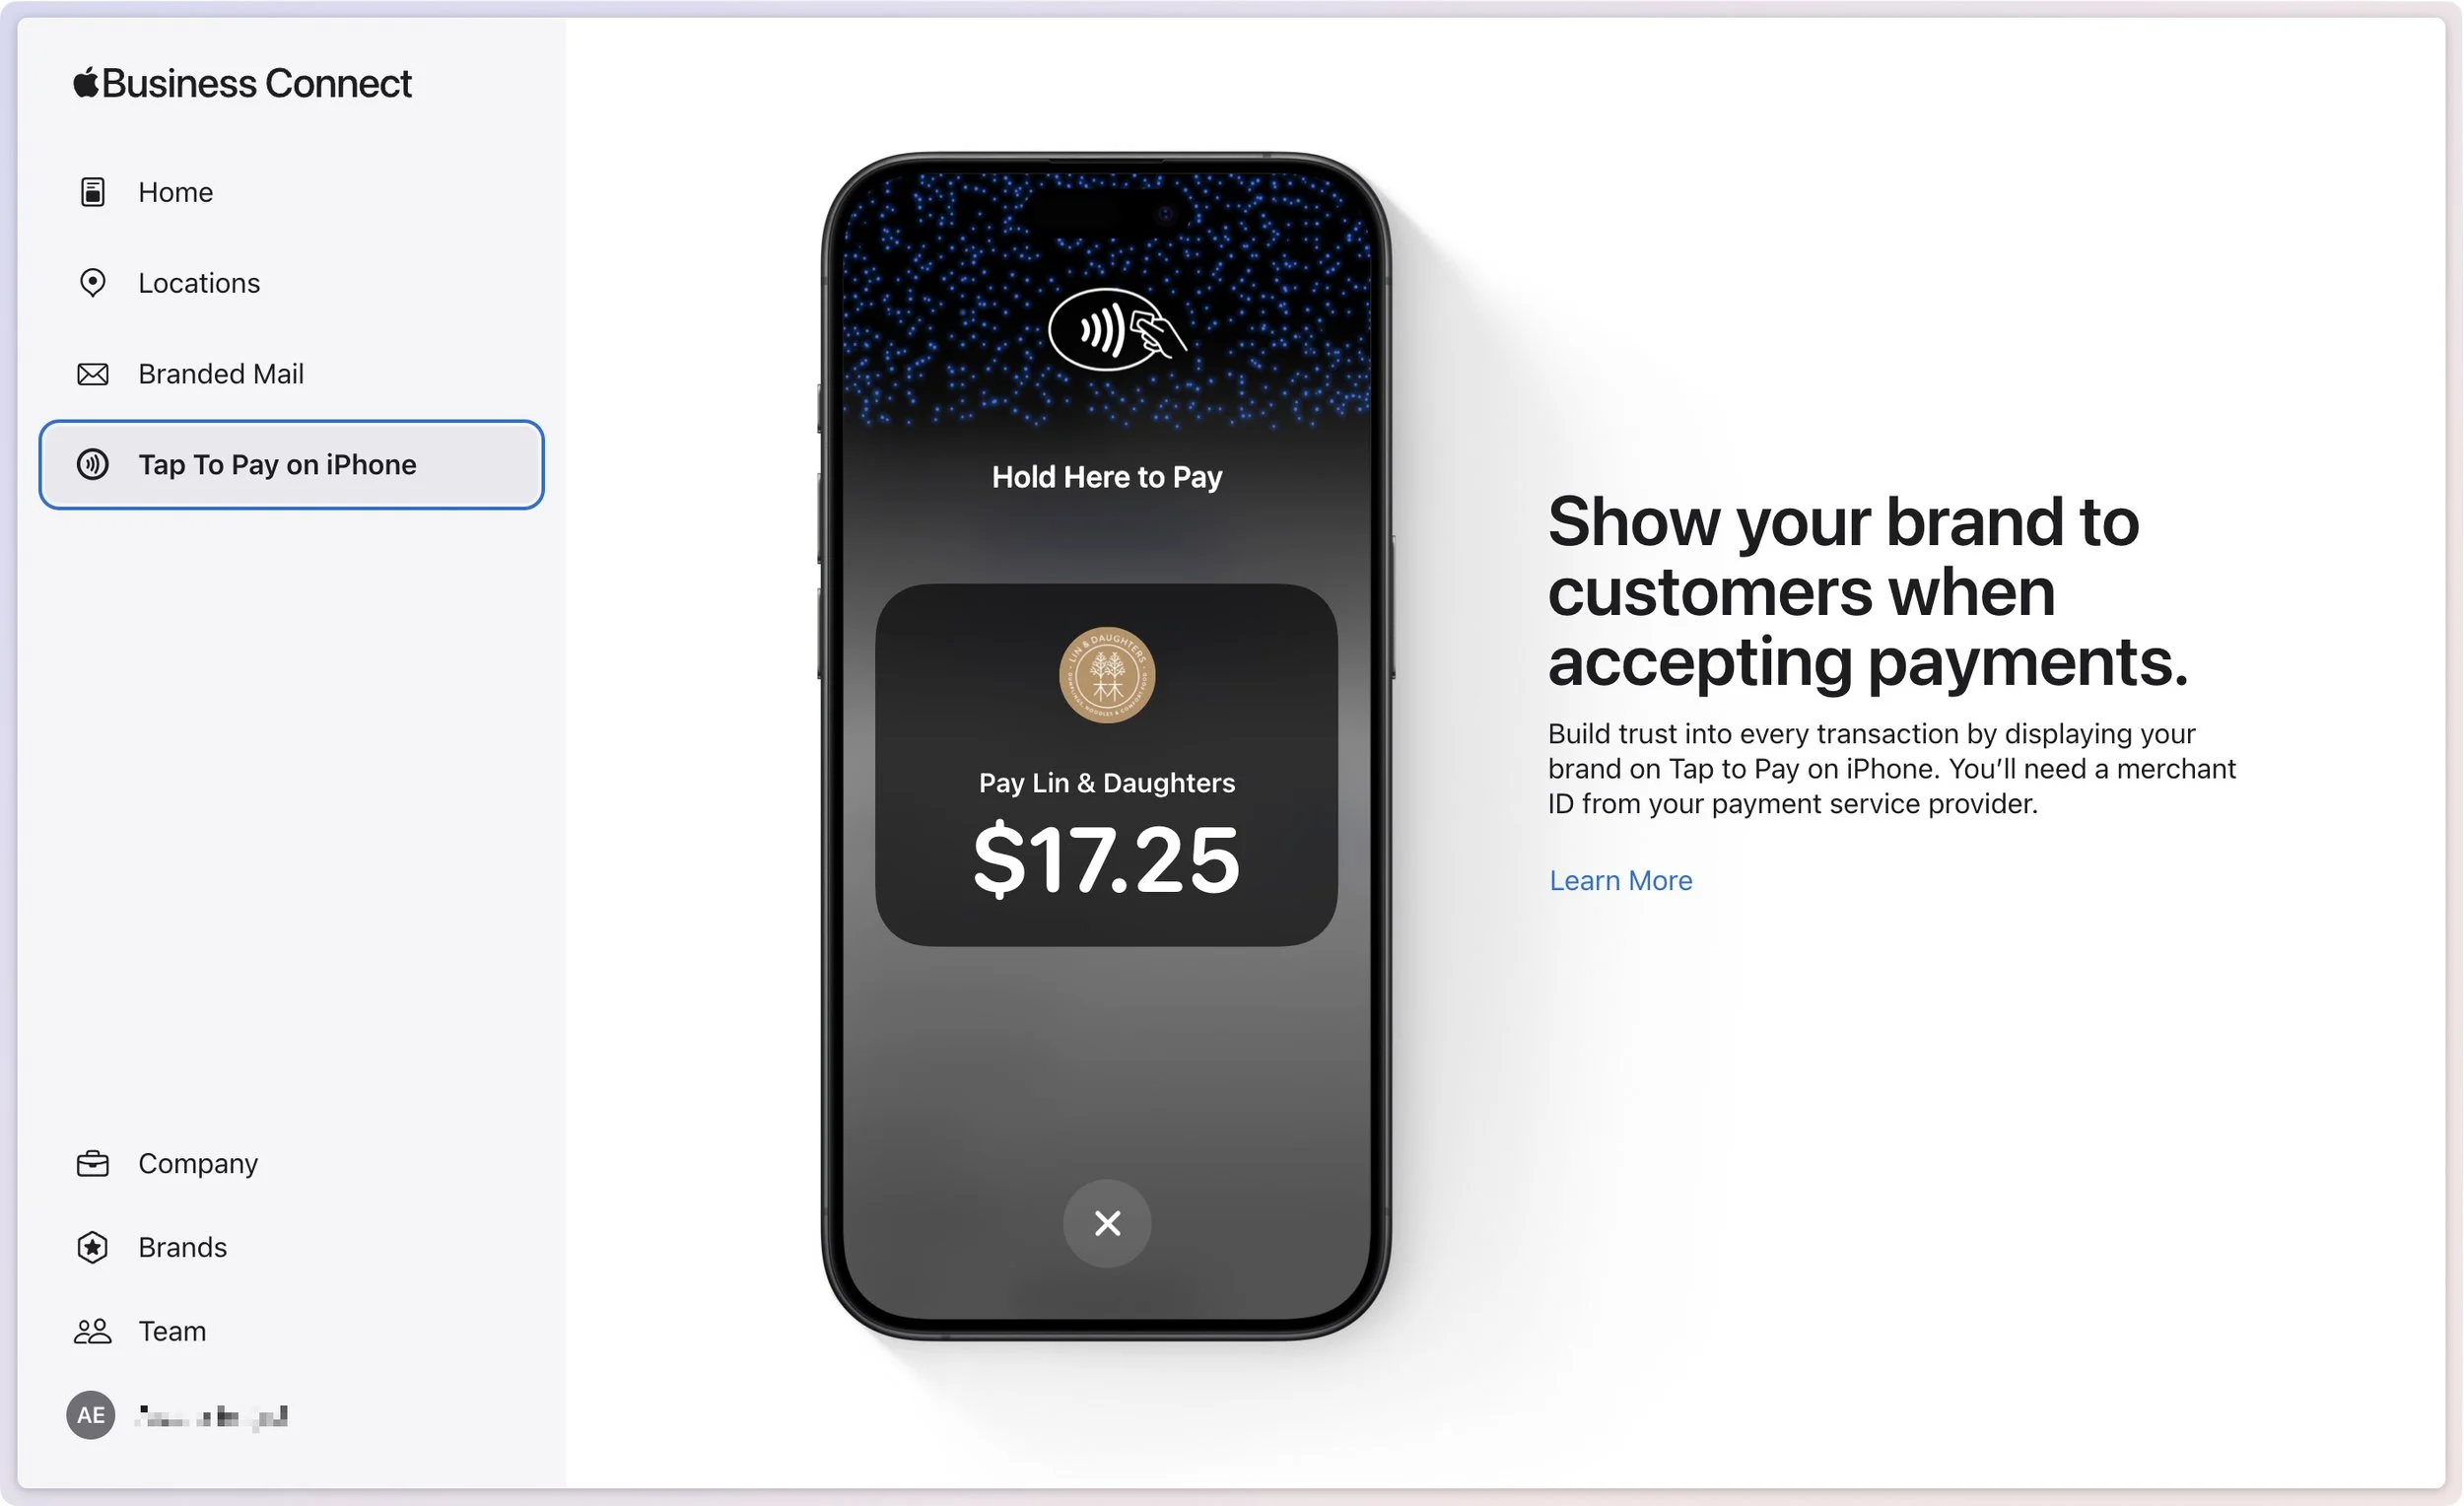
Add Tap to Pay on iPhone: For those who don’t already have a point-of-sale system, Tap to Pay on iPhone lets you accept contactless payments on an iPhone without an extra terminal or hardware.
Apple has also announced Business Caller ID, slated to ship in 2025, which will display your brand’s name, logo, and even a specific department when you call someone using an iPhone. That should help people realize that a call from your company is legitimate and not some telemarketer, making them more likely to pick up.
Getting started with Apple Business Connect is simple, but verification can take up to a week. It’s best to work through Apple’s clear documentation for registering your business, but the basics are:
Sign in with your Apple Account (use your Apple Business Manager account if you have one).
Enter your company details.
Set up a brand by giving its name, category, geographic location, and logo.
Turn on Branded Mail by adding a domain or email address, and verifying your company.
Add a location by specifying its address and hours.
Create a Place Card, add a Showcase, and create custom actions.
Needless to say, Apple Business Connect only impacts how you appear to people using Apple devices and apps. For everyone else, we recommend setting up a Google Business Profile, which provides similar features, though primarily for businesses with physical locations and upsells for advertising on Google.
However, it’s absolutely worth working with Apple Business Connect to enhance how you and your brand appear to customers. If you need help setting it up, contact us.
(Featured image based on an original by Apple)
You Can Now Migrate Purchases from One Apple Account to Another
After decades of users asking to be able to merge Apple Accounts, Apple has just published documentation on how to migrate purchases from one of your Apple Accounts to another. Hallelujah!

Ever since Apple launched the iTunes Store in 2003 with online accounts known as Apple IDs—now referred to as Apple Accounts—many users have ended up with multiple accounts. This situation arose partly because the early Apple IDs were tied to accounts users created with iTools and its successor, .Mac, which later evolved into MobileMe and then iCloud. Especially after Apple introduced the App Store in 2008, it was common for individuals with several Apple IDs to have their purchases scattered across different accounts.
Throughout that time, users have clamored to be able to merge accounts. Apple’s response was to let devices have a primary Apple Account for iCloud and other key features, plus another specifically for Media & Purchases. Others worked around the limitation by adding the second account to a Family Sharing group. That sufficed for most people but was never ideal, and we continue to field questions from people who want to merge the accounts.
It now appears that climate change has caused hell to freeze over, as Apple recently published three support articles detailing how to migrate apps, music, TV shows, books, and other digital purchases from one of your Apple Accounts to another:
Migrate purchases from one Apple Account to another Apple Account
Undo a migration of Apple Account purchases between accounts
It’s important to note that migrating purchases from a secondary account to a primary account is not exactly the same as merging them. iCloud data, account balances, and personalized recommendations in Apple’s media apps won’t transfer from the secondary account to the primary, nor will TestFlight betas for those who test apps for developers. Additionally, you will not be able to edit App Store reviews created with your secondary Apple Account after migration. The secondary account doesn’t go away, which also prevents certain other uses.
Normally, we’d tell you how to perform the migration, but because there are so many details and caveats, we recommend that you carefully read and follow Apple’s documentation linked above instead, especially since Apple may update it with new information as the feature gets more use. It explains:
Why you might want to migrate purchases
What happens when you migrate purchases
What doesn’t migrate with your purchases
What happens to your secondary account after migration
Who can migrate purchases
What to do before you migrate purchases
How to migrate purchases
What to do after migrating purchases
Why you might not be able to migrate purchases
What to do if you decide to undo a migration
How to undo a migration of purchases
What happens if you undo a migration of purchases
What to do after you undo a migration of purchases
We’re happy to walk you through a migration, but if you can’t migrate purchases, you should call Apple Support. The list of reasons why a migration may not work is long and technical, and Apple Support may have access to internal data that will explain the problem.
If you have long chafed at having to maintain multiple Apple Accounts because of a decision you made many years ago, now’s your chance to clean up the mess. Good luck!
(Featured image based on an original by iStock.com/metamorworks)
New M4 MacBook Air Features Faster Performance and Improved Video Calls
Apple has updated the MacBook Air with an M4 chip and higher memory ceiling for added performance, a 12-megapixel Center Stage camera for better video calls, and enhanced multi-display support for greater productivity. And it’s $100 less.
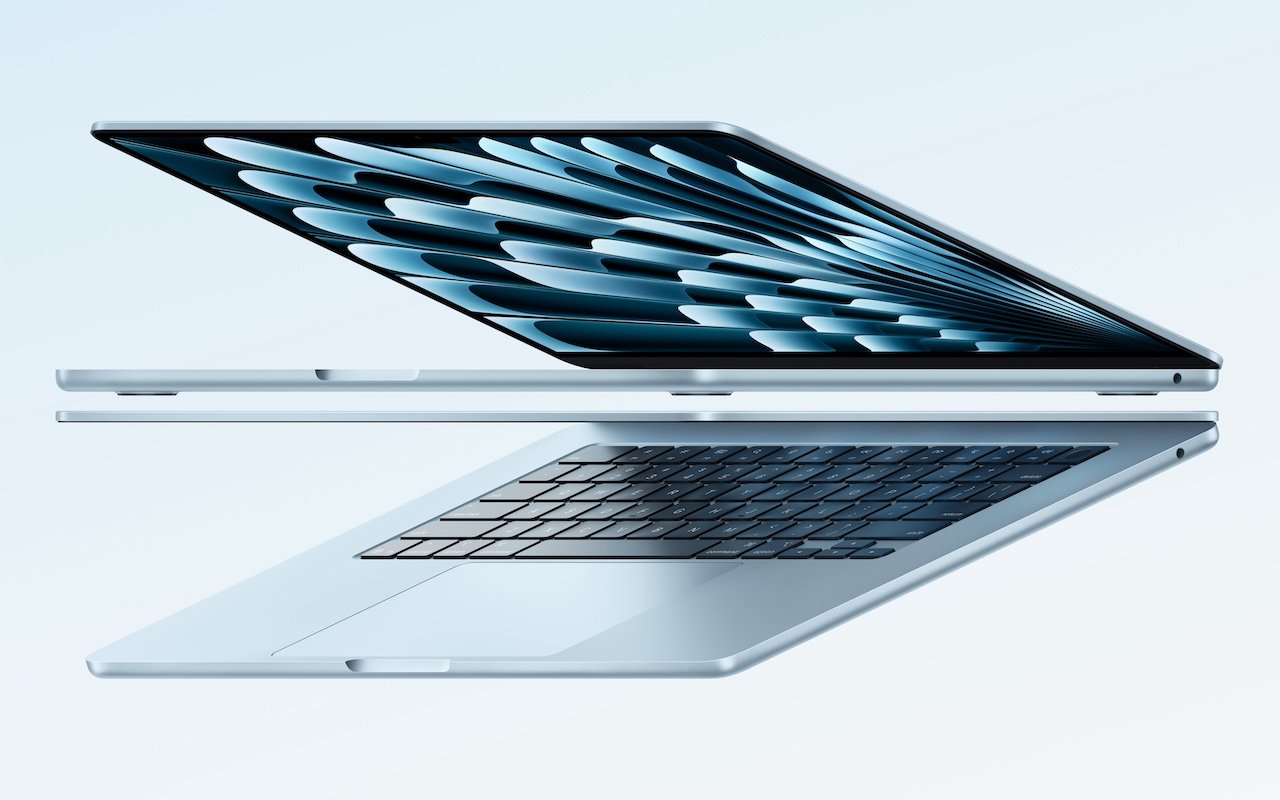
Apple has unveiled an update to the MacBook Air, which it touts as the world’s most popular laptop. While the MacBook Air has long been a compelling option for many consumers, the new 13-inch and 15-inch M4 MacBook Air models improve performance, boast a new 12-megapixel Center Stage camera, and fully support two external displays, making them even more appealing.
Adding to that appeal is a $100 price drop that brings the starting price back to $999 after Apple raised it several years ago. In concert with the return to the lower starting price, the company dropped the M2 MacBook Air and M3 MacBook Air from the official price list, though refurbished units remain available temporarily for discounted prices.
The jump from the M3 to the M4 increases performance, though Apple doesn’t say by how much. Independent benchmarks suggest that it may be about 20% faster. What’s more important for those considering an upgrade is that the M4 MacBook Air is up to twice as fast as the M1 MacBook Air and a whopping 23 times faster than the fastest Intel-based MacBook Air.
The base level of the M4 MacBook Air now comes with 16 GB of unified memory, up from 8 GB. This increase is partly aimed at enhancing Apple Intelligence performance. It also reduces the necessity for many users to consider upgrading, which we had previously recommended. For most people, 16 GB is sufficient, but for optimal multitasking performance and to future-proof your investment, consider upgrading to 24 GB. Only those with demanding workflows will need the new maximum of 32 GB, and in such cases, it may be worthwhile to consider a 14-inch MacBook Pro.
Apple also significantly improved video calls by swapping the MacBook Air’s previous 1080p FaceTime HD camera for the 12-megapixel Center Stage camera. As you move around during a call, Center Stage zooms and pans to keep you in the frame. Not having to stay stationary during calls can make a day with too many virtual meetings less exhausting. The camera also supports Desk View, which lets you show off items below the camera, essentially on top of the keyboard. It’s a niche feature, but one that some people find useful.
The final improvement in the M4 MacBook Air is subtle but may be compelling for some users. The M1 MacBook Air and M2 MacBook Air could drive a single external display in addition to the built-in screen, and the M3 MacBook Air supported two external displays at once, but only if you closed the lid and used an external keyboard and trackpad. With the M4 MacBook Air, you can now connect two external displays while keeping the lid open, which gives you three screens and lets you use the built-in keyboard and trackpad. Increasing screen space boosts productivity by allowing you to see more on-screen at once, so we recommend you give multiple displays a try.

The new M4 MacBook Air comes in four colors: silver, starlight, midnight, and a new sky blue that replaces the previous space gray. The 13-inch model starts at $999, and the 15-inch model at $1,199. Memory upgrades include 24 GB for $200 or 32 GB for $400, and storage options beyond the base 256 GB carry the usual price premiums: 512 GB for $200, 1 TB for $400, and 2 TB for $800.
Put simply, the M4 MacBook Air is impressive. It boasts serious power in a svelte, lightweight package that makes very few compromises. It’s equally at home on the road as a laptop or at a desk connected to external displays, making it the perfect Mac for nearly any student and many average Mac users. Only those who require significant processing power or prefer a desktop Mac need to look at the Mac mini or MacBook Pro.
(Featured image by Apple)
In Times of Uncertainty, Increase Your Digital Privacy and Security
If world events have you worried about your online privacy and security, you may be interested in minimizing your exposure. We recommend some simple steps that everyone can take and other actions for those who are especially concerned.
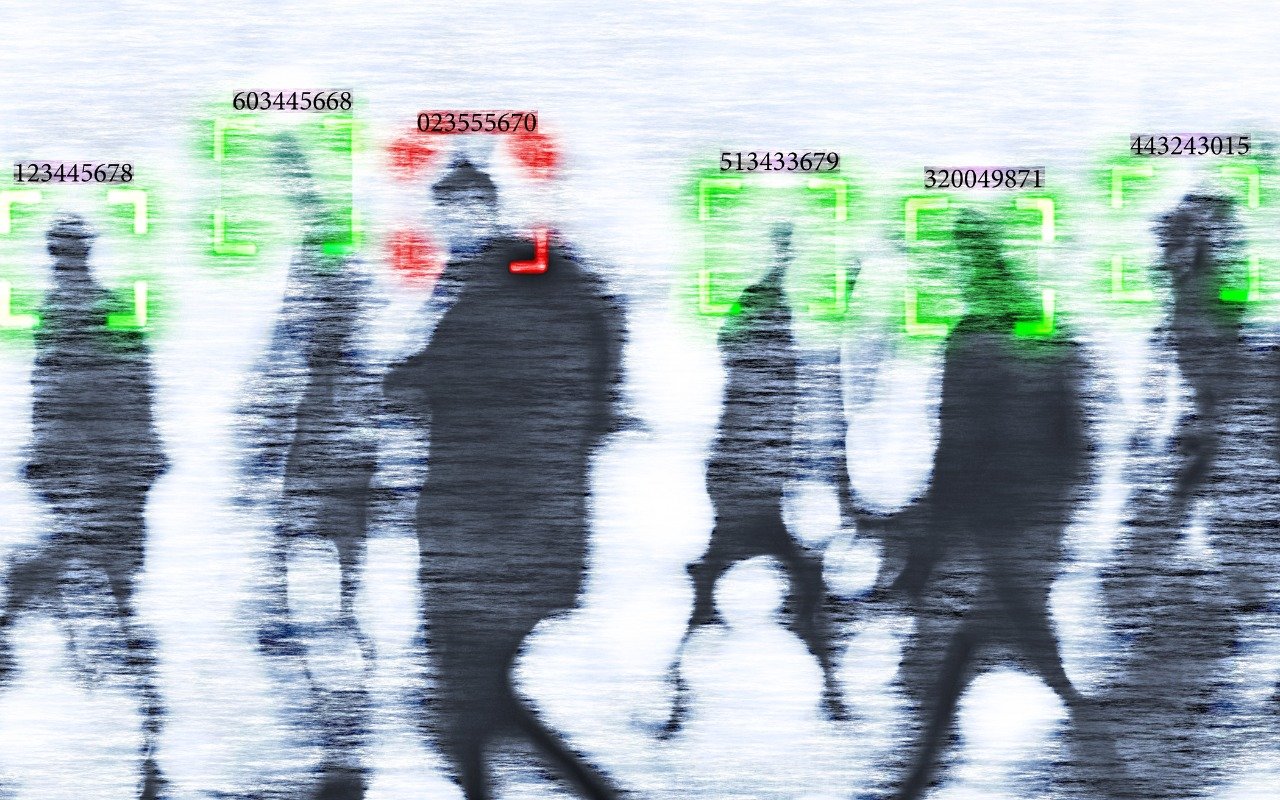
With so many troubling things happening in the world, some clients have inquired about ways to enhance their security. While we don’t want to encourage paranoia, there are many legitimate threats, and everyone will have their own levels of worry about each one.
The effort and inconvenience that different people are willing to endure also vary. Higher levels of security often necessitate significant effort and inconvenience. We have divided our list of suggestions—roughly organized from easiest to hardest—into two sections: actions we believe everyone should take and security measures mainly for those most concerned and willing to tolerate some fuss.
Before we delve into the details, it is important to remember that privacy and security are not the same thing. Privacy refers to the proper collection, use, and governance of personal data. Security, conversely, is concerned with protecting data from unauthorized access and malicious threats. It entails defending data against external dangers, while privacy ensures that the management and use of that data adhere to agreed-upon standards.
Security Improvements for Everyone
These actions are generally beneficial for most users. They don’t require much technical knowledge and can often be accomplished with easily accessible tools and settings:
Keep apps and operating systems up to date: Nearly every operating system update from Apple addresses numerous security vulnerabilities, and the same is often true for major apps. Always ensure you’re running current versions to take advantage of all those security improvements.
Enable FileVault: While all data on the internal SSDs of Macs with Apple silicon and Intel-based Macs with the T2 chip is automatically encrypted to prevent unauthorized access if the SSD is removed, it is automatically decrypted whenever the Mac boots, even before you log in. To link decryption to your user account, which makes your login password necessary to decrypt all data, enable FileVault in System Settings > Privacy & Security > FileVault. There are essentially no drawbacks.
Improve your passcode: For nearly a decade, it has been easy to set a six-digit passcode on the iPhone and iPad, greatly enhancing security compared to the previous standard four-digit passcode (1 million possible combinations versus only 10,000). If you still use four digits, consider switching to six digits, a custom number of digits, or a custom alphanumeric passcode in Settings > Face ID/Touch ID & Passcode > Change Passcode > Passcode Options. Alphanumeric passcodes offer the highest level of security but are more challenging to type.
Turn on biometric authentication and Stolen Device Protection: If you aren’t already using Face ID or Touch ID on your iPhone or iPad, that’s a mistake. Both provide significantly stronger security than repeatedly entering your passcode, which could be observed. Turn on biometric authentication and Apple’s Stolen Device Protection in Settings > Face/Touch ID & Passcode.
Adopt strong password habits: If security matters at all to you, you must use a strong, unique password for each online account and never reuse a password. It’s easy and secure as long as you create and store passwords with a password manager like Apple’s Passwords or 1Password.
Enable MFA whenever it’s available: Multi-factor authentication greatly enhances security, safeguarding you even if your password is compromised in a breach. It typically requires entering a six-digit code that you retrieve from an app or receive via text message. Apple’s Passwords and 1Password can both automatically enter MFA codes for many websites.
Use an ad blocker: Much of today’s surveillance society relies on ads to track you. Anything you can do to block ads will enhance your privacy, so use ad blockers whenever possible. Highly regarded options include 1Blocker, AdGuard, NextDNS, and uBlock Origin.
Enable privacy and security features in Web browsers: Safari can prevent cross-site tracking and hide your IP address, along with other privacy and security features. In Safari > Settings, review all the options in the Privacy and Security screens and enable those that are appropriate. (Keep cookies and JavaScript enabled; many sites won’t function properly without them.) If you don’t use Safari, choose Brave or Firefox instead of Google Chrome.
Utilize secure DNS services: To enhance browsing privacy and protect against DNS leaks, configure your devices to use a privacy-focused DNS service like Cloudflare’s 1.1.1.1 or Quad9’s 9.9.9.9.
Minimize app exposure: Be vigilant about iPhone or iPad apps that might be sharing information about you with data brokers without your knowledge. Specifically:
Turn off Settings > Privacy & Security > Tracking > Allow Apps to Request to Track.
Rescind location tracking permissions for all apps except those that require it, such as navigation or weather apps, in Settings > Privacy & Security > Location Services.
Delete apps you’re not using to prevent them from spying on you.
Security Improvements for the Particularly Concerned
Implementing these actions may require extra steps, specialized knowledge, or significant changes in habits. They’re primarily for those with heightened concerns or those at greater risk, such as journalists, activists, and individuals handling sensitive data:
Use independent search engines: Google and Microsoft are known for collecting information about their users. To keep your searches private, use a search engine that prioritizes privacy, such as DuckDuckGo, Brave Search, Kagi, or Startpage.
Protect network traffic: While we used to recommend ensuring you were using secure HTTP (HTTPS) connections, that’s now the bare minimum. For greater privacy while browsing the Web with Safari, turn on iCloud Private Relay in Settings/System Settings > Your Name > iCloud > Private Relay. (This requires an iCloud+ subscription and won't encrypt traffic from most non-Apple apps.) More broadly, you can safeguard all your traffic by using a trusted VPN service like Mullvad VPN, NordVPN, or ProtonVPN.
Activate Advanced Data Protection: End-to-end encryption (E2EE) keeps your online data private from everyone, including cloud providers. However, it requires you to manage your encryption keys, which means no one can help recover your data if you lose those keys. You can enable E2EE with Apple services using Advanced Data Protection; turn it on in Settings/System Settings > Your Name > iCloud > Advanced Data Protection.
Use encrypted messaging: The iMessage system used by Apple’s Messages app for blue bubble conversations is highly secure, particularly with Advanced Data Protection enabled. However, for the most secure messaging with E2EE, look to Signal. While WhatsApp also offers E2EE, its backups might not be encrypted, and its parent company, Meta, is one of the most egregious privacy abusers on the planet.
Regularly review and revoke permissions: Periodically check and manage app permissions on your device to ensure that no apps have unnecessary access to sensitive information, such as your contacts or location. Work through the options in Settings/System Settings > Privacy & Security and revoke permissions for anything that seems inappropriate. Apps that require additional permissions will always prompt you again.
Encrypt cloud-stored data: To ensure that cloud storage services like Box, Dropbox, Google Drive, and OneDrive cannot read your data, use the free and open source Cryptomator to encrypt it first.
Use encrypted email: While it’s impossible to ensure that email will remain private because you can’t control your recipients’ actions, the most privacy-focused email services are ProtonMail and Tuta Mail. They employ E2EE for emails sent to other users of the same service and allow the encryption of email messages sent to any external recipient.
Reduce reliance on cloud services: If you have general concerns about cloud services, consider exploring peer-to-peer alternatives that remove the need for a central provider. You can find peer-to-peer solutions for file storage, file sharing, chat and messaging, videoconferencing, collaborative documents, cloud-based notes, and more.
Avoid social media: Posting on social media, especially on platforms owned by large corporations, allows those companies to create a comprehensive profile of you that is shared with advertisers and is vulnerable to data breaches. Further, any information you disclose about yourself could be exploited by hackers in social engineering attacks targeting your accounts. Consider replacing social media with independent forums devoted to your interests and private messaging spaces for friends and family.
Ultimately, enhancing privacy and security is your responsibility. Apple and other companies may offer tools to assist, but it’s up to you to implement them and stay vigilant against new threats. We’re also happy to provide advice and assistance.
(Featured image by iStock.com/andreusK)
Never Save Your Work in These Locations
We won’t name names, but we’ve seen too many people saving important data in locations that are likely or even guaranteed to disappear. Here’s a list of places to avoid and another of spots that warrant caution.
In every job that involves interaction with the public, amusing “Can you believe…” stories about customers abound. They’re often triggered by seemingly reasonable behaviors that experts recognize as problematic. A well-known example from the early days of personal computing is a college student who kept track of his floppy disk by attaching it to his fridge with a magnet, not realizing that magnetic fields could disrupt the disk’s magnetic patterns and corrupt files. The advice from tech support? “Don’t do that.”
No one is sticking floppies to their fridge anymore, but we still occasionally see the modern equivalent: saving data or documents in places that are likely to disappear. Just as you shouldn’t write the only copy of essential information on an easily erased whiteboard, you shouldn’t store important data in any of these locations:
Unsaved documents: While autosave is becoming more common, it isn’t universal and often doesn’t activate until a document has been saved for the first time. When you create a new document, always save it right away, before you do anything else. Otherwise, you risk losing all your work if the app crashes, the Mac kernel panics, or the power goes out.
Trash: We know, we know! Who would put something in the Trash that they want to keep? But it happens. Don’t do that! On the other hand, there’s also no reason to empty your Trash regularly unless you’re low on space. A good compromise is to choose Finder > Settings > Advanced and select “Remove items from the Trash after 30 days.” This way, you’ll always have a 30-day grace period to recover mistakenly deleted items.
Clipboard: Most people know that the clipboard serves as a temporary holding place, overwritten with each new Copy or Cut. However, if you’re unaware of this, you might write something lengthy, use Cut to place it on the clipboard with the intention of pasting it elsewhere, and then forget to do so right away, resulting in data loss on the next use of Copy or Cut. Always paste anything you cut immediately. Many utilities (such as Copy ‘Em, Keyboard Maestro, LaunchBar, Pastebot, and Raycast) provide clipboard history so you don’t lose clipboard data immediately, but you still shouldn’t rely on it persisting indefinitely.
Email Drafts mailbox: There’s nothing wrong with starting an email and coming back to it later to finish—that’s the point of the Drafts mailbox. It’s also a sensible way to begin a message on one device and complete it on another. However, avoid storing anything in Drafts for an extended period, and be aware that items there may disappear without warning. (And never, ever store anything in your email Trash mailbox—it will be deleted eventually.)
Temporary folders: Thanks to its Unix roots, macOS includes several temporary folders, one located at /tmp and others specific to each user. These folders are cleared regularly, such as when the Mac is restarted, left idle for a long time, or when drive space is low. Storing important data in a temporary folder is a digital version of Russian roulette.
Downloads folder: Although the Downloads folder isn’t inherently volatile, it’s unwise to store anything important there. You might forget about that document while tidying up and accidentally delete it, or you might use a cleanup tool in the future that does it for you.
USB flash drives: There is nothing wrong with putting files on a USB flash drive. However, avoid storing the only copy of an important file on one, as it is too easy for the drive to be lost or damaged.
Public computers, virtual machines, and sandboxed environments: This scenario is unlikely but not impossible. Imagine you’re working on a public computer in a lab and save a file on the desktop. When that computer reboots, it will likely delete all data to return to a fresh state for the next user. The same could apply to a virtual machine used for testing or a sandboxed environment that you log in to remotely.
There are also a few locations that generally aren’t problematic but deserve extra attention due to the higher likelihood of losing data:
Third-party app folders in ~/Library: Some apps store their data in folders they maintain within your user account’s Library folder. While this is acceptable for data managed by those apps, we advise against putting anything else in these folders since it’s impossible to know how the app might deal with data it doesn’t recognize during a cleanup or major update.
Desktop: It’s fine to work on documents stored on the desktop, but we recommend filing them away carefully when you’re finished. If you frequently move files in and out of your desktop, it’s all too easy to delete something important accidentally. Additionally, if you have iCloud Drive’s Desktop & Documents folder syncing enabled, you might unintentionally delete files from another Mac due to being in a different context.
Box, Dropbox, Google Drive, iCloud Drive: Cloud storage services are entirely acceptable locations for important data, but they all offer options that store files only online, downloading them only when necessary. These options may prevent online-only files from being accessible when you’re offline or from being backed up locally. Worse, if you share cloud storage with others for collaboration, they could accidentally delete your data. Be sure to enable any available version history options and ensure everything is backed up locally.
External drives or network storage: Many individuals and organizations store essential files and data on external drives and network storage. This approach is perfectly valid, provided that these locations are backed up. When designing your backup system, remember to include your external drives, network servers, and NAS devices. Lastly, if an external drive is encrypted, ensure that you have a backup of both its data and the decryption key.
If you want to avoid all these issues, save your files in your Documents folder and make sure you have a solid backup strategy.
(Featured image based on an original by iStock.com/shutjane)
How (and Why) to Use iPhone Mirroring on Your Mac
The new iPhone Mirroring app in macOS 15 Sequoia lets you use your iPhone running iOS 18 in a window on your Mac. It’s a welcome feature that offers the possibility of increased productivity and fewer distractions.
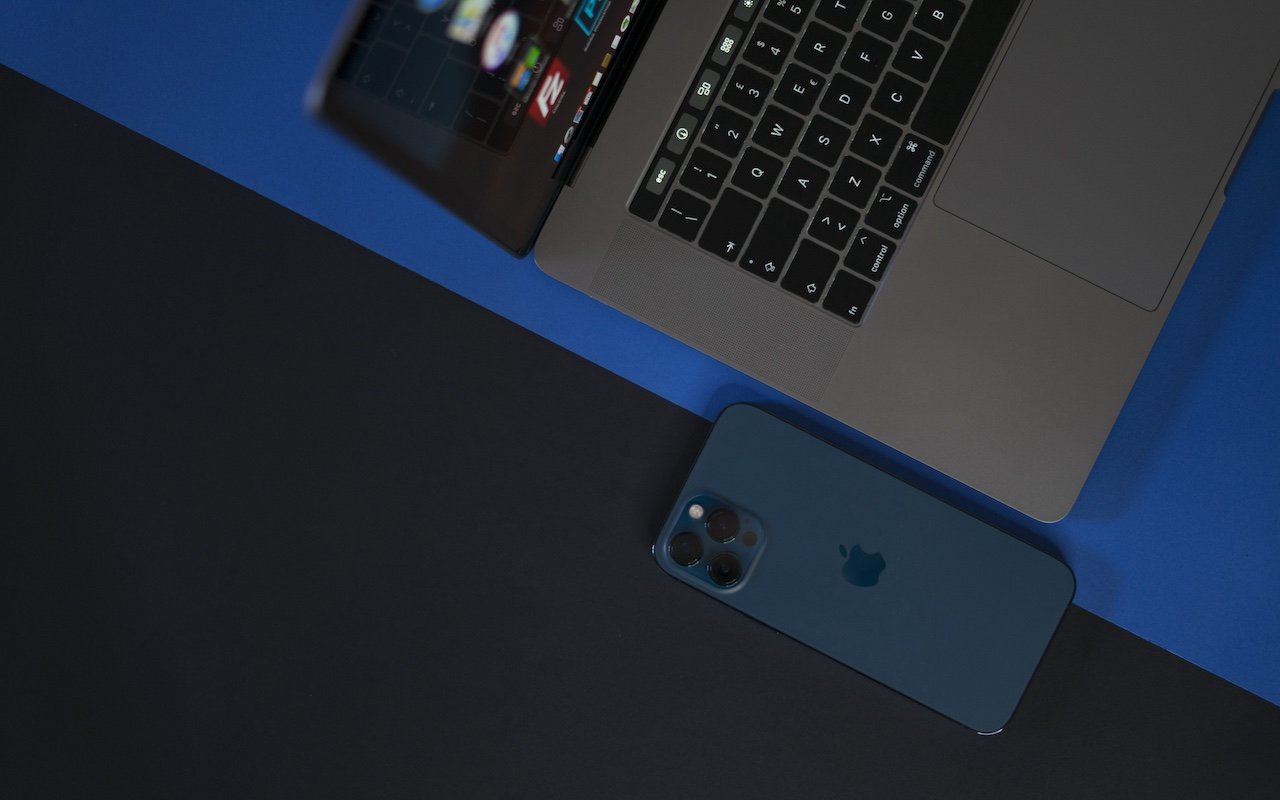
One of the flashiest features of macOS 15 Sequoia and iOS 18 is iPhone Mirroring, which allows you to use your iPhone in a window on your Mac. You might think, “But I can just pull my iPhone out of my pocket if I need to use it!” While that may be true, not everyone has their iPhone so readily accessible, even if it’s close by.
iPhone Mirroring Benefits
iPhone Mirroring provides a handful of benefits, including:
Centralized notification management: Once you’ve set up iPhone Mirroring, notifications from your iPhone can also appear on your Mac, ensuring you stay informed while maintaining focus on your work.
Increased productivity with a keyboard: Typing on a physical keyboard is faster and more efficient than using the iPhone’s virtual keyboard, making iPhone Mirroring a helpful tool for entering and editing lengthy texts.
Reduced physical distractions: Keeping your iPhone out of sight helps you avoid being distracted by it. With iPhone Mirroring, you can access important apps and notifications without letting the physical iPhone capture your attention.
Simplified file transfer: Certain apps allow file transfer between the iPhone and Mac using a straightforward drag-and-drop method.
Access to iPhone-only apps on the Mac: Many apps are available only for iOS, and iPhone Mirroring lets you interact with them directly from your Mac, removing the need to switch devices.
iPhone Mirroring Requirements
A few requirements must be met before you can begin using iPhone Mirroring:
Your iPhone must have iOS 18 or later, and your Mac needs macOS 15 Sequoia or later.
Both devices must have Wi-Fi and Bluetooth turned on.
The devices should be in close proximity and signed into the same Apple Account.
Handoff must be enabled for the iPhone in Settings > General > AirPlay & Continuity and on the Mac in System Settings > General > AirDrop & Handoff.
Mac App Limitations
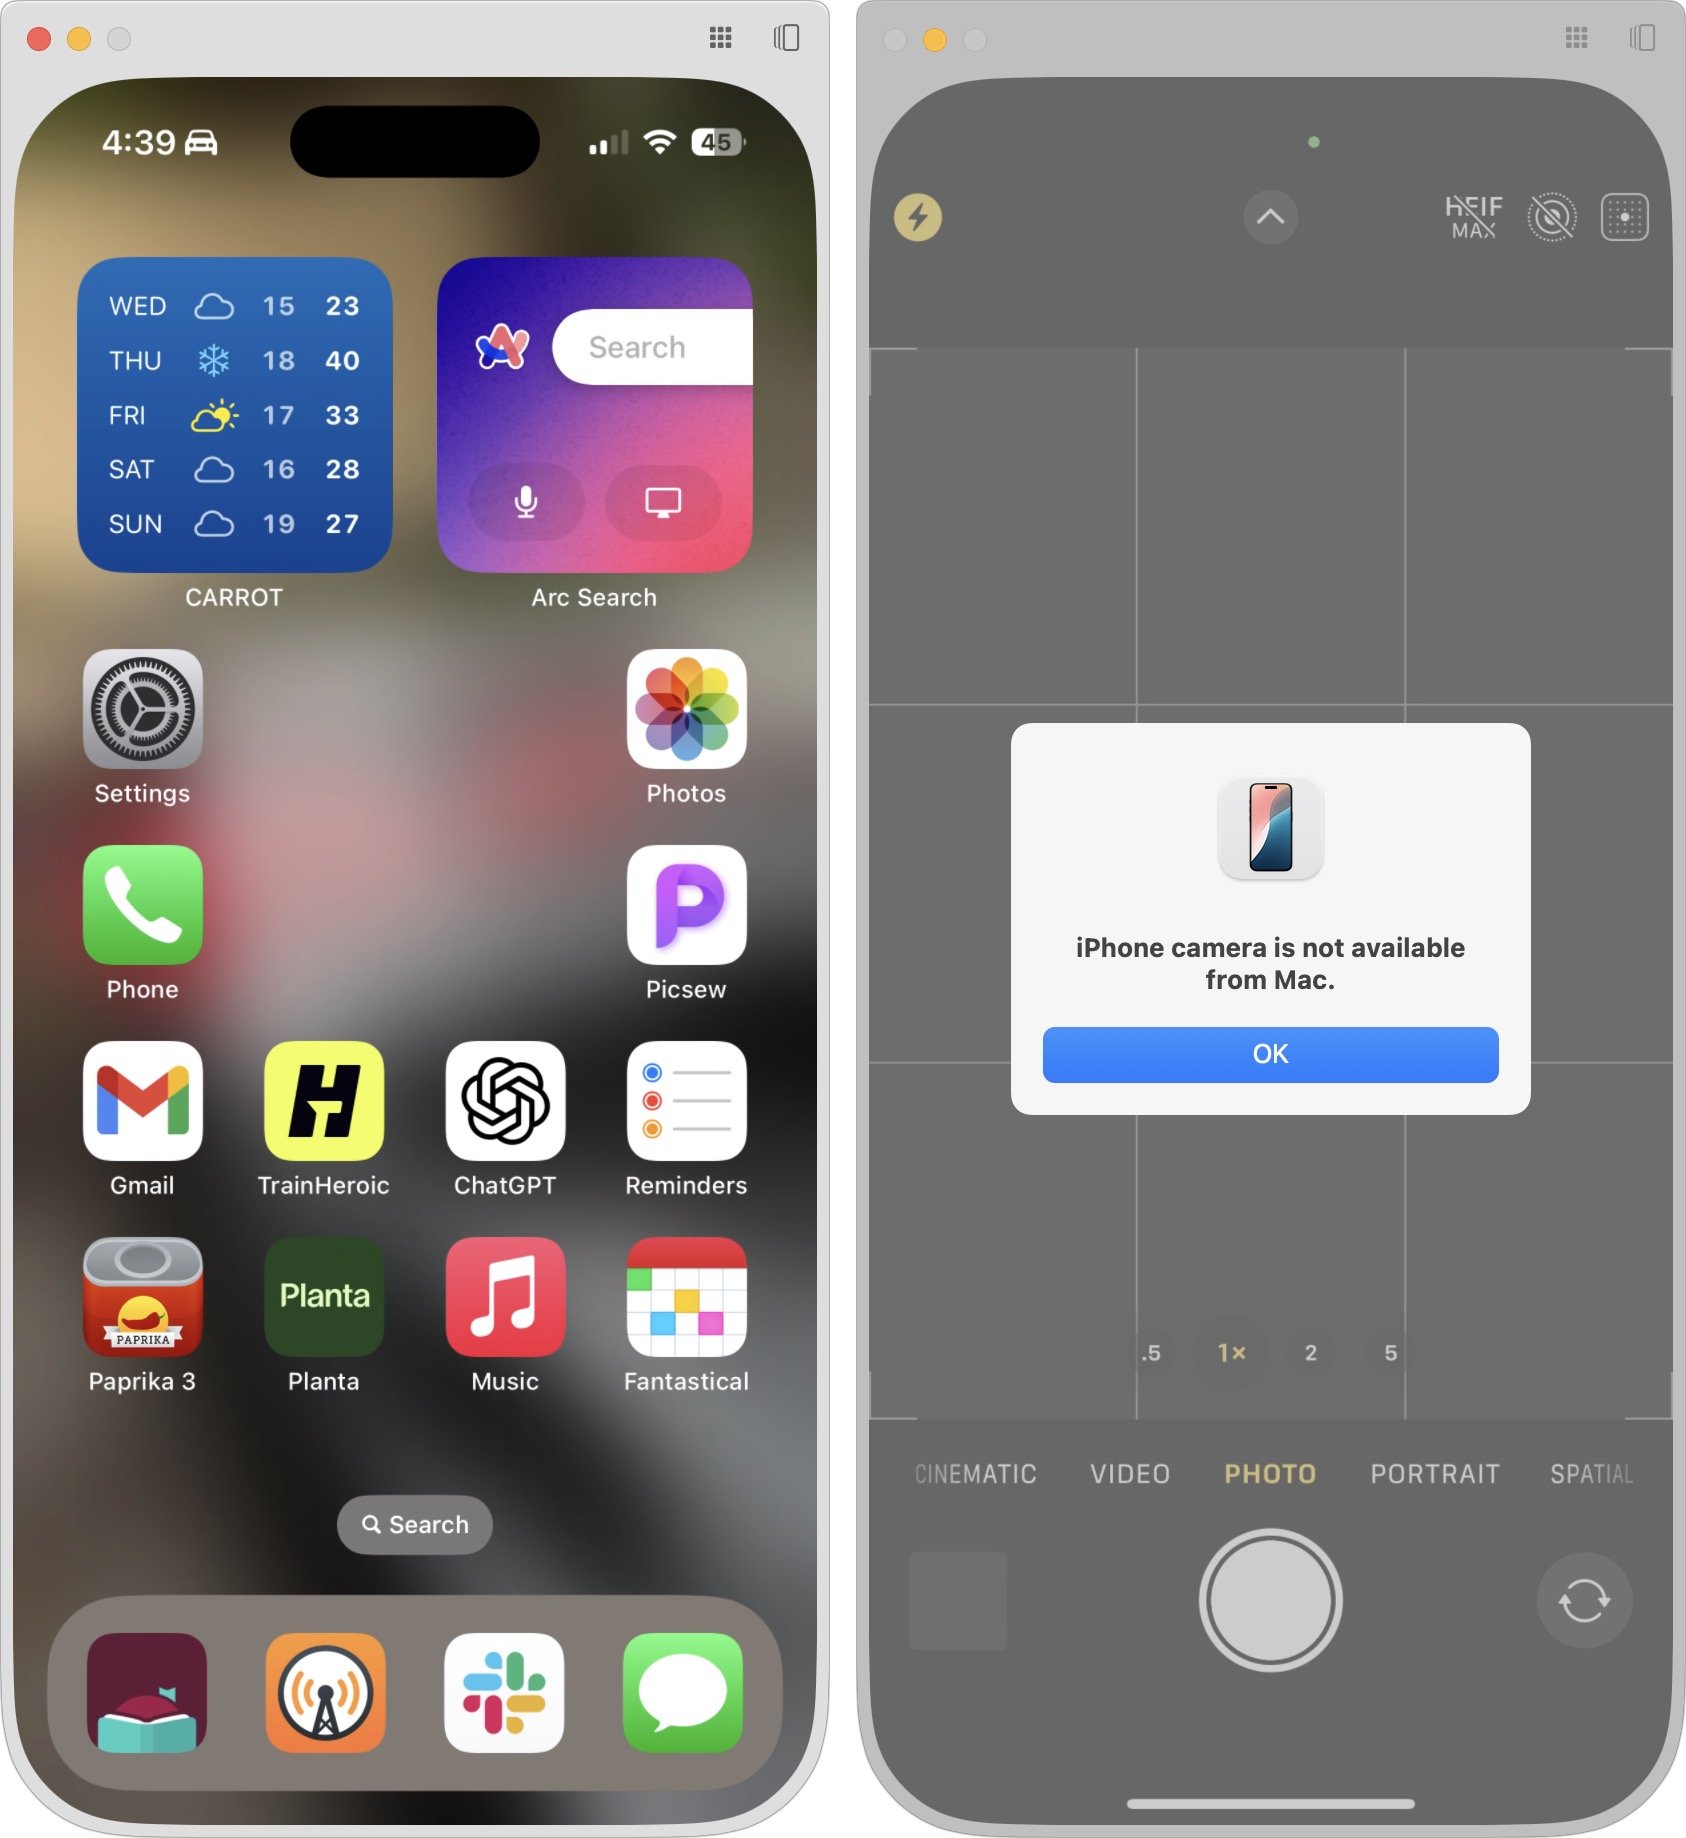
Once everything is set up correctly, launch the iPhone Mirroring app on your Mac. A few splash screens explain the basics during the first launch, and afterward, your iPhone will appear in a window. You can move it anywhere you wish and treat it like any other Mac app, with one notable exception—resizing. It does not have a green zoom button, and you cannot resize it by dragging the window edge, but it does offer three size options you can choose from the View menu.
iPhone Hardware Limitations
Using iOS and iPhone apps works pretty much as you’d expect, but there are some limitations. Notably, the iPhone camera and microphone aren’t available, although audio from the iPhone plays through the Mac. Face ID and Touch ID are also not accessible for obvious reasons, which may block access to apps and features protected by biometric authentication. There’s no way to access Notification Center or Control Center, nor to switch apps by swiping the Home indicator—presumably because those three swipes are special due to being at the edge of the iPhone screen. You cannot access the Lock Screen or perform any action that requires a physical button. Finally, you can use only one Continuity feature at a time, so other Continuity features like Universal Clipboard and AirDrop won’t function while you are using iPhone Mirroring.
Core iPhone Interactions
You’ll pick up the basic iPhone interactions quickly. Clicking is like tapping, Control-click acts like touch-and-hold, and swiping on a trackpad behaves like swiping on the iPhone screen. If your Mac has a mouse without swipe gestures instead of a trackpad, click and drag to swipe or use a scroll wheel (hold Shift to scroll horizontally with a scroll wheel). Buttons in the iPhone Mirroring window’s title bar take you back to the Home Screen and open the App Switcher—those actions involve swipes that would be difficult or impossible. Even easier are the keyboard shortcuts in the View menu for Home Screen (Command-1), App Switcher (Command-2), and Spotlight (Command-3).
File Transfer
Although the lack of Universal Clipboard prevents copying between your Mac and a mirrored iPhone, you can transfer files from apps that support it, like Files and Photos. Simply drag and drop between the Mac and the iPhone Mirroring app in either direction. With Files and Photos, it’s usually easier to use iCloud Drive in the Finder and the Mac version of Photos, but other apps may not be as well integrated.
Ending and Restarting Mirroring
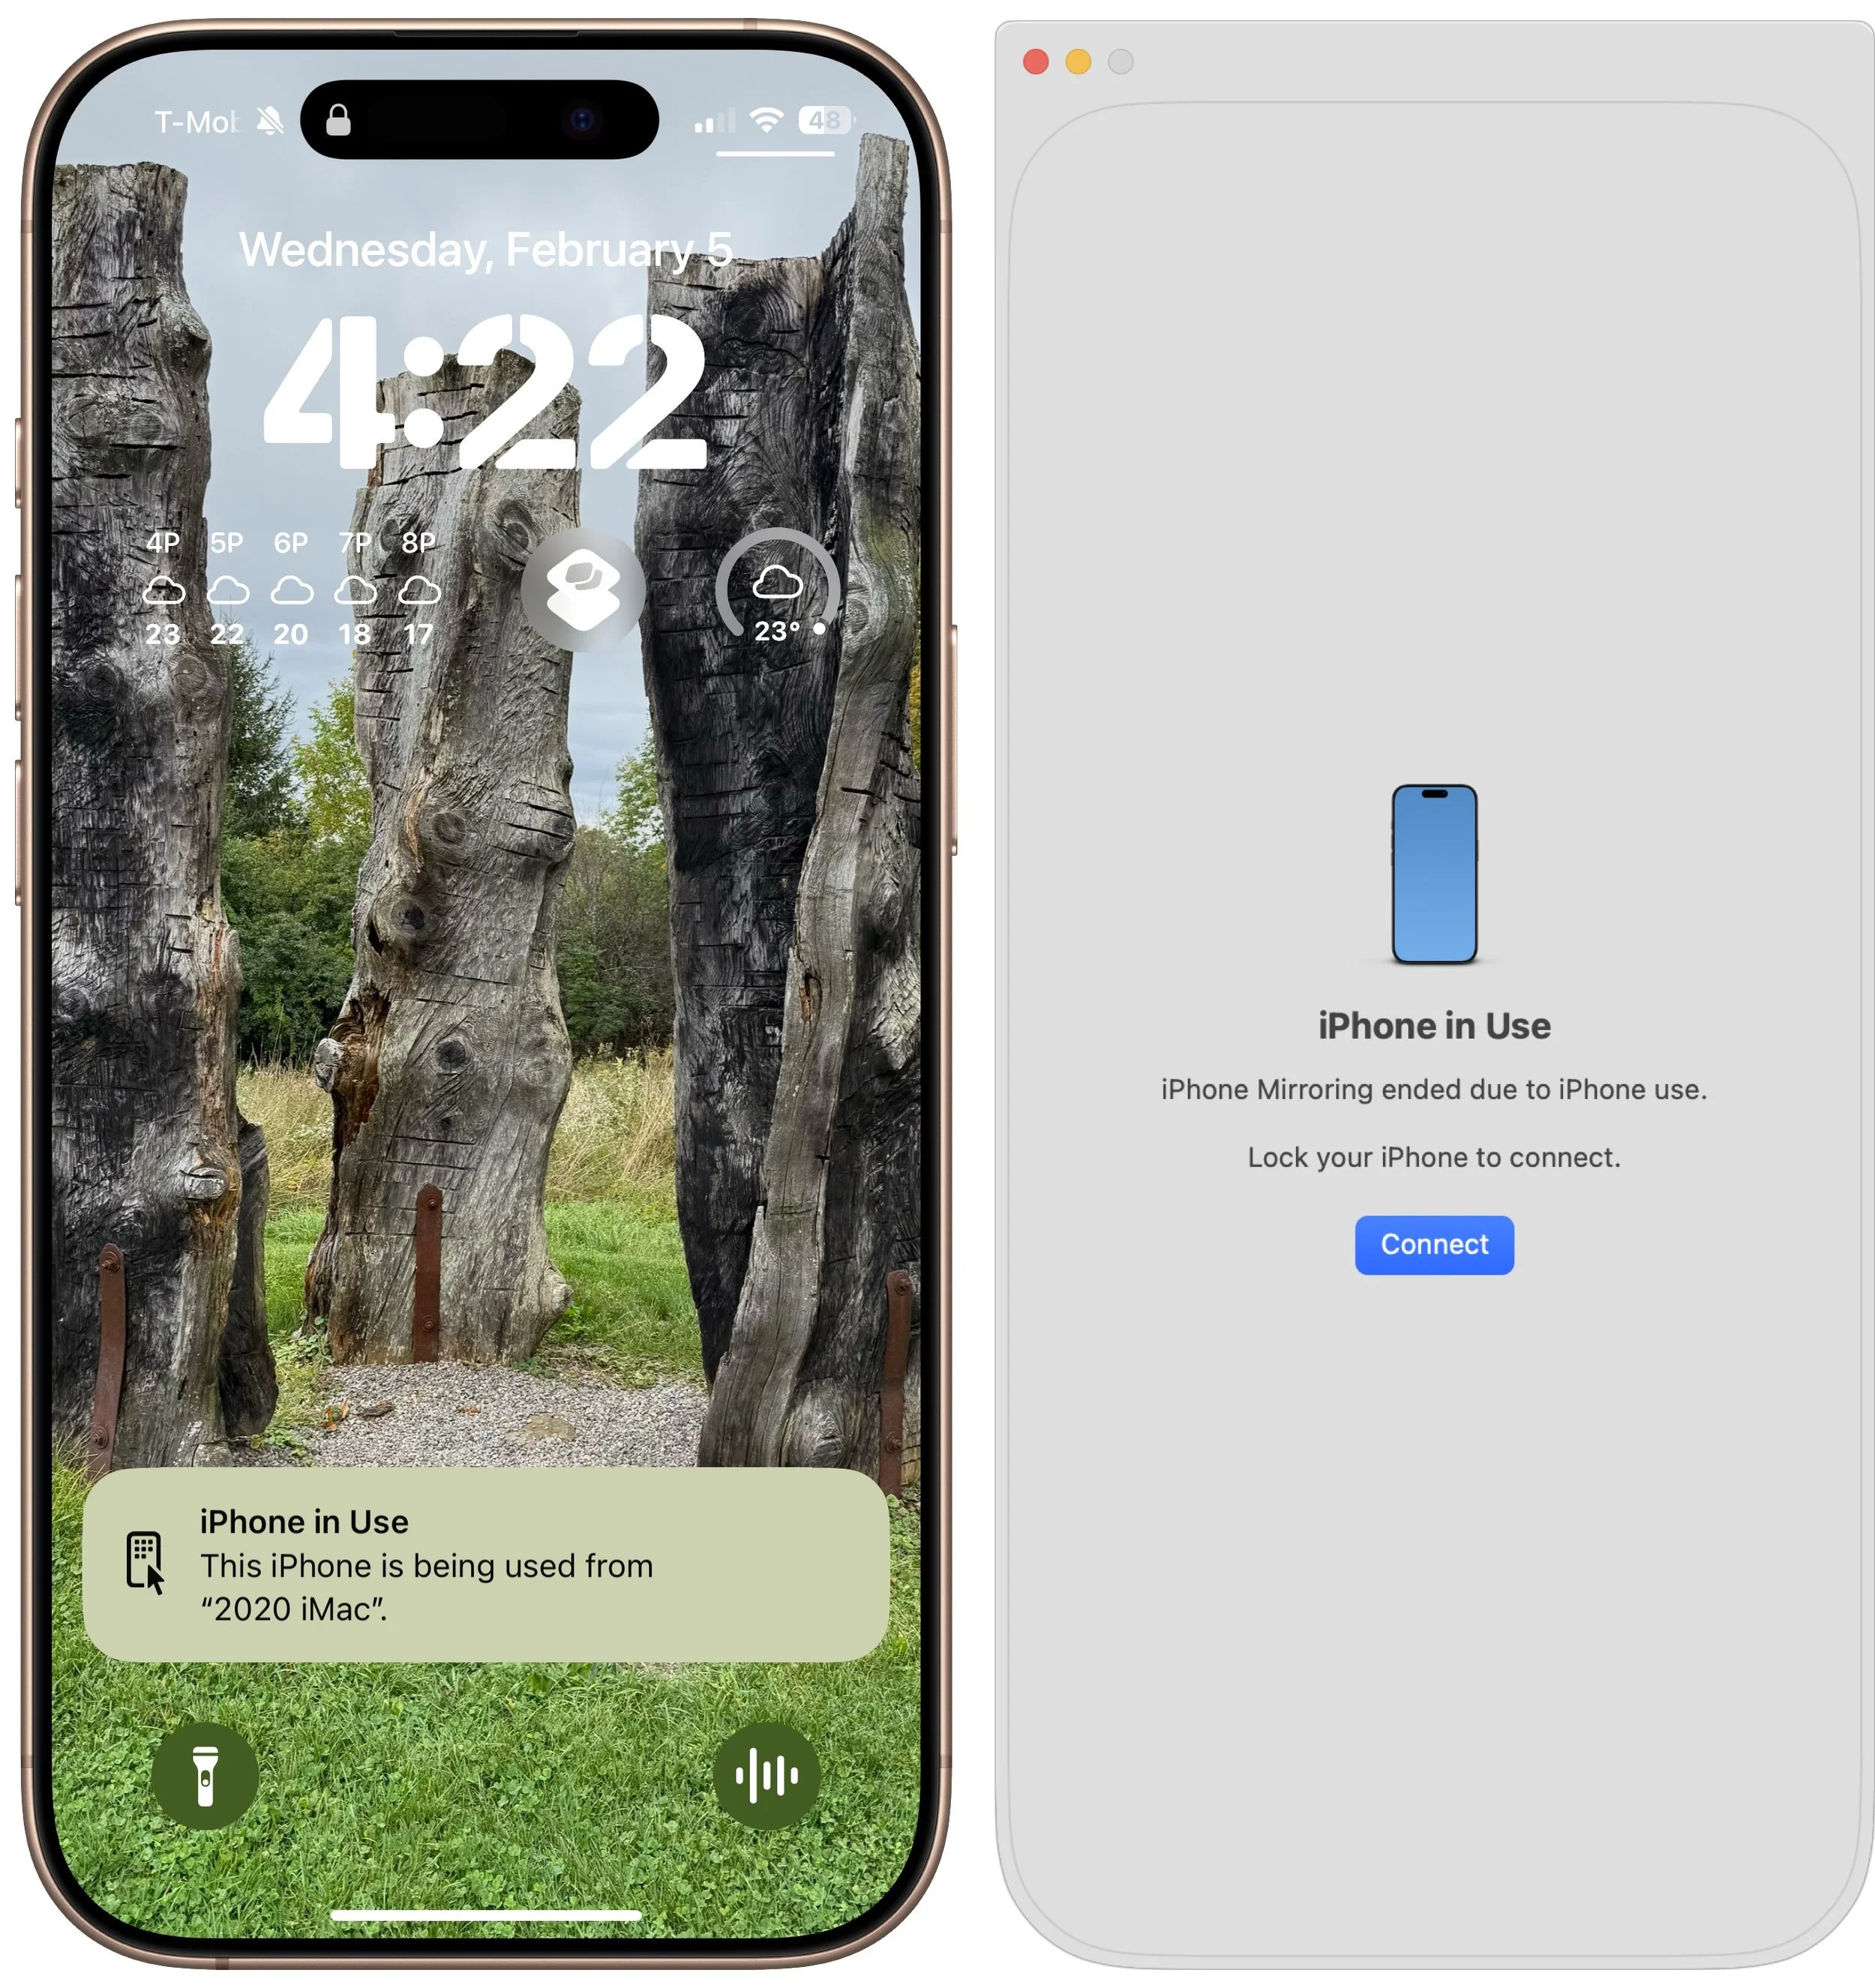
Switching back to using the iPhone directly is simple—just unlock it to disconnect from the Mac. When you’re done, lock the iPhone and click the Connect or Resume button to resume.
Dealing with Multiple Macs and iPhones
Connecting an iPhone to multiple Macs is not an issue, although only one can use it at a time. To remove access for a Mac, use the iPhone to navigate to Settings > General > AirPlay & Continuity > iPhone Mirroring, tap Edit, and then tap the red delete button. If you have more than one iPhone available for iPhone Mirroring, you can select which one to use in System Settings > Desktop & Dock, just below the “Use iPhone widgets” setting—the menu appears only when the Mac detects multiple iPhones nearby.
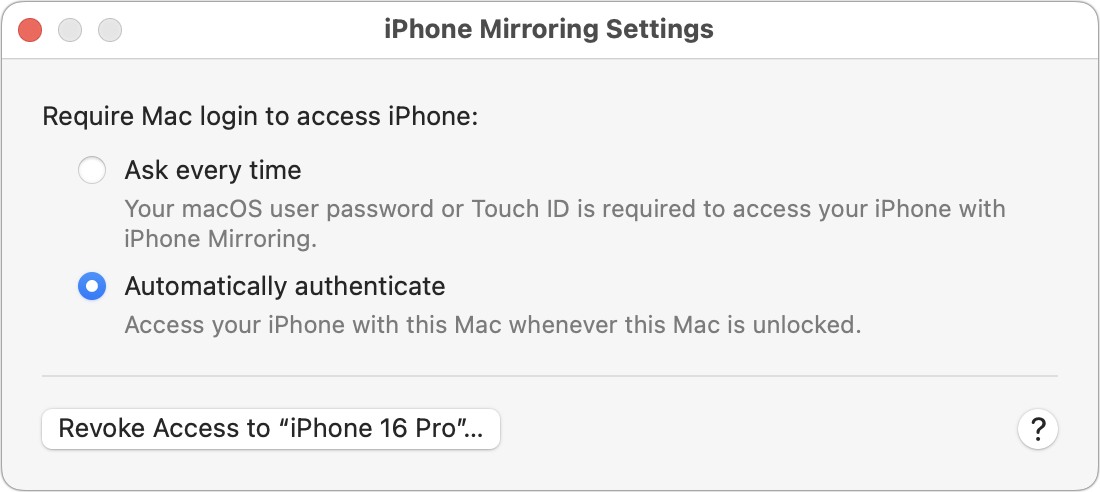
On final note. In iPhone Mirroring > Settings, you can choose whether to require your Mac login for every connection or to authenticate automatically. Set it to “Ask every time” if your Mac is shared with others, if others know your Mac password, or if you want to enhance protection against potential malicious software. It’s more secure but slightly more inconvenient.
In the end, if you frequently find yourself reaching for your iPhone while working on your Mac or wish it were more accessible, try iPhone Mirroring. It’s an easy, effective way to work between the devices and reduce unnecessary interruptions.
(Featured image by iStock.com/Diego Antonio Maravilla Ruano)
New iPhone 16e Redefines Budget iPhone Choices
Apple has unveiled the iPhone 16e for $599 and discontinued the iPhone SE and iPhone 14. It’s much more capable than the models it replaces, but the iPhone 16 may be worth $200 more. Read our buying advice here:
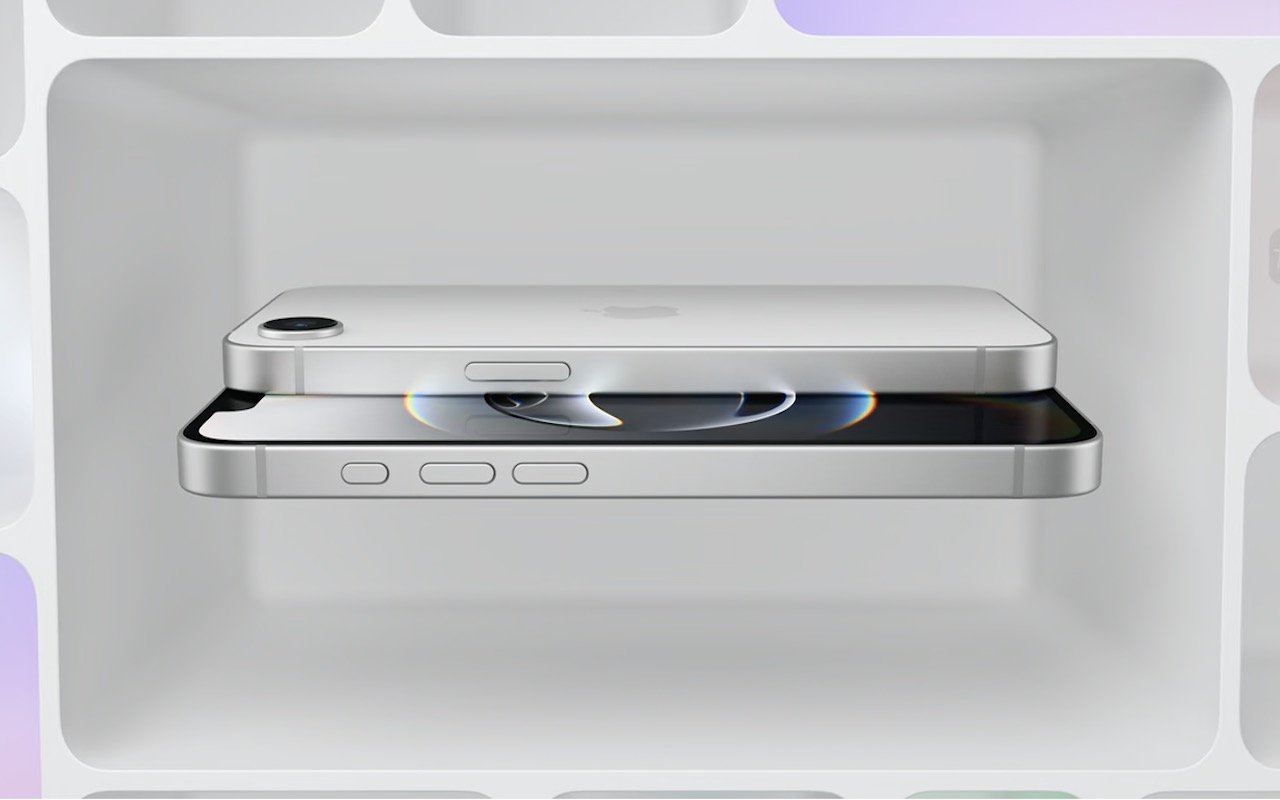
We know iPhones can get pricey—a top-of-the-line 1 TB iPhone 16 Pro Max costs $1,599, and that’s before AppleCare. To make the lineup more affordable, Apple has long sold the iPhone SE and kept previous years’ models available. Until February 18, you could buy a 64 GB iPhone SE for $429 or a 128 GB iPhone 14 for $599. Apple has now simplified the low-end choices by dropping those two older models in favor of the new iPhone 16e, which also starts at $599 for 128 GB of storage. It’s available in black or white.
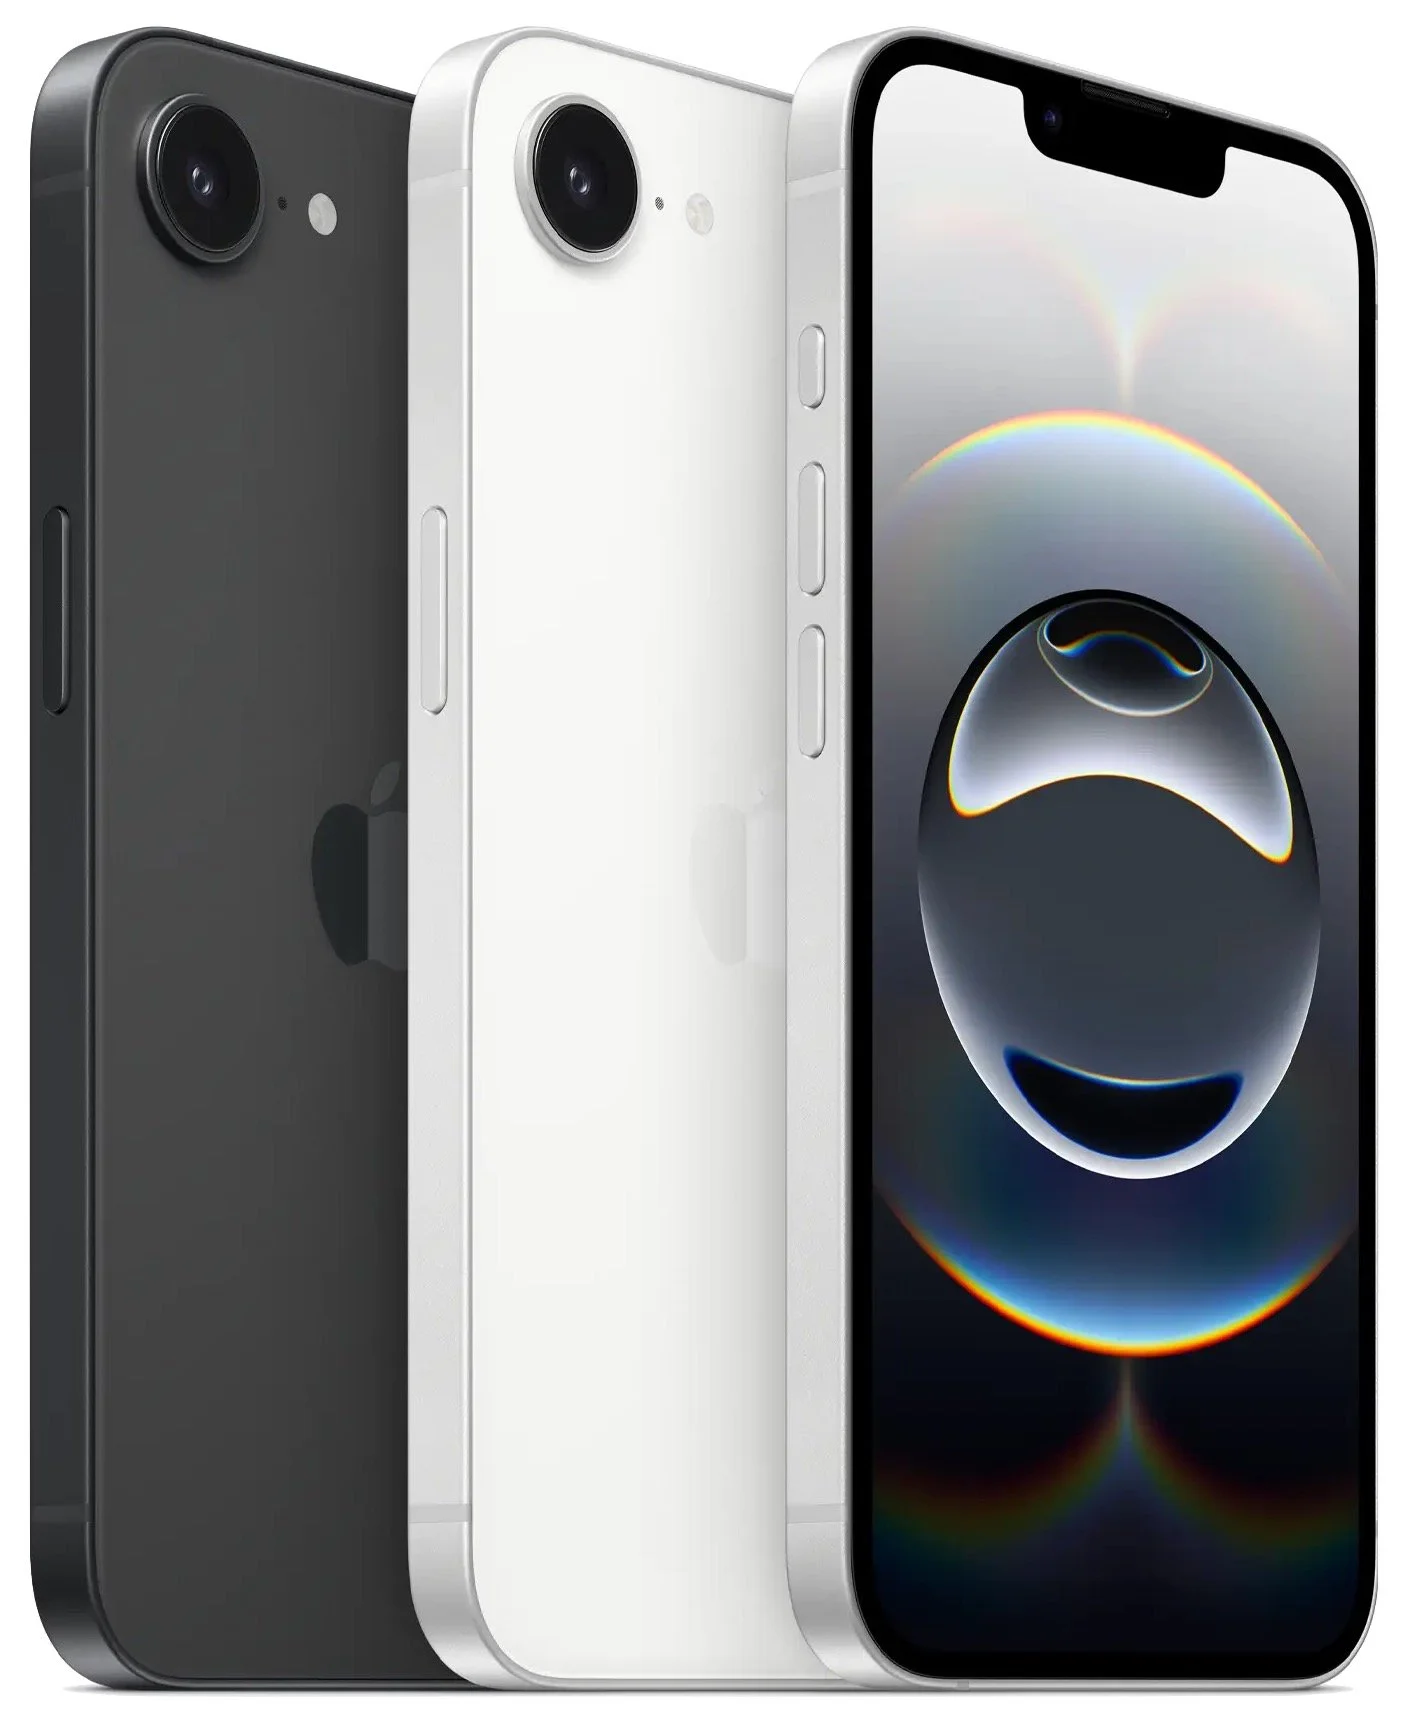
Physically, the iPhone 16e is a cross between the iPhone 14 and the iPhone 16. Its case dimensions match those of the iPhone 14, and it has the older notch design instead of the iPhone 16’s Dynamic Island. However, the iPhone 16e incorporates the iPhone 16’s Action button and uses USB-C.
What the iPhone 16e doesn’t do is replace the third-generation iPhone SE in terms of price or size. At $599, it’s $170 more than the 64 GB iPhone SE and $120 more than the comparable 128 GB model. That’s a significant increase for the most affordable iPhone. Moreover, while the iPhone SE’s compact size made it popular among those with smaller hands and pockets, the iPhone 16e is significantly taller, wider, thicker, and heavier. Anyone moving from an iPhone SE will feel the difference.
In exchange for its higher price and larger size, the iPhone 16e delivers significantly more technology than the iPhone SE. It replaces Touch ID with Face ID, boasts a much larger, brighter screen, sports notably improved front and rear cameras, and is powered by an A18 chip that is 40% faster than the iPhone SE’s A15 Bionic and supports Apple Intelligence features. The Action button can be customized to perform nearly any function and will soon also provide access to Visual Intelligence. The iPhone 16e also offers satellite connectivity for Messages, Roadside Assistance, and Emergency SOS in areas without cellular coverage, and it can alert emergency services after a car crash. Finally, it’s even more water- and dust-resistant.
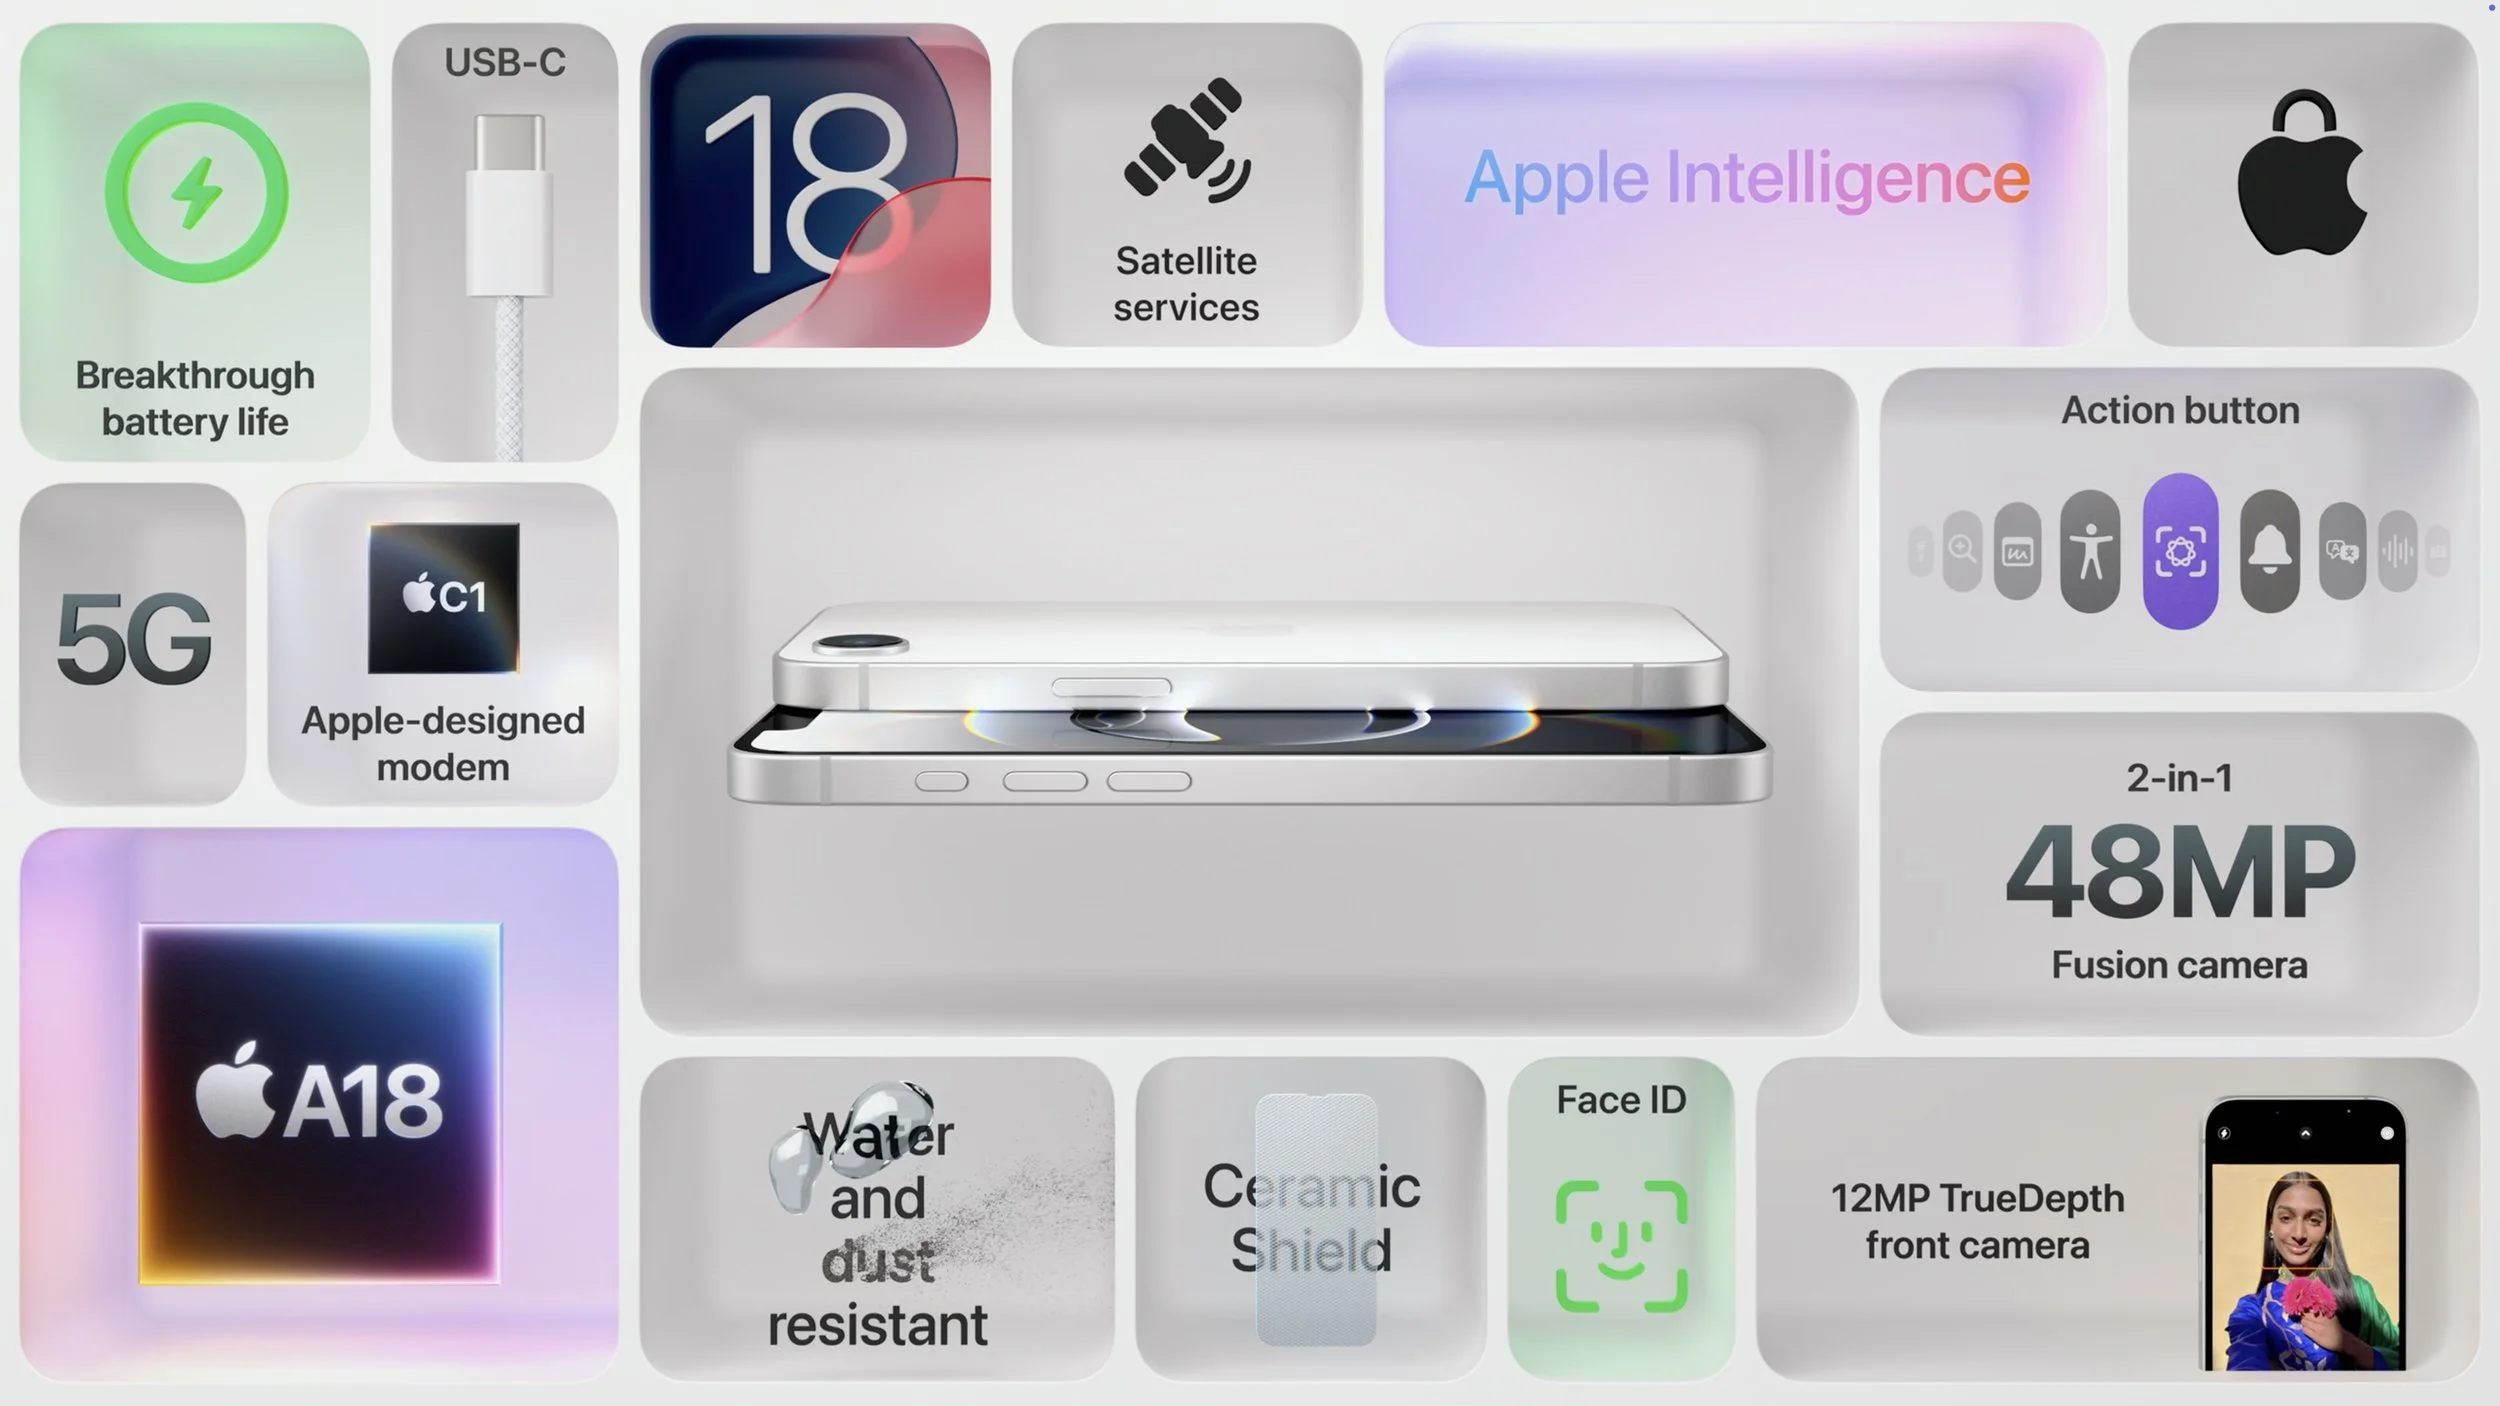
However, it’s also worth comparing the iPhone 16e to the iPhone 16, which starts at $799. That $200 premium gets you a lot, including a brighter screen, the Dynamic Island instead of a notch, a Camera Control button, a more advanced dual-camera system featuring a 12-megapixel Ultra Wide camera, a slightly more powerful A18 chip, 25-watt MagSafe charging with support for MagSafe accessories, and Ultra Wideband for precise Find My locating. Additionally, the iPhone 16’s camera system provides macro and spatial photography, as well as video features like cinematic mode, action mode, spatial videos, and macro recording. It may also deliver better optical image stabilization.
The only area where the iPhone 16e outperforms the iPhone 16 is in battery life. In Apple’s benchmarks, the iPhone 16e provides 12% to 18% longer runtime. The enhanced endurance is partly due to the power efficiency of Apple’s new C1 wireless communications chip. Apple also said it redesigned the internals of the iPhone 16e to accommodate a larger battery. The longer battery life may be especially welcome for those who expect to keep their iPhones for years.
Apple’s new C1 chip is a big deal, and the company wants to use it in future iPhone models to improve battery life and wireless performance. However, it’s worth keeping in mind that the C1 may suffer teething pains that Apple will address in software updates. Although Apple undoubtedly believes the C1 will work well, there’s no telling what will happen in the real world, and the company’s engineers may need to tweak it to address performance or reliability issues.
If you’re in the market for a new iPhone, what should you choose? The iPhone 16e is the best option for those on a tight budget since it’s the most affordable. (Last year’s iPhone 15, which is still available, starts at $699 and doesn’t support Apple Intelligence.) However, if you can afford that extra $200, the iPhone 16 is significantly more capable thanks to its superior rear camera system, Camera Control button, MagSafe compatibility, and Dynamic Island. For all the differences, check Apple’s iPhone comparison tool.
Finally, those seeking a smaller, lighter iPhone are out of luck. Their best hope lies with the rumored iPhone 17 Air, which is expected to arrive in September and could be thinner and lighter while maintaining the same height and width.
(Featured image by Apple)
When Purchasing a Fireproof Safe, Pay Attention to the Details
If the wildfires in Los Angeles have you considering a fireproof safe to safeguard backups and important documents, make sure to research temperature ratings over time and be mindful of water and impact resistance.

The devastating losses caused by the Los Angeles wildfires have underscored the need to protect data from catastrophic events. A traditional offsite backup—periodically moving a hard drive to another location—might not have sufficed in areas affected by wildfires, where many structures were destroyed. An online backup using a service like Backblaze or CrashPlan is often a better solution, although it can become costly for multiple Macs, and some individuals and organizations are uncomfortable storing their data online, even with encryption.
What about a safe? Would storing one or more backup drives in a safe provide adequate protection? Possibly, but the details are critical. Some safes are designed solely to guard against theft, focusing on preventing thieves from opening the door. However, paper ignites at 451ºF (it chars around 387ºF), and most house fires reach temperatures between 800ºF and 1200ºF, so you may think that all you need to do is look for a “fireproof” safe. That’s a good start, but paper is actually much more resilient than magnetic and optical media.
Fireproof safes come with ratings that indicate the internal temperature they can maintain, with the most common being:
Class 350: Safes maintain an internal temperature of 350ºF, suitable only for paper.
Class 150: Safes keep the interior below 150ºF, which should protect magnetic media.
Class 125: Safes maintain temperatures under 125ºF, appropriate for optical media.
It is also important to determine how long the safe can maintain that temperature. Generally speaking, a fireproof safe is rated for 1 or 2 hours, indicating it can maintain the specified internal temperature for at least that duration. Time ratings represent minimums, not maximums, so the actual protection time may be longer.
In most cases, the protection time is likely to be longer. That’s because safes are tested in furnaces at temperatures that can be two to three times hotter than the average house fire. For example, Underwriters Laboratory (one of several independent testing labs) conducts tests at 1700ºF or 1850ºF. Additionally, while a house fire may burn for several hours, the average fire will consume everything near the safe within 20 minutes and then move on.
Wildfires are a different story. In extreme conditions, wildfire temperatures can range from 1500ºF to 2200ºF, approaching or exceeding the testing conditions. Wildfires also last longer, so a safe in a destroyed building may remain in embers for hours or even days before it can be recovered.
While temperature over time is the main factor to consider when researching a fireproof safe, also look for two other variables being mentioned as well:
Water resistance: Where there’s fire, there’s usually water. Thousands of gallons of water, some of which will undoubtedly affect the safe. Not all fireproof safes are waterproof, so verify whether a specific safe can withstand being doused by firefighters.
Impact protection: If the floor collapses, a safe on an upper story could fall a considerable distance. If you are considering such a location, ensure the safe can withstand the impact. To simulate realistic fire conditions, the test may involve withstanding a 30-foot drop onto a concrete floor, followed by reheating.
Finally, remember that if your safe is in a fire, the heat will cause its insulation to swell up, rendering the lock useless, regardless of its type. Typically, you will need to hire a locksmith to access the safe using instructions from the manufacturer.
If you’re going to trust your data to a fireproof safe, do your research to ensure that whatever you buy will meet your needs for fire, water, and impact protection. It won’t be cheap—depending on the size and other factors, a good fireproof safe can cost many hundreds or even thousands of dollars. However, this is one area where you definitely shouldn’t cut corners.
(Featured image based on originals by iStock.com/phive2015 and Hanna Plonsak)