
How to Merge Two Similar Folders in the Mac’s Finder
If you want to merge two folders that contain some of the same data, a little-known Finder feature can do it for you.
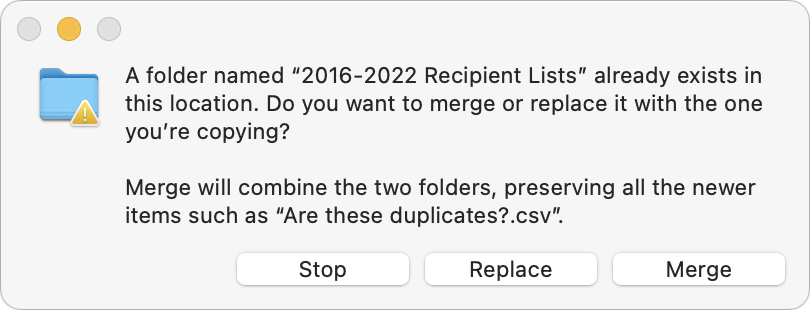
You’ve ended up with two folders whose contents—hundreds of files or more—are similar but not identical. Perhaps you’re recovering from a sync failure, or maybe you pulled an old version of the folder from a backup and aren’t sure what’s different. Regardless, here’s how you can merge them in the Finder. Make sure the folders are named identically and are in two different locations on your Mac. Press and hold the Option key, then drag the folder that contains more files to the location that contains the folder with fewer files. In the dialog that appears, click Merge to copy only newer files from the source and those not already in the destination. (It’s not a two-way sync; for that, you need an app like ChronoSync.) The Merge button appears only if the source folder contains files not in the destination; if the folders contain just different versions of identically named files, you’ll get only Stop and Replace buttons. For safety, always work on copies of your folders and check your work afterward to ensure the right things happened.
(Featured image by iStock.com/RerF)
Time Machine Now Offers Daily and Weekly Frequencies
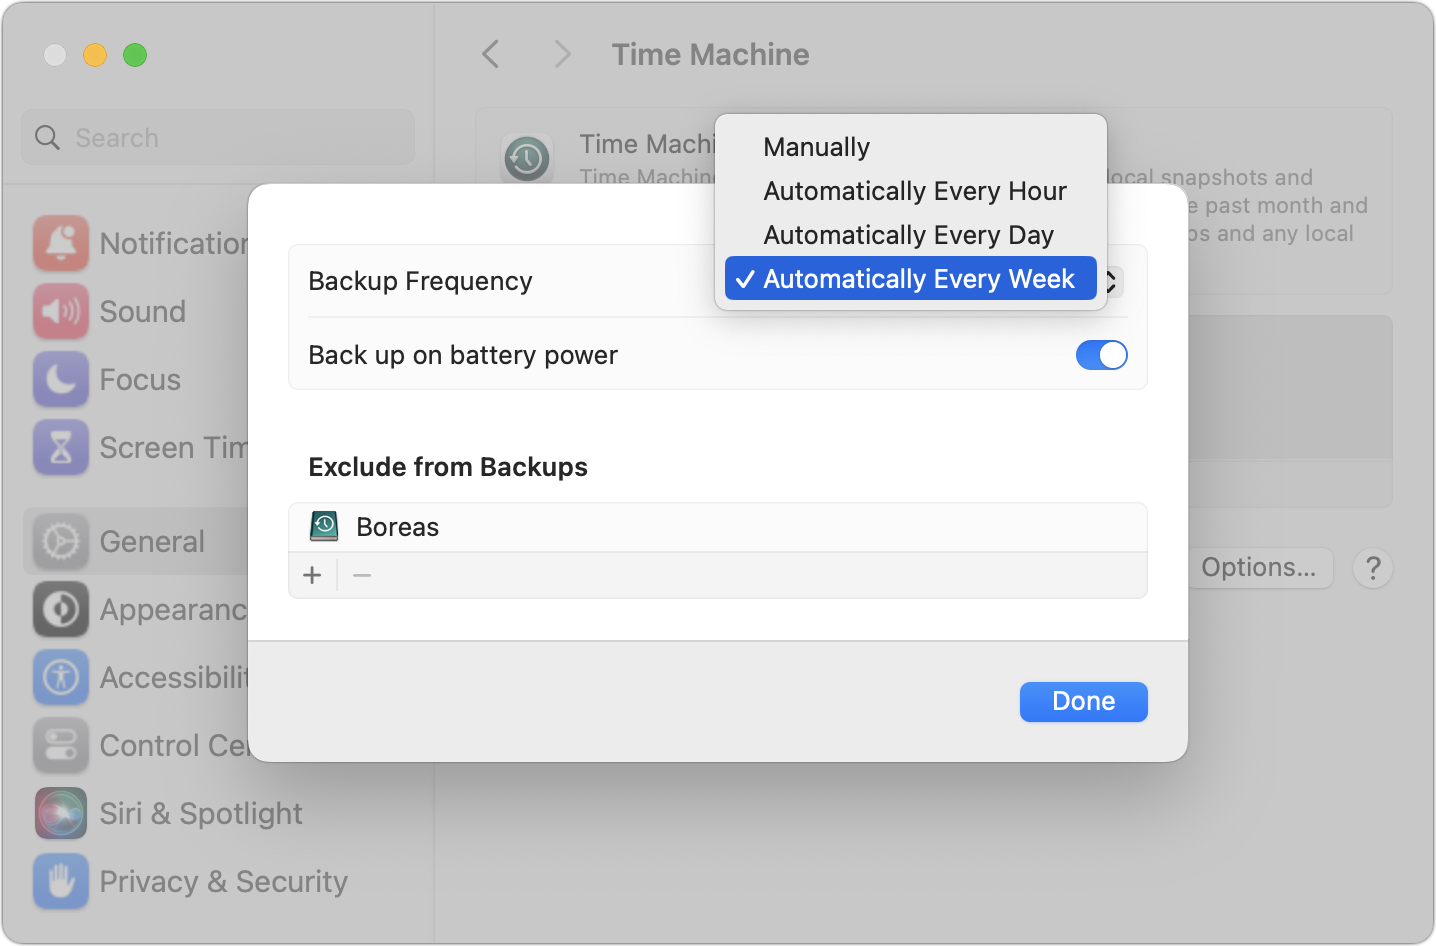
Has Time Machine’s hourly backup frequency been problematic for you? Starting in macOS 13 Ventura, you can instead choose a daily or weekly backup schedule.

Since its inception, Time Machine has backed up on an hourly schedule. It then keeps hourly backups for the previous 24 hours, daily backups for the last month, and weekly backups back to the start of the backup. Once free space on the backup drive gets low, Time Machine deletes older backups to make room for new ones, always maintaining at least one copy of every backed-up file. The traditional hourly backups are usually fine, but starting in macOS 13 Ventura, Apple lets you choose a daily or weekly schedule instead. One of those might be useful for Macs that are turned on infrequently or where very little important data changes. It also might reduce resource usage and how much data Time Machine backs up. Most people shouldn’t need to change the backup frequency, but if you’ve always wanted to, now you can.
(Featured image based on an original by iStock.com/STILLFX)
Use This Hidden Setting to Stop Triggering Caps Lock Accidentally
If you very seldom want to type in all caps, disable or remap the Caps Lock key so an errant key press doesn’t turn it on accidentally.
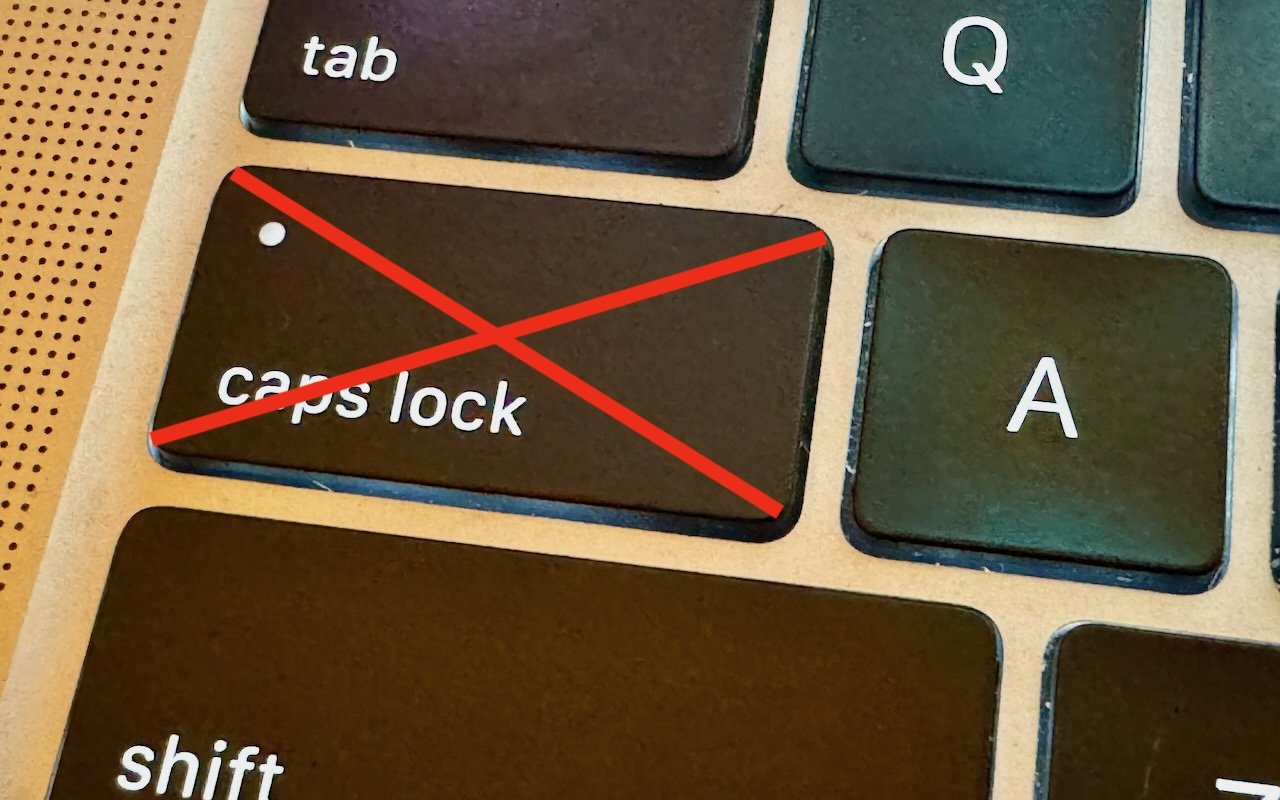
There’s little more annoying than accidentally touching the Caps Lock key while typing and having your text suddenly TURN INTO CAPITAL LETTERS, which we all know is seen as shouting. Unless you have some reason to type in capital letters regularly, you can prevent this mistake by disabling the Caps Lock key or remapping it to another modifier key. In macOS 13 Ventura and later, choose System Settings > Keyboard > Keyboard Shortcuts > Modifier Keys, and choose from the pop-up menu next to Caps Lock. (In earlier versions of macOS, open System Preferences > Keyboard > Modifier Keys.)
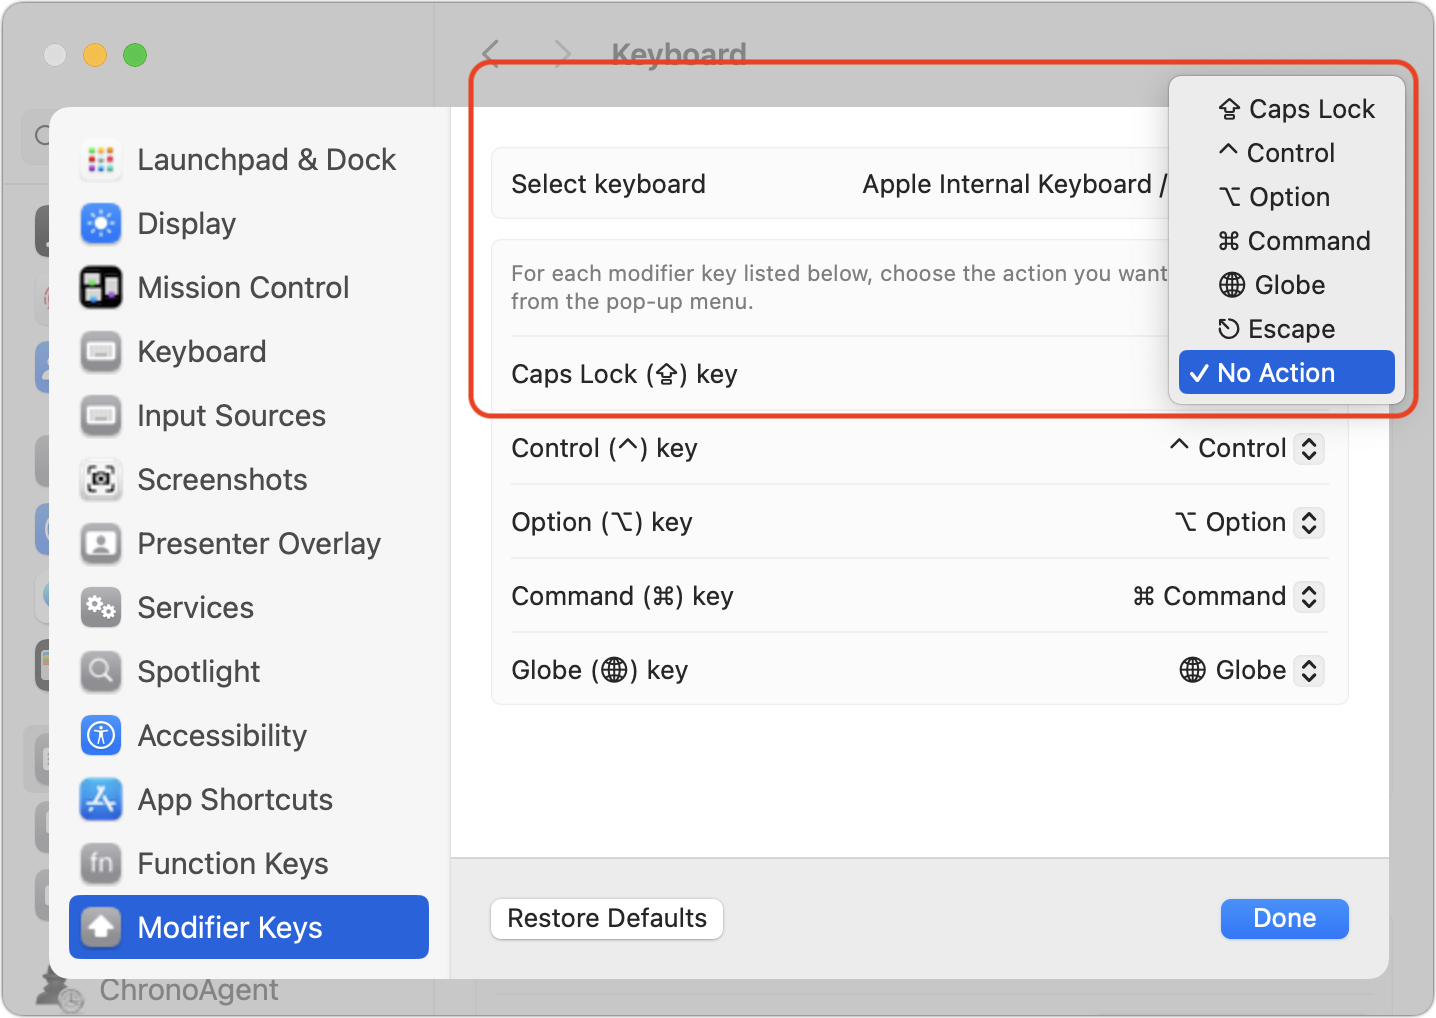
(Featured image by Adam Engst)
If Mail Fails to Send, Try, Try Again (Instead of Changing Servers)
If Mail on your Mac throws an error about being unable to send a message, always have it try again later rather than switching to a different server. Otherwise, your messages may look like spam and be blocked.

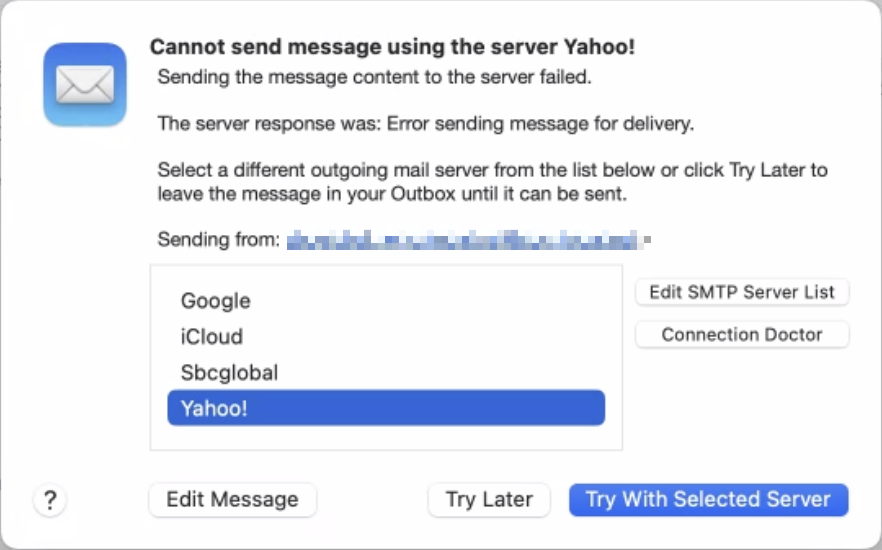
Sometimes, something goes wrong, causing Mail on the Mac to have trouble sending a message. When it does, you may see an error like the one below, encouraging you with a default button to try another configured server. Don’t do it! Always click Try Later. If that still doesn’t work, contact your favorite tech support professional to troubleshoot the problem with the SMTP server associated with the account from which you’re sending. Attempting to send through another SMTP server is a recipe for trouble because various anti-spam checks may fail, causing your message to be filtered as spam or bounced back to you. Worse, if you select a different server and click Try With Selected Server, Mail remembers that choice going forward, so you will have to reset it manually later.
(Featured image by iStock.com/Marut Khobtakhob)
Locate a Featured Lock Screen Image in Photos
Do you sometimes wonder when or where you took a photo that iOS’s Photo Shuffle wallpaper is displaying on your Lock Screen? Us too, and here’s how to find out more.
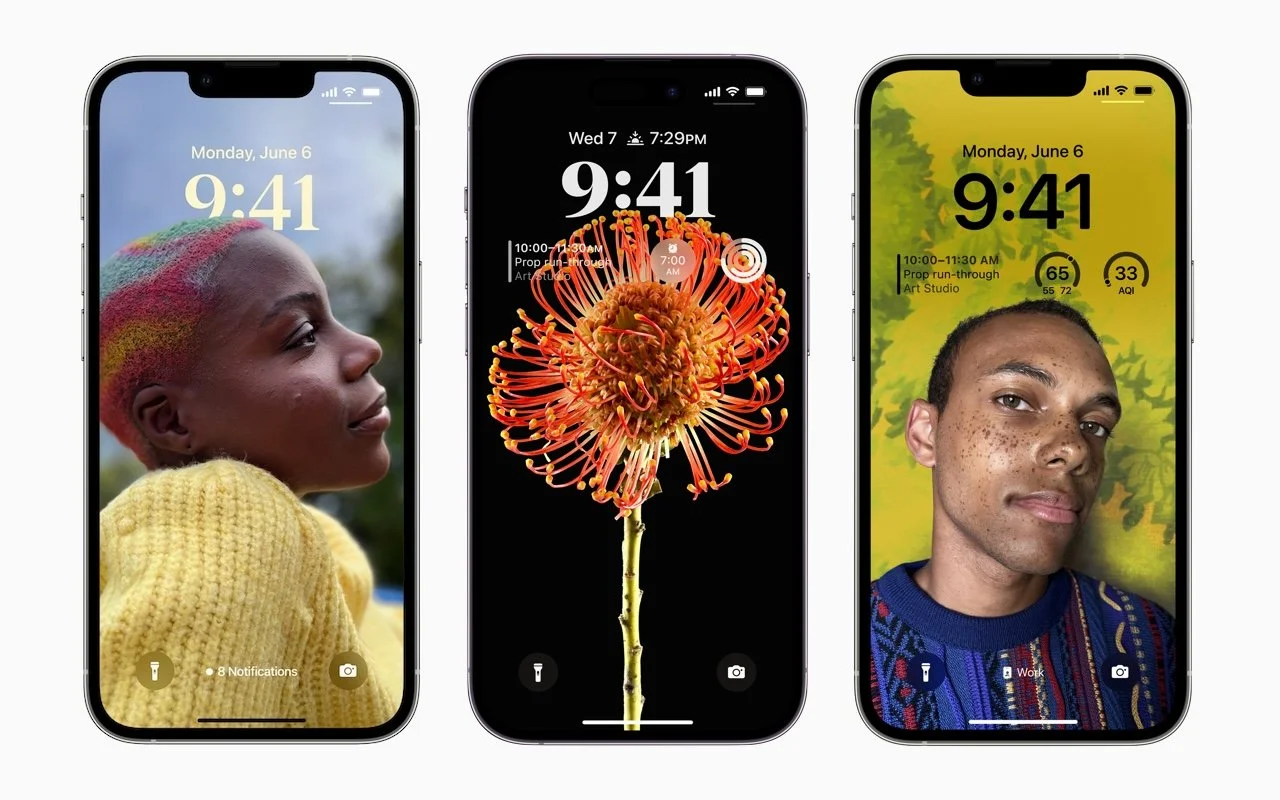
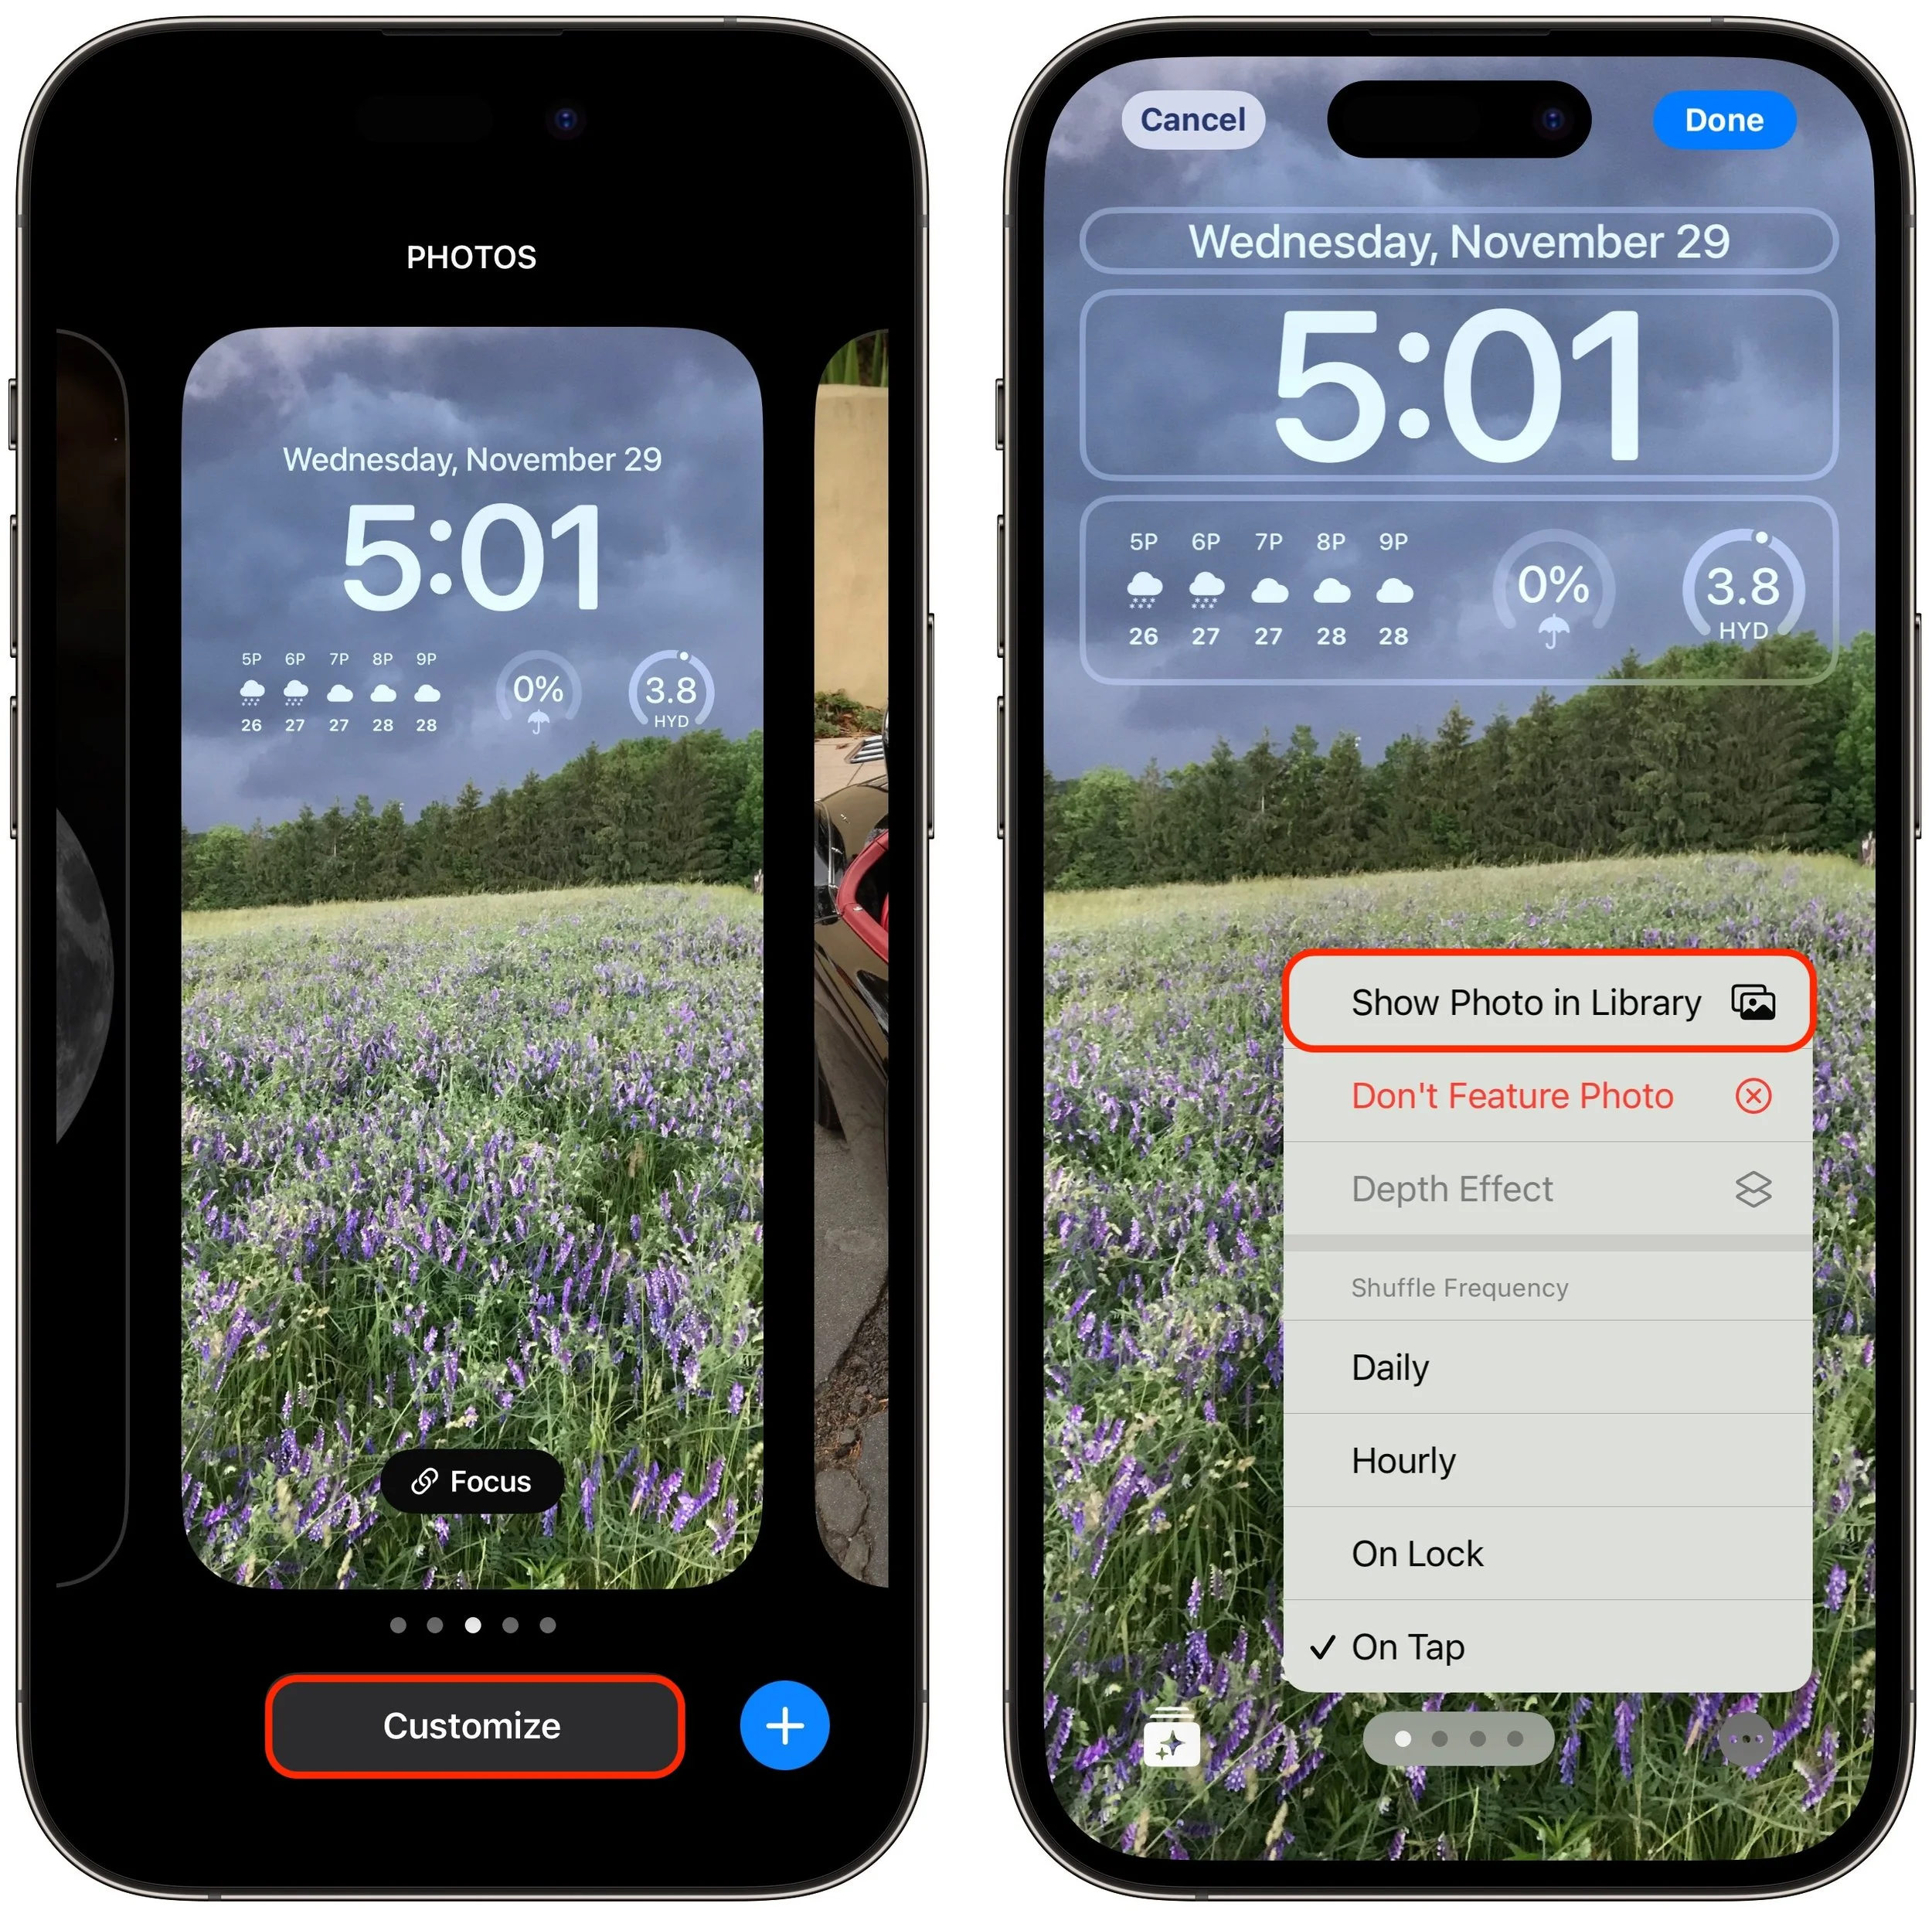
iOS’s Photo Shuffle wallpaper does a great job of identifying attractive photos for your Lock Screen. However, if you’re like us, you’ll sometimes wonder when or where you took a Lock Screen photo. Here’s how to figure that out. Touch and hold the Lock Screen when it’s displaying the photo in question, tap Customize, tap the Lock Screen wallpaper, tap the ••• button in the lower-right corner, and tap Show Photo in Library. Then you can swipe up to reveal more information about the photo, swipe left and right to see the photos on either side, or pinch to see it in the context of your entire photo library.
(Featured image by Apple)
Lift Objects from Photos on the iPhone
Starting with iOS 16, Apple made it possible to extract objects from photos. You can drag objects to other apps, copy them, turn them into stickers, and more.
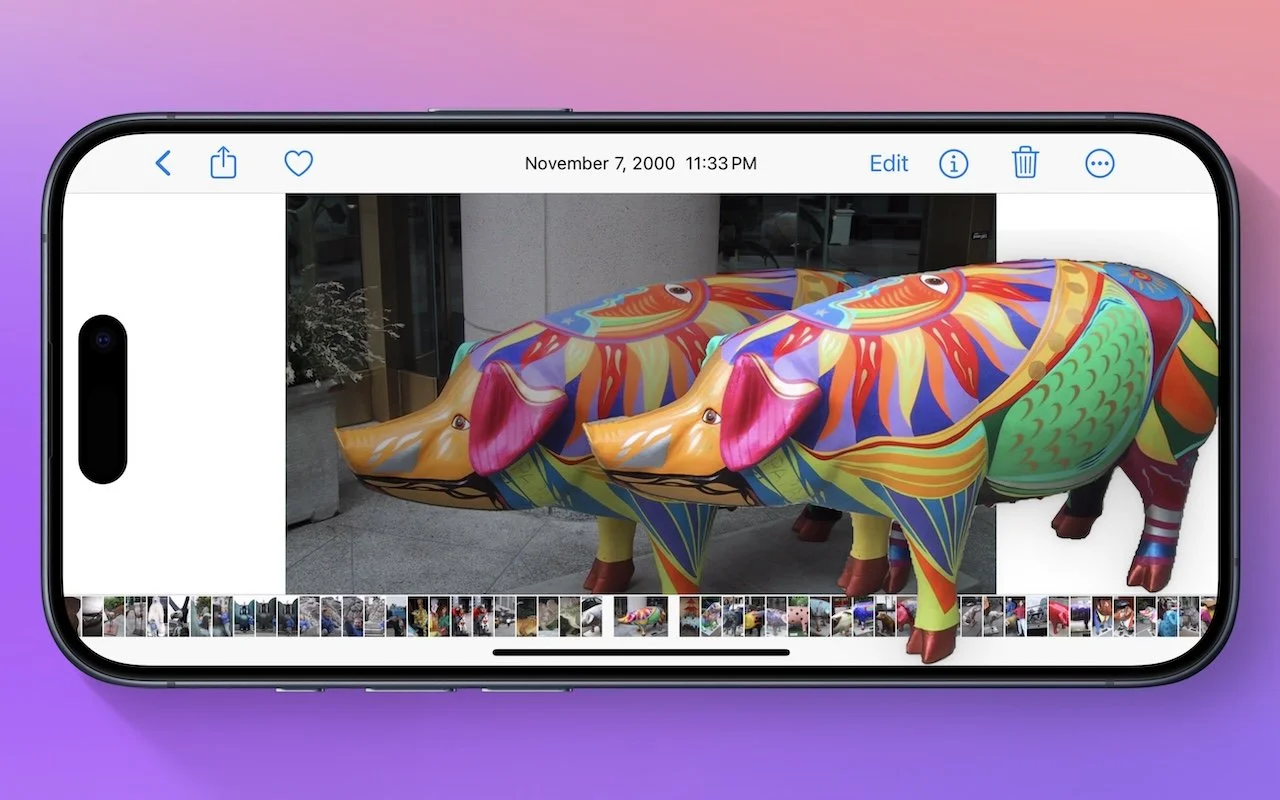
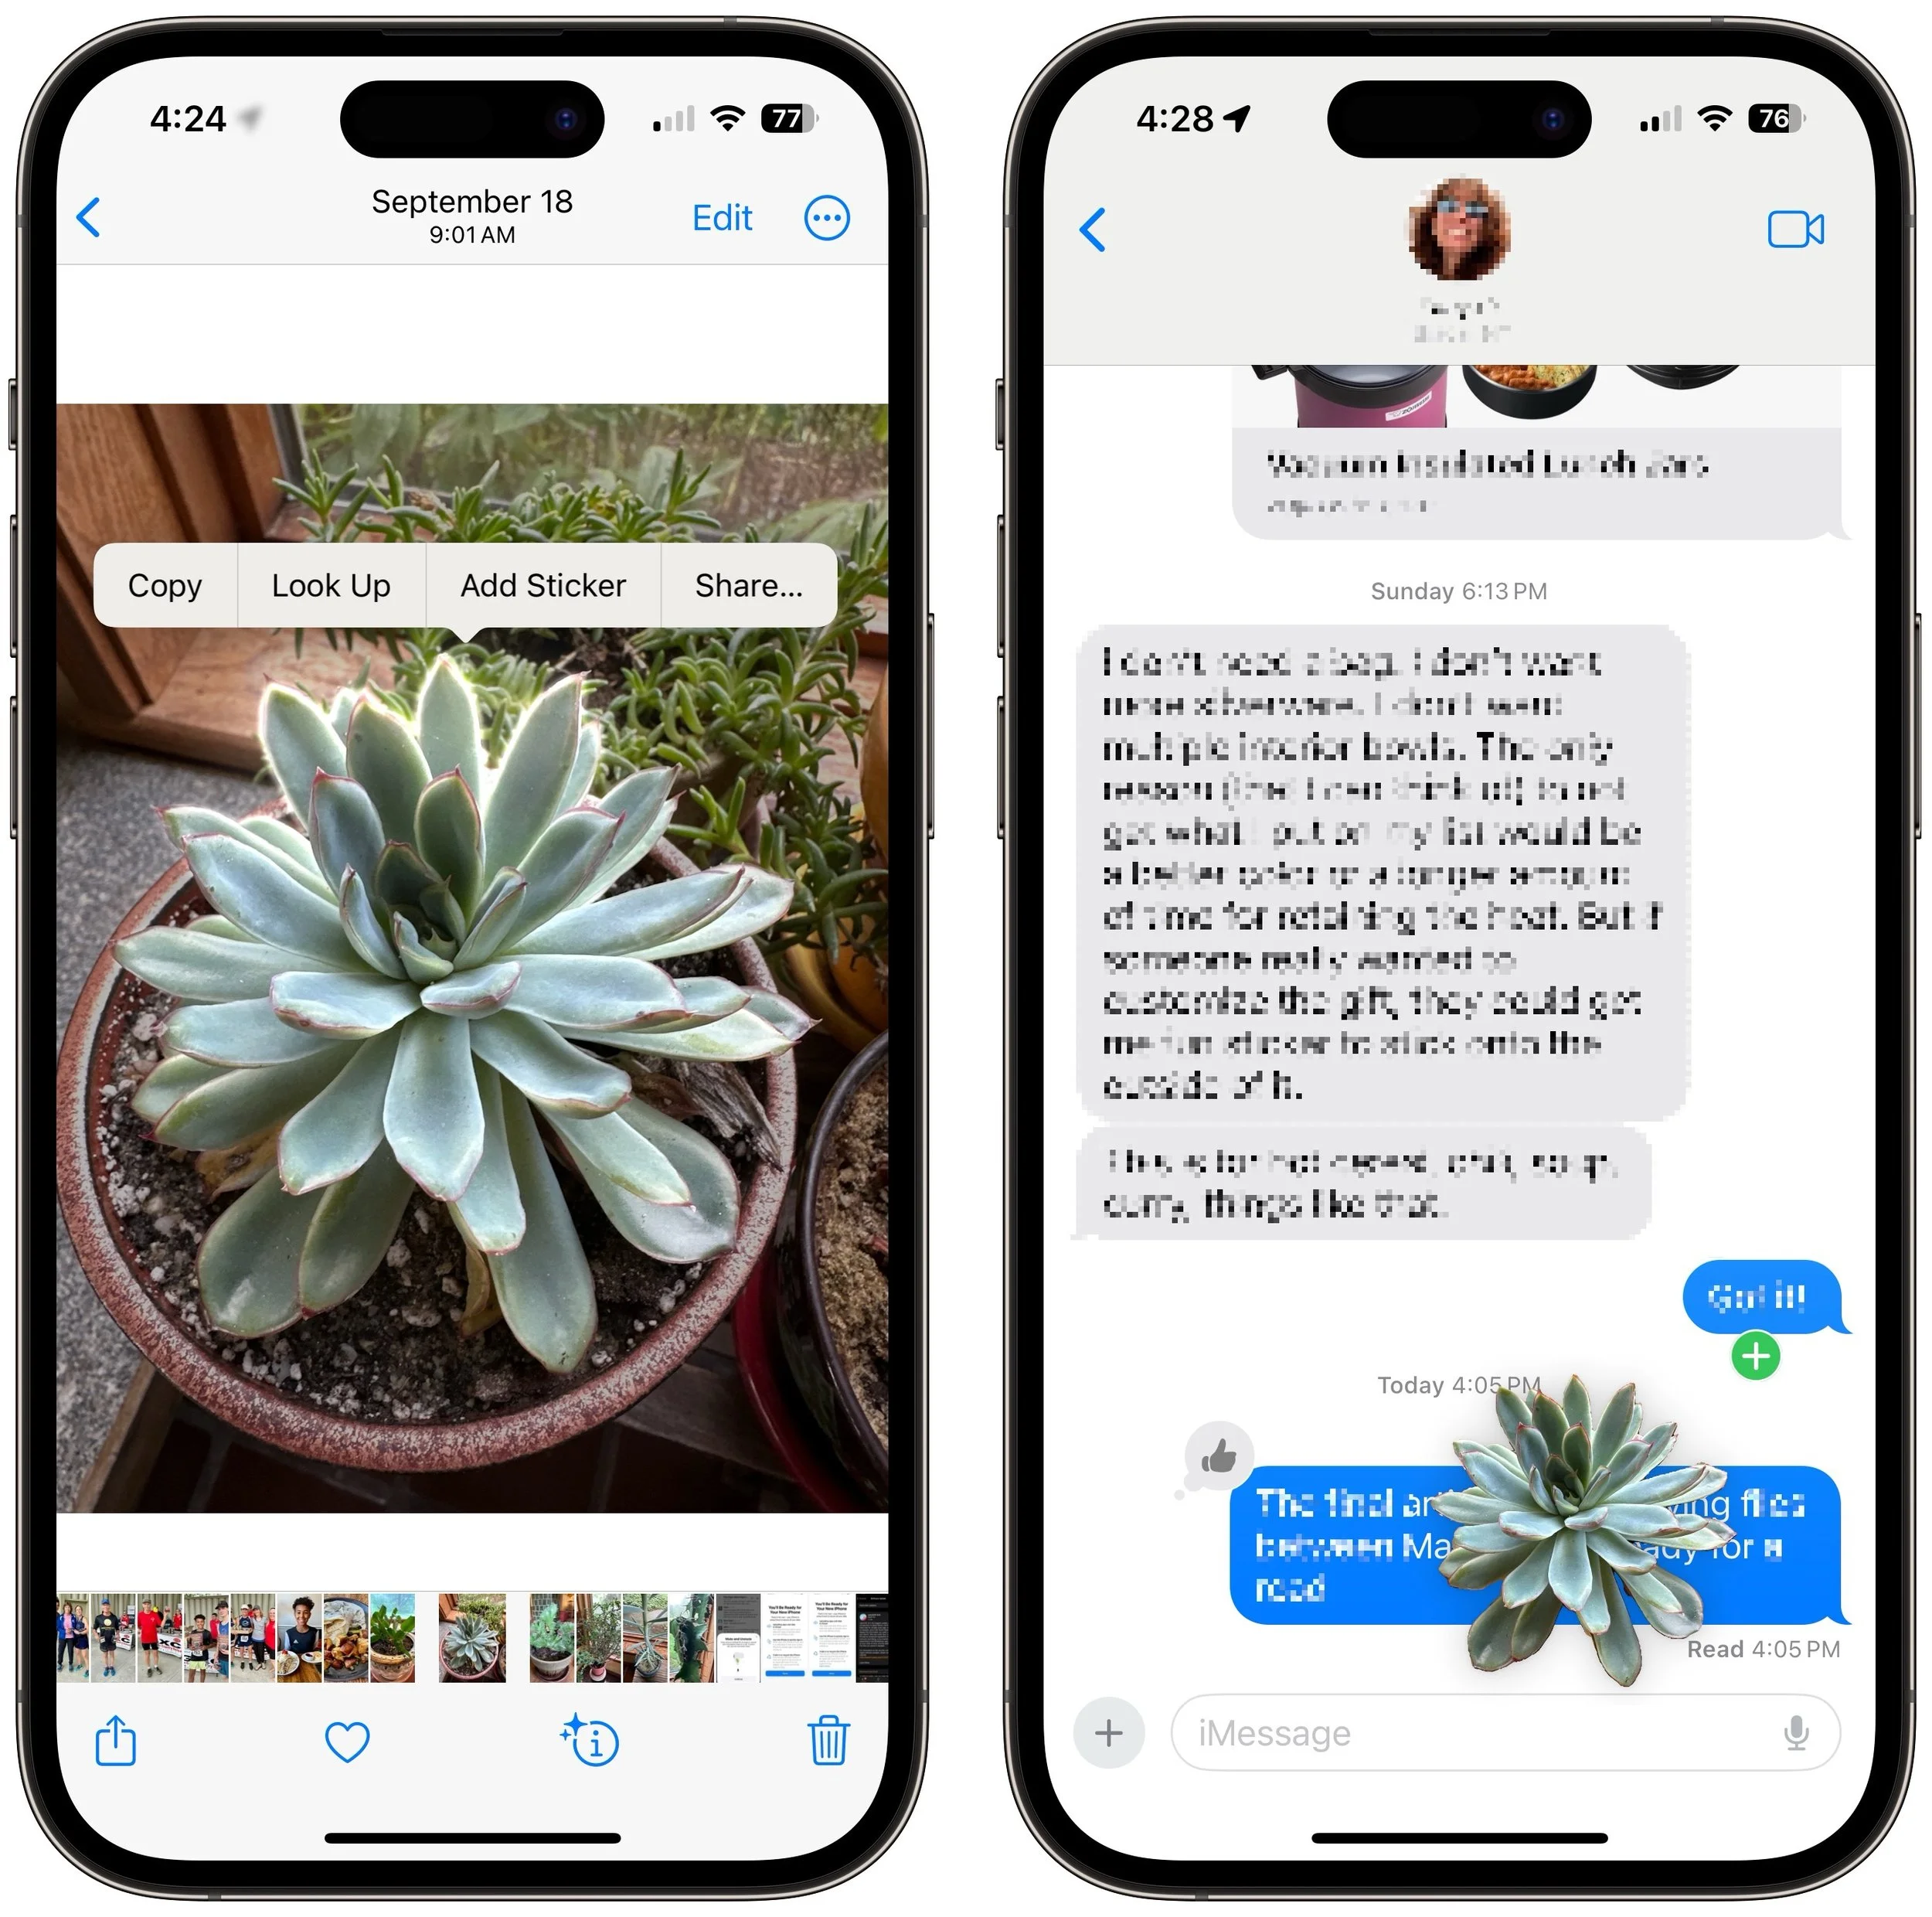
Have you ever wanted to extract an object from a photo for use in another context? Starting with iOS 16 on a relatively recent iPhone, you can do that with many photos. In the Photos app, touch and hold the object, and if Photos can extract it, you’ll see a highlight run around its edges. Raise your finger, and a popover lets you copy the object, look up information about it, turn it into a sticker (in iOS 17), or share it. Or you can start dragging the object, switch apps with your other hand, and drop it into another app, like Messages. With Universal Clipboard, you can even lift an object on an iPhone, copy it, switch to Preview on your Mac, and choose File > New from Clipboard. File this one under Arthur C. Clarke’s Third Law, which states, “Any sufficiently advanced technology is indistinguishable from magic.”
(Featured image by Adam Engst)
The “Hey” Part of “Hey Siri” Is Now Optional
In Apple’s new operating systems for 2023, you can choose to invoke Siri with just “Siri” or the old “Hey Siri”—or turn the feature off entirely. We explain where to find the feature for each of your Apple devices.

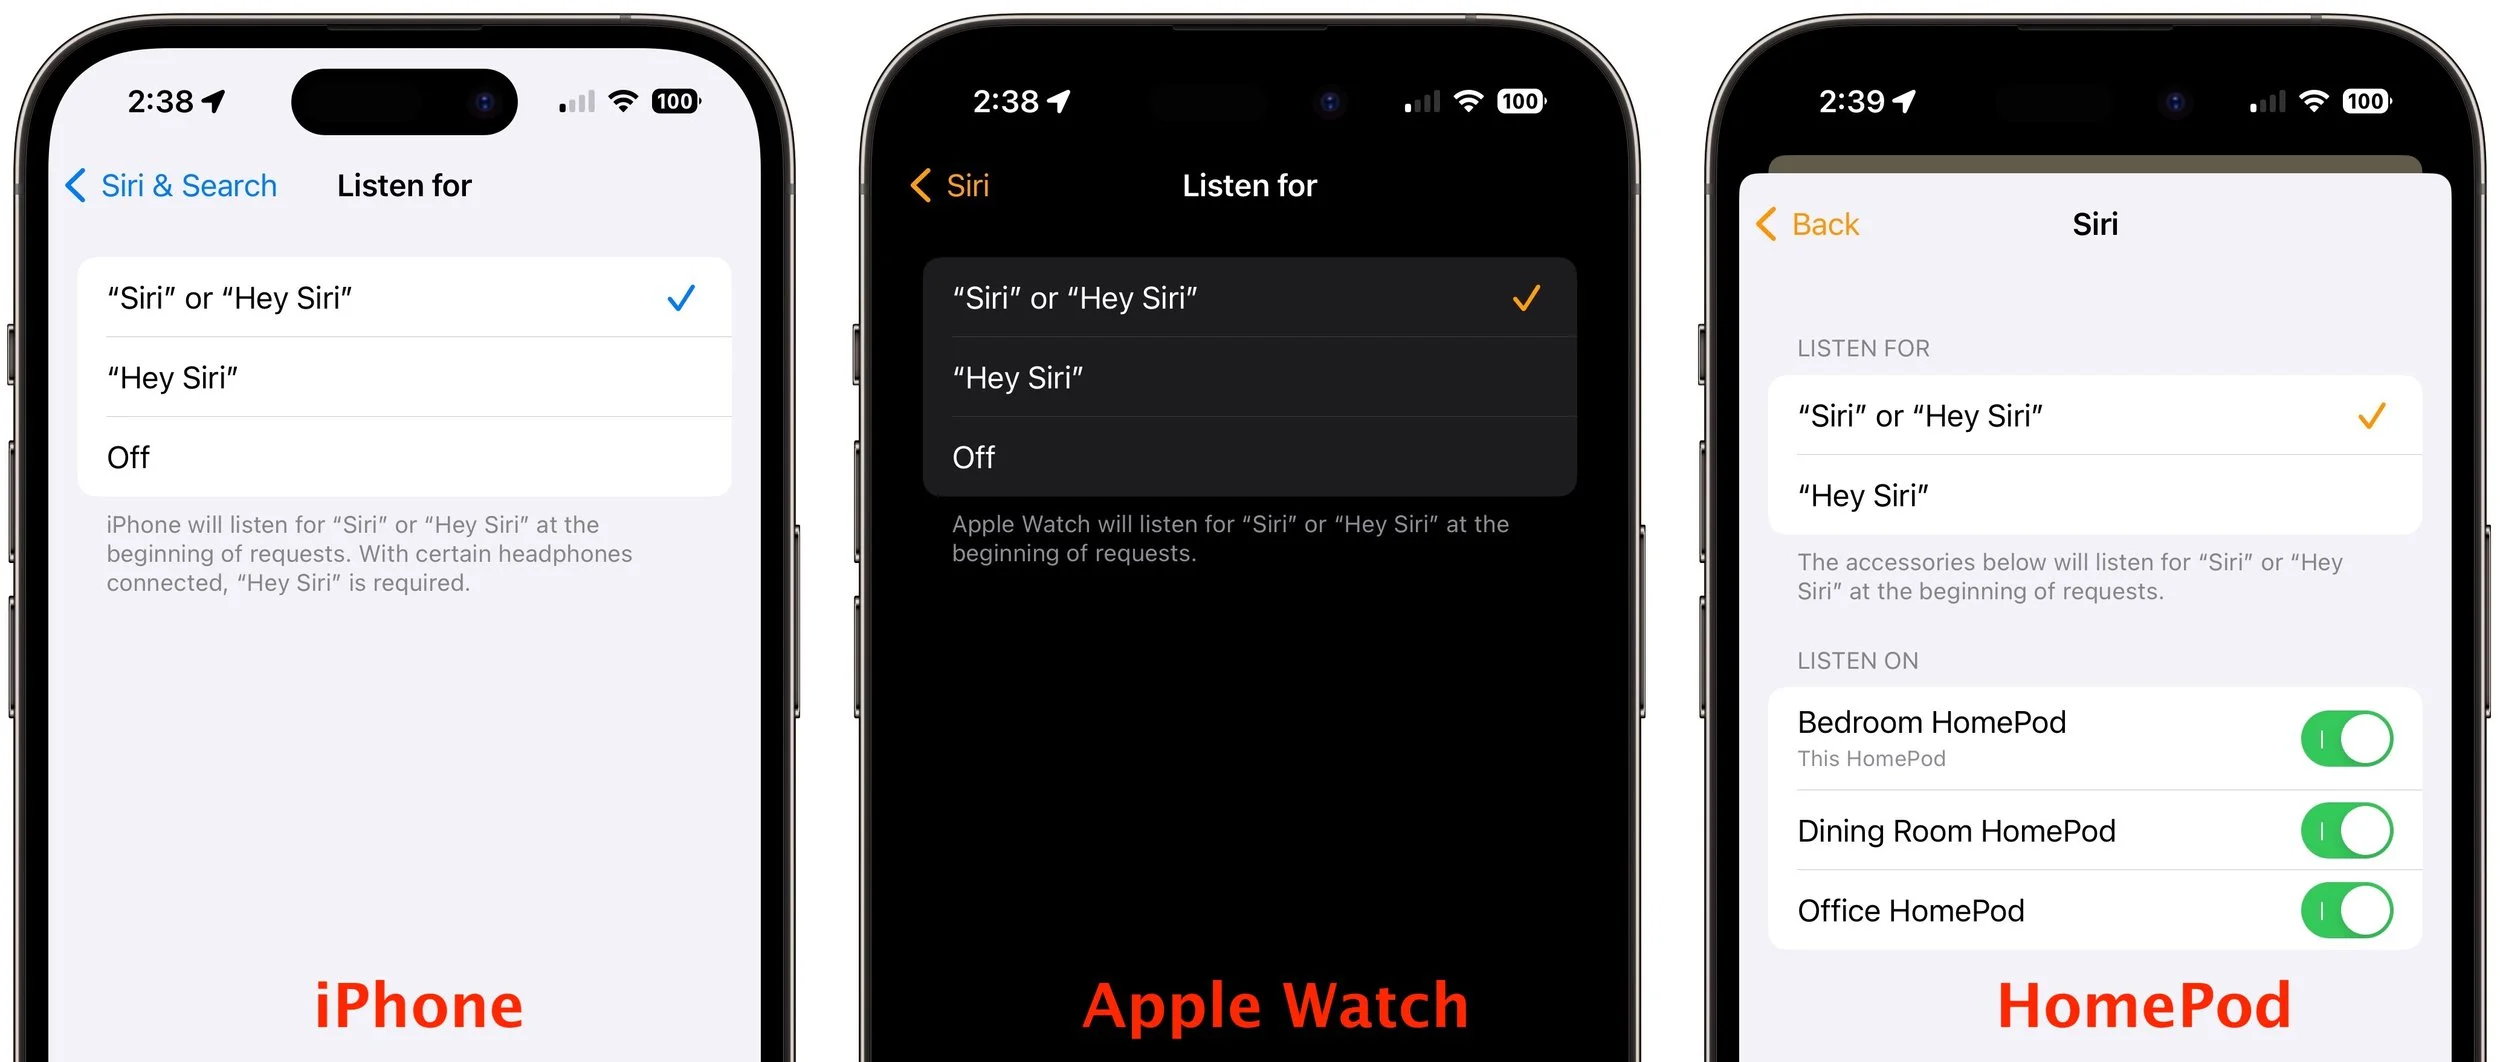
If you use Siri, particularly on a HomePod, you’re probably accustomed to saying “Hey Siri” as the trigger phrase before your requests. In Apple’s new operating systems for 2023, you can now choose to invoke Siri using the traditional “Hey Siri” or just “Siri” (at least in Australia, Canada, the UK, and the US). You might appreciate being able to stop saying “Hey” every time, or you might find that using just “Siri” generates incorrect activations. (And if someone in your family’s name sounds like Siri, you may want to turn the feature off entirely!) There are four places to look:
iOS 17 and iPadOS 17: Settings > Siri & Search > Listen For
macOS 14 Sonoma: System Settings > Siri & Spotlight > Listen For
watchOS 10: Watch app > My Watch > Siri > Listen For
HomePod Software 17: Home app > long-press HomePod > Accessory Settings > Listen For “Siri” or “Hey Siri”
(Featured image based on an original by Apple)
In Your Face App Guarantees That You Notice Appointment Alerts
Are you often late to online meetings or in-person appointments because you were too focused on your work to notice the time? The In Your Face app ensures you’ll never miss an important meeting again.
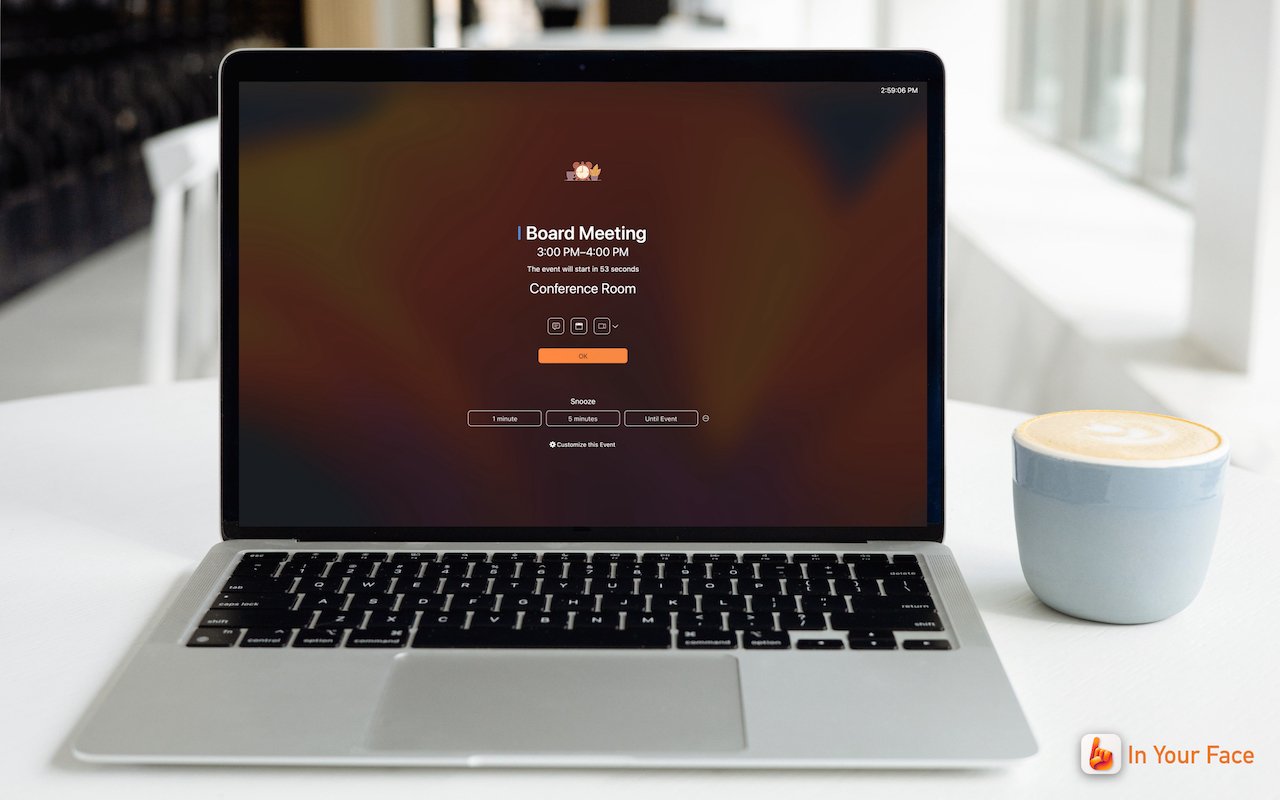
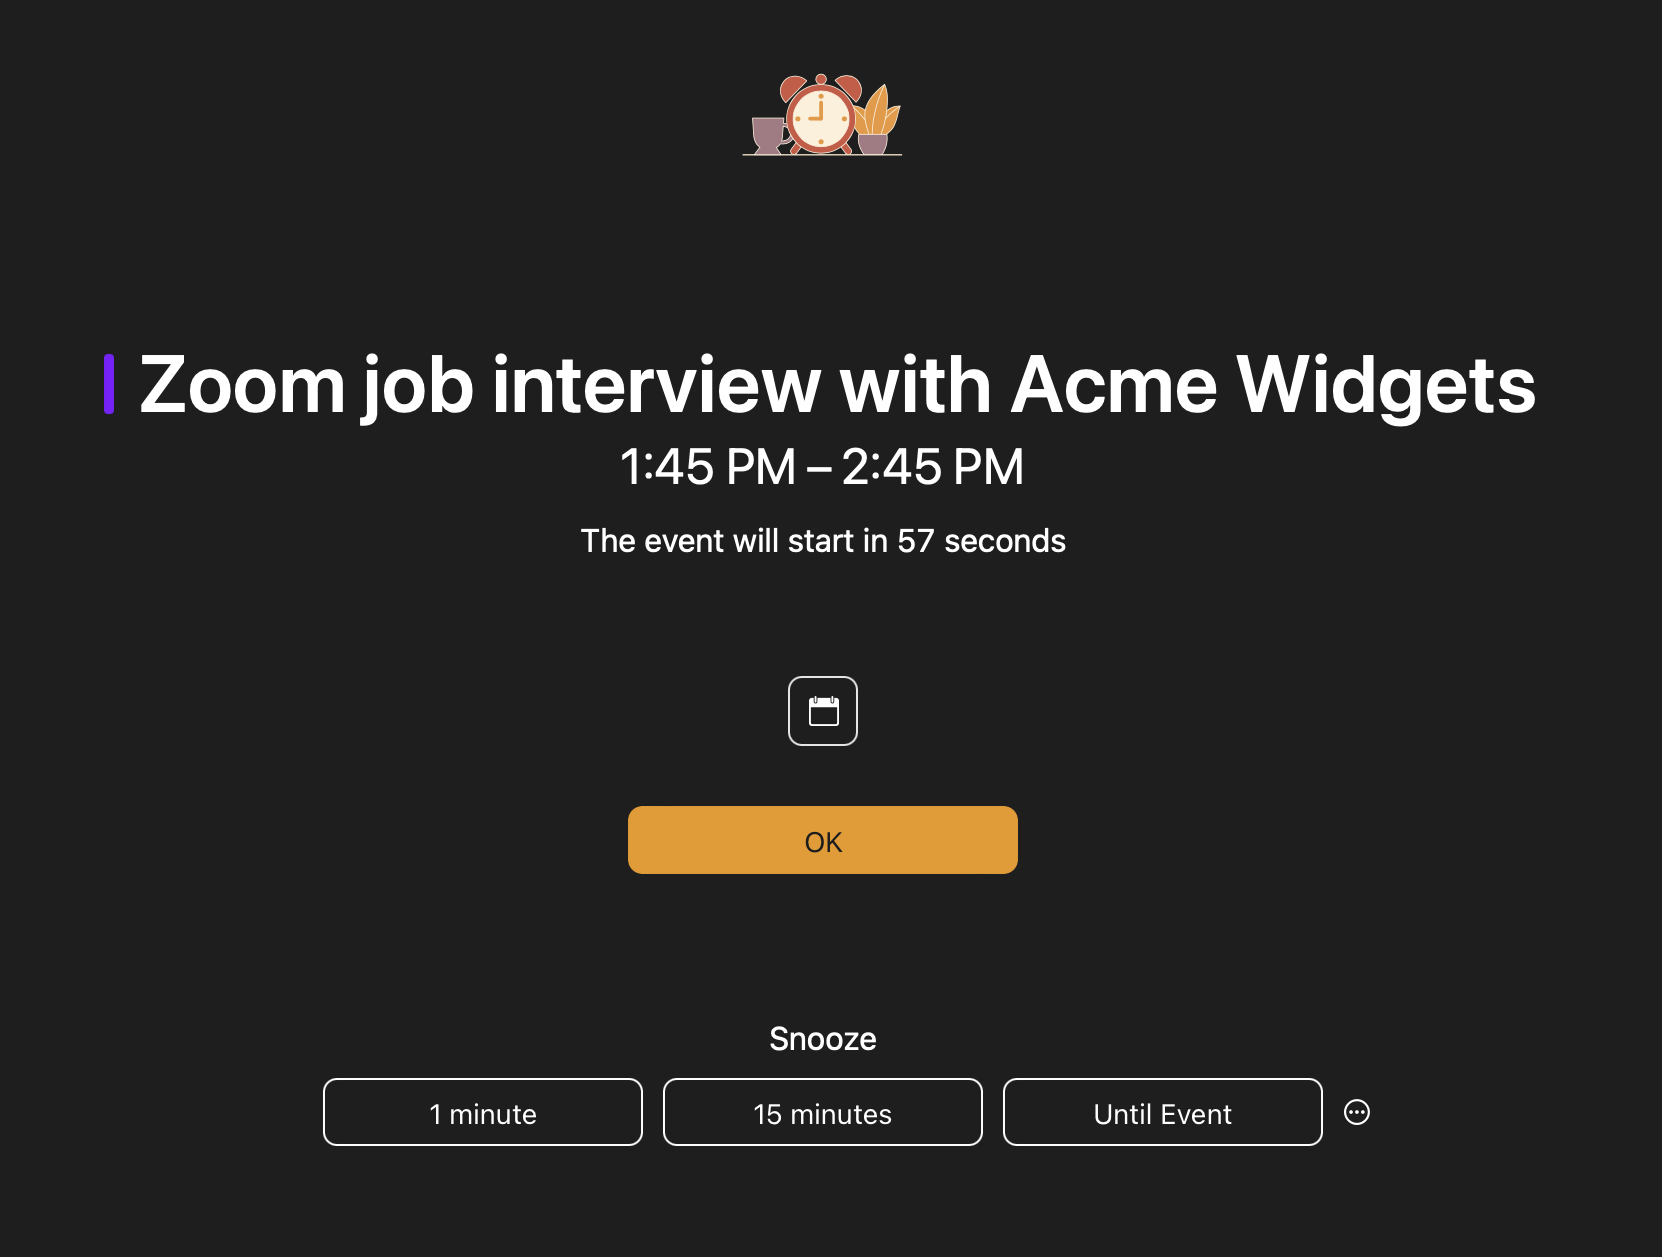
It’s easy to get caught up in what you’re doing and miss an alert for a Zoom meeting or a reminder to leave for an appointment. The Mac app In Your Face ensures that will never happen again by taking over the entire screen for notifications and requiring that you click a button to dismiss or snooze it. It can also play sounds repeatedly, lets you pick which calendars and reminder lists to use, gives you single-click access to videoconference links in events, and shows ongoing and upcoming events in the menu bar. In Your Face costs $1.99 per month or $19.99 per year, or it’s available in the $9.99 per month Setapp bundle of over 230 Mac apps.
(Featured image by Blue Banana Software)