
Where Can You Control Automatic Smart Quotes and Dashes in macOS?
Smart quotes and dashes usually make your text look more professional. But if they’re problematic, you can turn off the feature that inserts them automatically or revert them on a one-off basis.

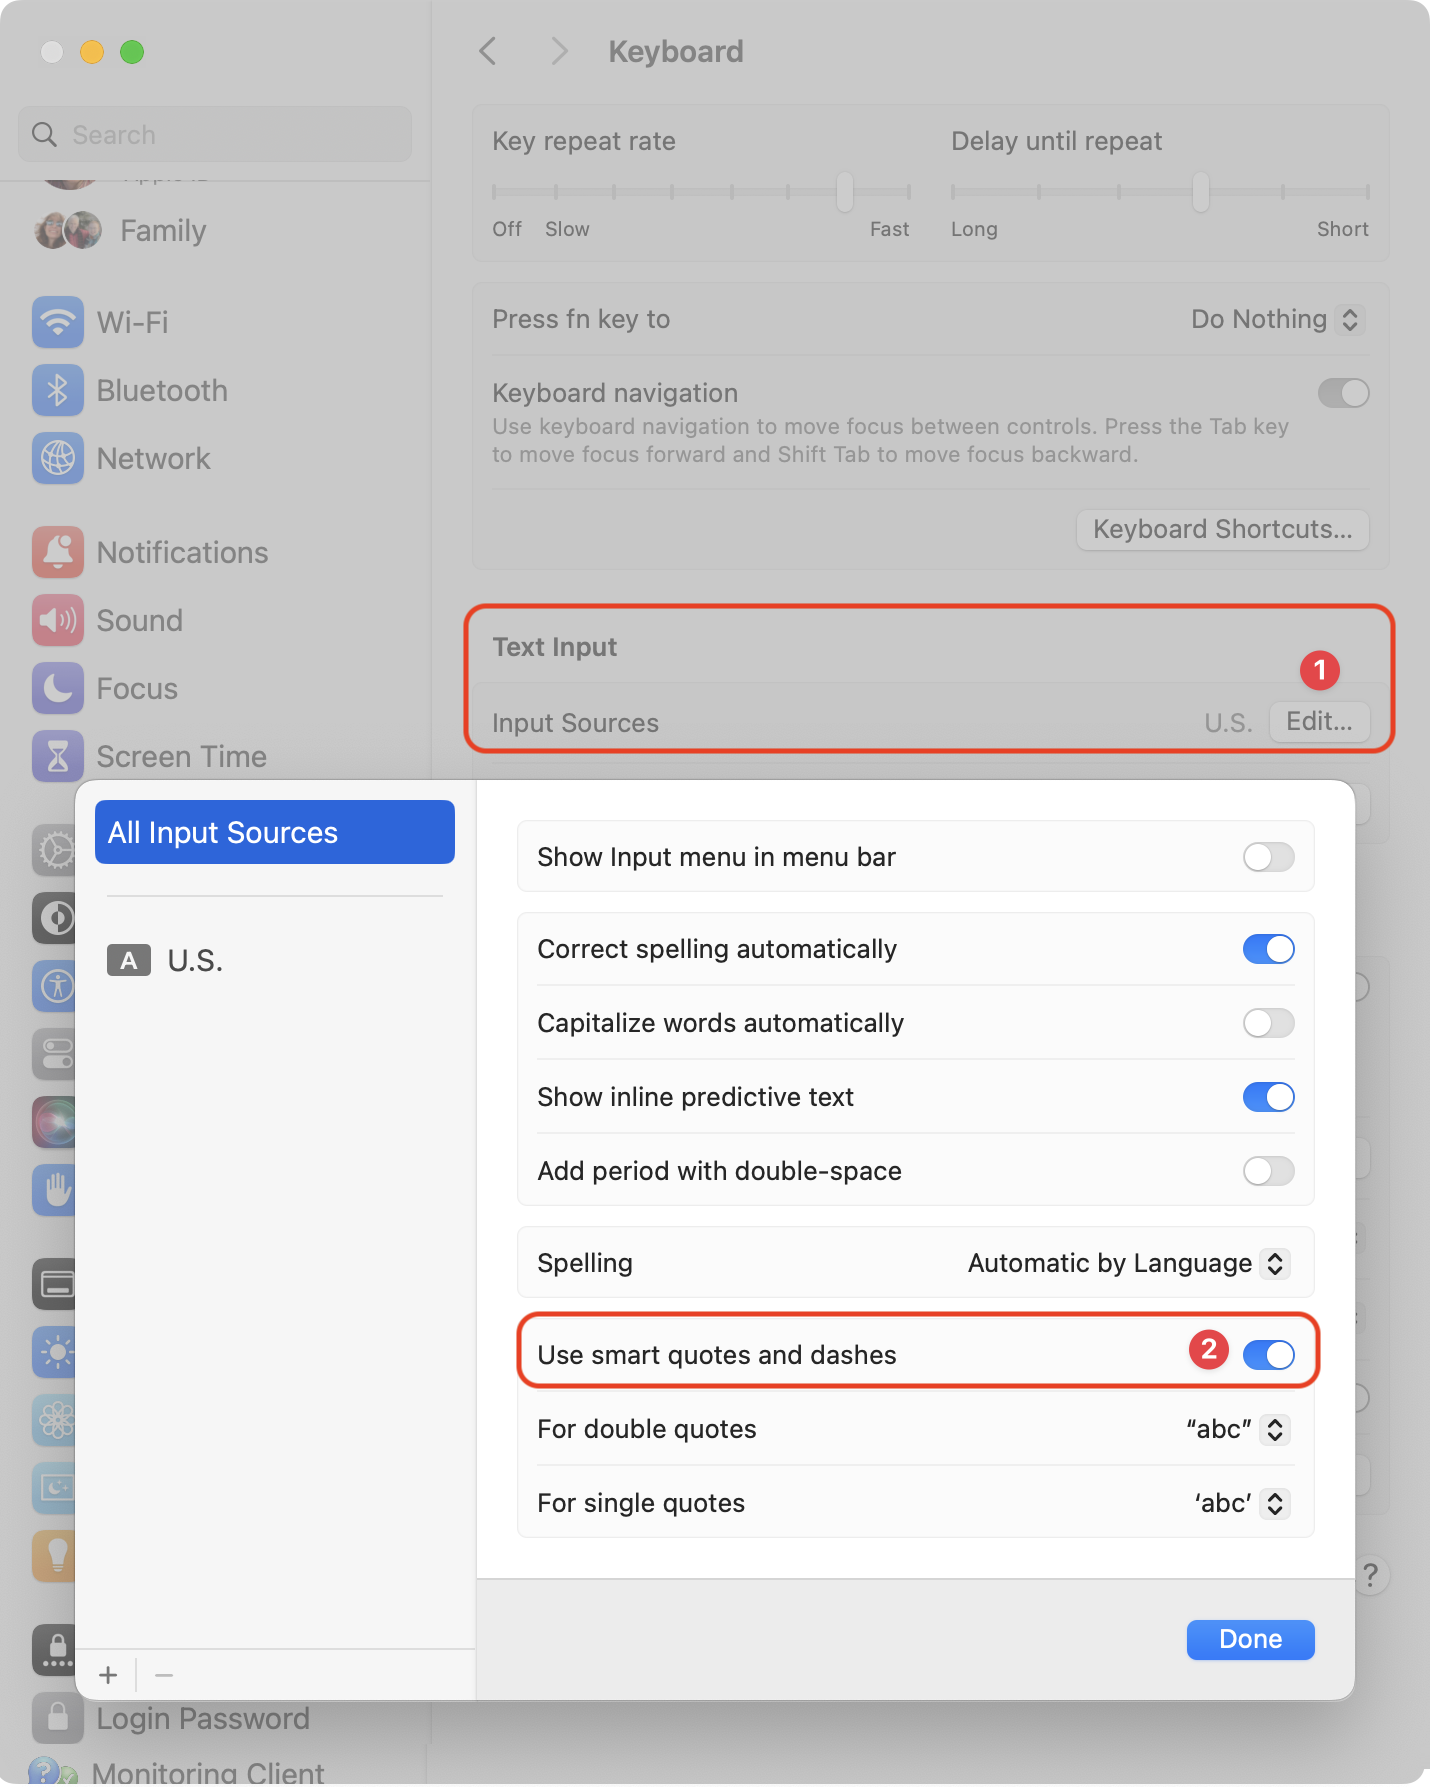
Most people like smart quotes and dashes, at least most of the time. Your Mac is probably set up to turn the single (') and double (") hash marks and double hyphens (--) that you type into the apostrophes (’) and single smart quotes (‘’), double smart quotes (“”), and em dashes (—) used in professional publications. However, in some situations, like programming, smart quotes and dashes are problematic. To prevent macOS from automatically inserting them, open System Settings > Keyboard and click the Edit button next to Input Sources. In the dialog that appears, turn off “Use smart quotes and dashes.” As a bonus tip, if you occasionally want single or double hash marks, such as to indicate feet and inches, instead of turning the entire feature off, immediately press Command-Z after typing a single or double hash mark to undo the change from straight to curly.
(Featured image by iStock.com/Wirestock)
How to Display the Battery Percentage in Your Mac’s Menu Bar
If you’re tired of trying to interpret how full your MacBook’s battery is from its menu bar icon, here’s how to get it to display a percentage as well.
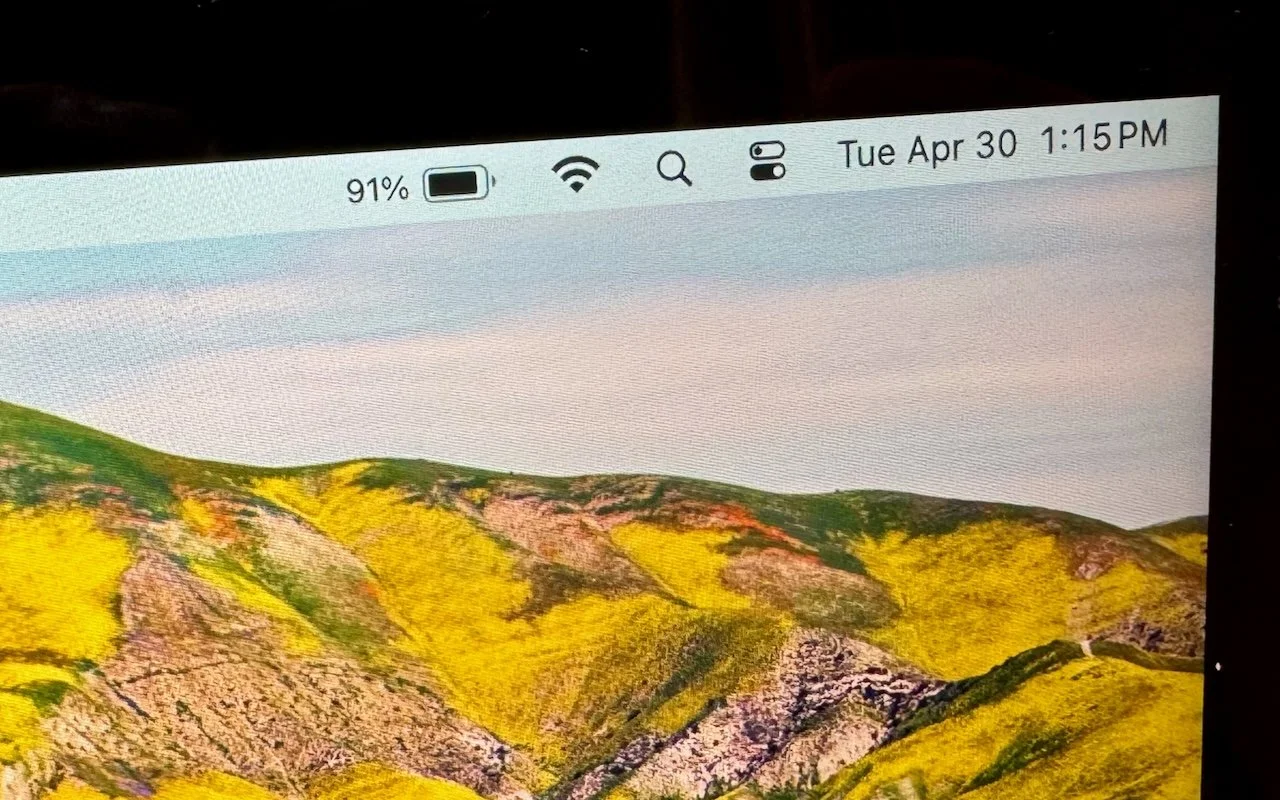
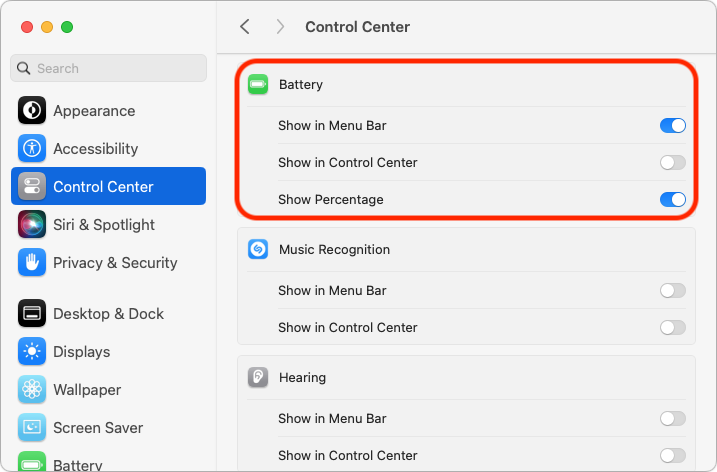
By default, the battery icon in your Mac laptop’s menu bar shows how full your battery is. Clicking it reveals the exact percentage, but you can also set macOS to display the battery percentage next to the icon. The setting isn’t where you might expect in System Settings > Battery. Instead, you’ll find it in System Settings > Control Center, where you need to turn on both “Show in Menu Bar” and “Show Percentage.”
(Featured image by Adam Engst)
Tips for Working with Mac Display Resolutions
You can adjust your Mac’s screen resolution to make text and graphics larger so they’re easier to see, or if you have good vision, you can make them smaller so more content fits on the screen. Our tips will help.
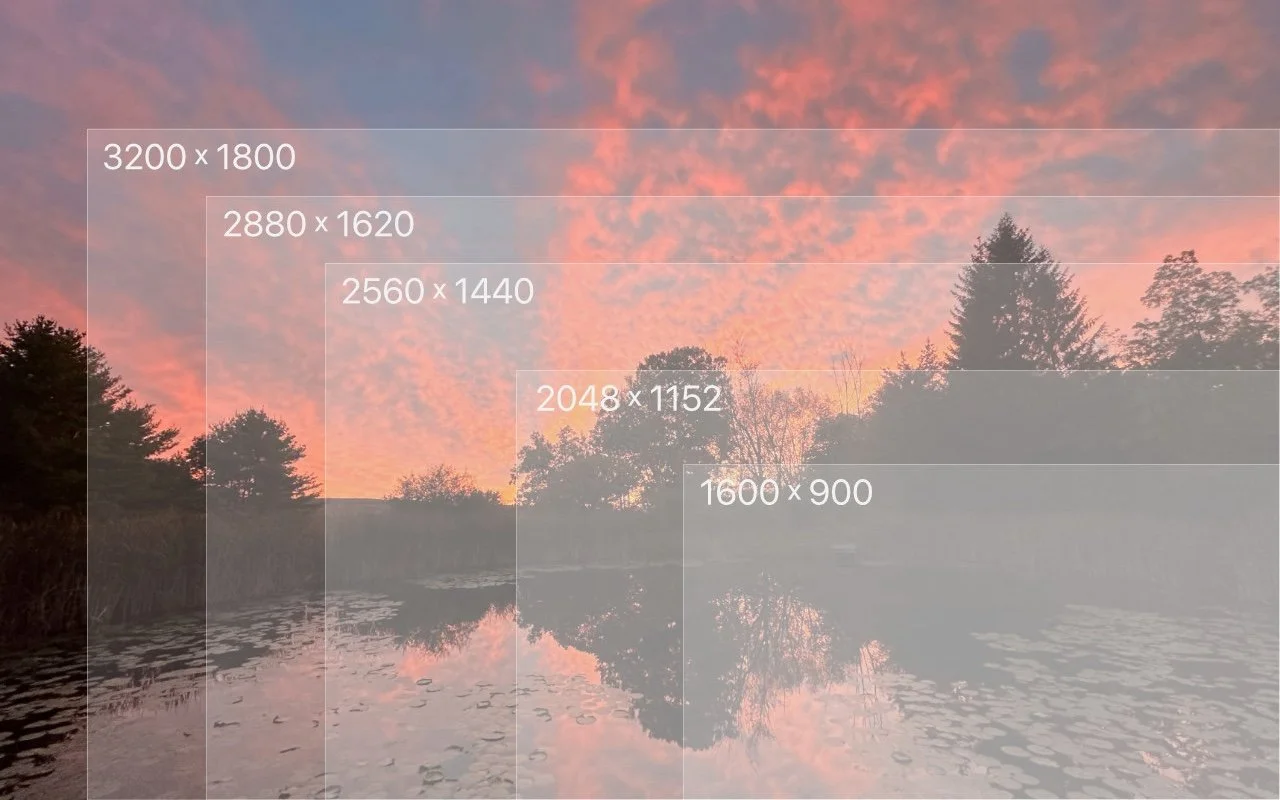
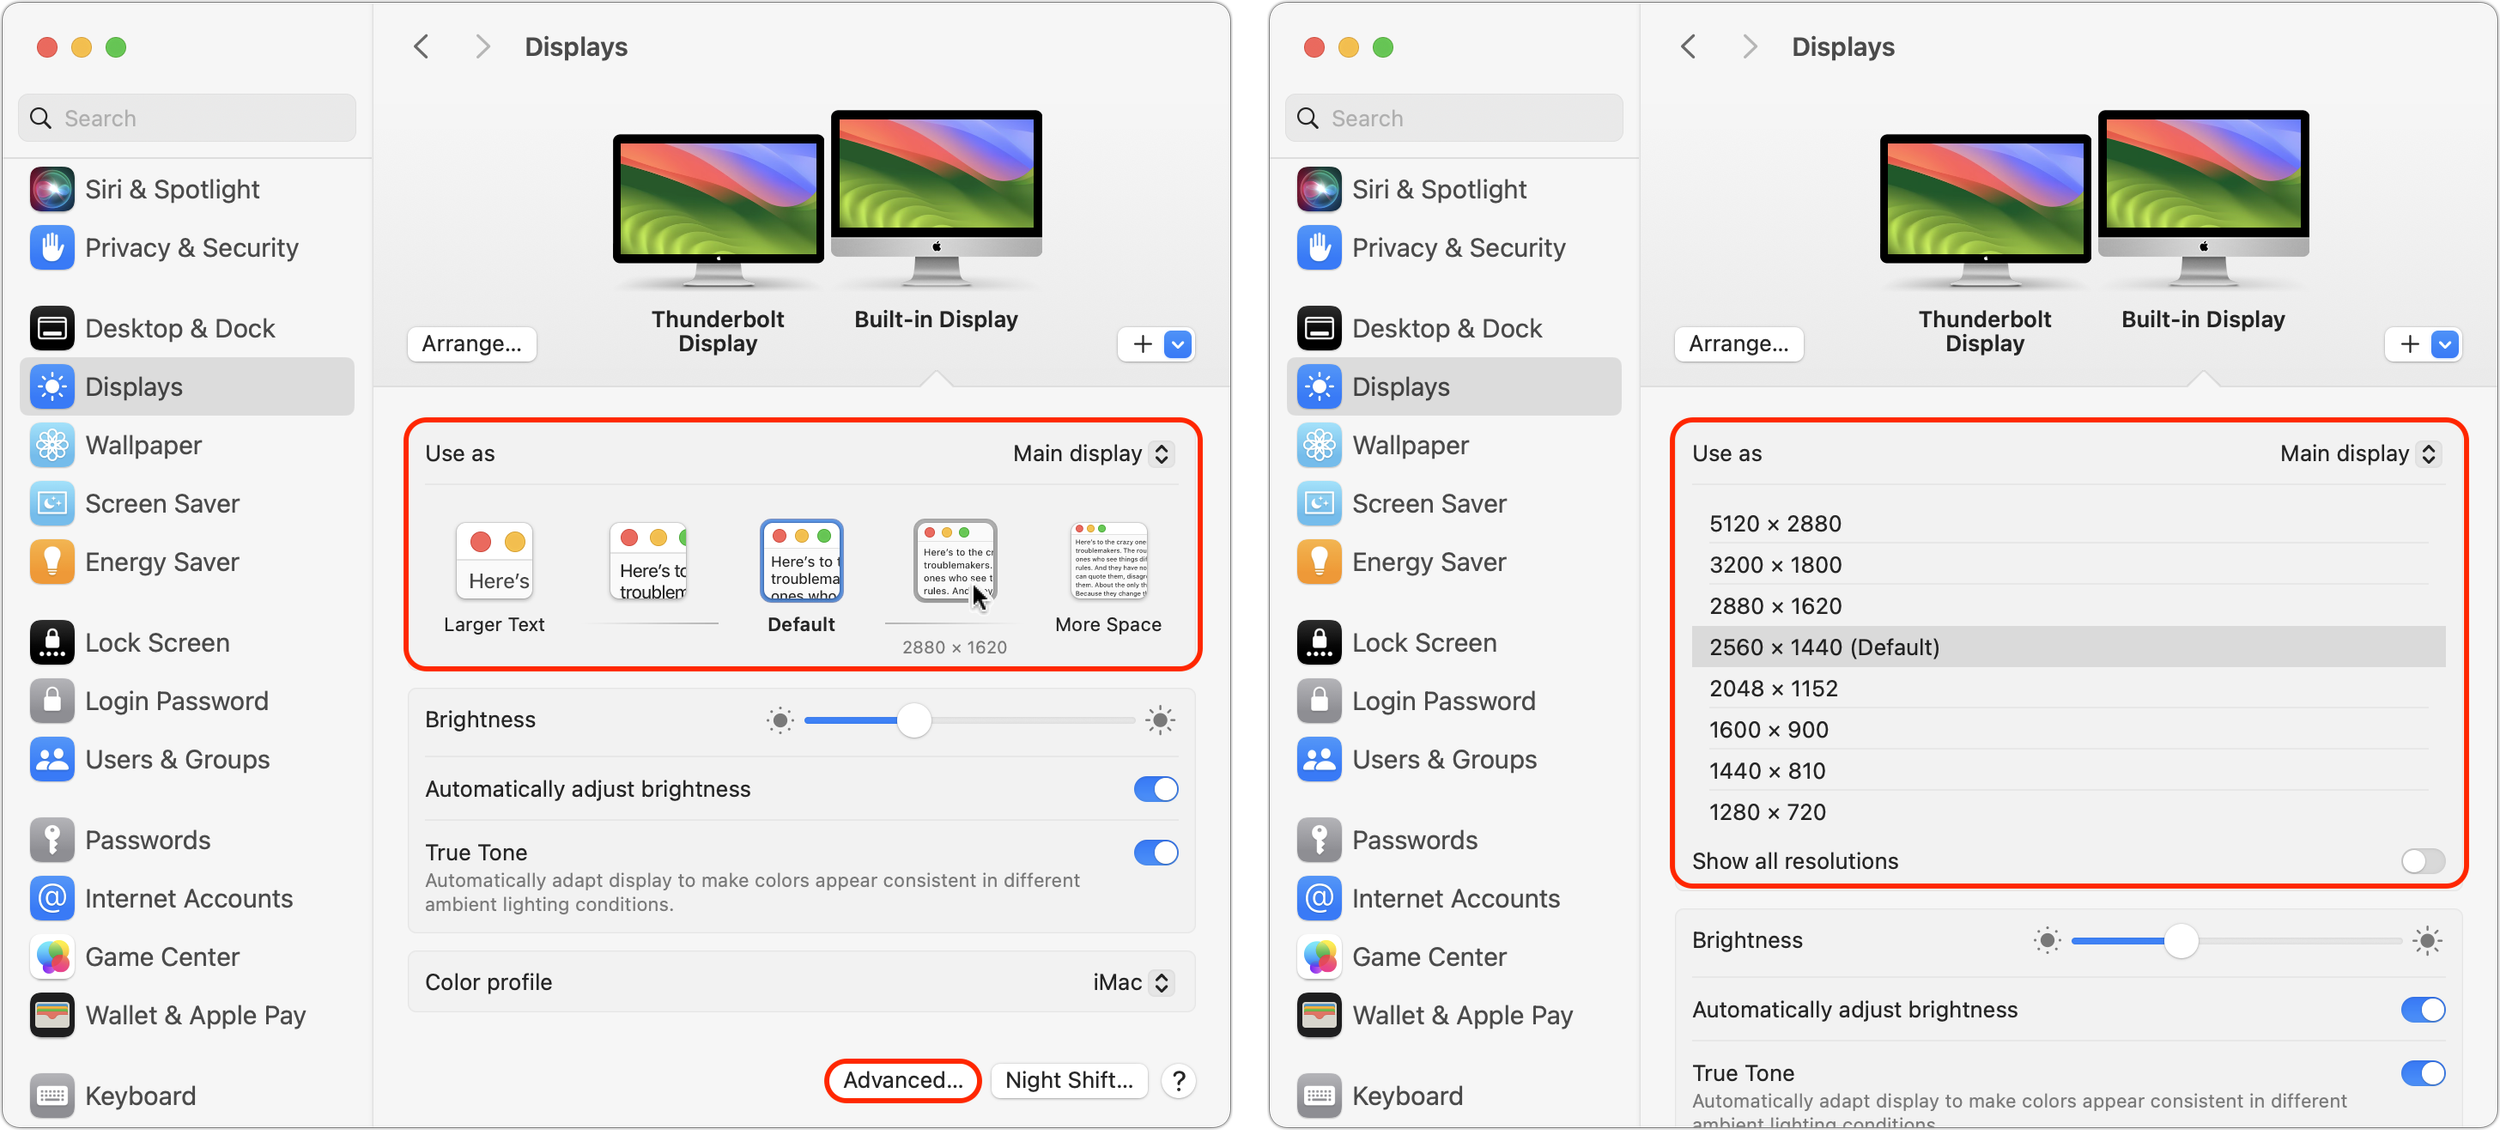
You can change the resolution of your Mac’s screen—how many pixels appear—to make text and graphics larger and easier to see or smaller to fit more content on-screen. In System Settings > Displays, Apple shows thumbnails for five likely possibilities. Hover the pointer over a thumbnail to see its numeric resolution underneath. If you prefer the traditional list of numeric resolutions, Option-click a thumbnail—another Option-click in the list brings back the thumbnails. Although the Show All Resolutions switch reveals more options, most will be fuzzy. If you always want to see resolutions as a list, click Advanced at the bottom and turn on Show Resolutions as a List. Finally, look closely for a tiny Easter egg: the text in the thumbnails is the script from Apple’s classic Think Different ad spot.
(Featured image by Adam Engst)
Apple Podcasts Adds Transcripts
Did you know Apple’s Podcasts app now includes written transcripts? Our tip helps you view the text while you listen, use it to navigate within the audio, search for specific bits, and more.

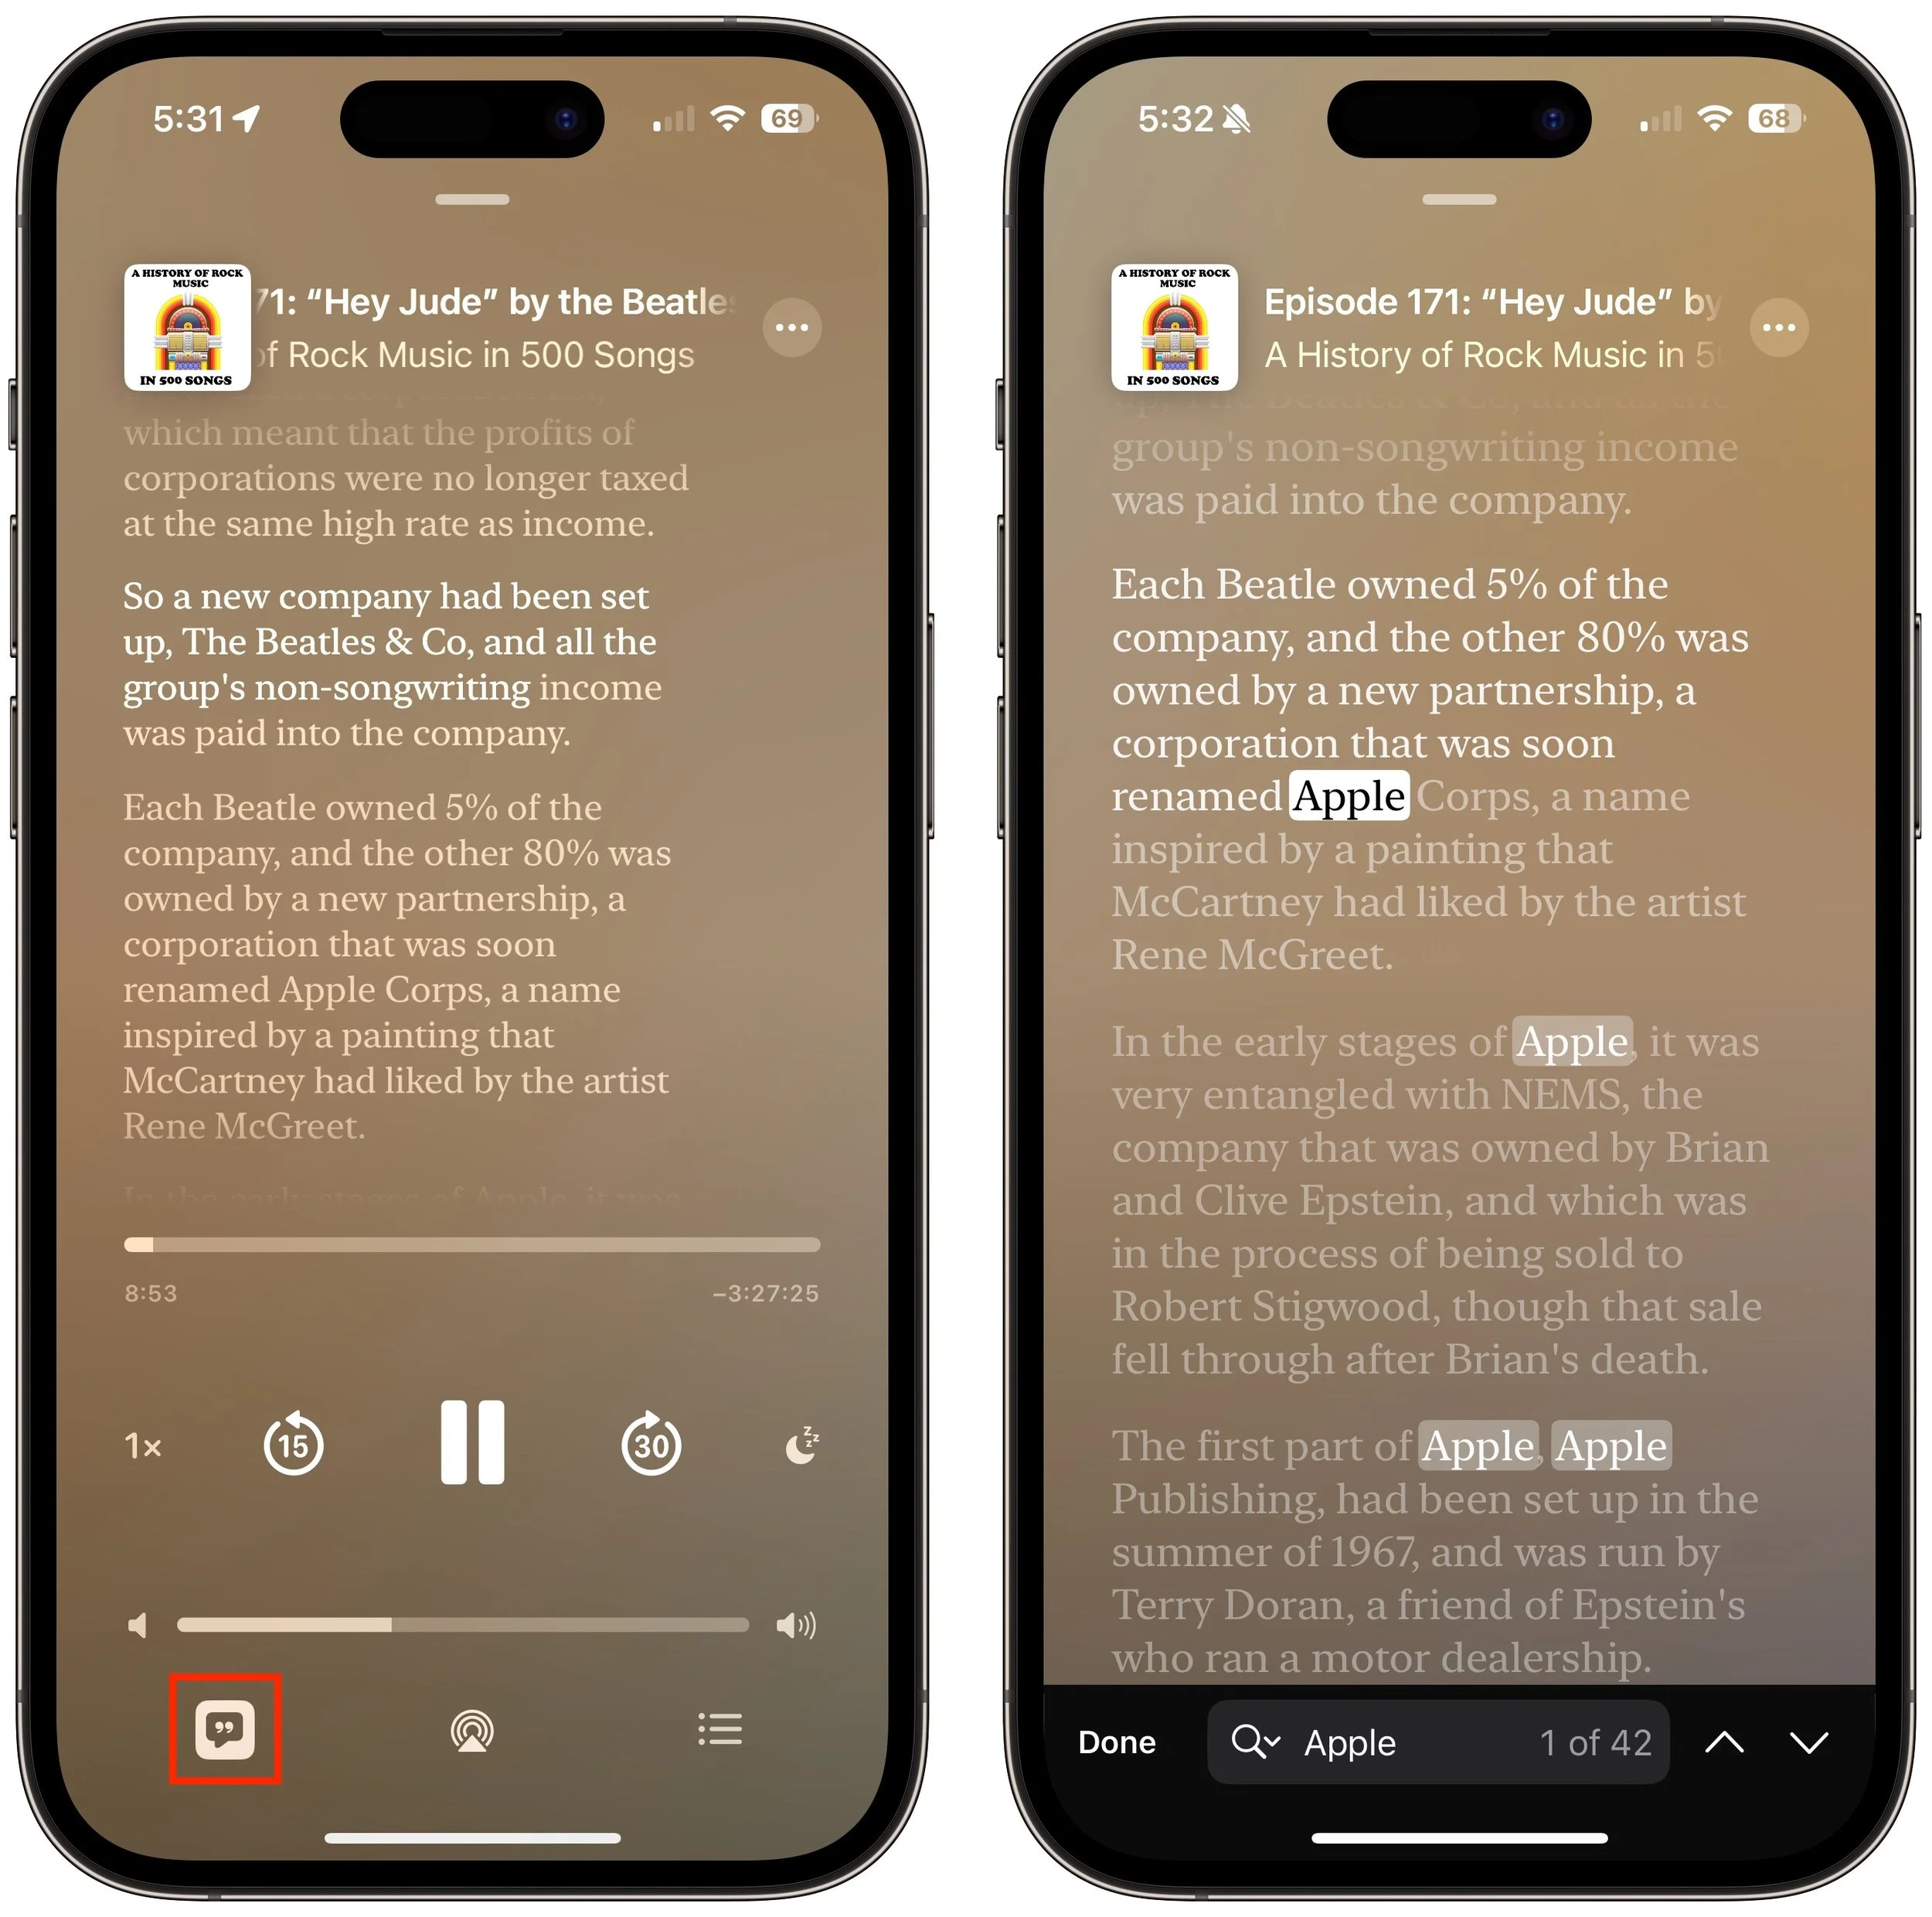
In iOS 17.4, iPadOS 17.4, and macOS 14.4 Sonoma, Apple enhanced its Podcasts app to include transcripts of all podcasts in the Apple Podcasts catalog as long as they’re in English, French, German, or Spanish. (It doesn’t translate from one language to another.) Much like song lyrics in the Music app—open it by tapping the dialog button in the player—the transcript scrolls in sync with the podcast’s audio, and you can tap anywhere in the transcript to play the audio from that spot. Tap the Search button that appears when you view the transcript to look for any text contained within. Recent podcasts should all have transcripts now, and Apple is working to catch up on older podcasts. The AI that generates the transcripts sometimes makes mistakes and doesn’t distinguish between different speakers, but overall, the transcripts provide a good sense of what’s being said.
(Featured image by iStock.com/microgen)
Want an Event List in Apple’s Calendar App? Try This Trick
Want to see all your upcoming events in a list in Apple’s Calendar app on the Mac? It doesn’t have a built-in list view, but there’s a workaround.

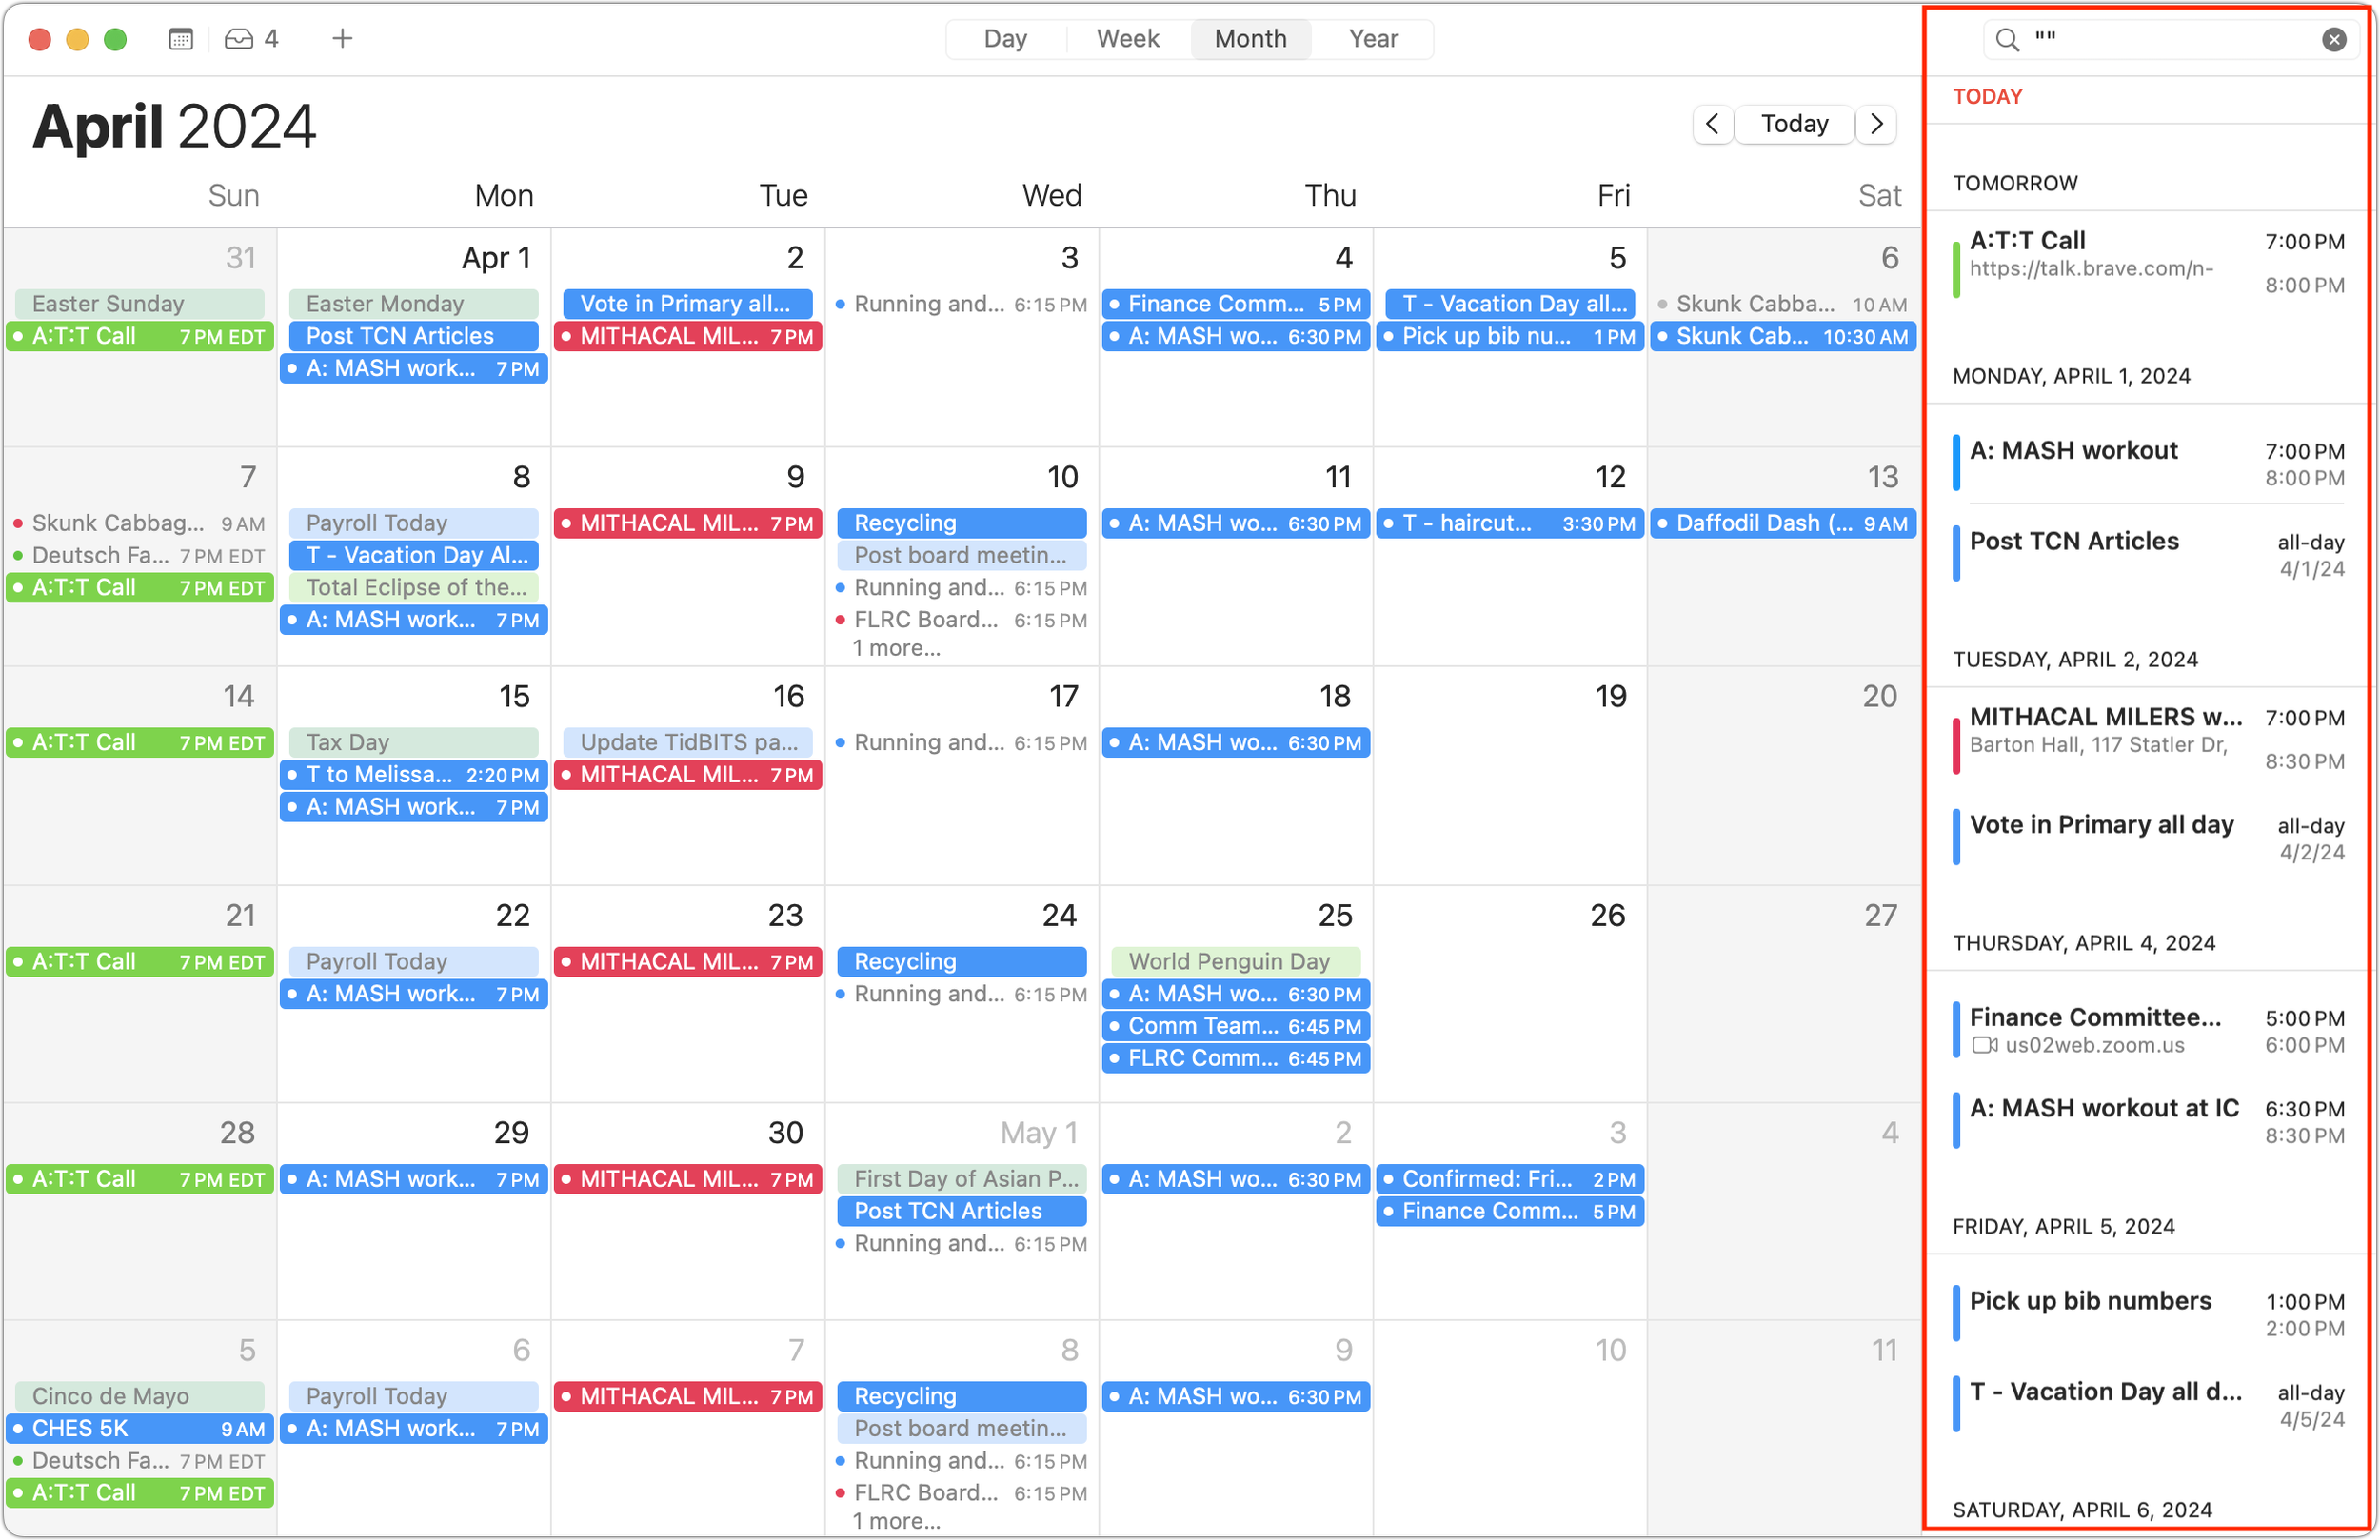
Along with day, week, month, and year views, most calendar apps offer the option of a simple chronological list of events, which can be a handy way to see what’s coming up. Apple’s Calendar app on the Mac is unfortunately not among those apps. However, there is a trick you can use to get it to show all your upcoming events in a scrolling list. Click in the Search field in the upper-right corner and enter two double quote marks (""). In essence, it’s a search for “everything,” and Calendar promptly shows all your events in a row down the right side of the window. If you’re looking for a more capable calendar app, BusyCal and Fantastical are popular in the Mac community, and some apps like Microsoft Outlook and Zoom also include calendaring features.
(Featured image by iStock.com/AndreyPopov)
Looking for Apple Manuals? Check the New Documentation Site
Do you want to read the actual manuals or specs for Apple products? You can now easily find them on Apple’s new Documentation website.

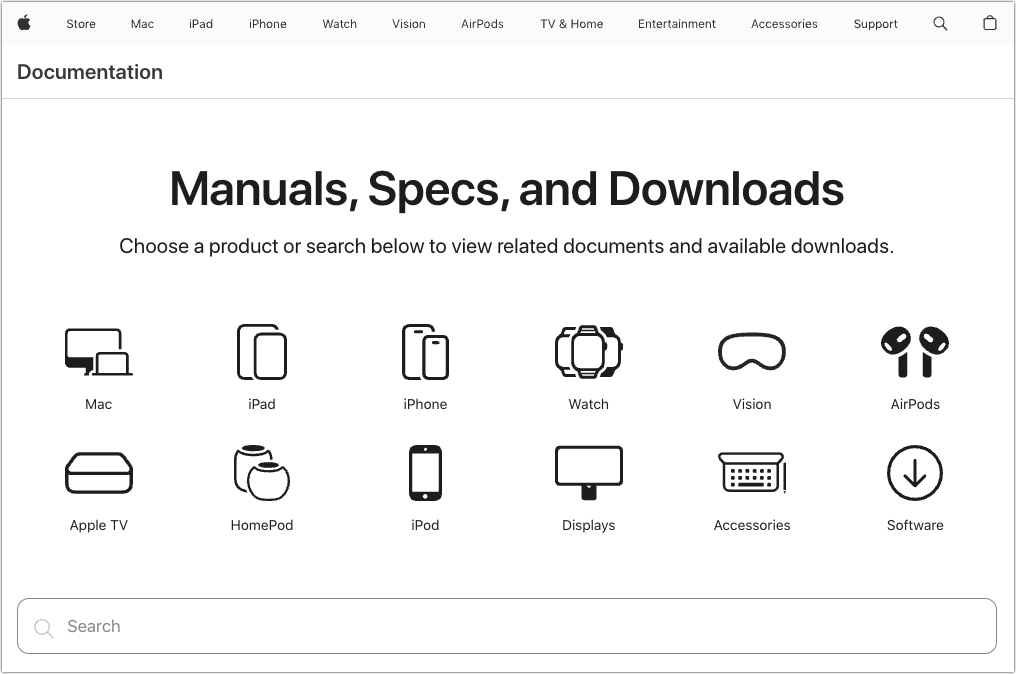
Apple publishes a multitude of manuals and tons of technical documentation for its products on its support site, but until recently, it could be challenging to find something specific because the search engine on Apple’s site is poor. For a better path into Apple’s online support materials, check out the company’s new Documentation site, which brings together manuals, specs, and some downloads for nearly all its products. The operating system User Guides are particularly helpful, and they even provide a Version pop-up menu that lets you make sure you’re getting information for the version you’re using.
(Featured image by iStock.com/Ildo Frazao)
Use the Command Key to Rearrange and Remove Menu Bar Icons
If your Mac’s menu bar is a mess, you can use the Command key to rearrange the icons and remove those you never use.

Is your Mac’s menu bar overwhelmed with icons? They’re helpful little critters, but finding one can be difficult when you have too many and they’re in no particular order. The hidden trick to cleaning up your menu bar relies on the Command key.
Rearrange the menu bar icons in an order that makes sense to you by Command-dragging them around. You can’t move the Control Center icon or put anything to its right, but every other icon is movable.
Delete unnecessary Apple-provided status icons by holding down Command and dragging them off the menu bar. (To put one back, select the “Show icon-name status in menu bar” checkbox in its System Settings screen.) You can’t remove the clock, Control Center, or the Siri icon this way, though you can turn off Siri in System Settings > Siri & Spotlight. Command-dragging to delete doesn’t work for non-Apple apps; instead, look for a preference in the app itself.

(Featured image by iStock.com/Valentyna Yeltsova)
Send Photos in Messages Faster with This Hidden Shortcut
It’s not hard to add a photo to a conversation in Messages, but with this tip, it’s even faster and easier!

On the iPhone and iPad, to send a photo to a Messages chat, tap the ⊕ button and then tap Photos in the list that appears to reveal the photo picker. That’s not difficult, but it requires an extra step you can avoid with this tip. If you’re running iOS 17 or iPadOS 17, instead of tapping the ⊕ button, touch and hold it for a second to bring up the photo picker immediately.

(Featured image based on an original by iStock.com/oatawa)