
Privacy Tip: Don’t Post Vaccination Record Cards on Social Media
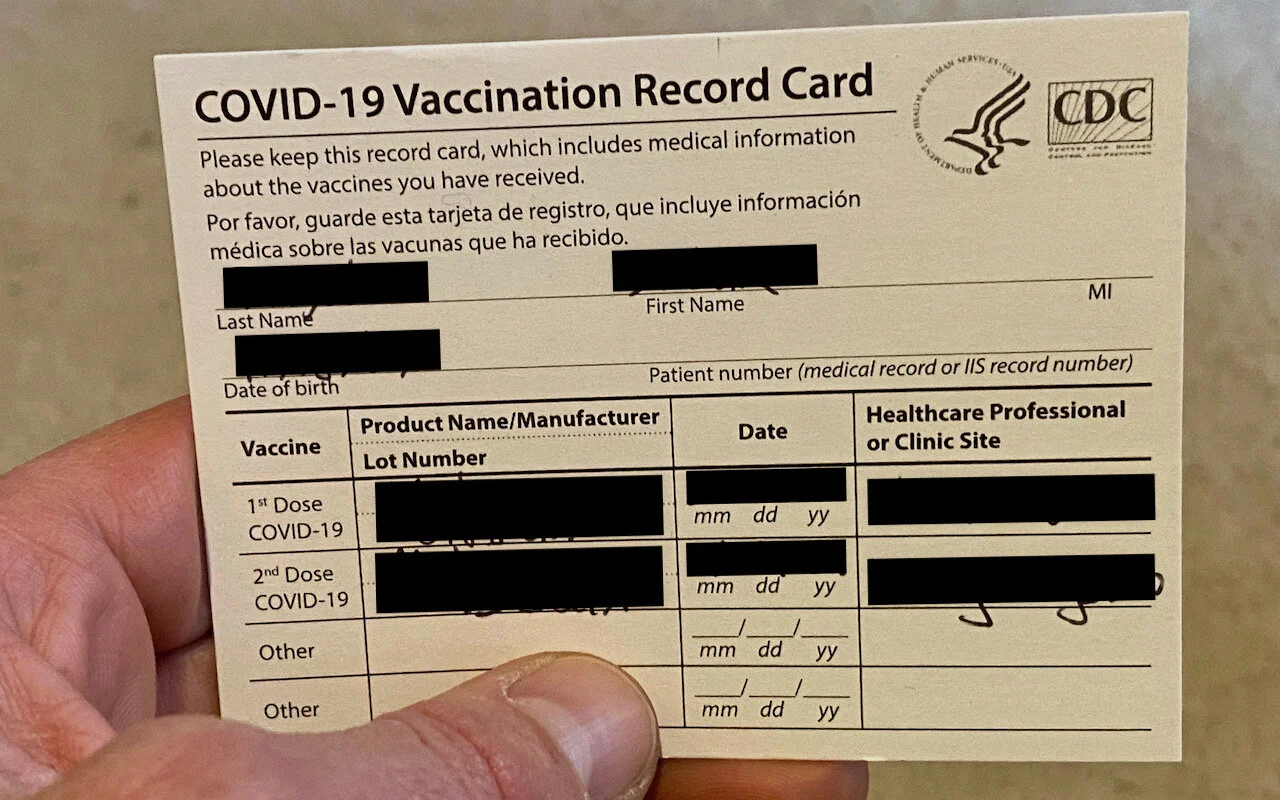
So you’ve gotten your COVID-19 vaccination. Congratulations, and thank you for nudging the planet closer to the herd immunity needed for life to return to normal! It’s a good idea to take a photo of your card as a backup before filing it with your other important papers, just in case. (If you lose the original, you may be able to get a new one from the site where you got the vaccine or through your state’s Immunization Information System.) However, we do want to offer a note of caution. Resist the urge to post that photo—or one of you gleefully brandishing your card—on social media. The cards include your name, date of birth, vaccine location, and other personal information that could be used to steal your identity, and any digital miscreant worth their salt is already trawling through your social media feeds for as much personal information as they can find.

(Featured image by Adam Engst)
Work with iOS App Updates in Your Account in the App Store

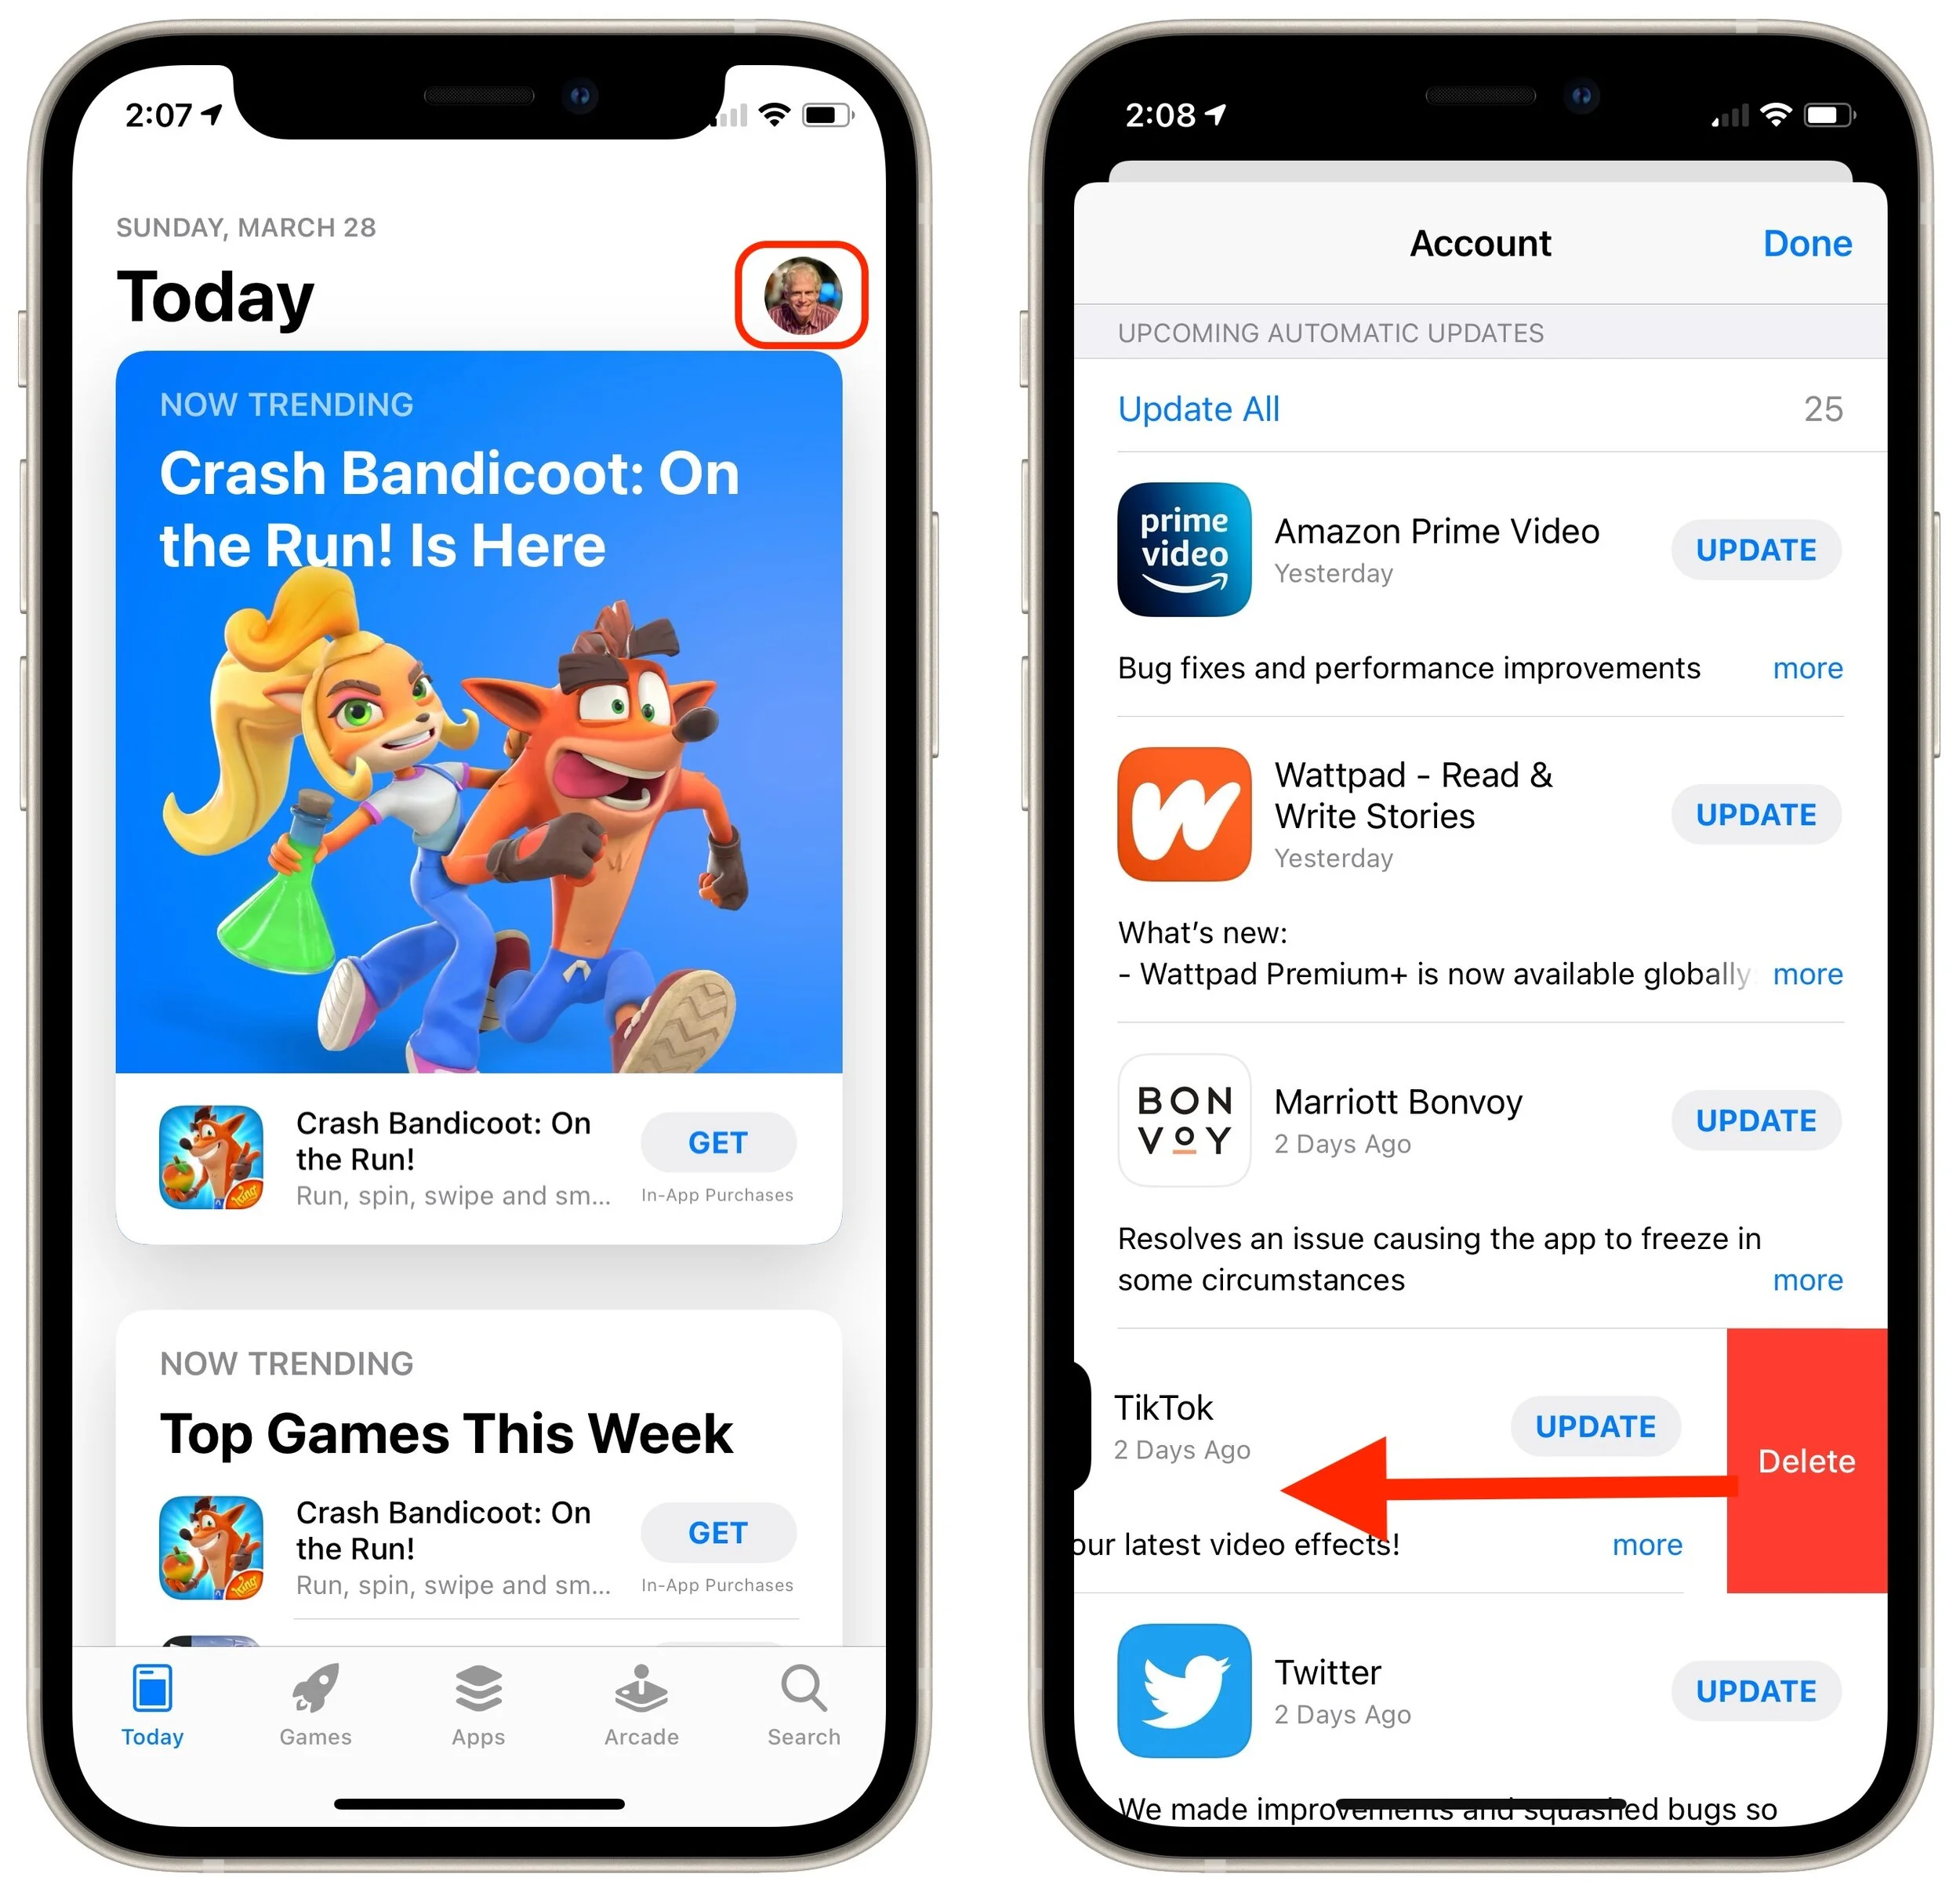
If you’ve turned on automatic App Updates in Settings > App Store on your iPhone or iPad, you might wonder how you’d know if an app was updated or what changed. To find that information, open the App Store app and tap your avatar icon in the upper-right corner. Scroll down and you’ll see an Updated Recently list. If you pull down on the screen, that will force it to refresh, and you may see a list called Upcoming Automatic Updates at the top. For any downloaded update, you can tap Open to open it. If it hasn’t yet been downloaded, you can tap Update to update it right away rather than waiting for the automatic update. Tap More to see the full release notes. Finally, here’s a hidden tip: swipe left on any app to delete it.
(Featured image by Brett Jordan from Pexels)
Don’t Store Confidential Files in Online File Sharing Services

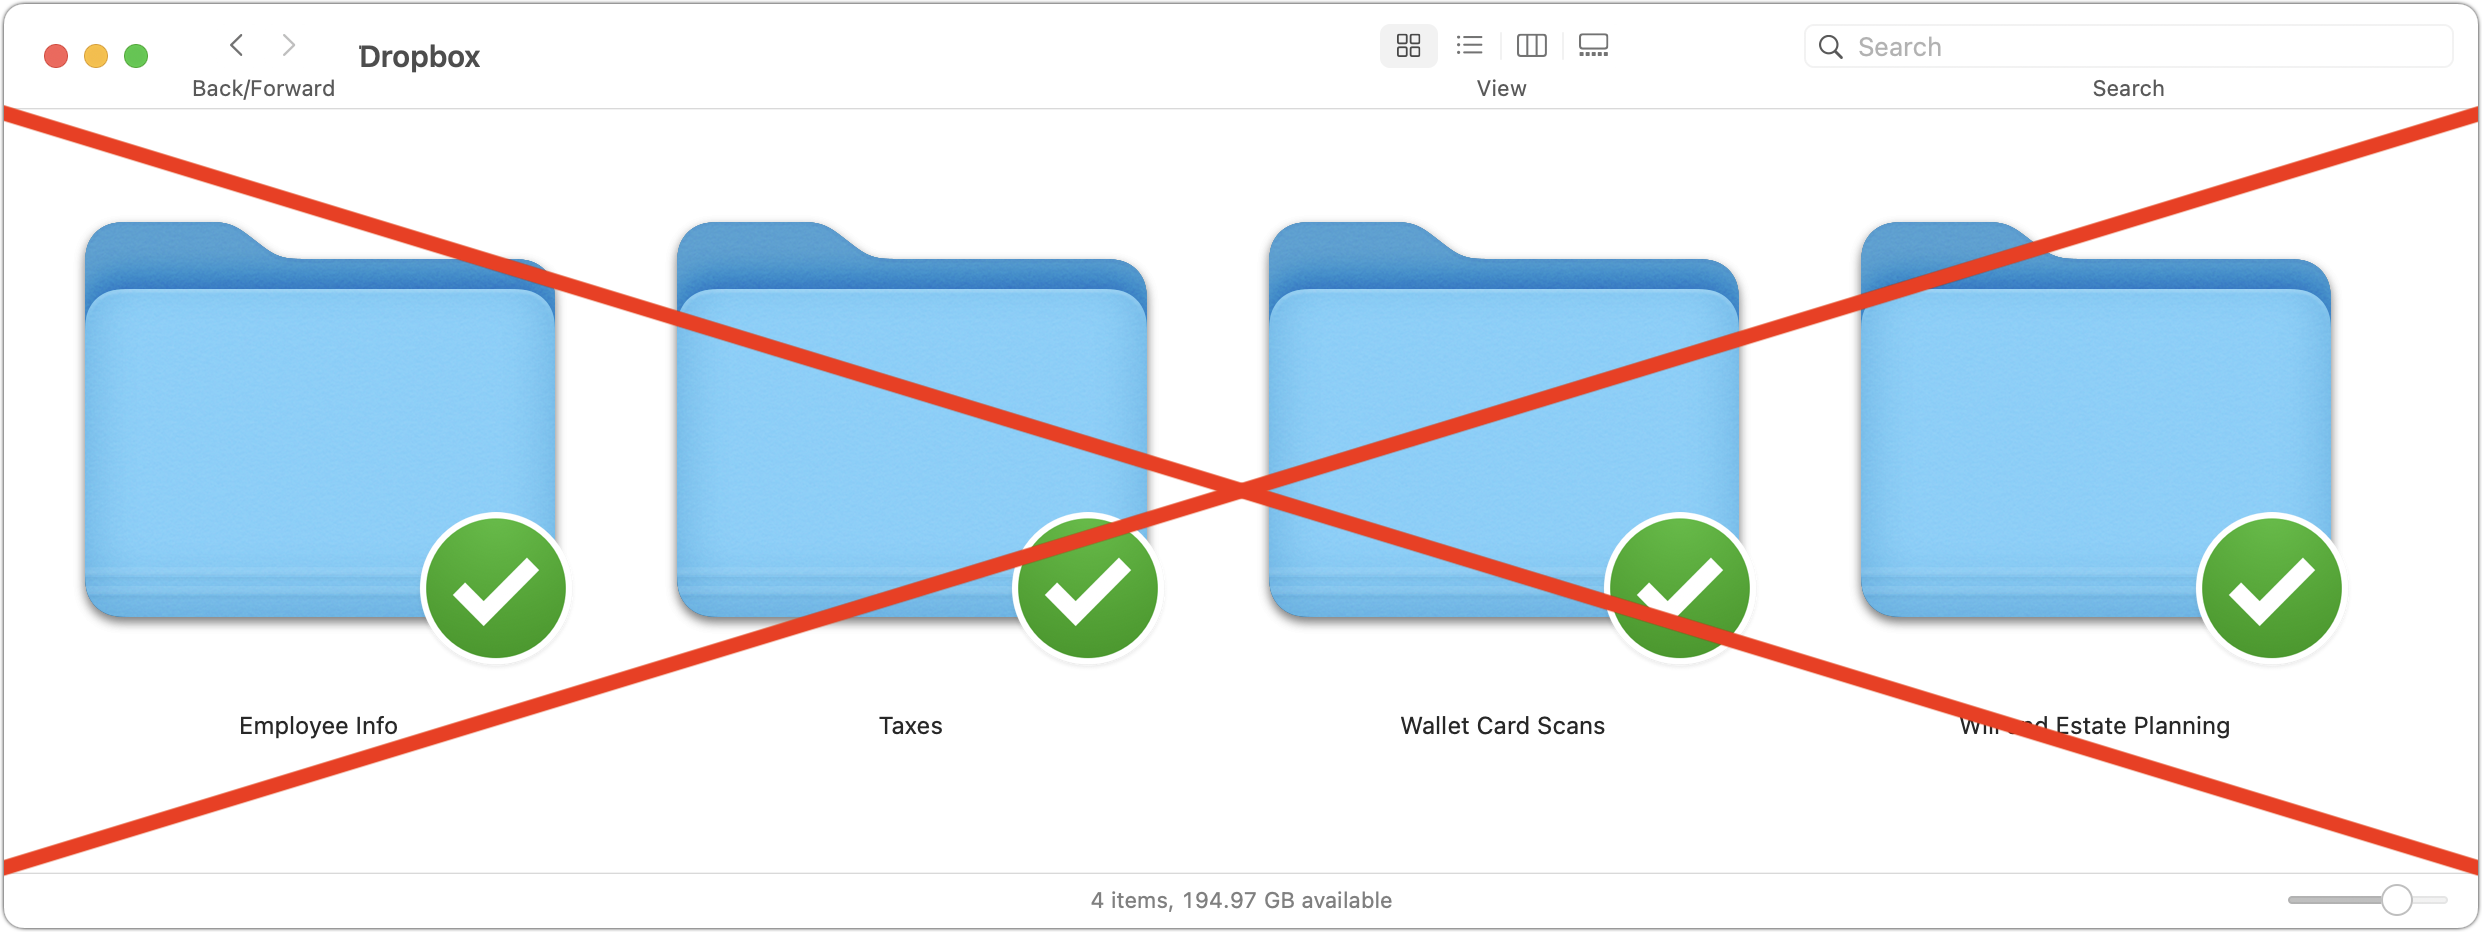
Given their integration into the Mac’s Finder, it can be easy to forget that online file sharing services like Dropbox, Google Drive, iCloud Drive, and Microsoft OneDrive can be accessed using a Web browser by anyone with your username and password. Obviously, you should always have strong, unique passwords, but to be safe, it’s best not to use services designed for public file sharing to store unencrypted files containing sensitive information like credit card numbers, Social Security numbers, passport scans, privileged legal documents, financial data, and so on. Keep such data secure on your Mac—outside of any synced folders—where accessing it requires physical access to the machine. If you are worried about where your files are stored or are not comfortable moving them on your own, bring your device into the store anytime, no appointment needed, or you can give us a call or shoot us an email to schedule a remote or onsite support session.
(Featured image based on an original by Kenaz Nepomuceno from Pexels)
Not a Fan of Big Sur’s Translucent Menu Bar? Here’s How to Disable It

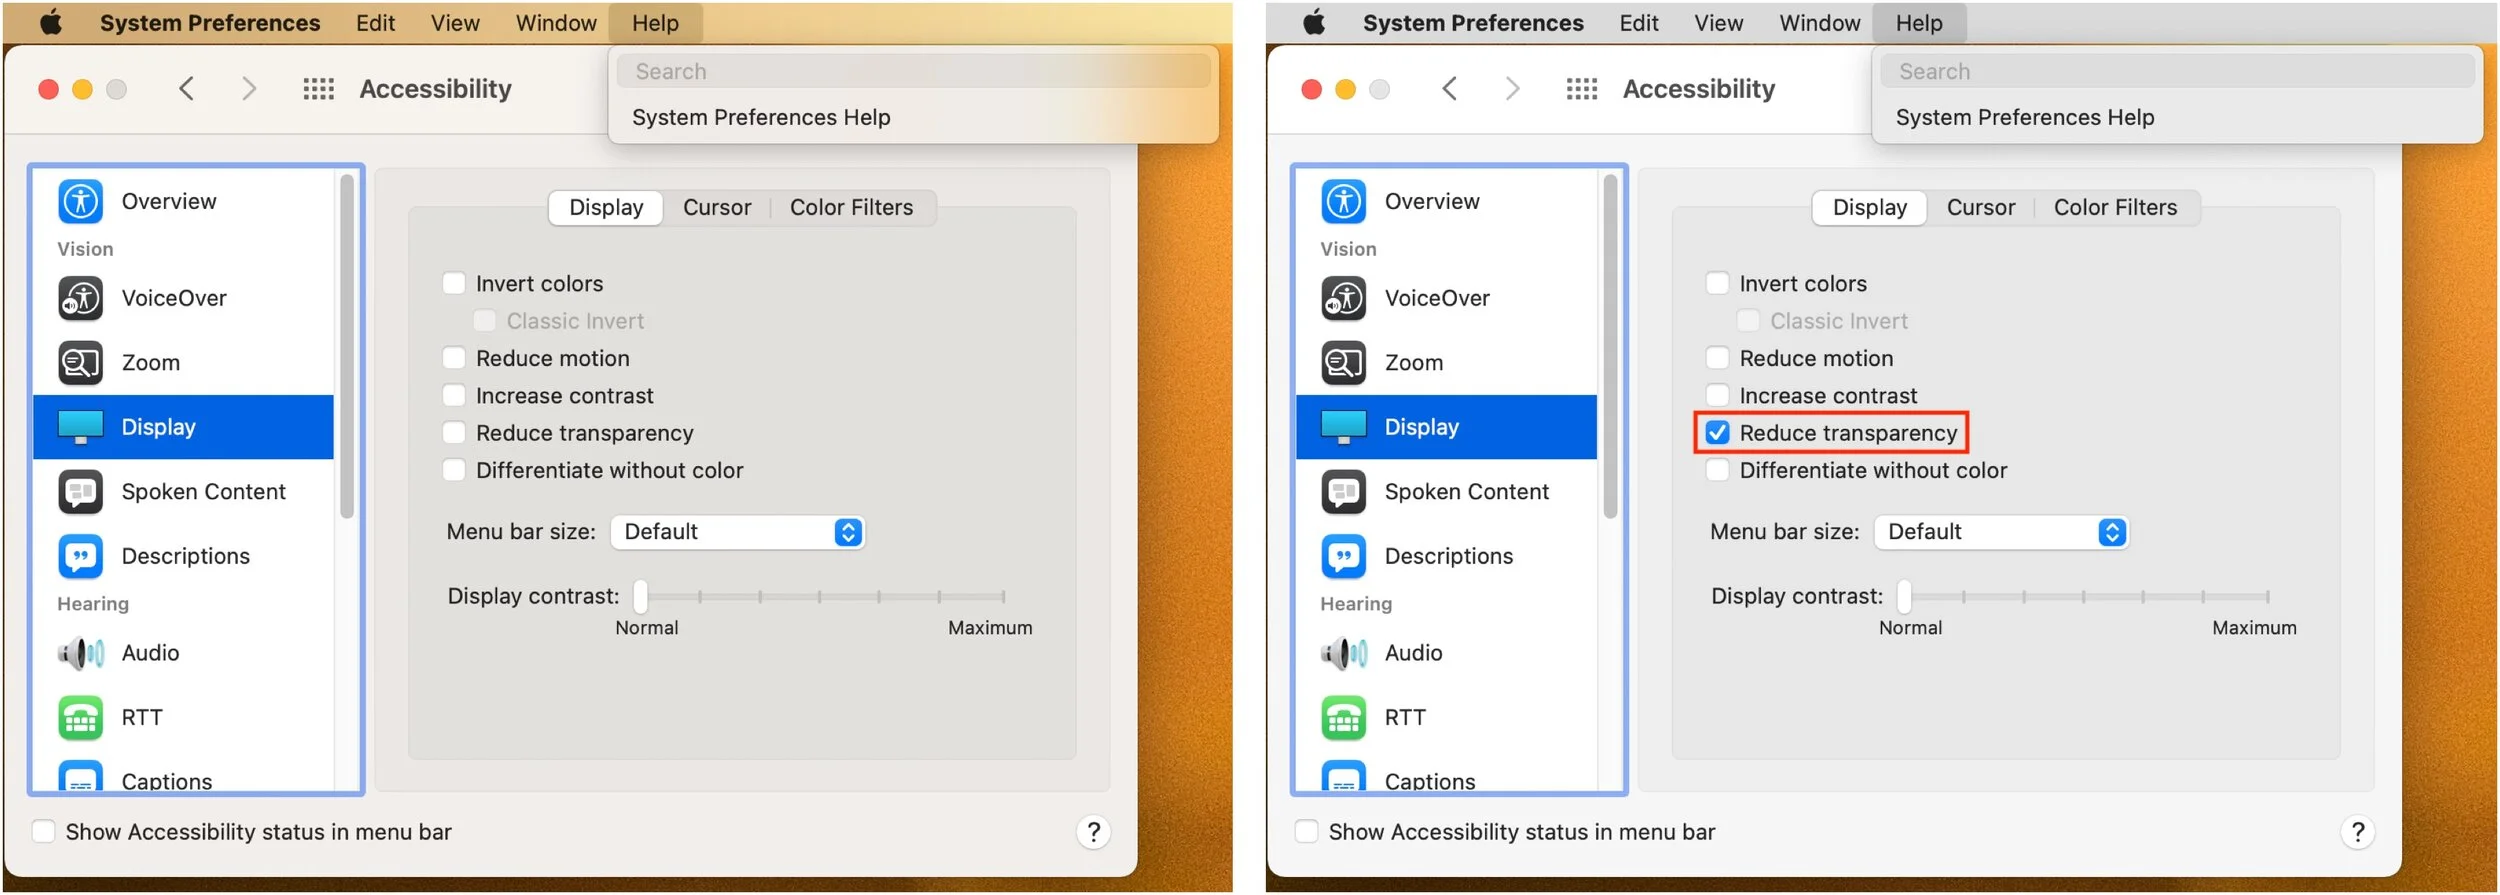
In macOS 11 Big Sur, Apple went back to a design direction from the earliest days of Mac OS X: a translucent menu bar. Since its color changes depending on the desktop picture, many people aren’t enamored of it (left, below). Luckily, reverting to the traditional opaque menu bar is simple. Open System Preferences > Accessibility > Display and select Reduce Transparency. That will turn the menu bar gray again and make other windows and menus opaque, too (right, below). Simple gray might not be as fancy as transparency, but it’s more predictable and easier to see. Come by the store anytime, no appointment needed, if you would like assistance from a Geek to do this.
Disable or Remap the Caps Lock Key to Avoid Accidental ALL CAPS

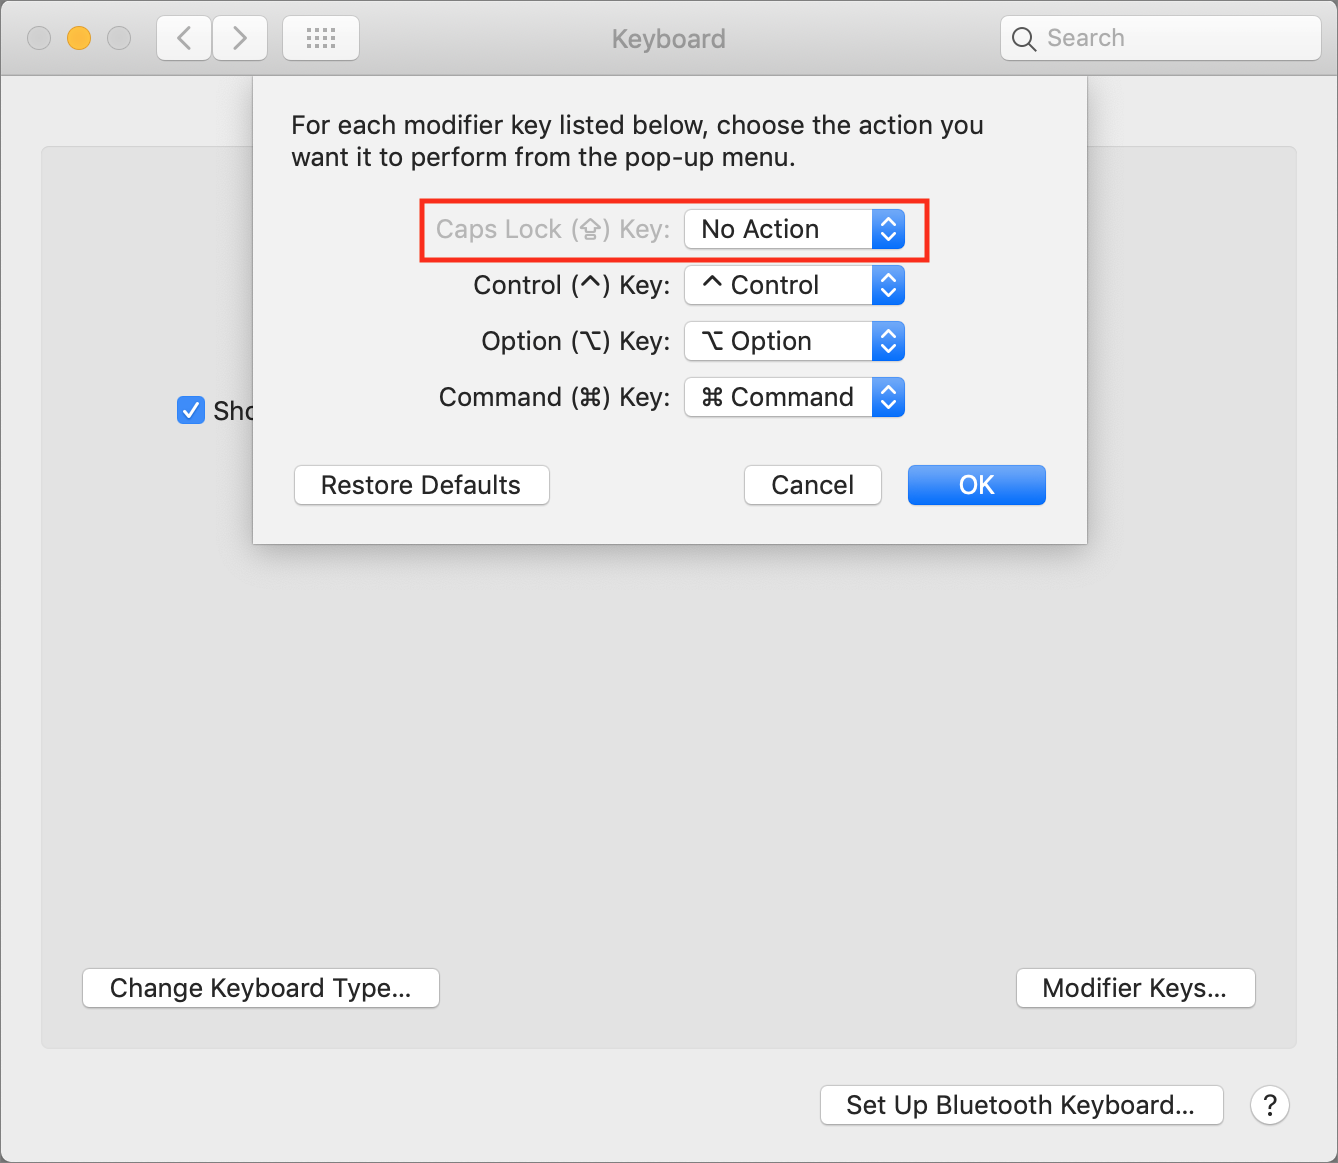
As you undoubtedly know, TYPING IN ALL CAPS is considered shouting on the Internet. Doesn’t it bug you when you accidentally tap the Caps Lock key and start writing in uppercase? The Caps Lock key is vestigial—it was invented as a “Shift lock” key to make it easier to type the second characters on the keys of a mechanical typewriter without also holding down the Shift key the entire time. It’s seldom useful on a computer; Google replaced it with a Search key on Chromebook keyboards. It still appears on all of Apple’s keyboards, but macOS lets you disable or remap it. In System Preferences > Keyboard > Keyboard, click the Modifier Keys button. In the dialog that appears, choose No Action (or another key) from the pop-up menu next to Caps Lock. Click OK and you’re free from accidental capitalizations.
(Featured image based on an original by Scott Webb from Pexels)
Set Your Preferred Name and Photo for Messages in iOS 13

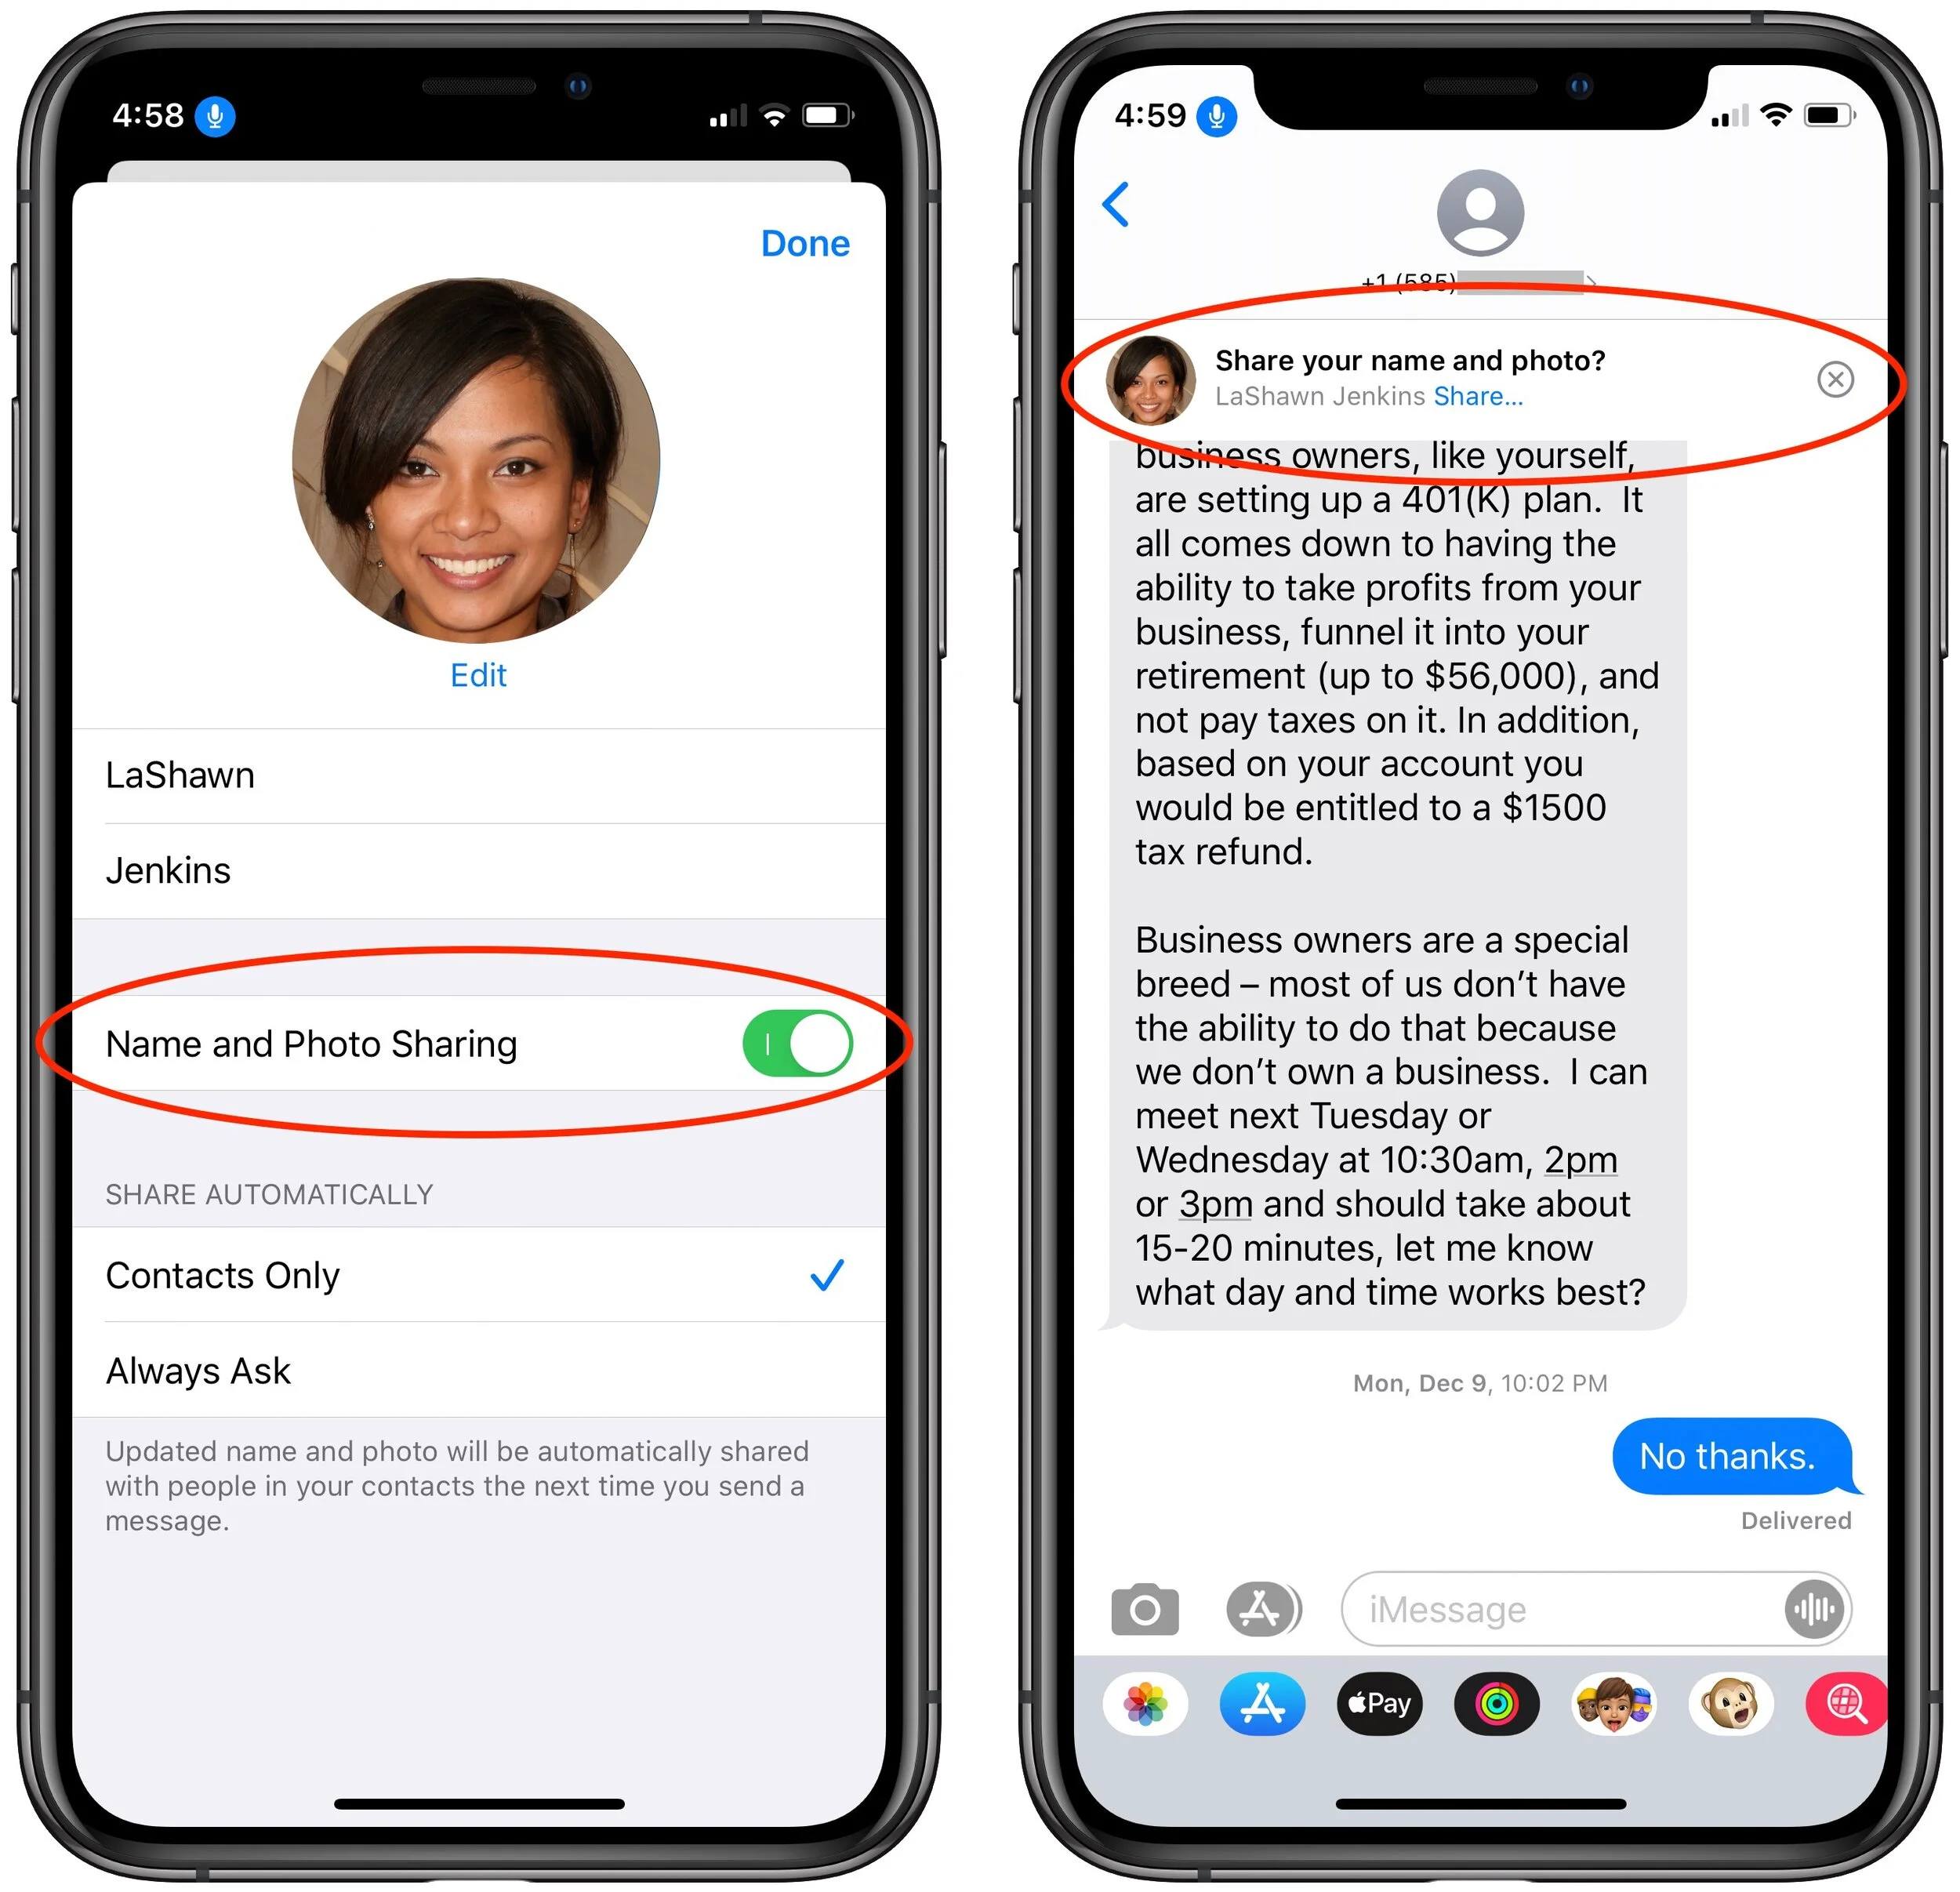
In your list of conversations in Messages, you probably have lots of people who have generic icons next to their names or numbers. You likely look like that to other people as well, but a new feature in iOS 13 lets you share your preferred name and avatar picture with other iMessage users (blue-bubble friends). In Messages, first tap the ••• button and then Edit Name and Photo. Then, in the activity view that appears, tap Edit under your photo to select a new photo and set your name as you want it. Make sure Name and Photo Sharing is enabled before tapping Done. From now on, for any iMessage conversations, you’ll see a little banner at the top that asks if you want to share your name and photo. Do so and your recipient will get a prompt to replace whatever they’re seeing for you. (And if, as a recipient, you don’t want to accept the new photo, tap the X button at the right of the prompt.)
(Featured image by Daniel Frese from Pexels)
Unsubscribe from Marketing Email to Lighten Your Inbox Load

Are you overwhelmed by email? Is your Inbox filled with promotions, special offers, and the like? These messages aren’t spam—you almost always bought something from the company or have some sort of relationship with the sender—but that doesn’t mean you want to hear from them repeatedly. Luckily, it’s easy to get off the lists of legitimate senders. Just scroll to the bottom of each message and look for an unsubscribe link. Often it will be the word “Unsubscribe” or an instruction to “click here to remove yourself.” Click the link and, if necessary, click an Unsubscribe button on the resulting Web page. Then delete the message and move on to the next one. After a week or so of doing this regularly, you should start to notice a marked decrease in unwanted messages.

(Featured image by Sharon McCutcheon on Unsplash)
Invoke Split View More Easily in Catalina
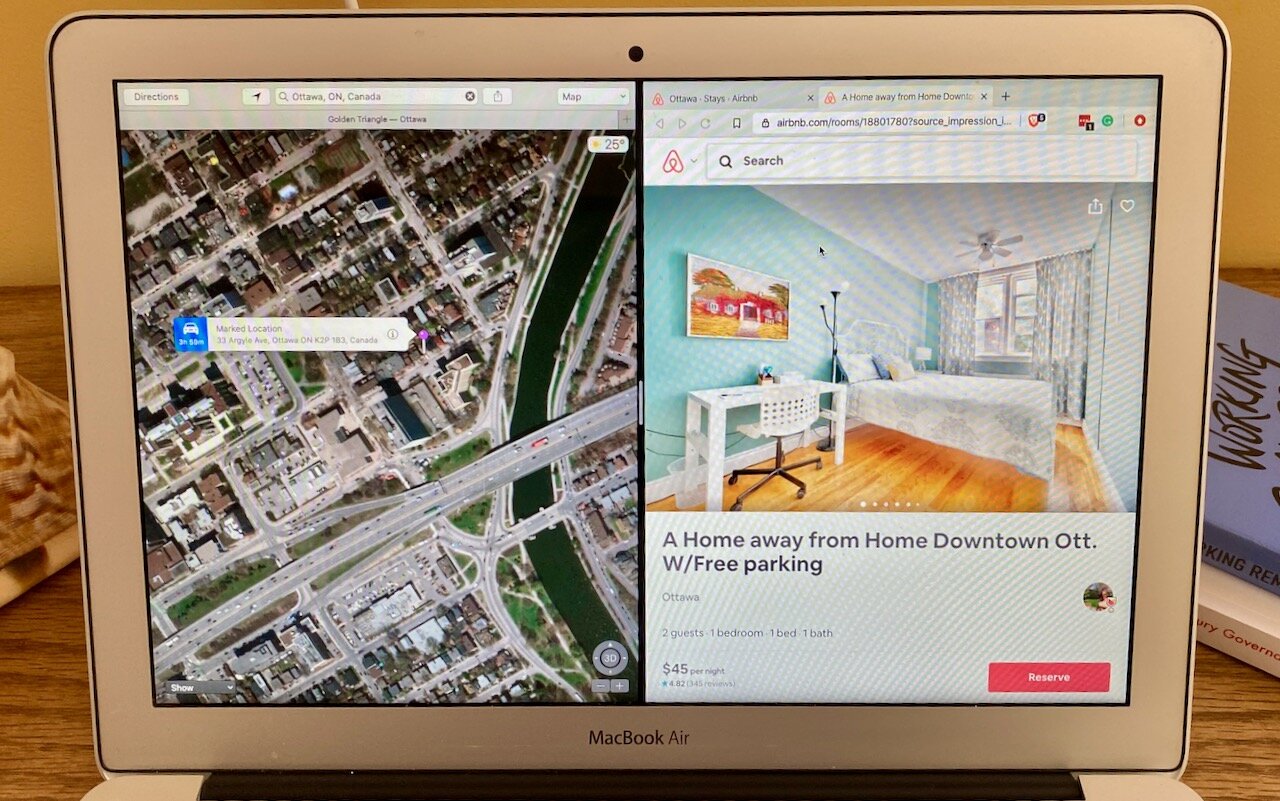
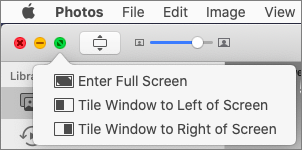
Split View on the Mac helps you focus on your work in one app—perhaps a word processor—while providing access to one other app, like a Web browser. (Make sure “Displays have separate Spaces” is selected in System Preferences > Mission Control.) Before macOS 10.15 Catalina, you had to click and hold on the green full-screen button in the upper-left corner of any window, drag that window to one side of the screen, and click a window on the other side to put them side by side. Catalina makes this easier to discover: hover over the green full-screen button briefly and then choose Tile Window to Left of Screen or Tile Window to Right of Screen before selecting a window on the other side of the screen. If you don’t want a 50-50 split, drag the black divider bar between the windows to adjust the proportions. To leave Split View, move your pointer to the top of the screen to reveal the menu bar and then click the green full-screen button.
(Featured image by Adam Engst)