
Ever Have Trouble Printing? Try a Different Printer Driver
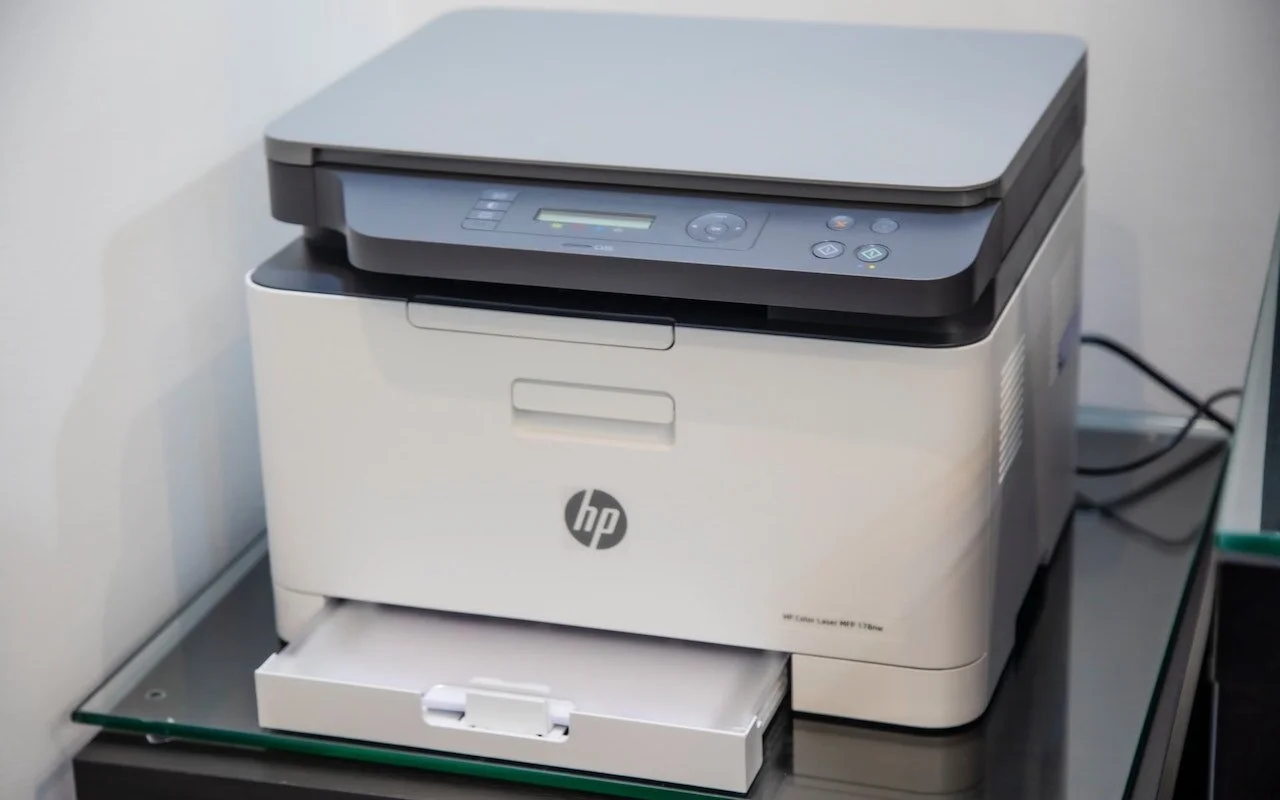
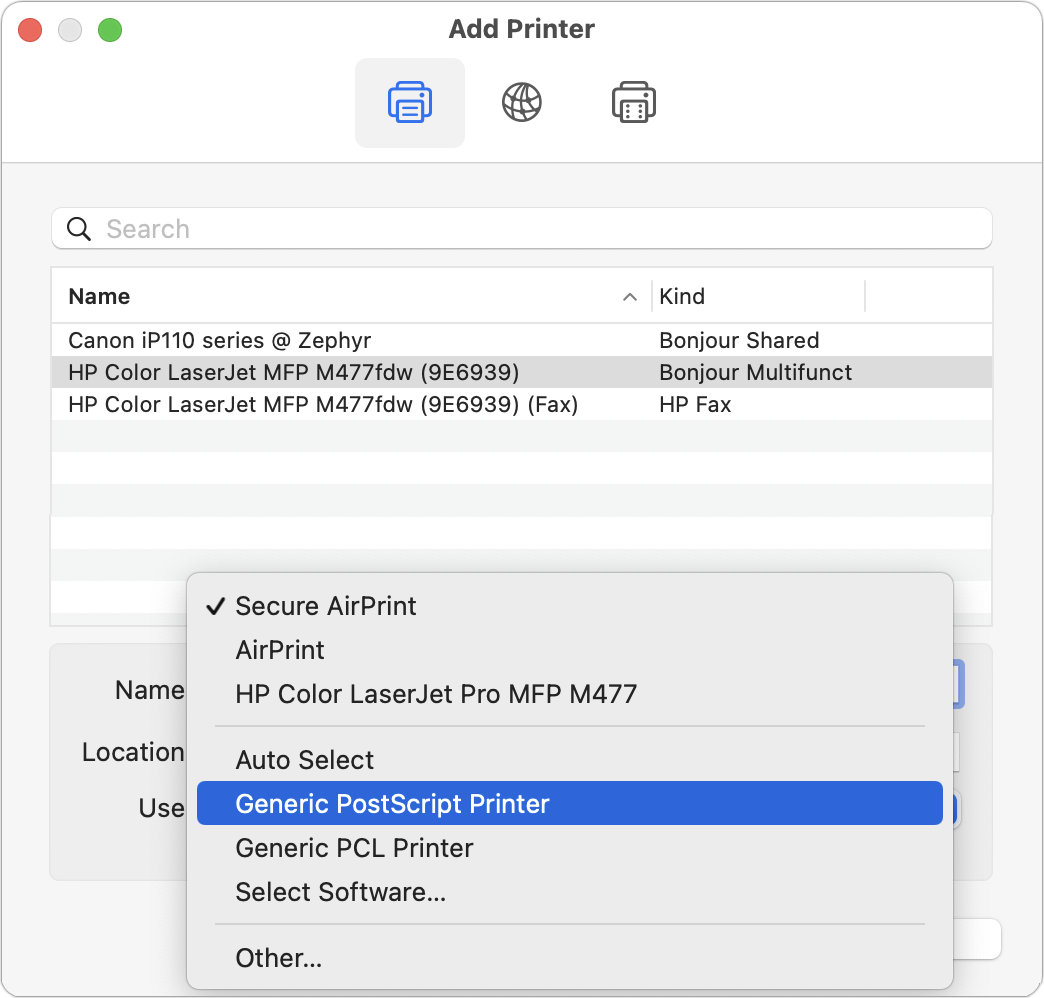
Some clients have reported problems with HP laser printers failing to print. Sometimes there’s an error. Other times, the print job just disappears into the ether. It’s unclear why this is happening or how widespread it is, but here’s a workaround that can help. Create a new printer configuration by clicking the + button in System Preferences > Printers & Scanners and selecting your printer in the list. Then, from the Use pop-up menu, choose something other than the default Secure AirPrint driver. We’ve had the most luck with Generic PostScript Printer. Both the old and new configurations will be available when printing, so if one doesn’t work, try again with the other one.
(Featured image by Mahrous Houses on Unsplash)
Filter What’s Showing in Photos to Focus on Specific Types

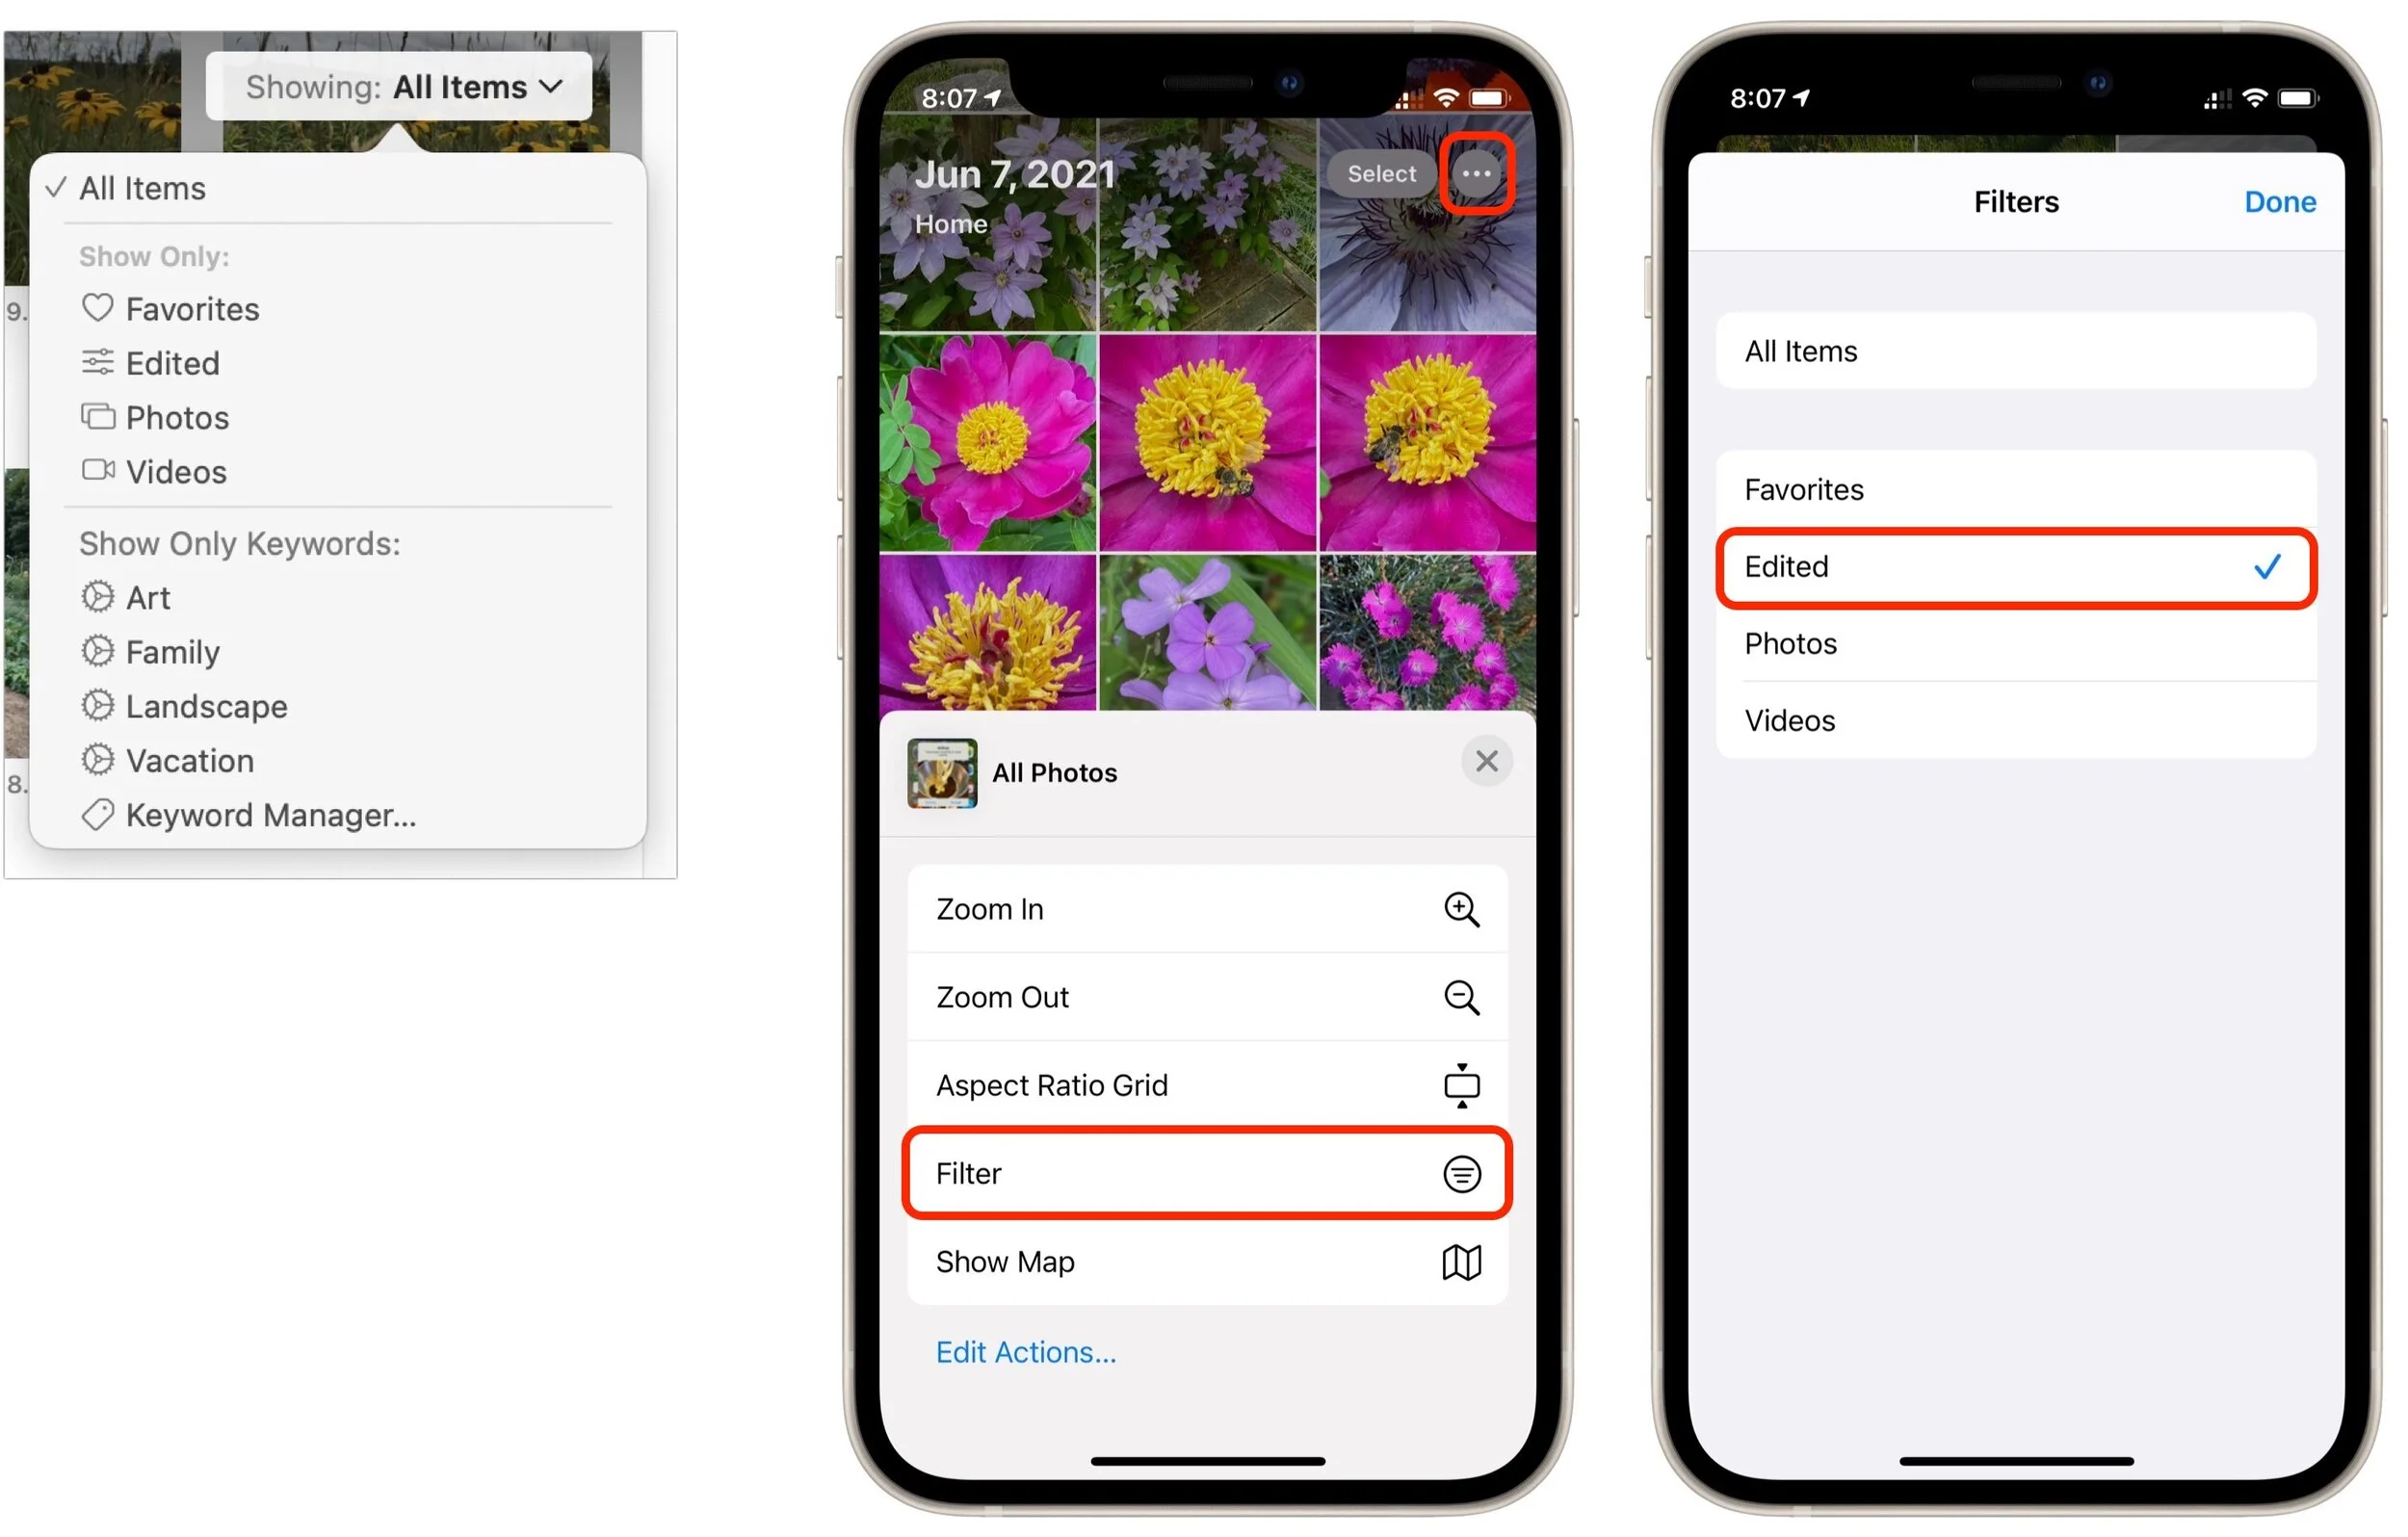
You know you can make albums and smart albums in Photos, and do searches to find photos that contain particular objects. But what if you want to separate photos from videos, identify which images in an album have been edited, or pick out just the ones you’ve favorited? For that, use Photos’ filters. On the Mac (below left), click the Showing menu in the upper-right corner, and in iOS and iPadOS (iPhone screens below right), tap the ••• button in the upper-right corner and tap Filter. Either way, you can choose Favorites, Edited, Photos, or Videos to limit the items showing to that type. When you’re done, turn the filter off by choosing All Items.
(Featured image by iStock.com/metamorworks)
The Mac’s Magic Shortcut to Trashing Files and Photos Quickly

Sure, you could select a file in the Finder and choose File > Move to Trash or drag it to the Trash in the Dock. Similarly, you can trash selected photos in Apple’s Photos app by choosing Image > Delete X Photos, or by pressing the Delete key, but both of those methods result in a dialog asking if you’re sure. The easiest way of trashing a file in the Finder or a picture in Photos is to select it and press Command-Delete. Poof, it’s in the Trash (Finder) or Recently Deleted album (Photos), with no extra effort or prompts! And if you accidentally trash the wrong thing, just press Command-Z to restore it. Keep this key combination in mind for other apps too, since they may also support it as a shortcut for “delete without prompting.”

(Featured image by iStock.com/YurolaitsAlbert)
Nightstand Mode Makes Your Apple Watch a Helpful Bedroom Companion

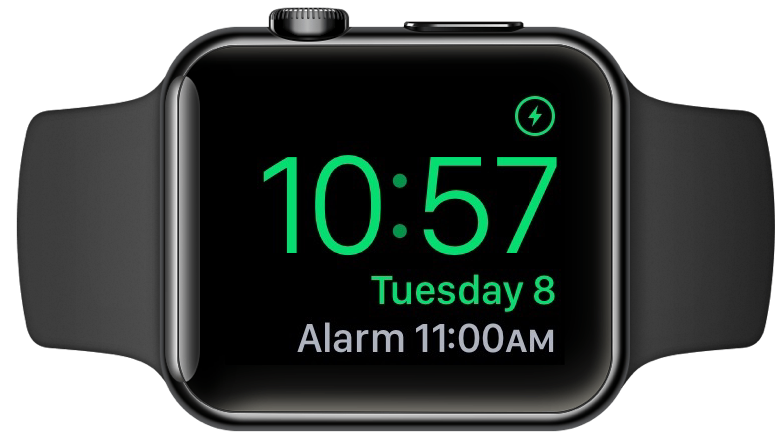
Most Apple Watch users charge their watch every night, putting it on a charger as part of a bedtime routine. If that’s you, make sure you’re not missing one of the Apple Watch’s best features: nightstand mode. When you enable it in the iPhone’s Watch app, in General > Nightstand Mode, a charging Apple Watch displays the charging status, current time and date (in a large, easily readable font), and the time of any alarm you’ve set. It uses a green color that won’t shock your eyes in the middle of the night, and after a minute, the screen goes completely dark. To see it again, tap the watch or—even better!—the surface it’s on. The screen lights up for 10 seconds before going dark again. (And yes, we love the little classic Mac stand.)
(Featured image by Adam Engst)
Live in the Future by Using Apple Pay on Your Apple Watch

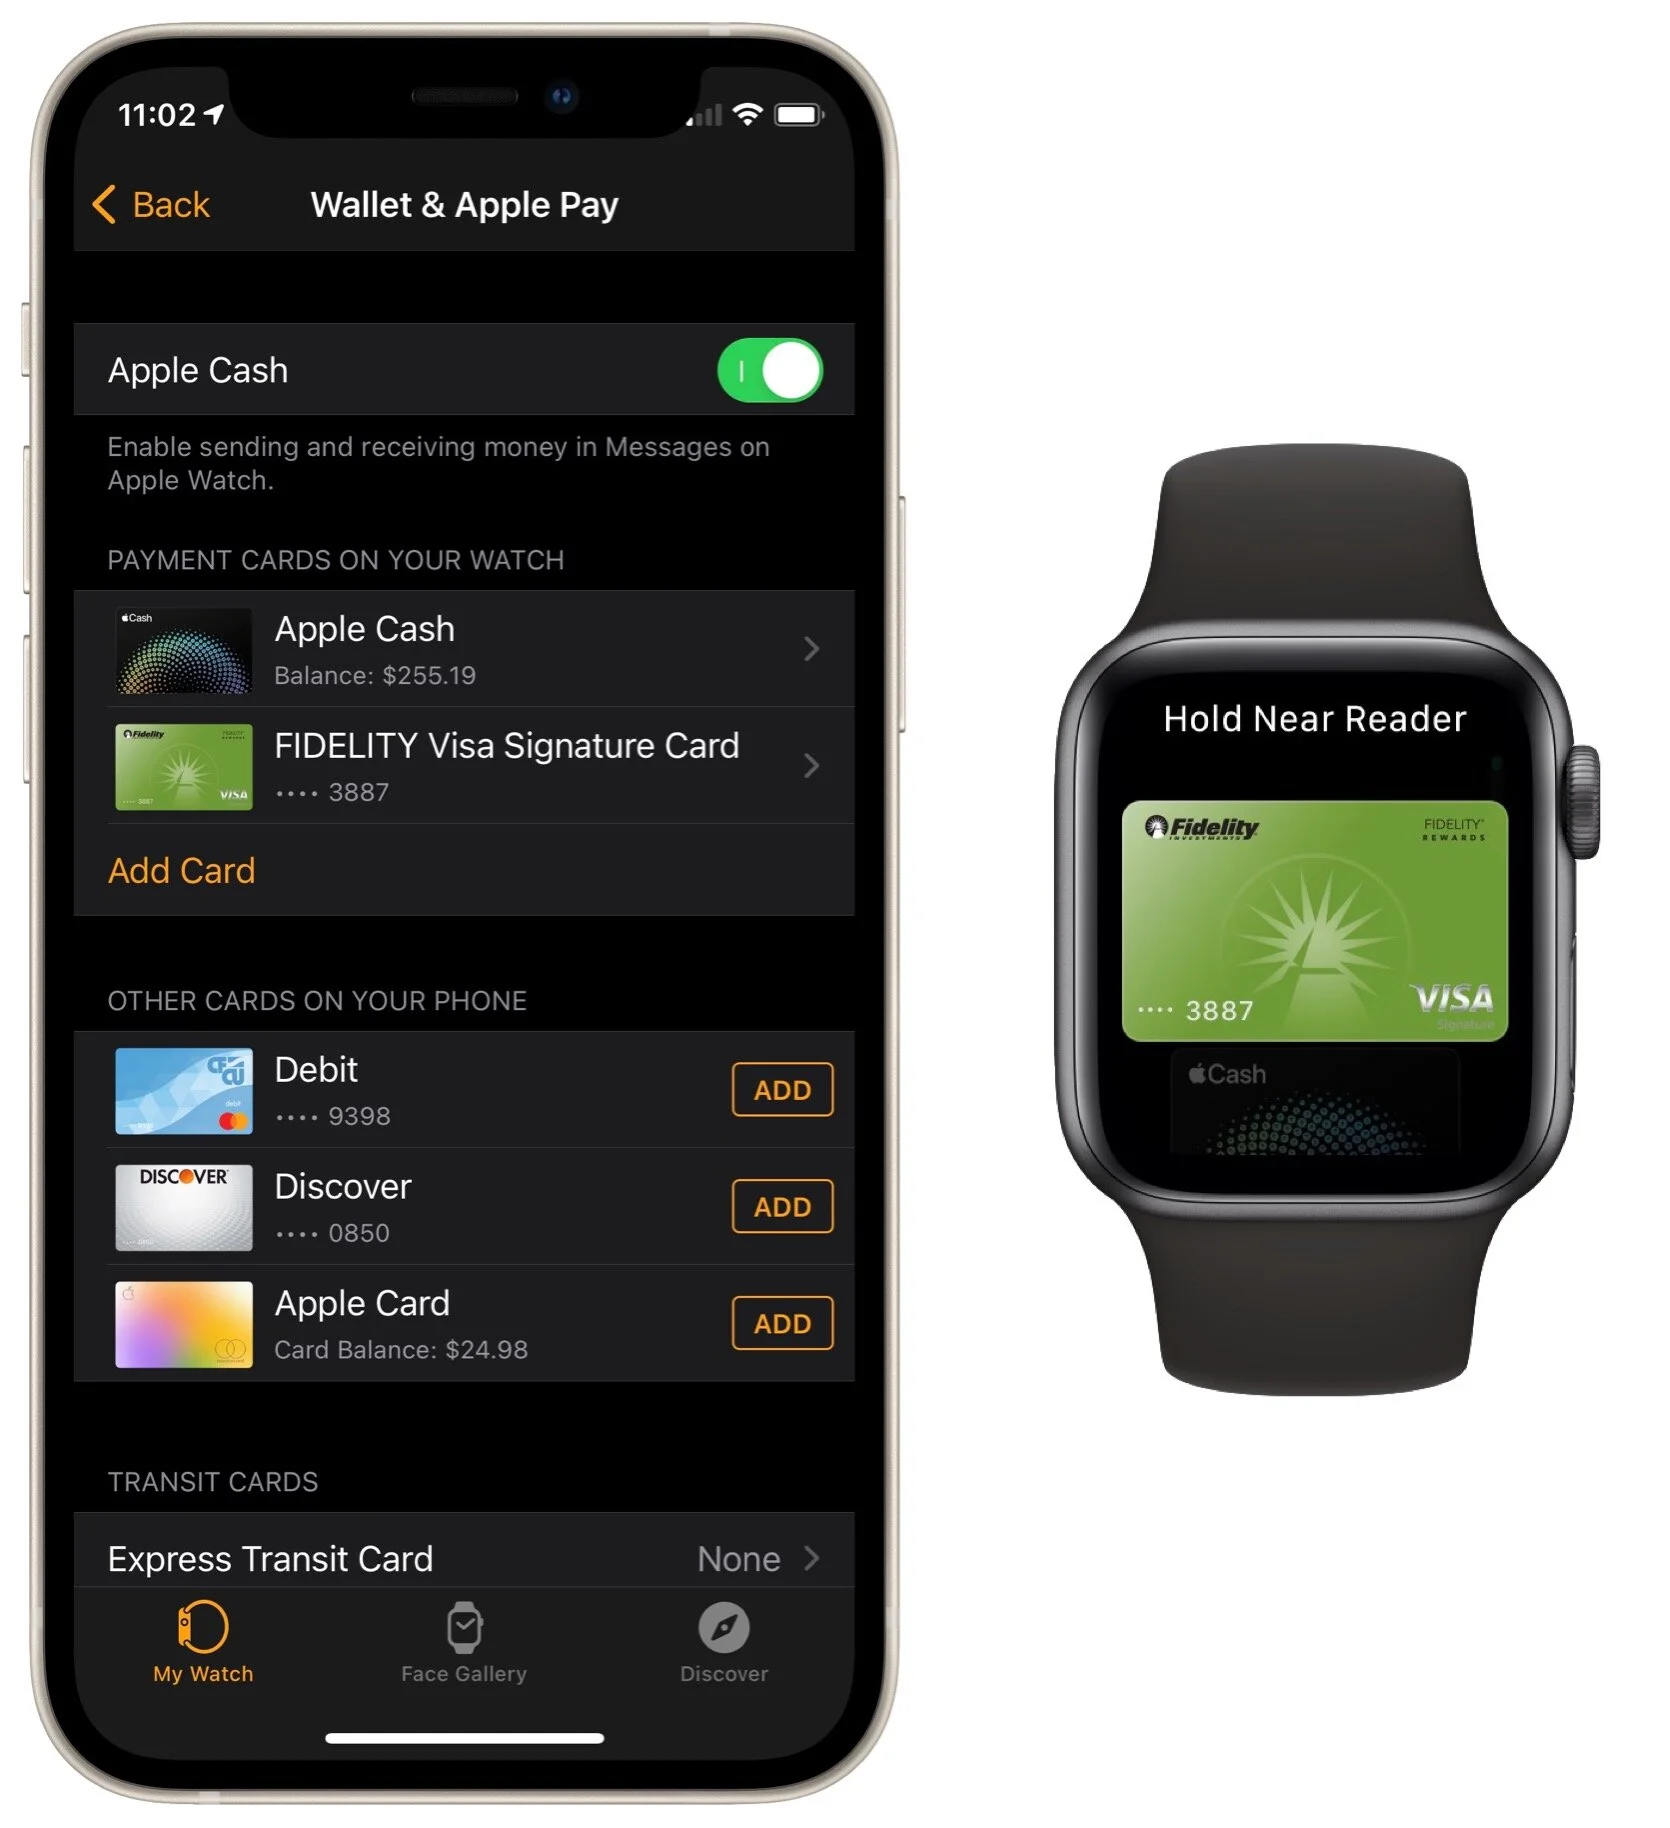
With mask wearing over the past year rendering Face ID ineffective at cash registers, we’ve become fond of using the Apple Watch for contactless payments with Apple Pay. We recommend it highly since it’s so fast and convenient. Once you’ve set up a credit card in the Wallet app on your iPhone, switch to the Watch app, go to My Watch > Wallet & Apple Pay, and tap the Add button next to the desired card. From then on, to pay for a purchase, double-click the Apple Watch’s side button and put it very close to the reader. (We generally turn our arms so we can put the Apple Watch face flat on the reader.) It takes just seconds and tends to wow cashiers who haven’t seen it before.
(Featured image by Karolina Grabowska from Pexels)
Two Important Tips for External Storage Devices

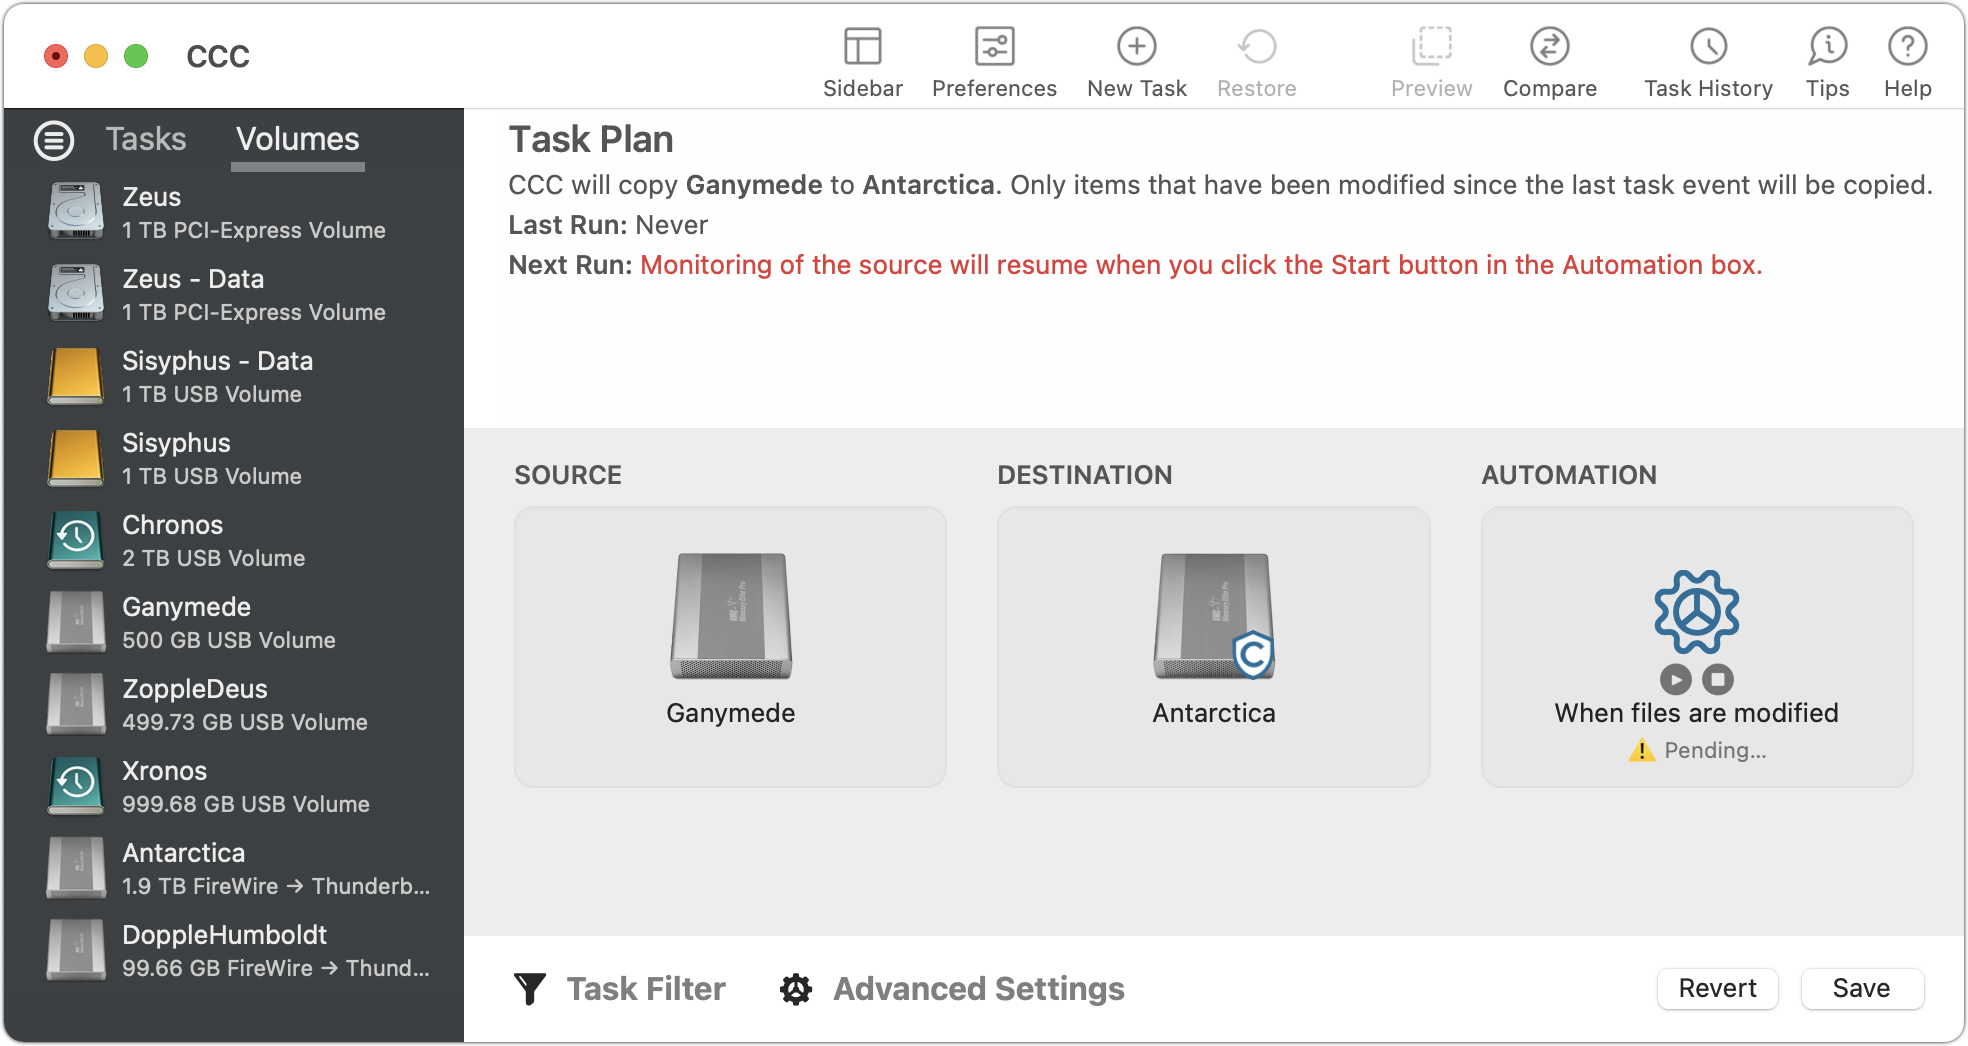
It’s tempting to think that most external storage devices—whether simple hard drives or more complicated network-attached storage (NAS) units—are relatively similar because they all do roughly the same thing. However, a recent problem with older Western Digital My Book Live NAS devices highlighted that there can be large differences. In that case, hackers figured out how to cause a factory reset that wiped the entire drive of all files. (If you have one, note that Western Digital recommends disconnecting it from the Internet immediately.) Two tips: Although no one could have anticipated this particular problem, ask us before buying external storage because we may be able to recommend known good products or warn you away from sketchy manufacturers. Also, if you store unique data on an external drive, you must back up that drive just like your Mac’s internal drive or risk losing everything, like these My Book Live owners did. Backup, backup, backup!
(Featured image by Western Digital)
Disable Unused Sharing Options on Your Mac If You’re Not Using Them

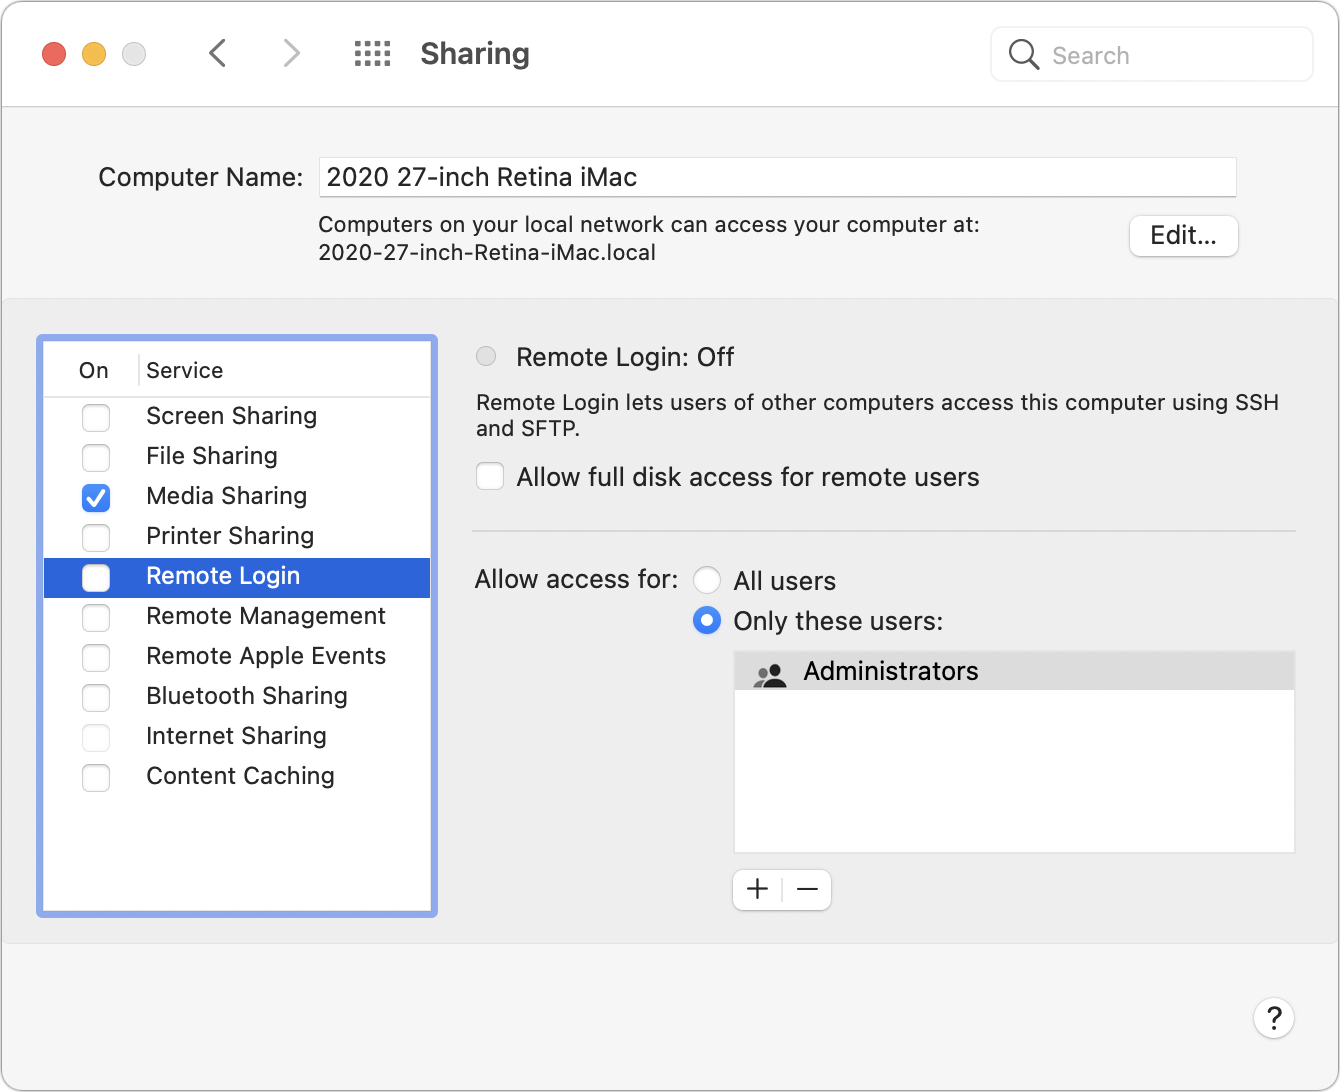
Many security breaches—even high-profile ones—stem from simple oversight. There’s one spot in macOS that has long been particularly susceptible to such lapse: the Sharing pane of System Preferences. In it, you can enable a wide variety of sharing services, some of which could allow another user to access your Mac remotely. They all let you limit access to particular users, but passwords can be stolen, accounts can be compromised, and server software can have bugs. For safety’s sake, if you’re not actively using a sharing service, turn it off. The most important ones to disable when not in use are Screen Sharing, File Sharing, Remote Login, Remote Management, and Remote Apple Events. We also caution against leaving Printer Sharing and Internet Sharing on unnecessarily.
(Featured image by Morgane Perraud on Unsplash)
Name That Tune with Siri or Control Center

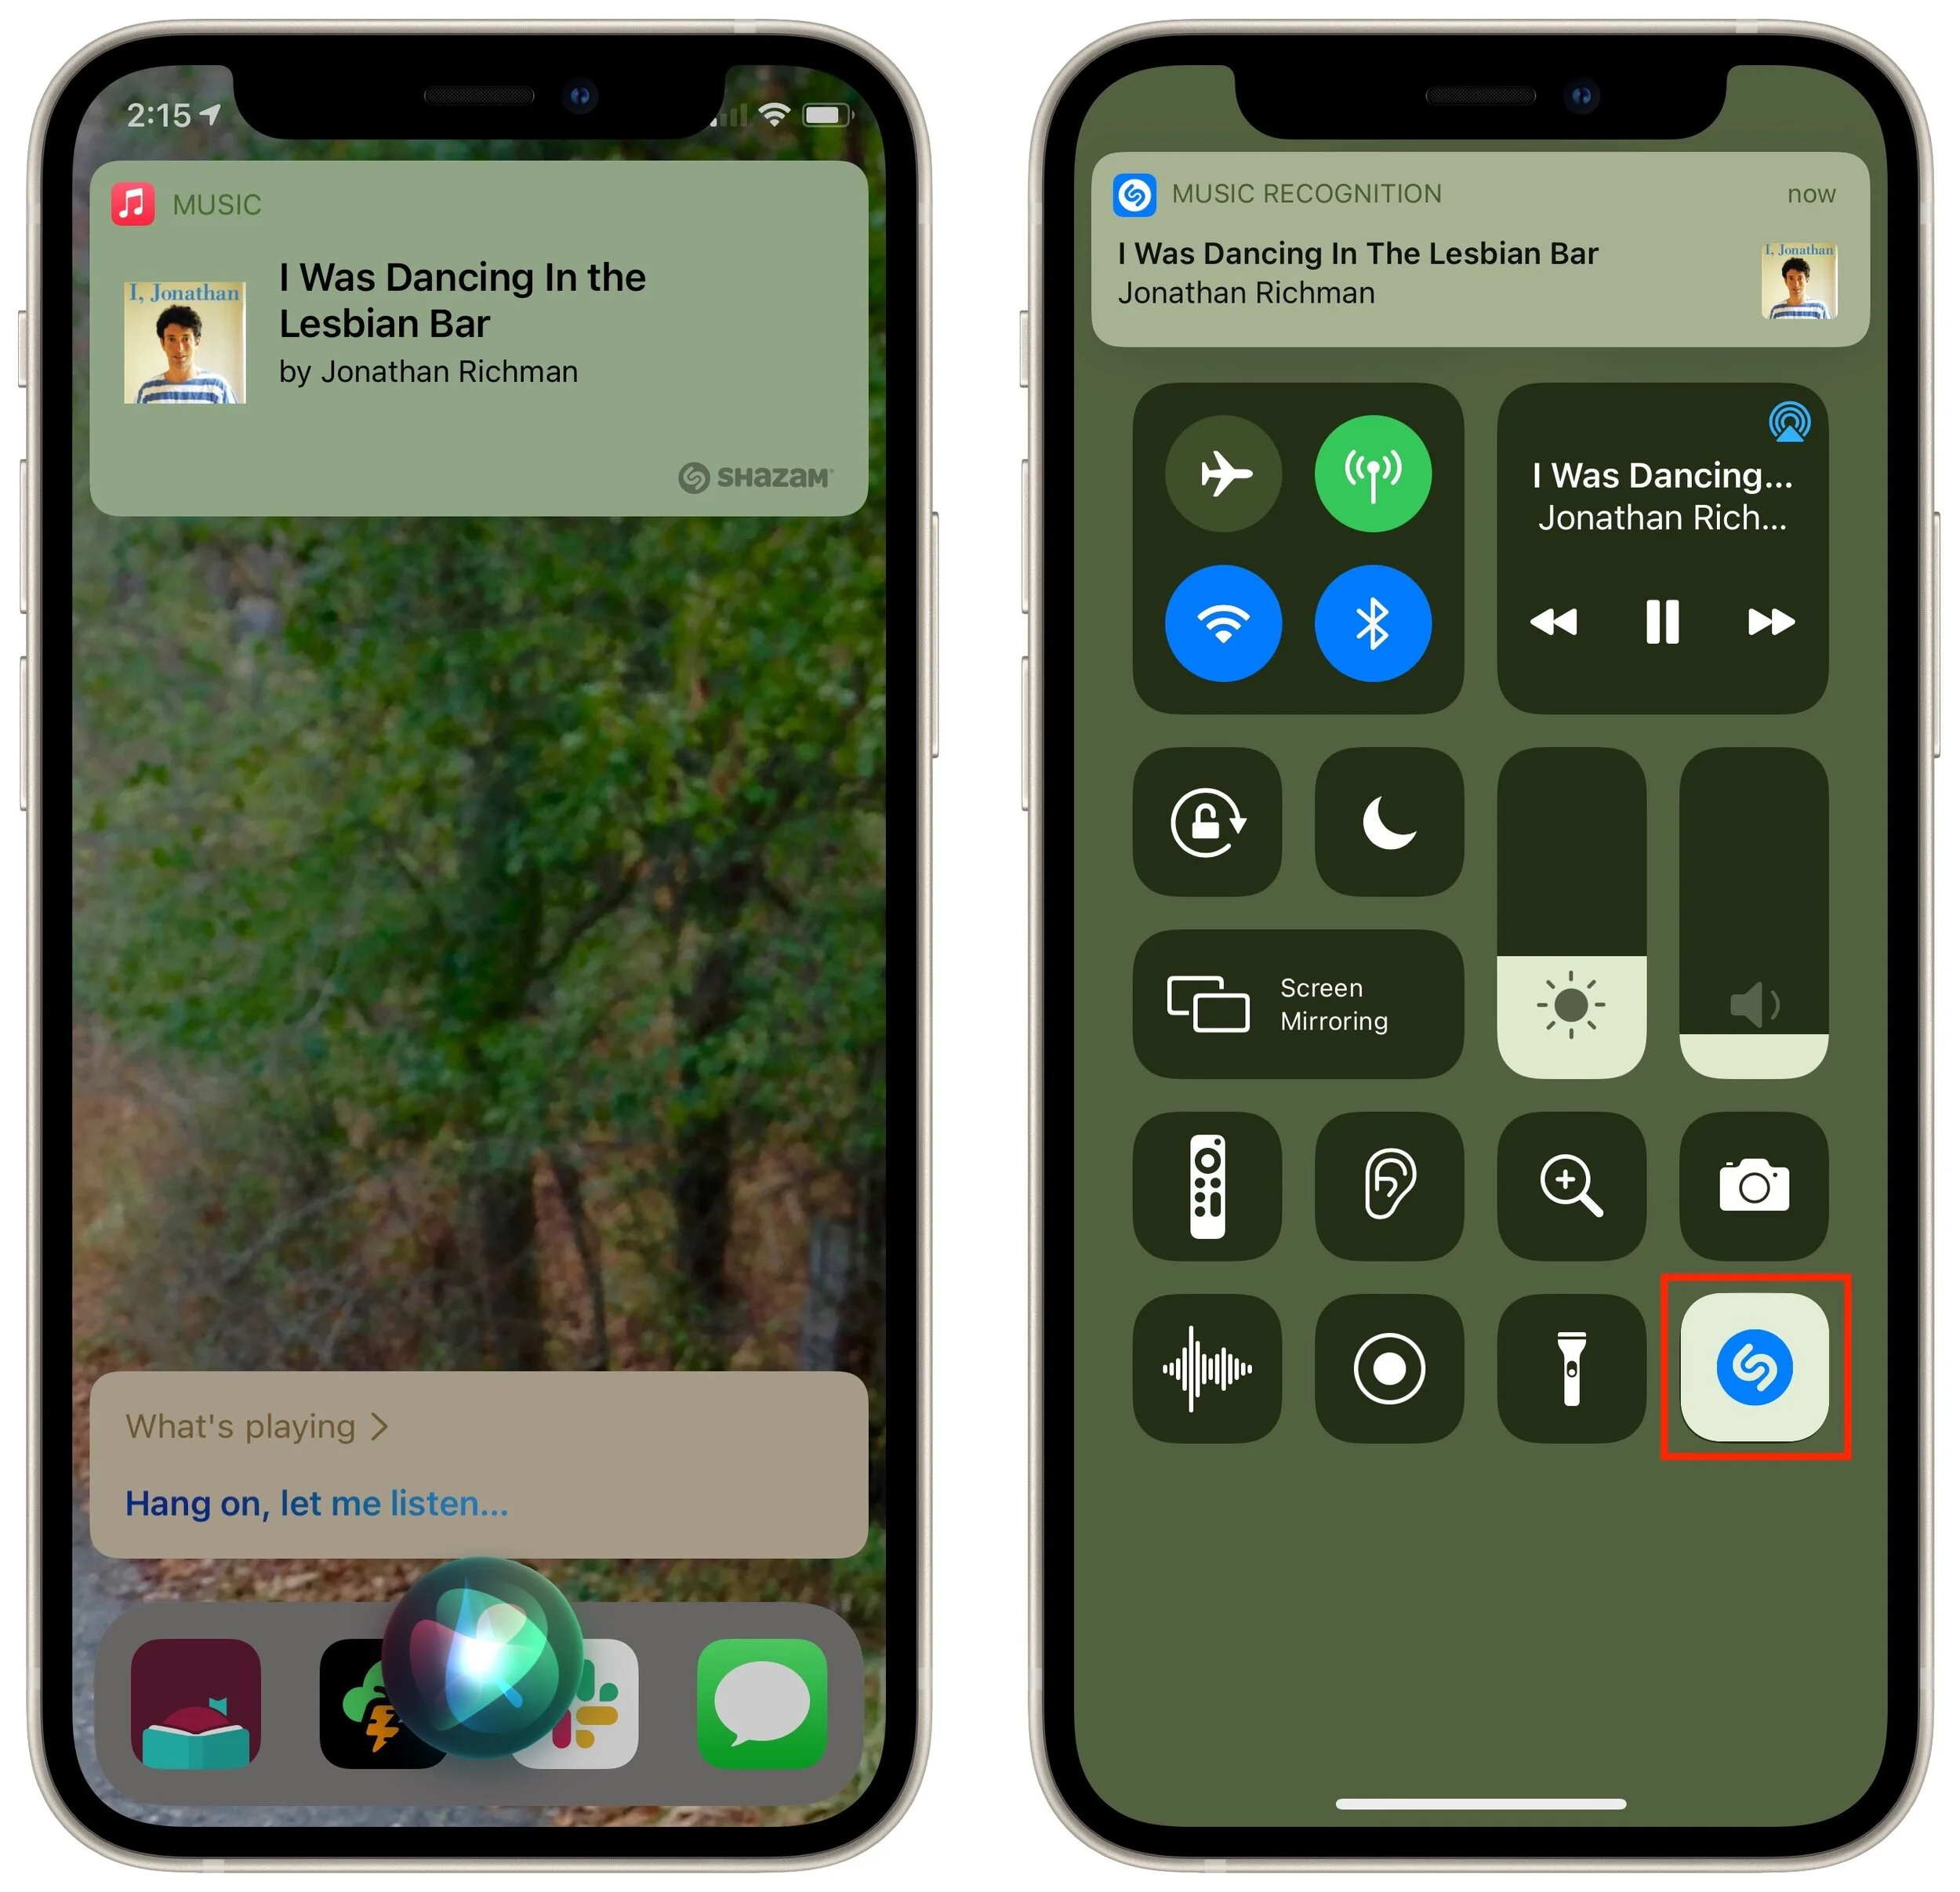
Don’t you hate it when a familiar song is playing but you can’t think of what it’s called? Or worse, when you hear a new track you really like but have no one to ask what it is? Never worry about that again, thanks to your iPhone or iPad. Back in 2018, Apple bought the music identification app Shazam and has since integrated it into iOS. You can still use Shazam, but it’s easier to ask Siri, “What’s playing?” or tap the Music Recognition button in Control Center (add it in Settings > Control Center) and then let your iPhone listen to the music for a few seconds. Siri is easiest, but the Control Center button is perfect in situations where you’d prefer to keep your question quiet. The music recognition feature recognizes only recorded music—no high school glee club versions, sorry—and while not perfect, is often helpful. Tap the notification that appears to open the song in Apple Music.
(Featured image by Laura Balbarde from Pexels)