
iOS 16.4 Adds Voice Isolation Feature to Improve Cellular Calls
If you make phone calls in loud environments, you can now be heard more easily with iOS 16.4’s new Voice Isolation feature for cellular calls. The tricky part is enabling it in Control Center while talking.

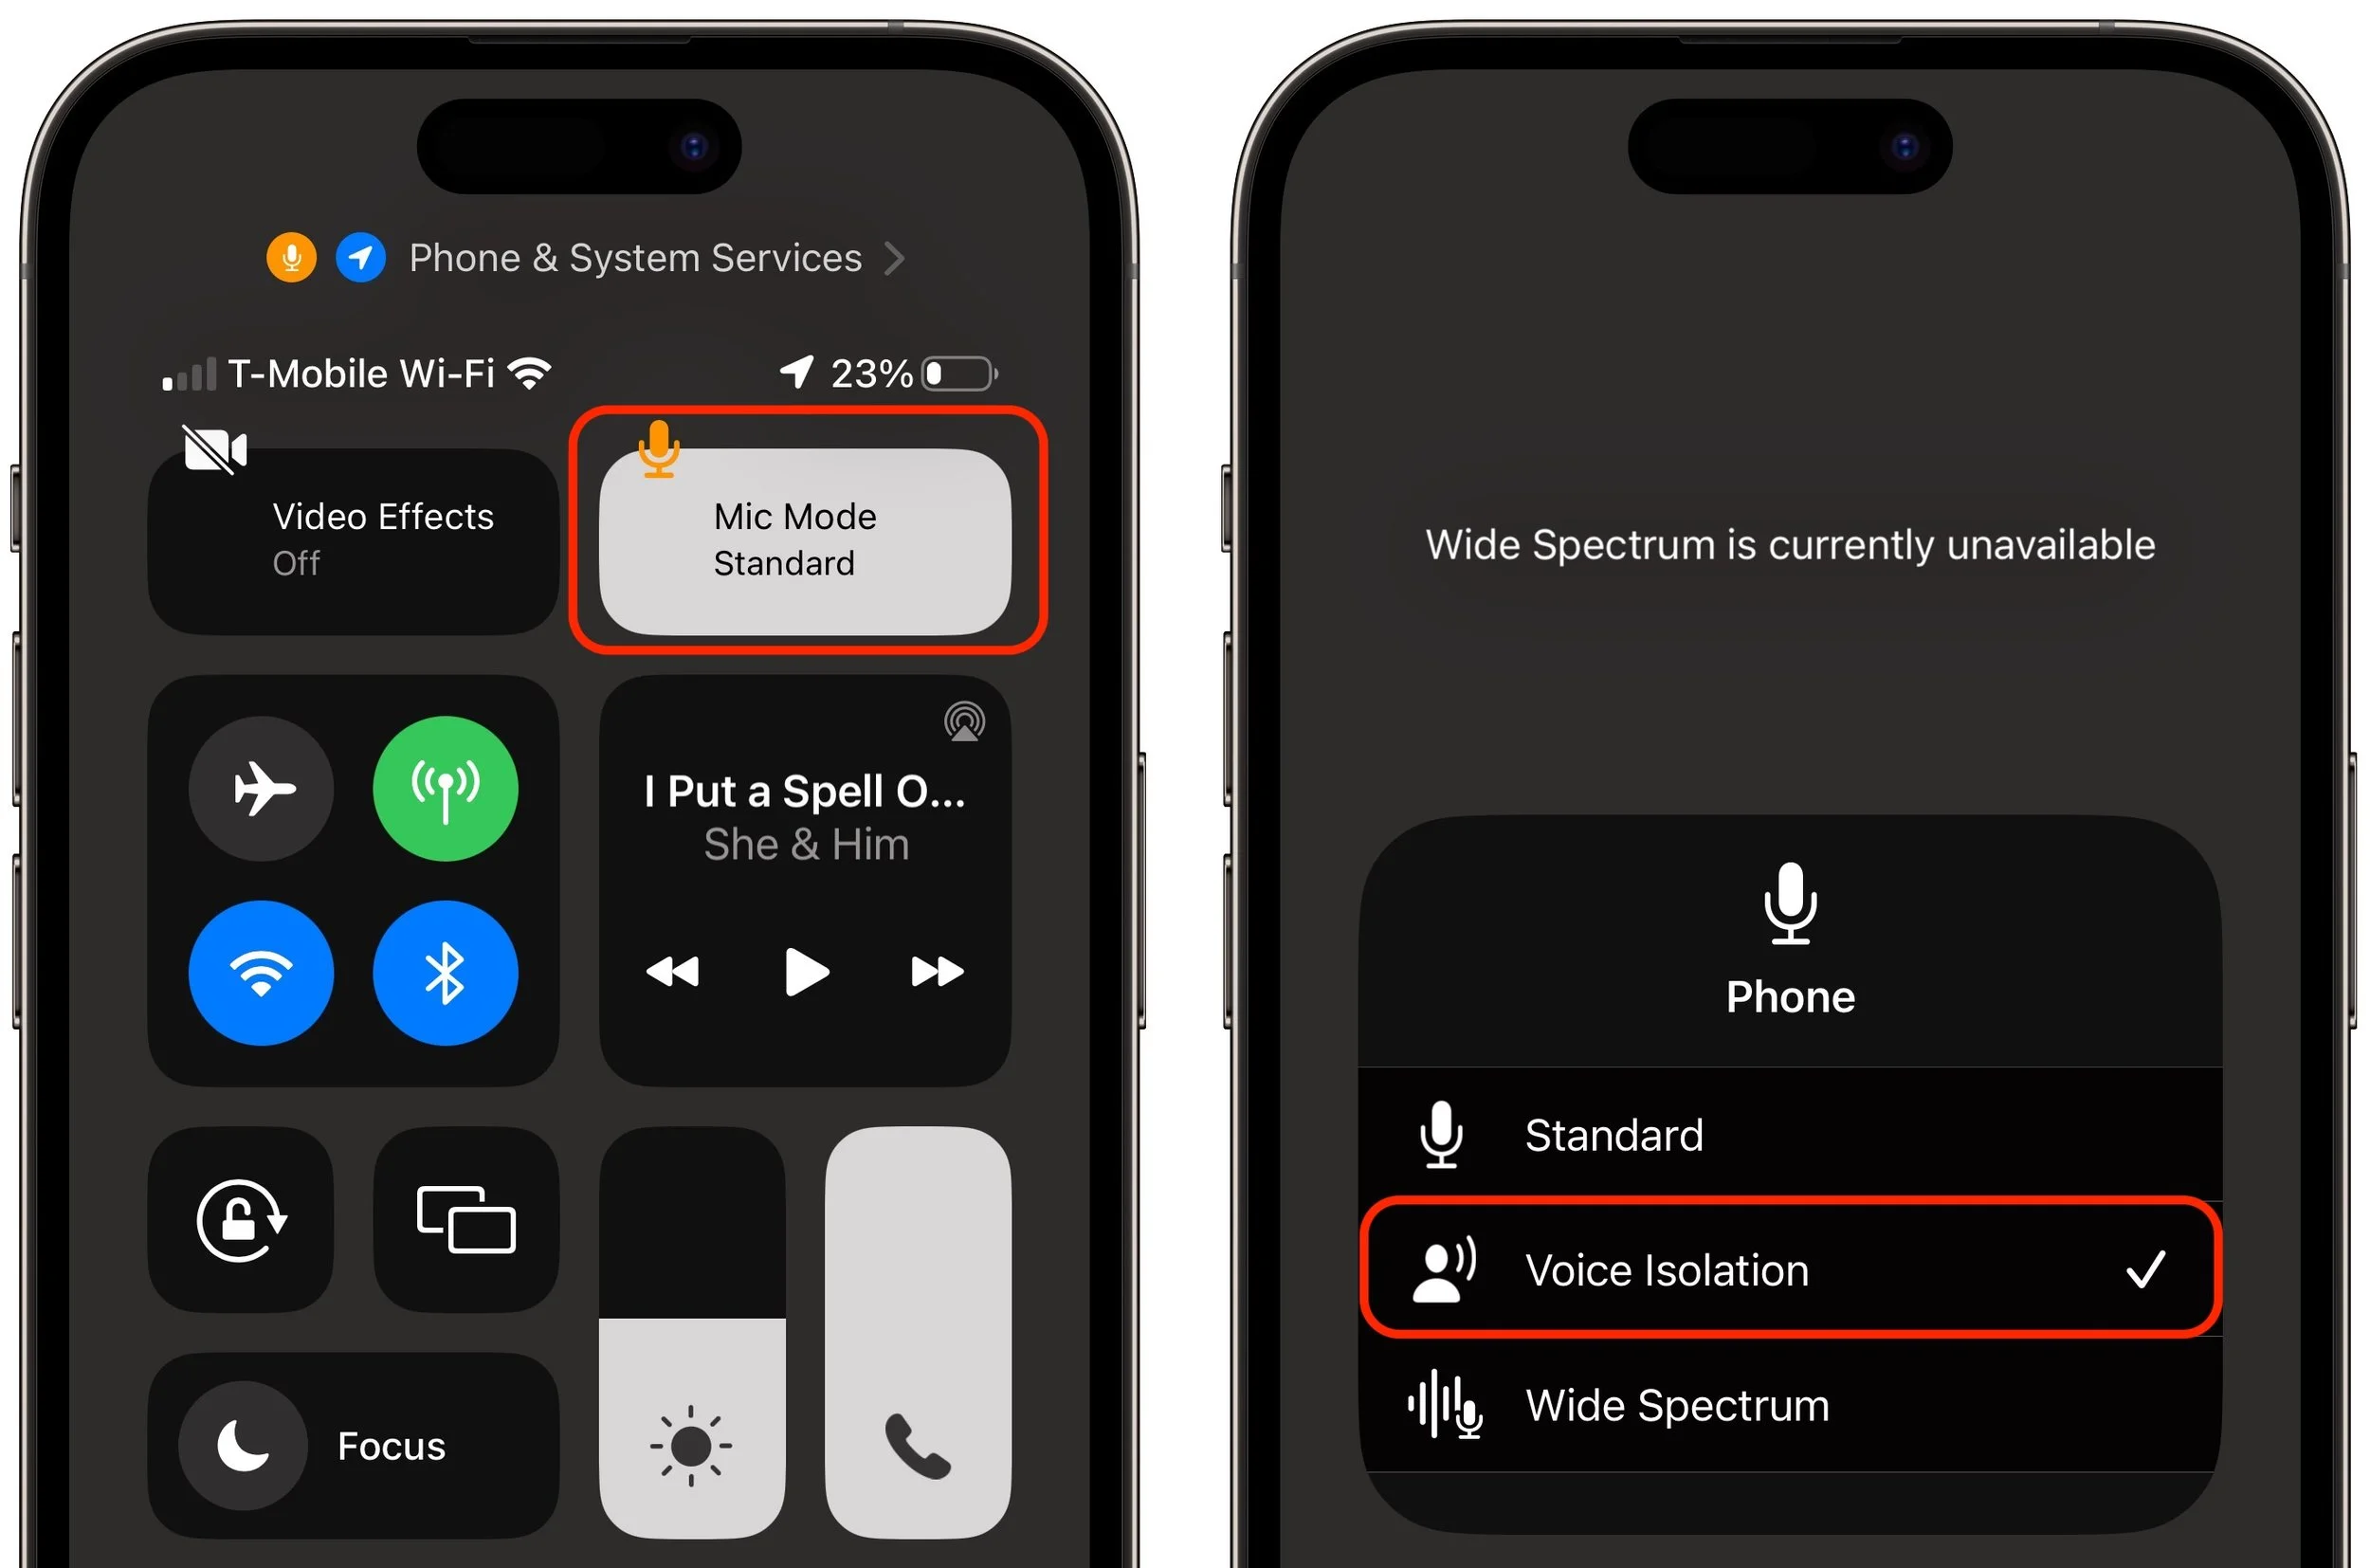
In iOS 15, Apple added the Voice Isolation feature to FaceTime calls to filter out noise around you while you’re talking, which is a boon if you’re making a call in a loud space or outside environment. With the recently released iOS 16.4, Apple has now brought that feature to cellular calls as well, but it’s not an option in Settings > Phone, as you might expect. Instead, during a call, open Control Center by swiping down from the top right of the screen (Face ID iPhones) or up from the bottom (Touch ID iPhones). Then tap the Mic Mode button and Voice Isolation. You won’t hear any difference, but the person on the other end should be able to hear you better. iOS remembers your setting, so switch back to Standard when you’re done—Voice Isolation may not sound as good as Standard in quiet spaces.
(Featured image by iStock.com/Jub Job)
Prevent Quick Screenshots from Cluttering Your Photos Library on the iPhone and iPad
Do you take temporary screenshots on your iPhone or iPad so you can message what your screen looks like to a friend? If you don’t want these images saved in Photos, read on for a tip about how to move them to the clipboard for pasting instead.
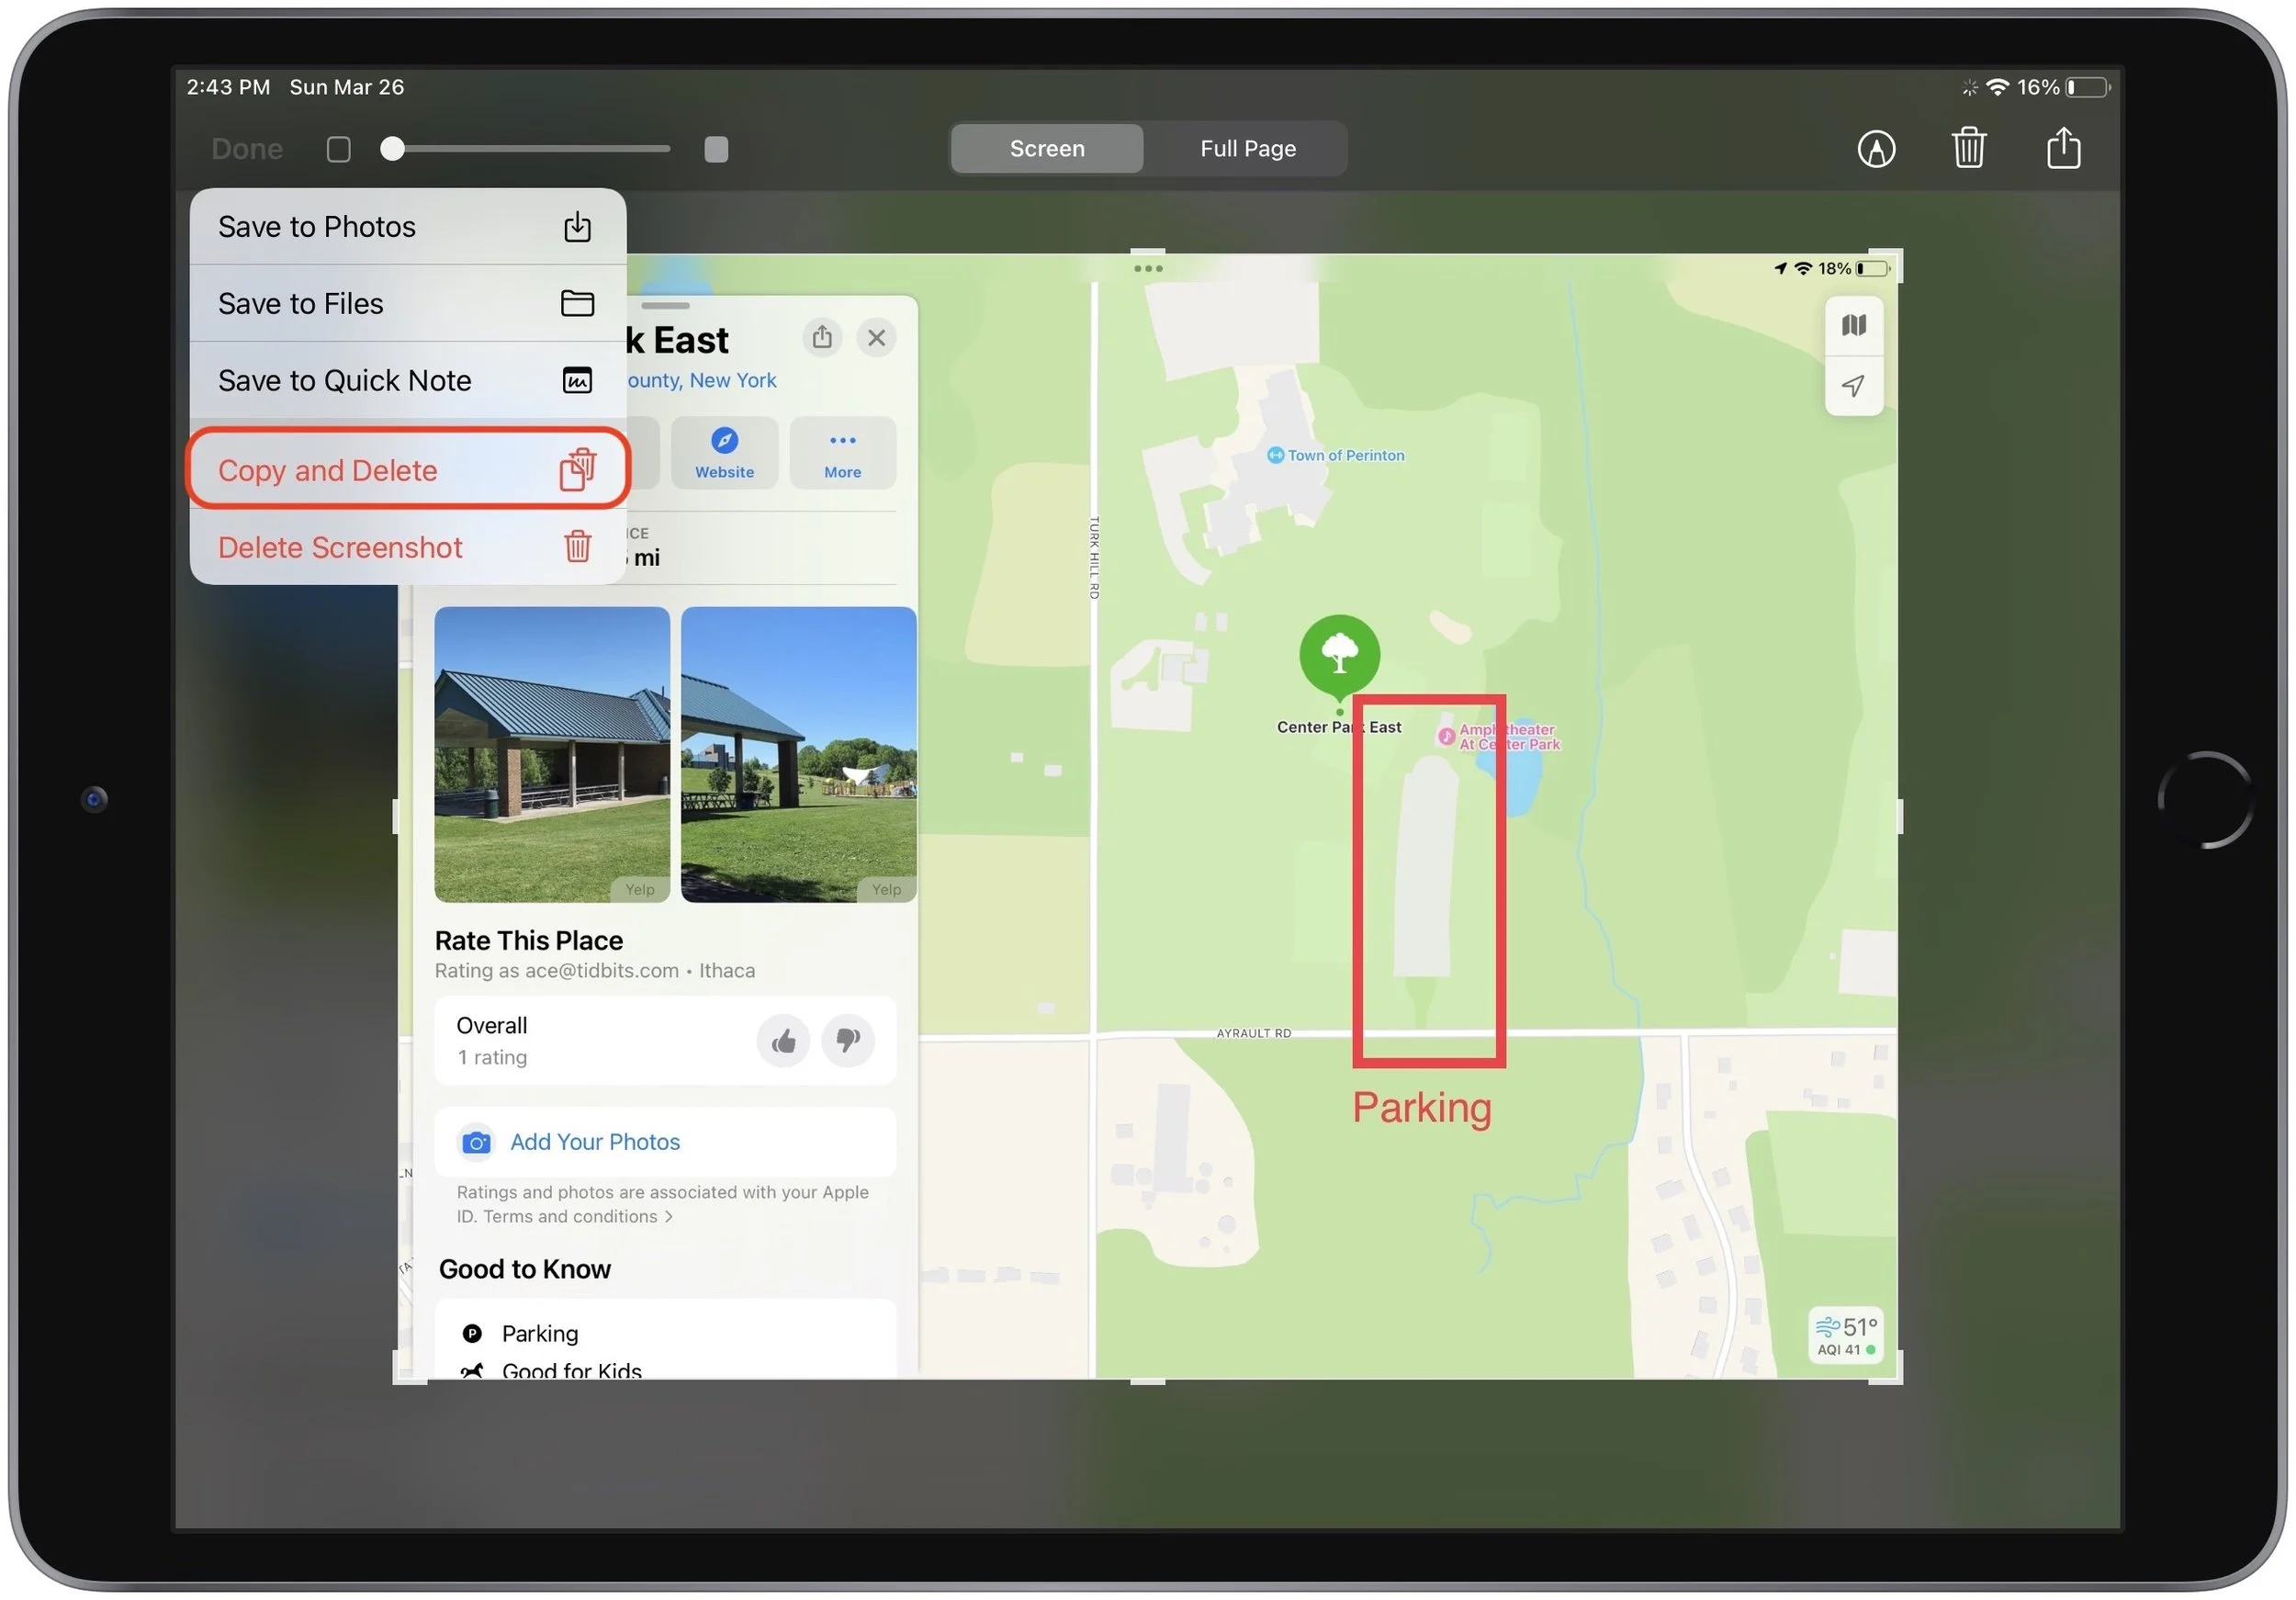
By default, when you take a screenshot (instructions for iPhone and iPad), it saves to Photos. But what if you don’t want something like a quick image of a map for a friend to clutter your Photos library? In iOS 16 and iPadOS 16, Apple has added new options. When you tap the screenshot thumbnail that appears briefly after pressing the capture buttons, you can crop and mark up your image. Or not. The key is that when you’re ready, tap Done to get an option to Copy and Delete, which is great when all you want to do is paste the screenshot into a Messages conversation or Mail message. You can also save to Photos, Files, or Notes, or just trash the screenshot if you’ve changed your mind.
(Featured image by iStock.com/simona flamigni)
Make Apple Watch Apps Easier to Find with List View
If you have trouble finding apps on your Apple Watch in the randomly arranged “grid” view, you’ll be pleased to learn how to switch to the more sensible list view, which sorts alphabetically.
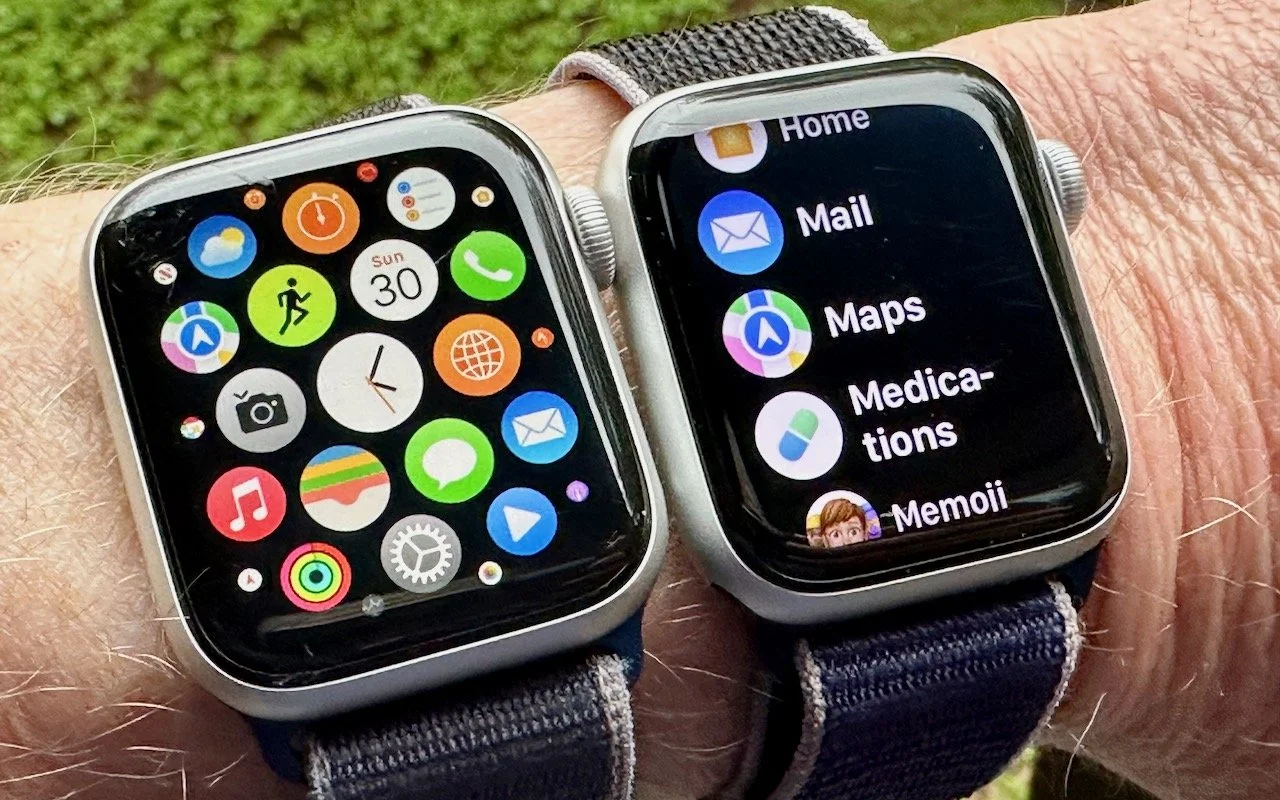
With the original version of the Apple Watch, Apple introduced “grid” view, which shows tiny icons for each app in a random circular pattern, making them difficult to find for most people. Happily, at some point, Apple relented and gave us the more sensible list view, which shows all the apps—with their names—sorted alphabetically. If your Apple Watch shows apps in grid view when you press the Digital Crown, fix it by opening the Watch app on your iPhone, tapping App View, and selecting List View. You can also do this on the watch itself in the Settings app.
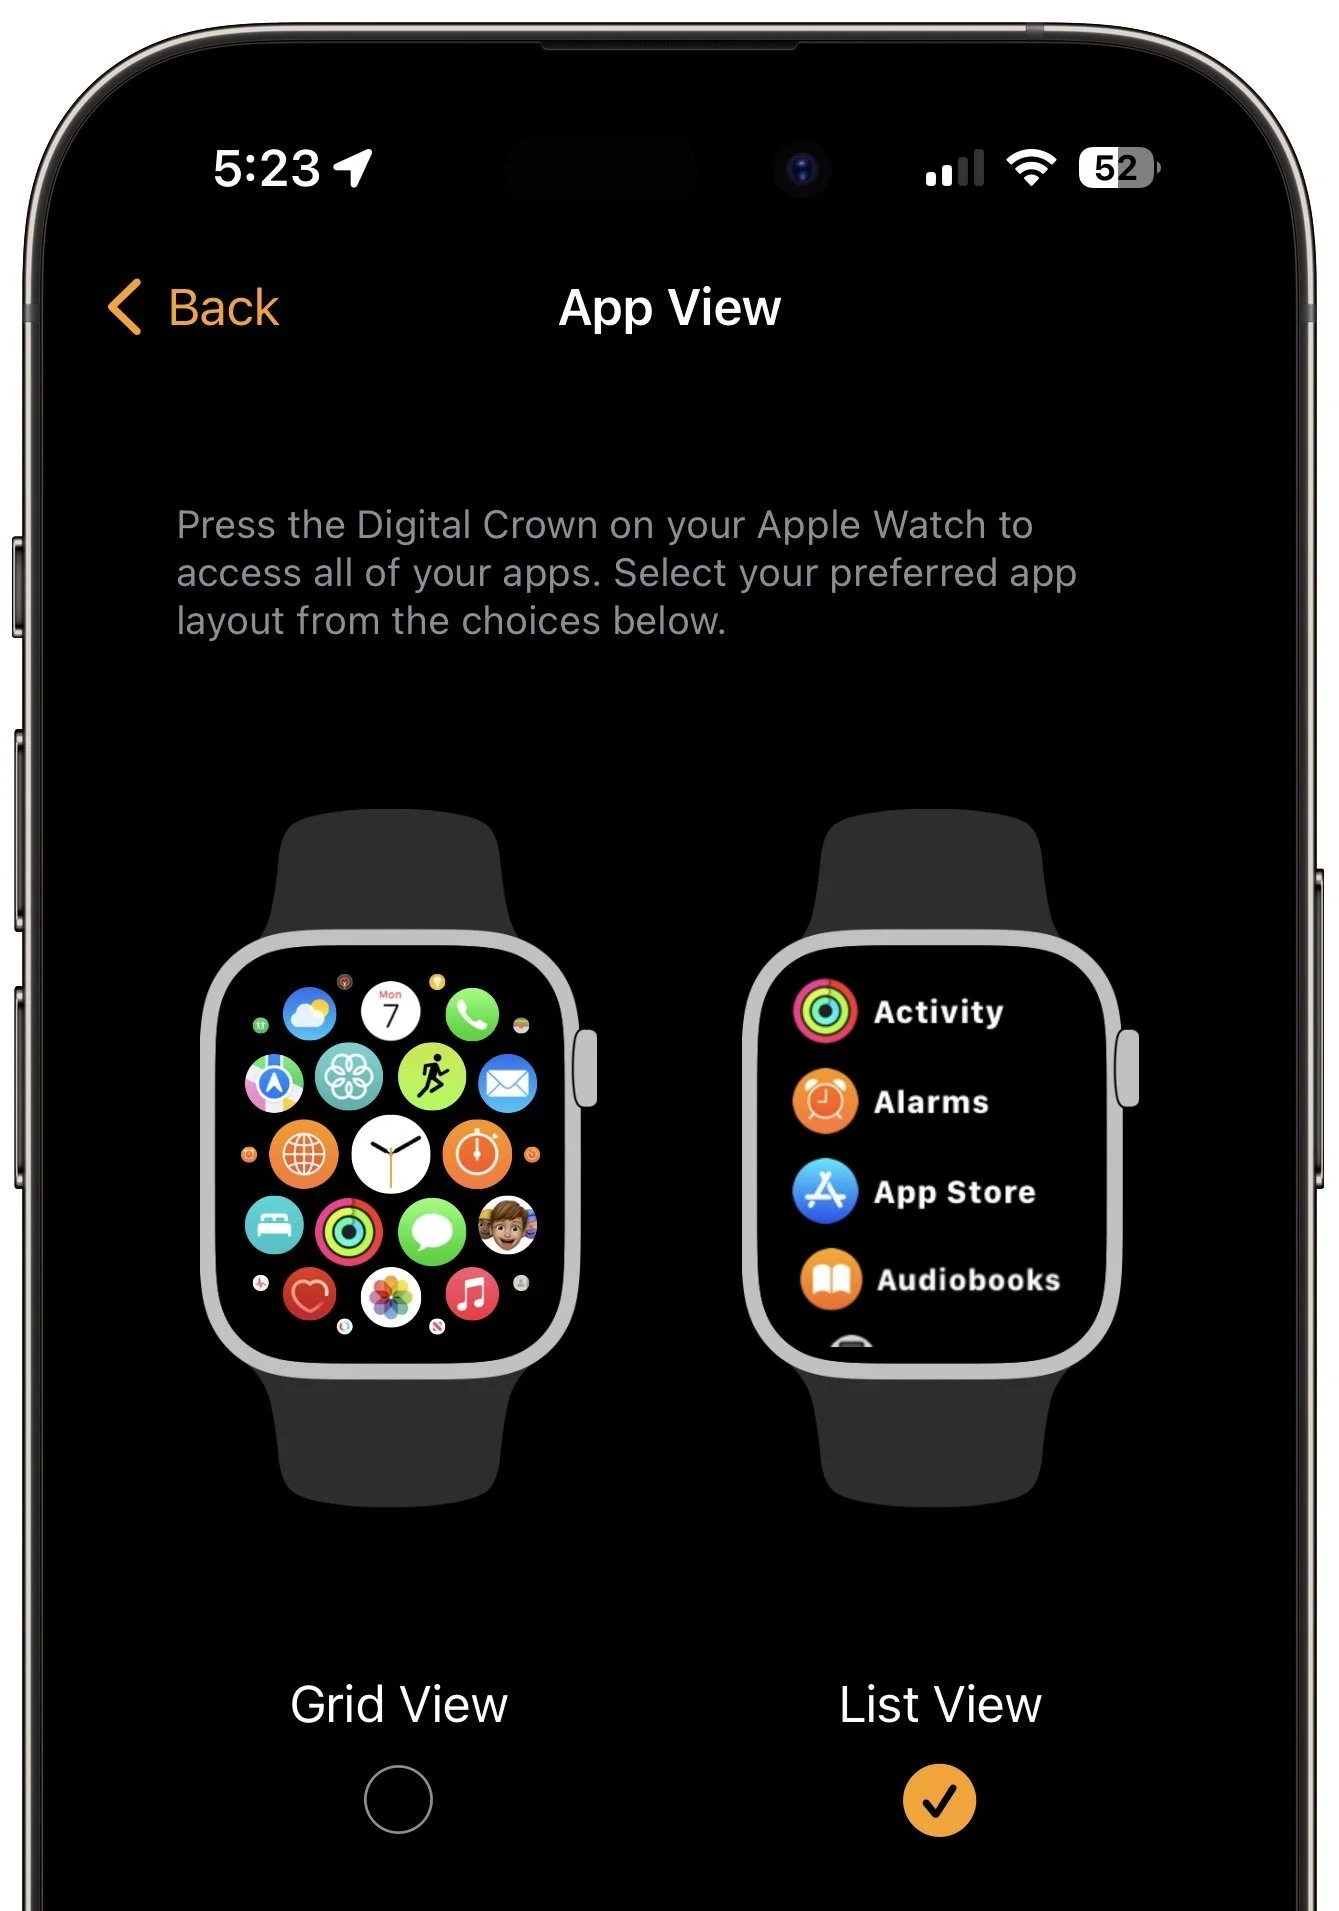
(Featured image by Adam Engst)
New Apple Card Savings Accounts Offers 4.15% Interest
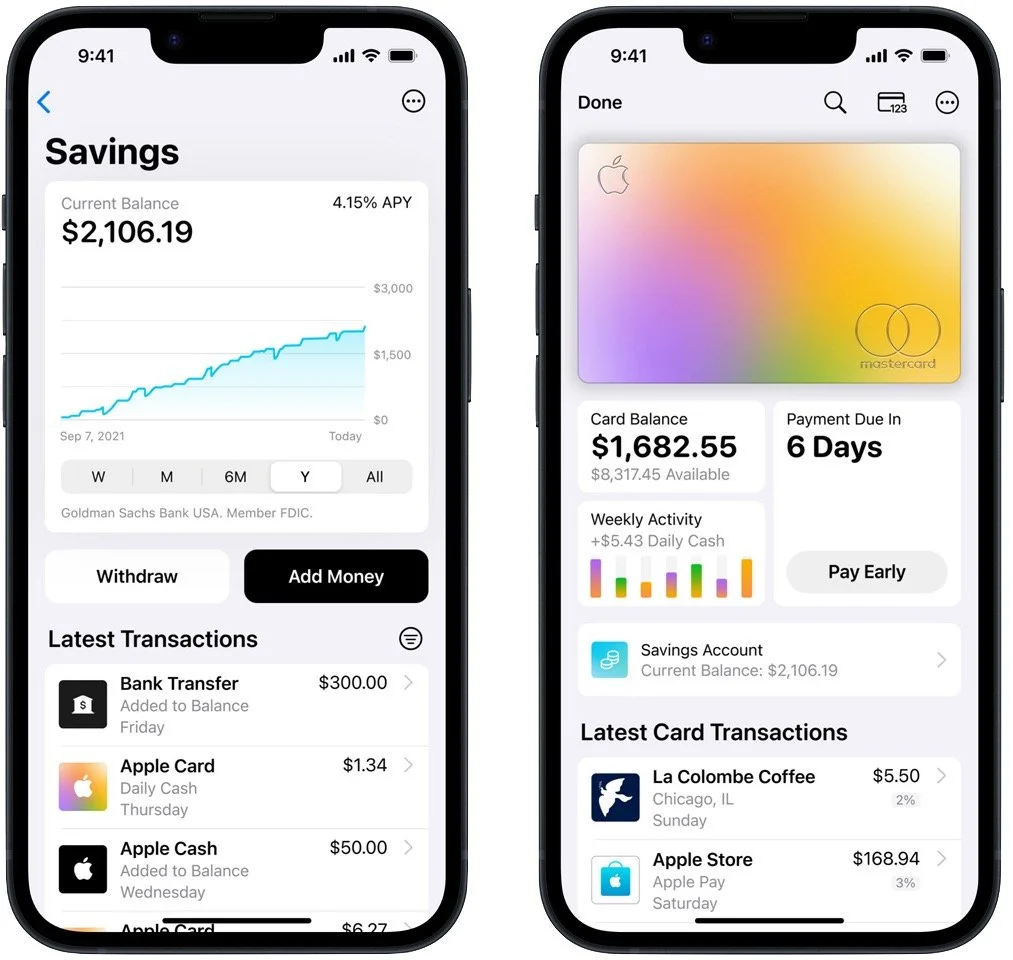
Apple’s latest new product is… a 4.15% savings account? That’s right, as part of its financial ventures, Apple has introduced Apple Card Savings, a high-yield savings account aimed at holding Daily Cash rewards and more.
Apple is continuing its forays into the financial world with the introduction of Apple Card Savings, a new savings account from Goldman Sachs that offers 4.15% interest with no fees, no minimum deposits, and no minimum balance requirements. The Savings account is designed to hold your Daily Cash rewards from using the Apple Card, but you can transfer as much as you want into it, up to $250,000. Given the woefully low interest rates offered by many local banks, the Apple Card Savings account may be compelling. It’s easy to manage in Apple’s Wallet app, but it doesn’t integrate with other personal finance apps right now.
(Featured image by iStock.com/brookebecker)
Follow These Tips To Avoid Getting Scammed
If you own a phone or have an email address, you have most likely experienced an attempted scam. They have become an expected part of our lives with technology and are constantly evolving and becoming more difficult to spot. Since they don’t seem to be going anywhere, here are some of our tips to prevent yourself from coming victim to a scam.
Don’t click on anything in an unsolicited email or text message asking you to update or verify account information.
Never send funds to a merchant until you can confirm that the request to change a payment destination is legitimate, like a statement from them or a verified customer service phone number.
Don’t rely only on caller ID to confirm someone’s identity, as scammers can compromise that too.
Look up the company’s phone number through a legitimate source like a statement provided by the company, and don’t use the number a potential scammer is providing.
Take your time. A legitimate person whether from a bank or vendor will never pressure you to immediately make a decision. They’ll provide you with all the necessary information and specific time frames to make your decision.
When in doubt, hang up the phone and call the number for the vendor that is calling you from either your credit card, banking, or vendor information. For credit or debit cards the number on the back of the card or on your statement is the best way to get a real phone number
Set Your Apple Watch Clock Ahead a Few Minutes to Avoid Being Late
Want to give yourself a few more minutes to get to meetings on time? Use this little-known option to set the time displayed on your Apple Watch ahead by a few minutes.

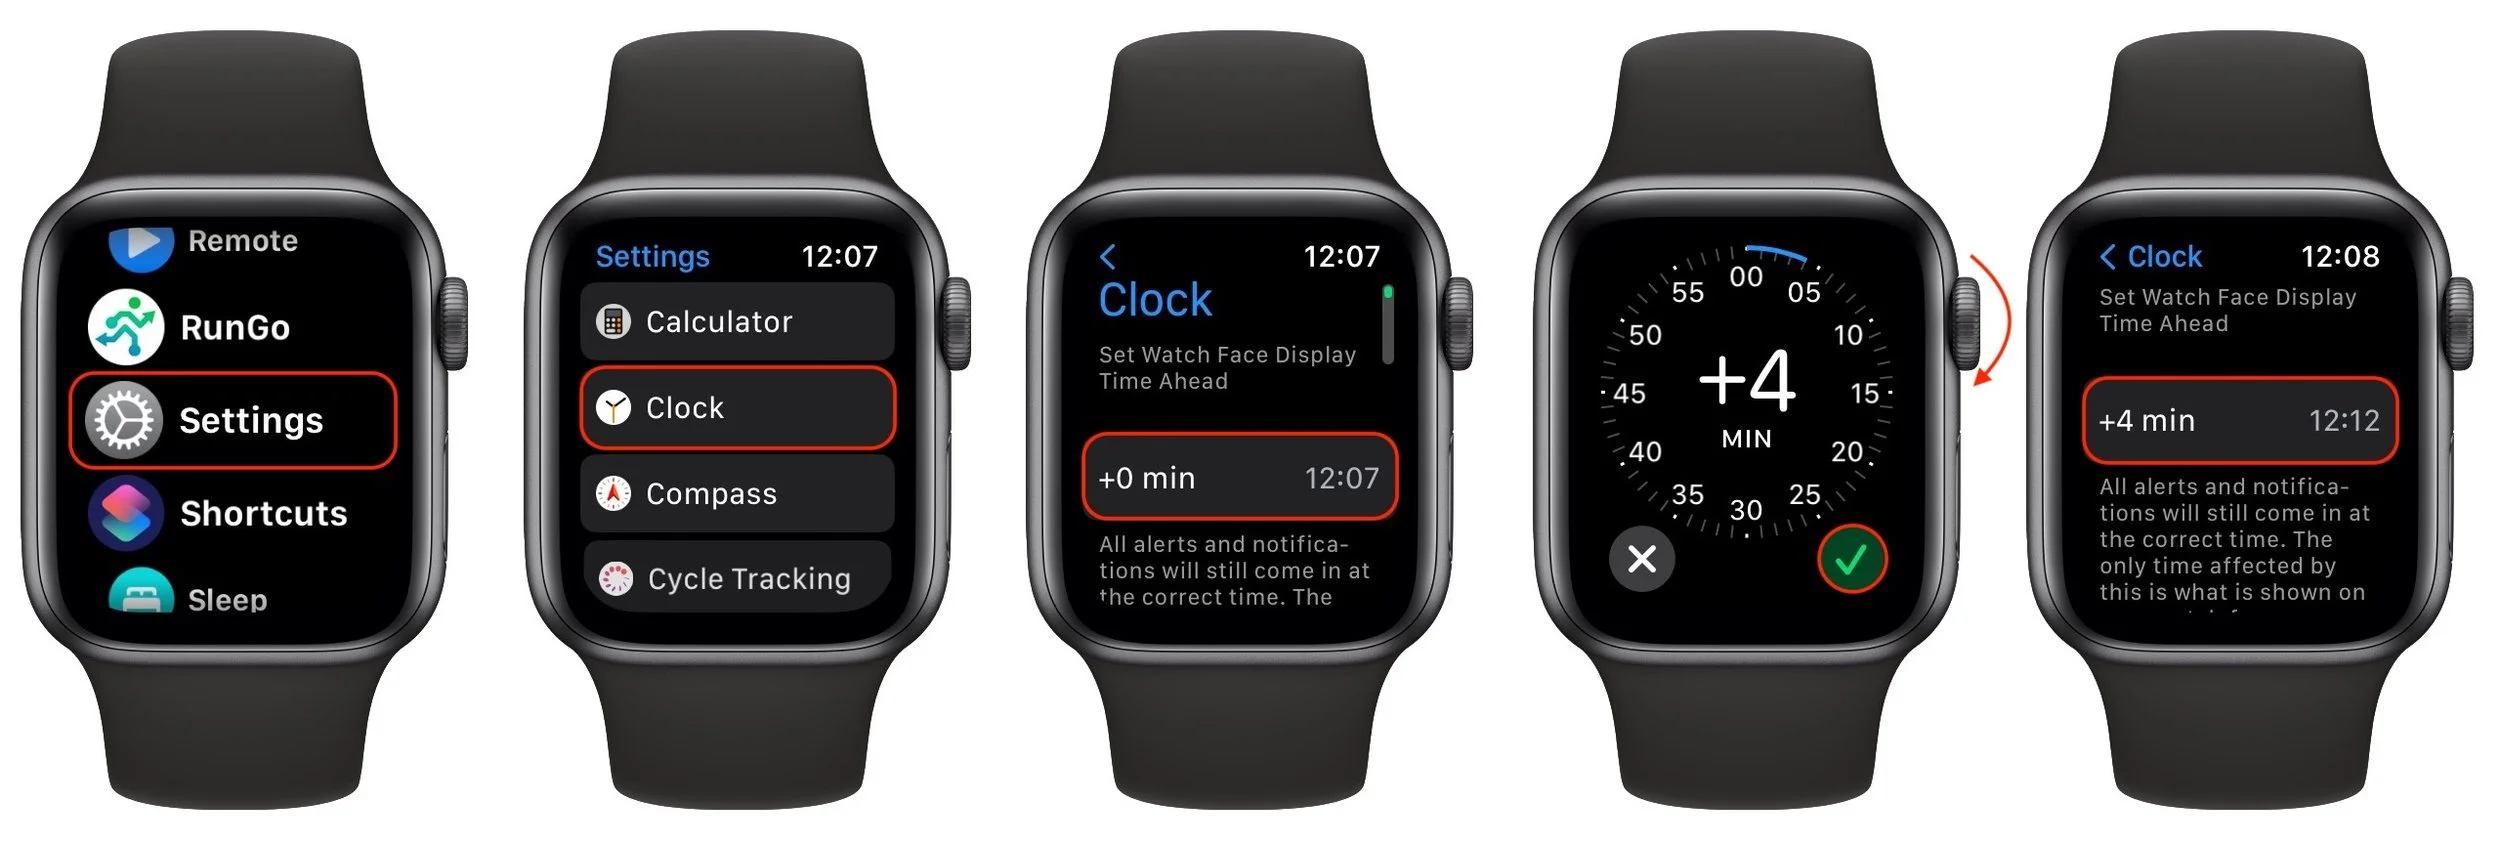
Those who tend to cut things tight have a time-honored tradition of setting their watches ahead by a few minutes. That way, when you glance at your watch and realize that you need to leave, you actually have a few more minutes. You can do this with your Apple Watch, but only on the watch itself. Press the Digital Crown to see your apps, tap Settings, scroll down to and tap Clock, tap the button for Set Watch Face Display Time Ahead, and use the Digital Crown to choose your desired time adjustment. Note that this setting affects only the time you see on the watch face. All alarms and notifications will come in at the correct times.
(Featured image by iStock.com/Bobex-73)
Reveal Your Desktop Quickly with a Keyboard Shortcut
The Mac’s Desktop is a great place for in-progress documents, screenshots, and other things you’re working on, but only if you can get to it easily. Read on for two little-known tricks for temporarily pushing windows aside.
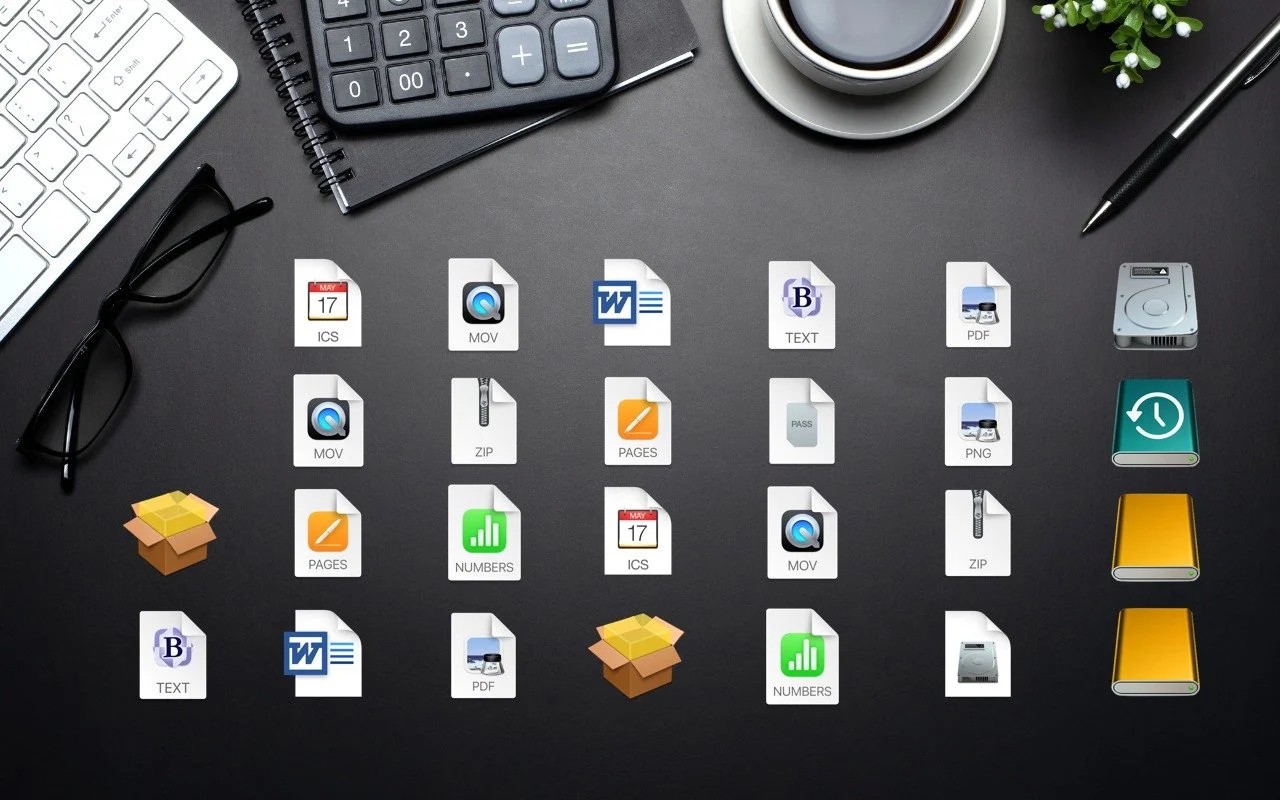
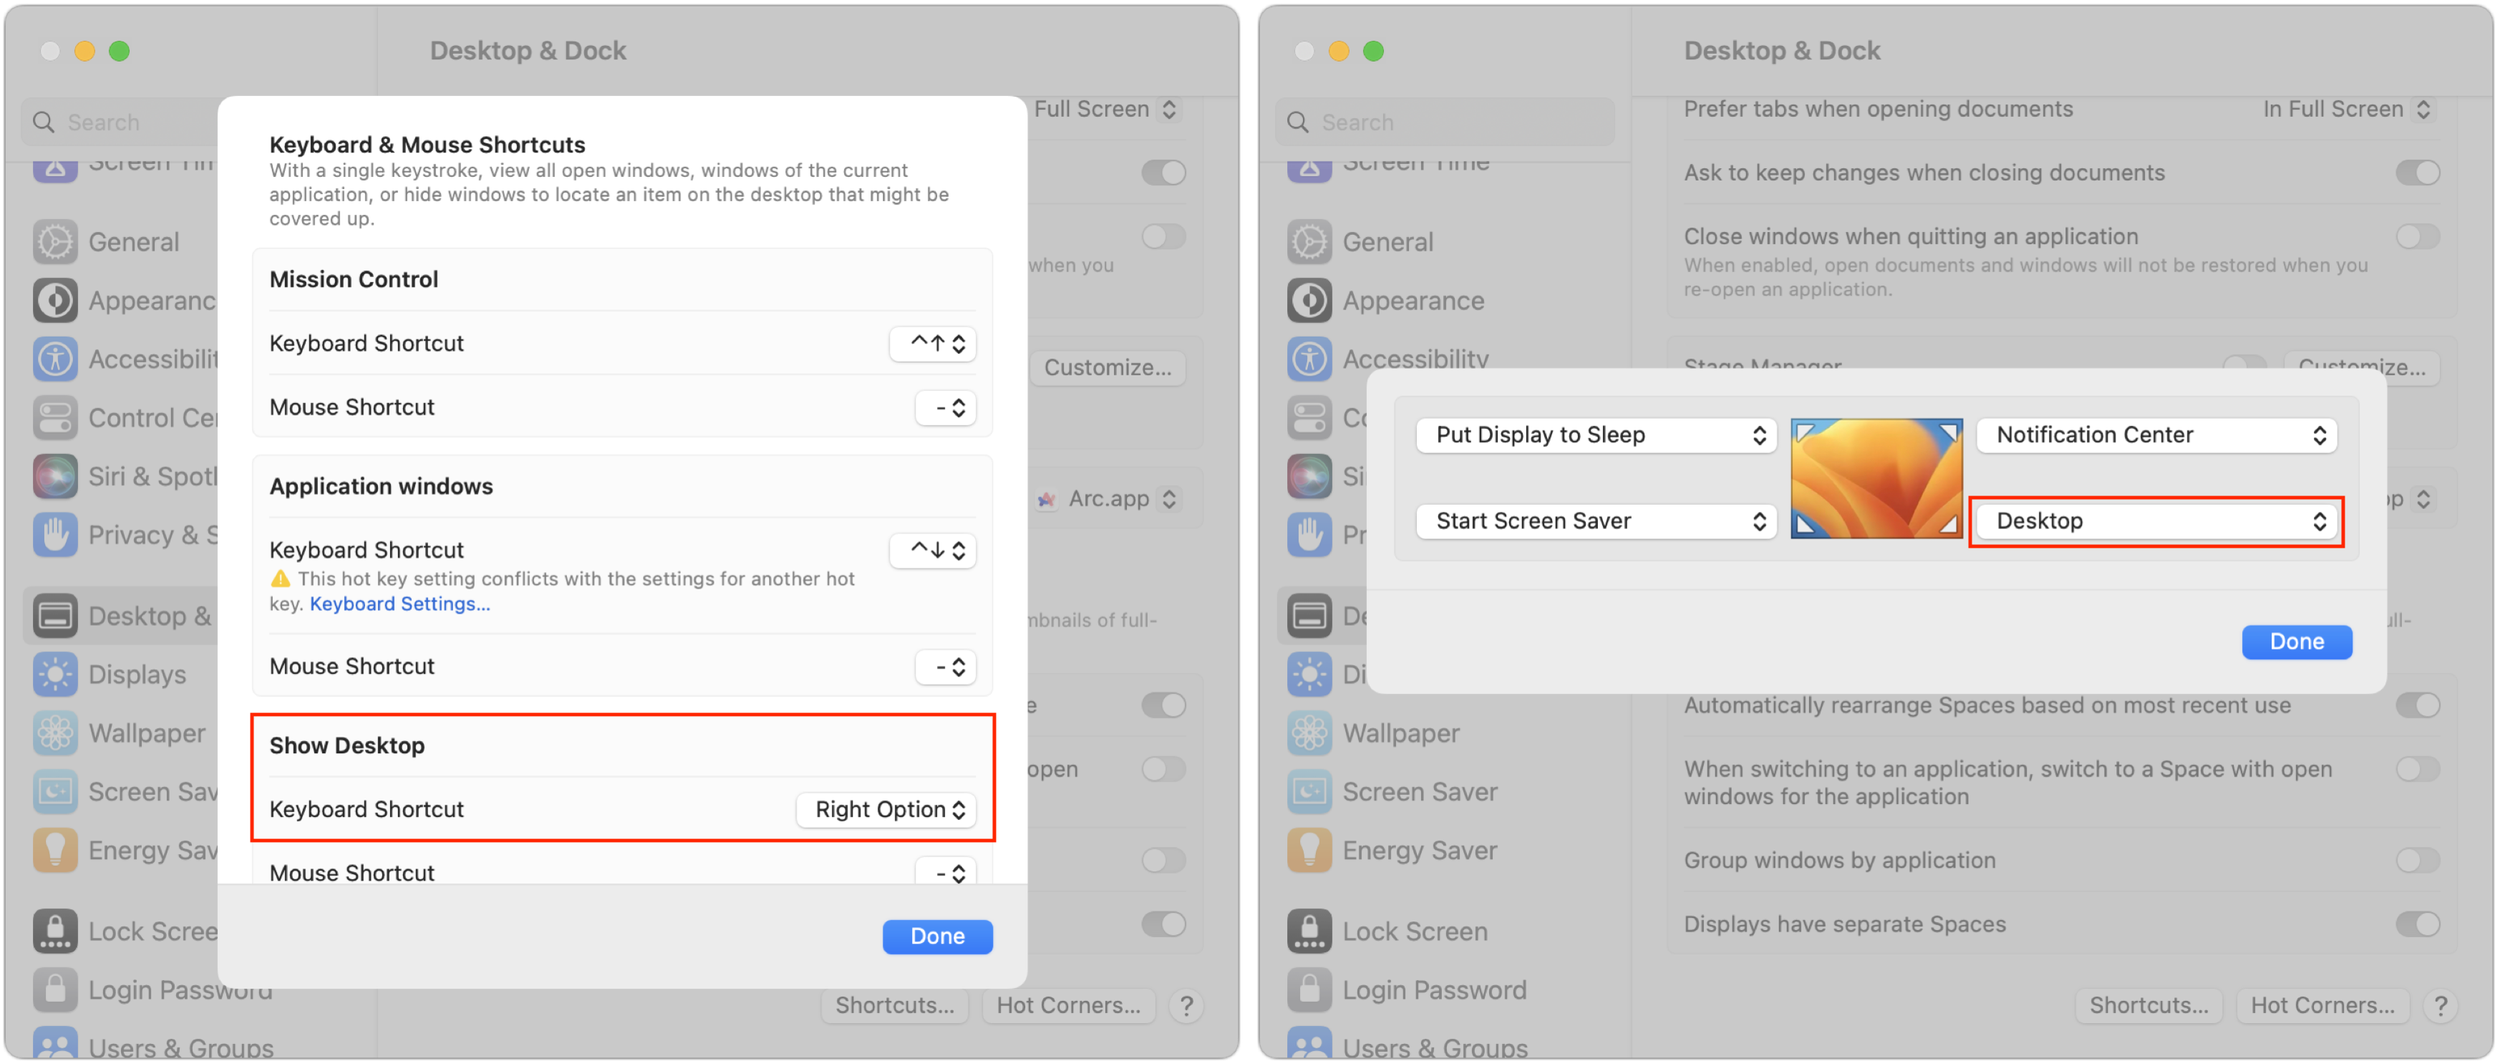
The Mac’s Desktop is a remarkably useful place. It’s a good spot for in-progress documents, screenshots, images dragged out of Web pages, and more. However, app windows tend to obscure the Desktop, making it harder to use. There are two quick ways you can temporarily hide windows, making it easy to access icons on the Desktop. In macOS 13 Ventura, in System Settings > Desktop & Dock, click the Shortcuts button at the bottom and assign a keyboard shortcut to Show Desktop (we like the Right Option key). Or click Hot Corners and choose Desktop for one of the corners. (In macOS 12 Monterey and earlier, look in System Preferences > Mission Control.) Then, press that keyboard shortcut or put your pointer in that corner to move your windows aside temporarily. When you’re done, press the key or move the pointer there again to put the windows back.
(Featured image based on an original by iStock.com/AmnajKhetsamtip)
How to Turn Mail’s Rich Website Previews into Plain Links
Annoyed by how Apple’s Mail on the Mac turns pasted URLs into rich link previews? We offer three ways to avoid them.
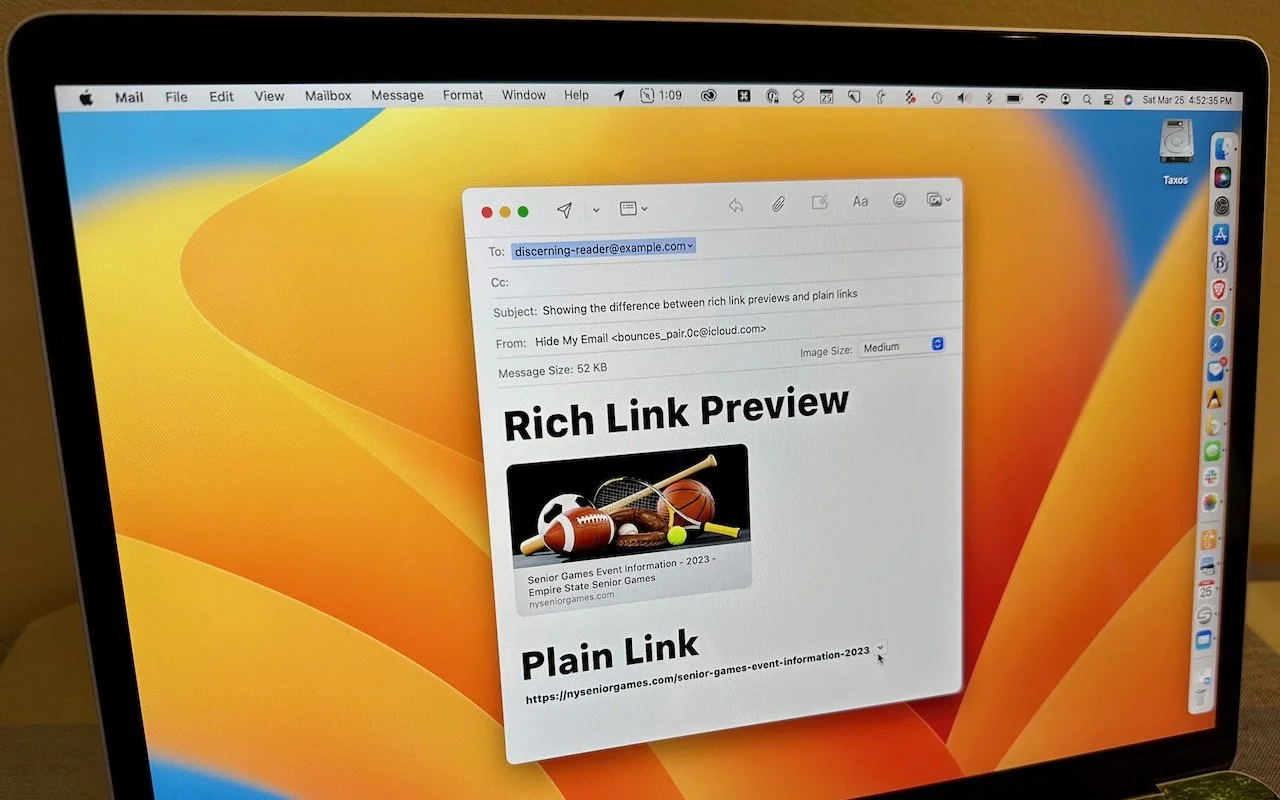
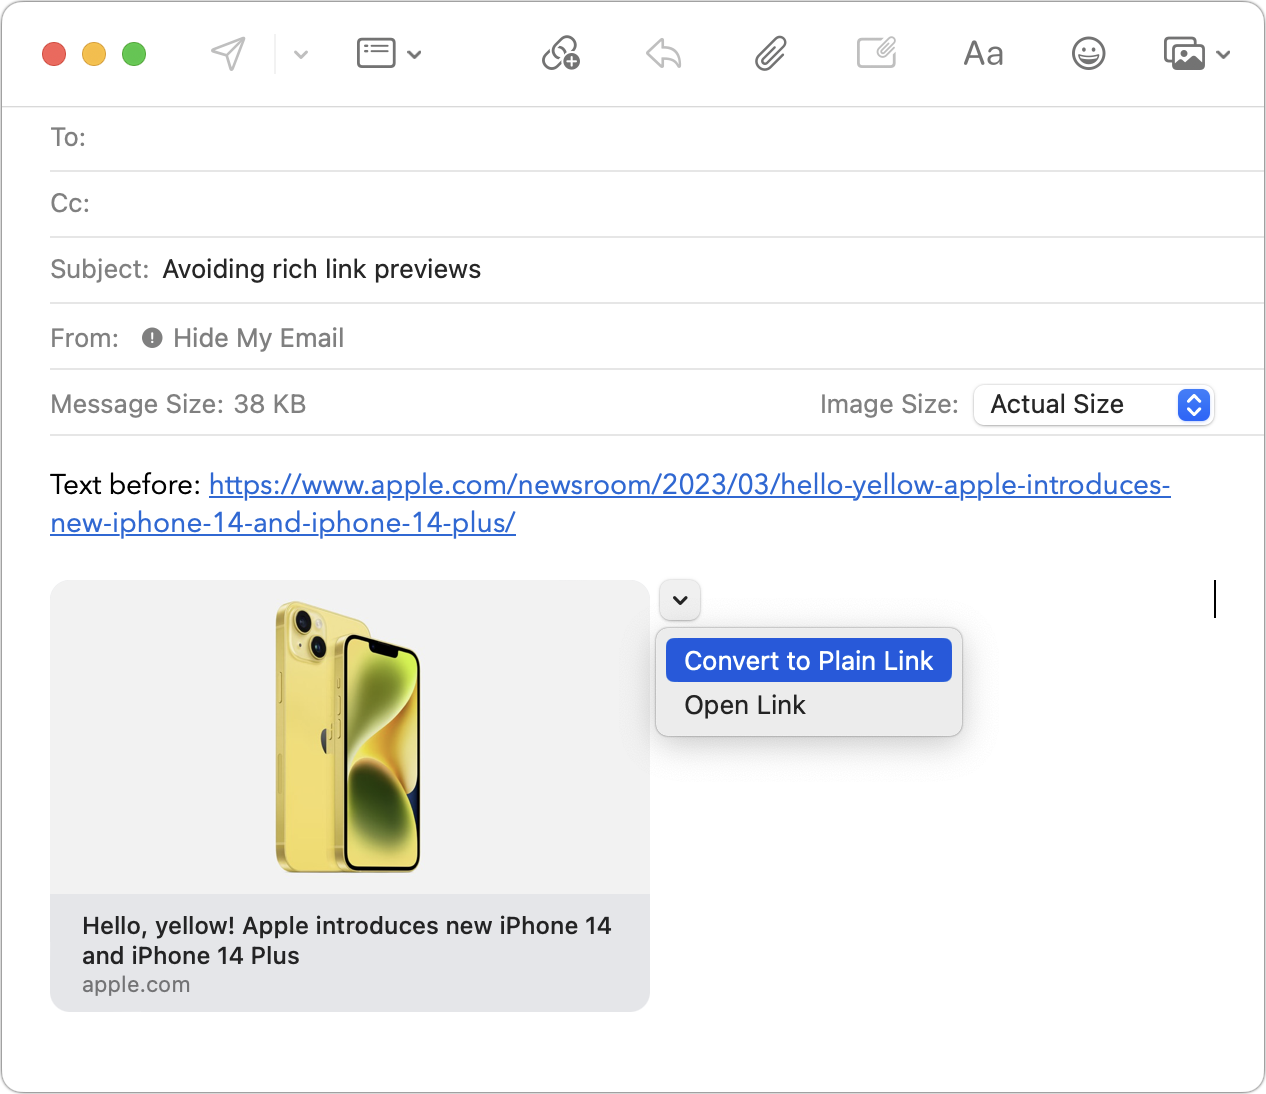
Sometimes apps can be too helpful. Apple’s Mail on the Mac likes to turn pasted URLs into graphically rich previews, and sometimes that’s OK. But other times, the preview is confusing or takes up too much space. Or you may want to send a plain link so the recipient can see its text. There are three ways to avoid rich link previews:
Before pasting a URL into your message, type a space or any other text. Mail converts URLs to rich previews only when they’re on a line by themselves.
Hover over the preview, click the down-pointing arrow that appears, and choose Convert to Plain Link from the pop-up menu.
In Mail > Settings > Composing, change the Message Format pop-up menu to Plain Text. Although this eliminates rich link previews, it also prevents you from including formatting and images.
(Featured image by Adam Engst)